Falling for Begonias

Rescued wax begonias keeping my retaining wall pretty. (Photo by Charlotte Ekker Wiggins)

Rescued wax begonias keeping my retaining wall pretty. (Photo by Charlotte Ekker Wiggins)

Falling for Begonias

I have to admit, I haven’t been terribly fond of begonias. Nothing personal. I have lived with an Angel Begonia in my living room for many years, the serrated leaves making way for lovely clusters of pink flowers midwinter.

It’s those little containers of wax begonias late spring at garden centers that I bypassed. They didn’t look very interesting and, as an annual that doesn’t winter over outside, I have to admit I didn’t even look at them.

Then two years ago, I rescued a pot of begonias late fall. I kept them inside over winter in a sunny window and they bloomed a lovely red. And kept blooming with very little care.

Love the color of these red wax begonias, so pretty close up. (Photo by Charlotte Ekker Wiggins)

Love the color of these red wax begonias, so pretty close up. (Photo by Charlotte Ekker Wiggins)

Once the danger of frost was over, I moved them outside, pinching a few branches off to add a splash of color to my deck and front porch.

I also started a couple of pots to keep one of my garden benches in shade company.

More wax begonias easily rooted in these pots by my garden bench. (Photo by Charlotte Ekker Wiggins)

More wax begonias easily rooted in these pots by my garden bench. (Photo by Charlotte Ekker Wiggins)

They have me hooked; I now can’t imagine my little garden without them. They are easy to root, bloom continuously and add an elegant dash of red.

According to Garden Design, begonias were first discovered in Brazil. Even more interesting, the flowers are high in Vitamin C and edible. The leaves are also used in several traditional Chinese dishes, which suggests they have travelled the world.

Growing Wax Begonias

Wax begonias are extremely easy to grow. The only challenge is that their fleshy stems can easily be broken off so be careful when moving them and brushing against them.

Can you tell that the wax begonias on left get more sun than the ones on right? (Photo by Charlotte Ekker Wiggins)

Can you tell that the wax begonias on left get more sun than the ones on right? (Photo by Charlotte Ekker Wiggins)

Mine grow well in dappled sunshine and shade in pots with potting soil and compost.

The ones in pots on my front porch, facing east, have different colored leaves depending on the amount of sunshine they received. The pot on the left gets more morning sun. The pot on the right doesn’t get any direct sun.

I am switching the two pots to equalize the amount of sun they have been getting.

If left in full sun all day, the leaves will be burnt. The traditional wax begonias do best in shade. There are some new varieties that tolerate sun.

I water every other day depending on the temperature. These red ones have bloomed continuously since May.

And yes, I will bringing these inside not only to overwinter but to cheer me up during our cold Missouri winter months.

Charlotte

Christmas Ferns

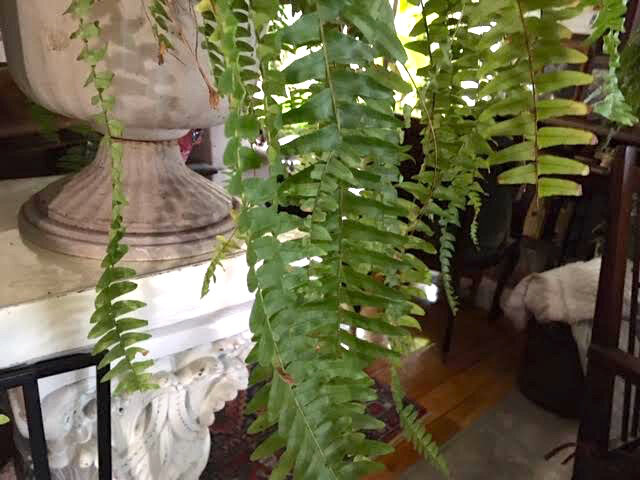
Leaflets from one of my ferns wintering over inside in my dining room. (Photo by Charlotte Ekker Wiggins)

Leaflets from one of my ferns wintering over inside in my dining room. (Photo by Charlotte Ekker Wiggins)

Christmas Ferns

When we think of Christmas, we may think of model trains, eggnog, being with family but I doubt you think of a fern.

Tropical ferns are often offered for sale late fall for inside winter plants. Or they get tossed after a full season in the garden because people don’t want to mess with the dropped leaves when they are in dry conditions.

The tropical ferns are relatives of the ones we have growing naturally in Missouri. You probably have walked by them on a nature trek. You certainly have driven by them along shady Missouri country roads because I have. They are native Polystichum acrostichoides one of the few plants that hold on to their color through cold, sleet and snow.

Also known as Christmas and Holly Ferns, these plants are remnants of dinosaur days, which comes to mind most of the times I see these plants. I I find that pretty awesome. And is something I think about now quite often since I love their green fullness and have them scattered through my house overwintering. Yes, they do drop leaves. Yes, my cats love to play among their drooping leaflets. What is even more mind boggling is that these plants lived before there were bees, butterflies and other pollinators. So how did these plants reproduce?

Ferns like moisture so it’s a challenge to keep a house humidified in winter. (Photo by Charlotte Ekker Wiggins)

Ferns like moisture so it’s a challenge to keep a house humidified in winter. (Photo by Charlotte Ekker Wiggins)

Most of these ferns have two types of leaves: ones that produce spores underneath and ones that don’t produce any spores. The leaves with spores are smaller than the larger, sterile leaflets. The larger ones as the ones that last through winter hugging the ground.

If you look closely, the fern’s lance-shaped leaflets are spiny-toothed with briste tips, which is where they get their comparison to holly leaves.

Spores on the back of leaflets is how ferns reproduce. (Photos by Charlotte Ekker Wiggins)

Spores on the back of leaflets is how ferns reproduce. (Photos by Charlotte Ekker Wiggins)

Underneath, the spore clusters are in neat rows of circular, umbrella-like structures. The spores get carried off by wind and water, which partially explains why these plants are found in shady, moist soil.

According to Missouri Department of Conservation, when the spores germinate, they become tiny, flat, green heart or kidney-shaped plants that produce eggs and sperm. ‘the sperm has to swim to reach eggs so water must be present for fertilization. T”he fertilized eggs then develop into another sporophyte plants and the cycle starts all over.

The leaves are not edible. Their role in the ecosystem is more to prevent erosion and stabilize slopes, which is where they are often found. Unless they are sitting in my den and dining room, wintering over until they can go back outside during the growing season.

I have them in hanging and decorative pots on casters so I can easily move them into shade. Or next to a dinosaur, whichever comes first!

Charlotte

Tree Spikes

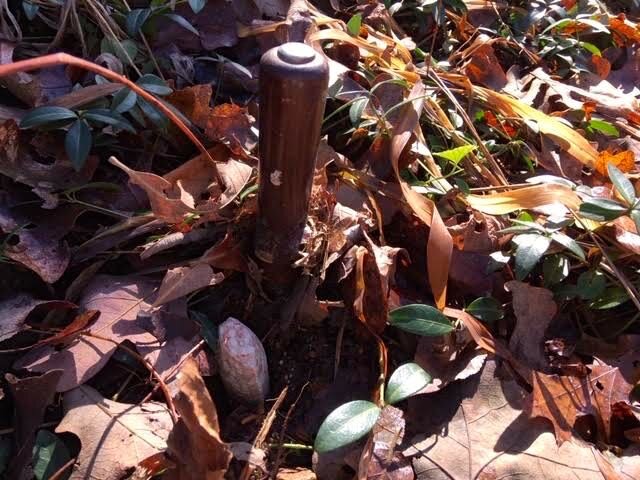
A weed remover makes adding fertilizer spikes easy after a good fall rain. (Photo by Charlotte Ekker Wiggins)

A weed remover makes adding fertilizer spikes easy after a good fall rain. (Photo by Charlotte Ekker Wiggins)

Tree Spikes

No, I’m not talking about anything metal. These tree spikes are time released fruit tree fertilizer shaped into a spike. They come with a small plastic top one is supposed to place on the blunt side of the spike, then it is pushed into the ground by pounding the plastic.

Tree spikes are a bit controversial. Because they are concentrated in one spot once placed in the ground, tree roots may not have access to the fertilizer nourishment evenly. A granular fertilizer will provide more even fertilizer along the tree drip line, more evenly encouraging root growth.

However.

I garden on a Missouri limestone hillside. The chances that my granular fertilizer will stay in place long enough to integrate with the soil in spring during heavy spring rains is pretty low to poor. Even so, I will spend a good day in spring making small trenches around the dwarf fruit trees and giving them a good supply of compost to feed them through the upcoming growing season.

In fall, I hedge my bets by placing fruit tree spikes around my fruit trees. With the ebb and flow of fall temperatures and rain, the fruit spikes will decompose and integrate themselves into the soil. The trees are dormant but these should provide my fruit trees with a good start next spring.

Push the tree spike in next to the weeder, then push into the ground. (Photo by Charlotte Ekker Wiggins)

Push the tree spike in next to the weeder, then push into the ground. (Photo by Charlotte Ekker Wiggins)

In other words, the tree spikes won’t be carried down the hill in the next fall rain.

I use these mostly for my young dwarf fruit trees. They need all of the help they can get in my garden to get strong roots established so they can grow next spring.

Charlotte

December Gardening Chores

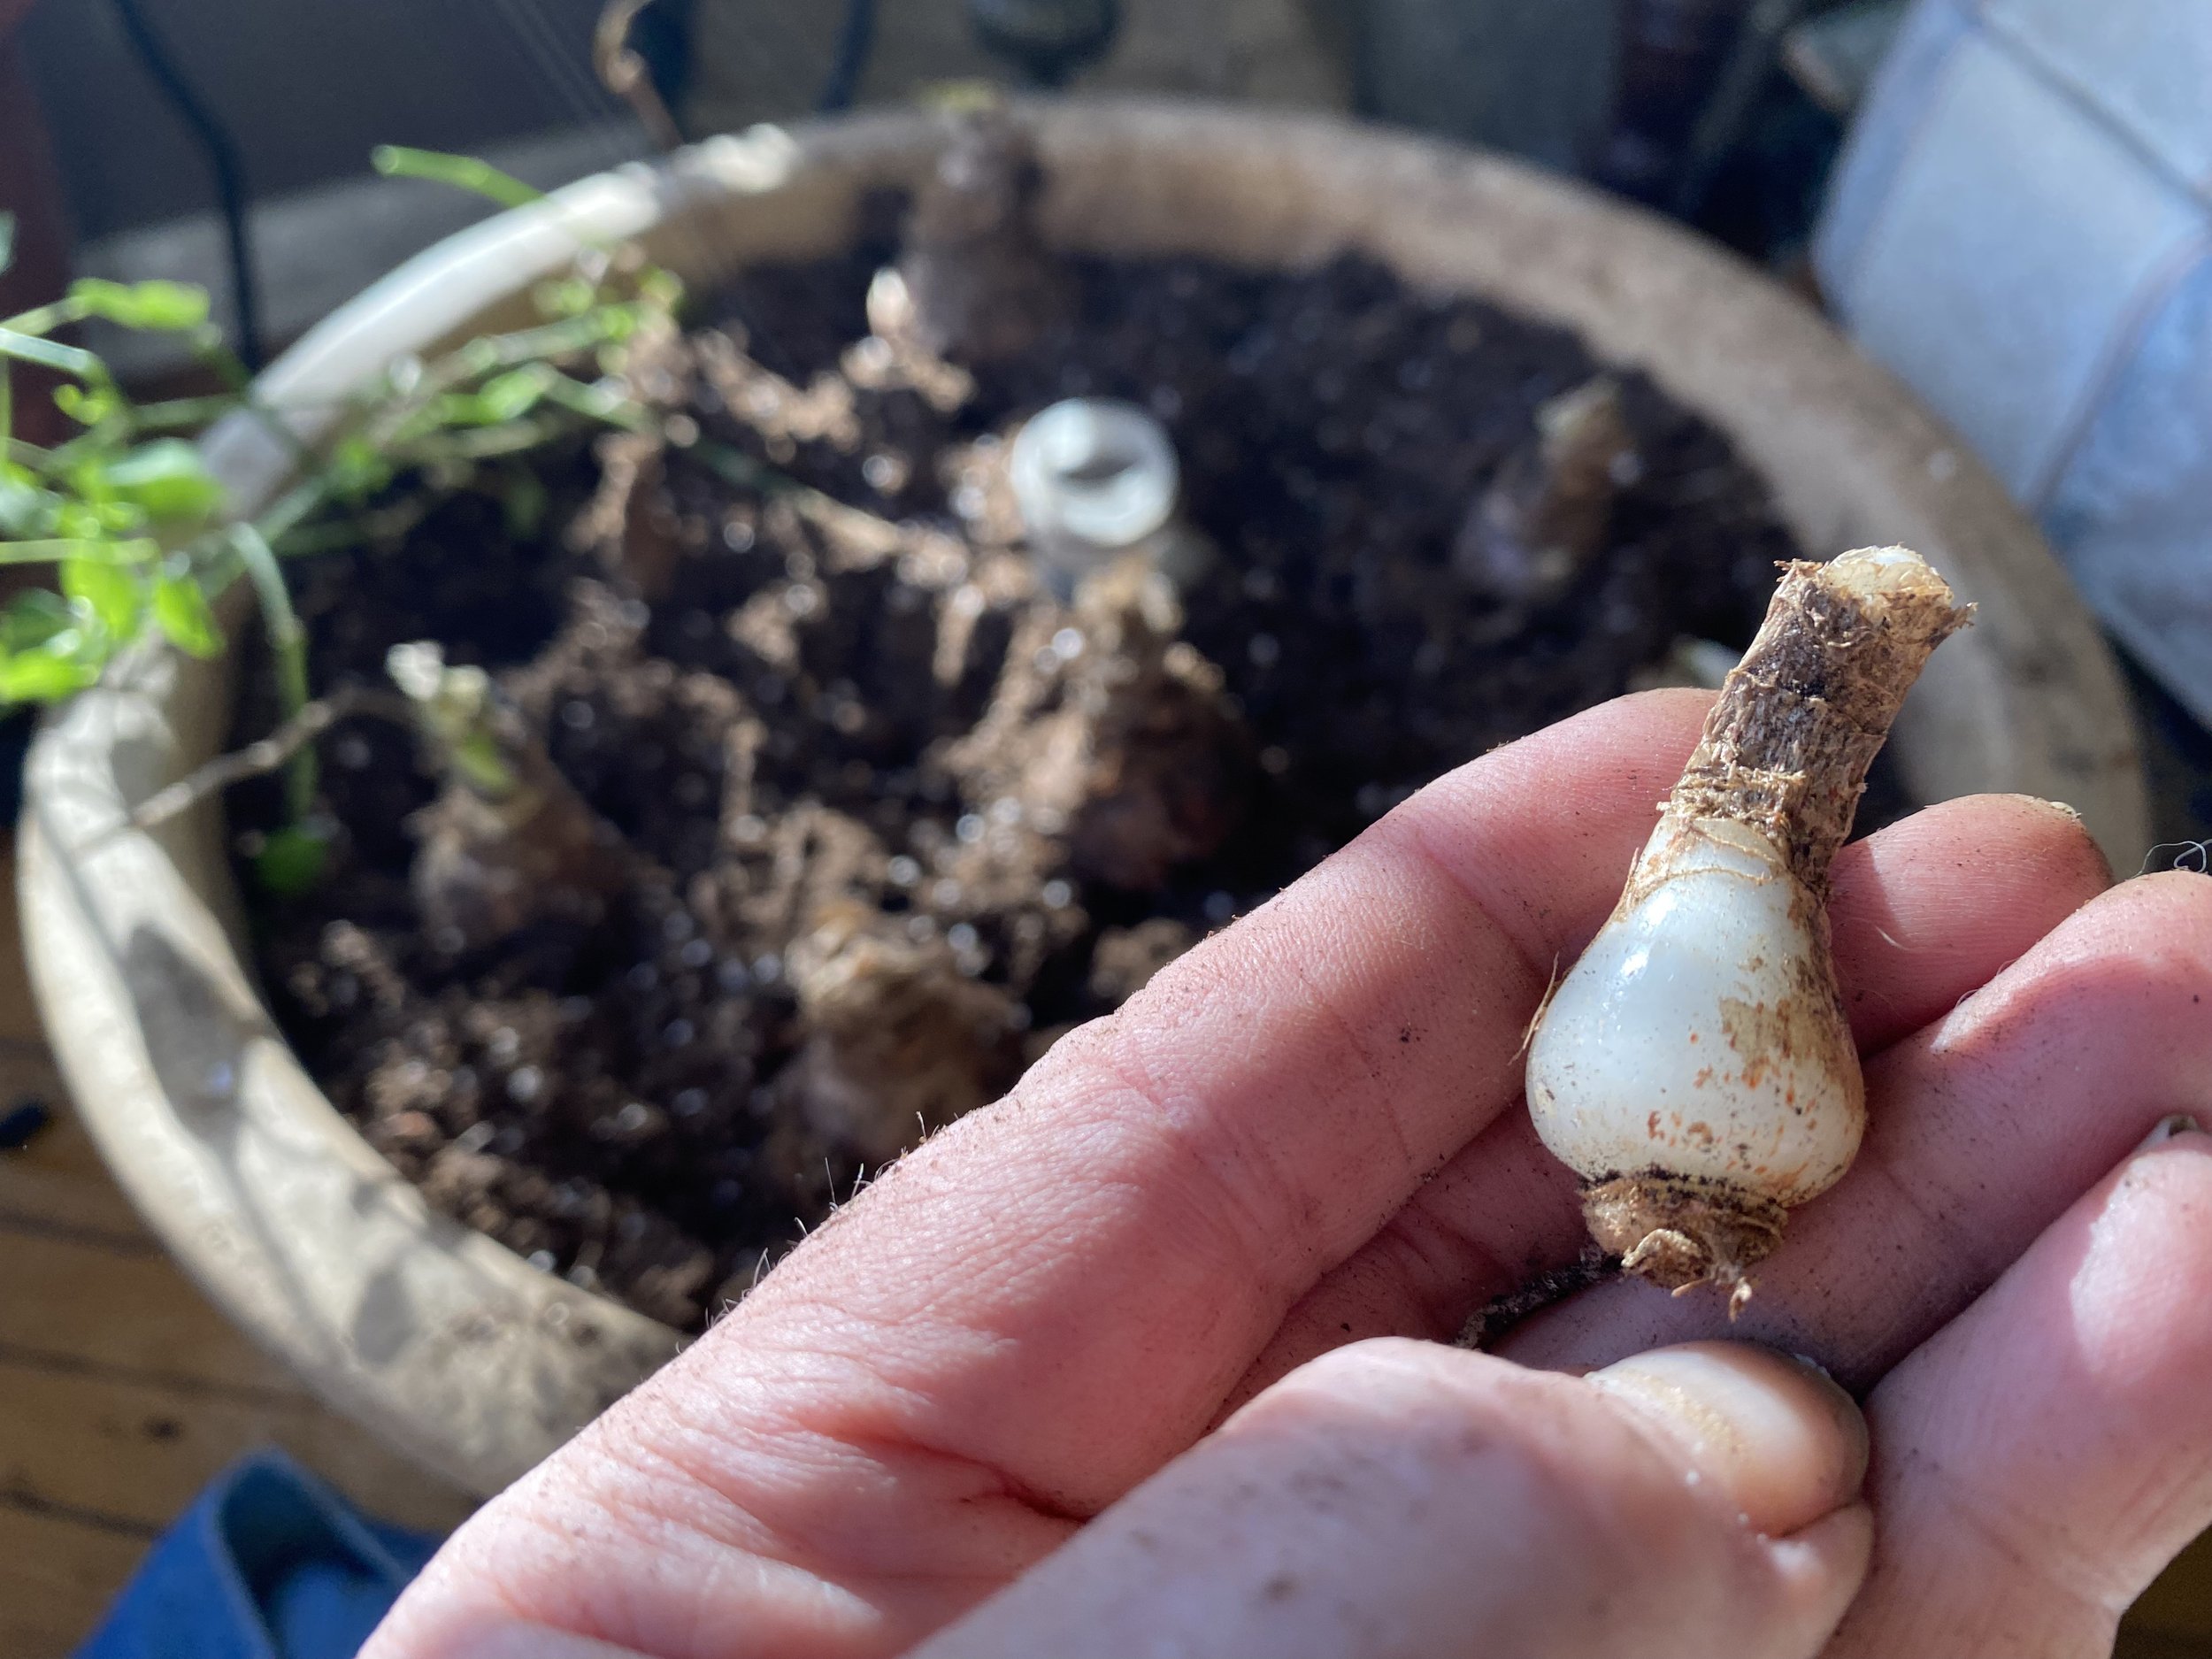
Time to get my last spring bulbs in the ground with a sprinkle of bone meal. (Photo by Charlotte Ekker Wiggins)

Time to get my last spring bulbs in the ground with a sprinkle of bone meal. (Photo by Charlotte Ekker Wiggins)

December Gardening Chores

The ground where I live in USDA Hardiness zone 5b is still workable early December so I am hoping the moisture will replenish depleted water tables and still let me do a little last-minute garden work. We had record cold temperatures last month for a couple of days and, by the third day, I was bundled up and trying to get some garden work done. If this winter is as bad as forecast, it’s going to be a very long cold few months for me, love being in my garden; garden dreaming about it when I can’t.

I still have some spring garden bulbs to get in the ground. Sprinkled with bone meal in the hole before placing the bulb, these new garden additions will be fun to see in bloom in only a few months.

Get broken branches and limbs trimmed before ice hits, or before someone runs into them visiting for the holidays. You know where they are but people new to your property are bound to run into them.

 As soon as a hard frost hits, it will be time to mulch. Mulching maintains the soil at an even temperature. During winter, the point of mulching is to keep plants in hibernation. If you still have leaf piles, move those into flower beds, those will also make good mulch.

 To mulch trees, make a well around the tree trunk and leave an area the width of a tire between the tree trunk and the mulch. When mulching, don’t pile mulch up to the trunk or you will create an area for diseases. Leaving a little moat around the tree also reduces girdling.

 Have empty pots, garden carts, rakes leaning against the side of the house? It’s time to clean them off and store them for the season. The rakes, in particular, you don’t want to step on the tines and hit yourself on the side of the head.

Getting fruit tree spikes in the ground up the hill from the trees. (Photo by Charlotte Ekker Wiggins)

Getting fruit tree spikes in the ground up the hill from the trees. (Photo by Charlotte Ekker Wiggins)

A warm fall day after a rain is a good day to feed fruit trees with tree spikes. Since I live on a hill, applying fertilizer means I am feeding plants at the bottom of the hill. With tree spikes, I can insert them in the ground p hill, allowing the fertilizer to leach through soil down hill.

Leave the dry flowers for now. Birds will eat the seeds and the dry greenery will provide protection for the young shoots growing at the base of the plant.

 Did you plant mums this fall? Remember to water them every couple of weeks this first year. Once they make it through their first winter, mum roots will become established and won’t require regular watering through winter.

 If you saved seeds, this is the time to make sure they are marked and stored in a dry, cool place. Some people store them in a refrigerator. I use an old ice cooler in my garage to keep mice from snacking on the bags through winter.

 Still have trees you haven’t planted? There’s still time so get them in the ground and water well.  If you are getting a live Christmas tree, dig the hole now so you can pop it in the ground right after Christmas.

 Let tap water settle overnight before using on house plants. Tap water can be too cold and may have additives that need to evaporate before being exposed to indoor plants. I fill my recycled milk jugs and let them stand overnight before pouring on inside plants.

 Have bulbs ready to bloom through winter? Paper white narcissus, hyacinths and Amaryllis  are all good choices to bloom when it’s cold outside. The first two can also be permanently planted outside and Amaryllis are repeat bloomers.

 Make sure to make notes in your garden diary for next year projects, I seem to remember them this time of year as I am putting things away.

 Charlotte


Carrion Flowers

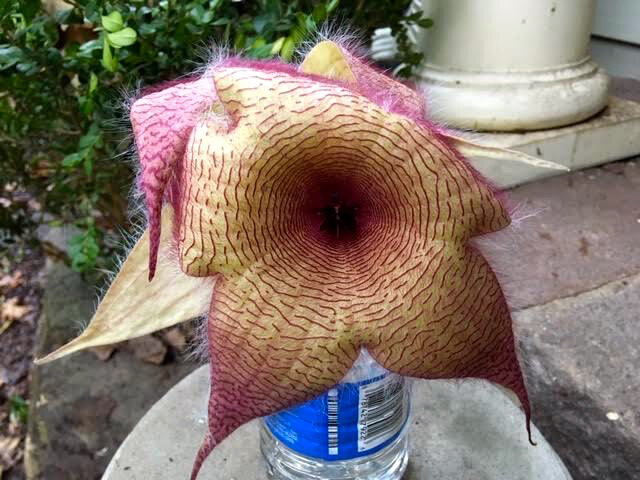
My neighbor Elaine shared a couple of her carrion flowers with me. (Photo by Charlotte Ekker Wiggins)

My neighbor Elaine shared a couple of her carrion flowers with me. (Photo by Charlotte Ekker Wiggins)

Carrion Flowers

If you have a ghoulish bent as a gardener, you probably track when botanical garden corpse flowers finally bloom. Those unusual flowers put off a scent similar to that of rotting bodies. Not one of my favorite flowers but I became fascinated when a neighbor shared a couple of her carrion flowers with me.

Carrion flowers (genus Stapelia),  include about 44 species of succulent plants of the milkweed family, native to tropical areas of southern Africa. They are named for the unpleasant carrion odor of their large flowers which attracts certain insects to pollinate the plants and lay their eggs there. A few species are cultivated as ornamentals.

The one my neighbor shared with me is one of them. What makes them different?

First, they appear to have fur.

The furry water-collecting aspects of a carrion flower. (Photo by Charlotte Ekker Wiggins)

The furry water-collecting aspects of a carrion flower. (Photo by Charlotte Ekker Wiggins)

Secondly, they have a deep center well to collect rain water.

The deep center of carrion flowers collect rain water. (Photo by Charlotte Ekker Wiggins)

The deep center of carrion flowers collect rain water. (Photo by Charlotte Ekker Wiggins)

Carrion flowers have thick four-sided grooved stems, often coloured or covered with outgrowths.

The plants lack true leaves but have scales or spines.

The flowers have purple, red, or yellow bars and markings and are often hairy or textured. The colors are typical fall leaf colors, similar to the colors some tree leaves turn when autumn comes.

The fruit is a follicle.

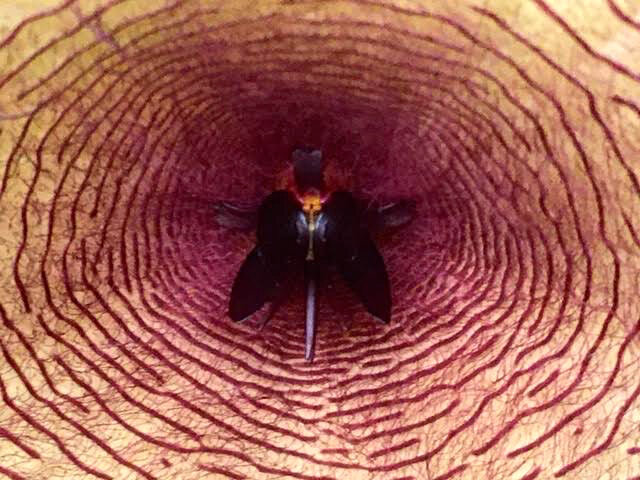
The lovely tiny center of a carrion flower. (Photo by Charlotte Ekker Wiggins)

The lovely tiny center of a carrion flower. (Photo by Charlotte Ekker Wiggins)

So back to the scent. We may not like how it smells but the plant doesn’t care, they are trying to attract pollinators that will help them reproduce. In the case of carrion flowers, they are after attracting the second largest of the pollinators, flies.

I have one more word to say about this flower. Fascinating!

Charlotte

Saving Marigold Seeds

An old paint pan makes a nice marigold seed-drying pan. (Photo by Charlotte Ekker Wiggins)

An old paint pan makes a nice marigold seed-drying pan. (Photo by Charlotte Ekker Wiggins)

Saving Marigold Seeds

I have to confess, I fell out of interest in marigolds several years ago when the original bug-deterring plants seem to be less and less successful at keeping bugs at bay. Some bugs, like ladybugs, are good to have around. Other bugs, however, damage plants and need to be discouraged.

The reason marigolds are no longer effective is simple enough. Plant breeders have bred the insect-repelling pheromone out of some of the newer varieties, in part because some people don’ t like the unique marigold scent. I myself love the pungent scent, which is what used to make them good plants to have around vegetable gardens.

This year, a friend gave me a couple of her dried marigold plants. I was startled to note the strong scent and asked her where she had picked up the seeds. From my grandmother, she said.

As it was snowing outside, I found myself picking off the flower heads to dry. There were two marigold colors, one yellow and one all orange. Once the plants were cleaned of most of their seeds, I spread the seeds in an old paint pan to dry.

After they are all dry, I will store them in bags ready for planting next spring.

And I will share some with other gardening friends. There is little gardeners like more than free seeds.

Charlotte

Missouri Native Poinsettias

Fire on the Mountain, or wild poinsettia, growing in my hillside garden. (Photo by Charlotte Ekker Wiggins)

Fire on the Mountain, or wild poinsettia, growing in my hillside garden. (Photo by Charlotte Ekker Wiggins)

Missouri Native Poinsettias

You have probably walked by them a number of times as I have. They tend to grow with other Missouri native flowers such as dayflowers. I have stopped to get a closer look, then decided it’s not possible that a native of Mexico would be related to something growing in mid-Missouri. If you haven’t seen poinsettias at your local home and garden, you will soon, the Mexican native is a favorite holiday plant for its colorful leaves. The flowers are actually the small yellow centers.

Typical holiday poinsettias that originated in Mexico. (Photo by Charlotte Ekker Wiggins)

Typical holiday poinsettias that originated in Mexico. (Photo by Charlotte Ekker Wiggins)

Turns out I was wrong.

There are actually two Missouri native plants related to that Mexican poinsettia that do grow in Missouri. The first is commonly known as toothed spurge or green poinsettia (Euphorbia dentata). It is an annual, with toothed leaves and hairy stems. Its leafy bracts are green or white at the base. The flowers are the green round items in the center of the bracts. It grows in full sun and mesic to dry conditions.

The second is commonly known as Fire on the Mountain or wild poinsettia (Euphorbia cyathophora.) It is an annual as well with thinner leaves. It has red toward the base of the bracts and prefers sun and a moister soil.

Both of these plants are members of the Spurge family and are considered herbs.

Bees, wasps and butterflies visit them for their nectar. The sphinx moth eats the leaves of the plants. Toothed spurge is considered a weed by Missouri Extension as it often appears in pastured where it is not welcome.

How about that!

Charlotte


Such a Heel!

The start of heeling in some potted plants for winter. (Photo by Charlotte Ekker Wiggins)

The start of heeling in some potted plants for winter. (Photo by Charlotte Ekker Wiggins)

Such a Heel!

Almost like clockwork I have this conversation with myself. It’s usually when the soil is warm enough again to work, or when I am wrestling an overgrown plant still sitting in my make shift nursery.

Self, I say, I thought you said we weren’t going to do this again this year. That’s right, I will say to my self, we did but time got away from me. And off I will go to inventory what is in the nursery and where it should be planted in my Missouri hillside garden.

The saving grace is heeling the plants into my nursery. I don’t call it a make shift one anymore, it’s been there now for several years and, based on this year’s additions, may be there for awhile longer. I like it as a nursery because it’s easy to get to, has shade in the morning and some sun afternoons. Better yet, it’s full of mulch so it’s easy to make my trenches.

I did make an attempt this year to not end the growing season with plants still in pots. What was left are plants that could use another year of pot growing - tree peonies, a few native Missouri shrubs, a native cherry tree I didn’t have the heart to toss. The one remaining elderberry was plopped into the ground on the last day of fall temperatures in the 60s. I had the spot picked out months ago, just didn’t get to dragging the big pot to the spot.

So heeling plants in was designed for gardeners like me. It’s a simple way to get planted, or bare rooted plants, through winter without planting them in their permanent spots. I have been heeling in potted plants although you can also get bare rooted plants through winter with this as well.

If bare rooted, make sure the plants are well-hydrated. I leave them in a small pond to absorb water for a day before tucking them in.

Pink blueberries purchased on sale are spending winter in my nursery. (Photo by Charlotte Ekker Wiggins)

Pink blueberries purchased on sale are spending winter in my nursery. (Photo by Charlotte Ekker Wiggins)

Potted plants can be plopped in just as they are although I do give them a long drink of water as well.

Next, build a nice trench as deep and wide as the pots. Add the pots at an angle and cover them with soil. I also dump a load of mulch on top to give them an extra blanket. If planting bare root plants, also place them horizontal to the ground with their roots tucked at an angle. Cover.

On the next warm day, check that they have moisture but don’t disturb until you plan to move them to their final spot.

Now in the past, my blackberries, a pot of strawberries and a wisteria have taken matters into their own leaves and sprouted new plants outside their pots. I did mention that I have left a couple of plants in the nursery too long, haven’t I?

I was fine with the extra blackberries but now I am wondering about planting the wisteria. I would rather not have a repeat of the trumpet vines I planted several decades ago and now spend a slice of spring trying to remove.

Besides running out of time, heeling in works well for those end of season plant sales when you pick up some starts at excellent prices. As long as they have been outside all season, they should do well settling into your well-heeled plant nursery.

Charlotte
November Gardening Chores

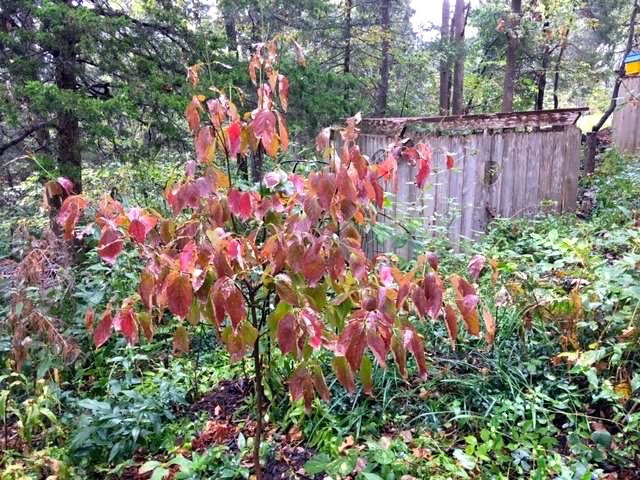
Fall is all about extra garden color, like this lovely plum accent from a pink dogwood. (Photo by Charlotte Ekker Wiggins)

Fall is all about extra garden color, like this lovely plum accent from a pink dogwood. (Photo by Charlotte Ekker Wiggins)

November Gardening Chores

Snow was back in the forecast for Halloween this year but we are still waiting for a white dusting in mid-Missouri USDA Hardiness zone 5b/6a. I survived moving all of my potted plants inside but just barely, had to escort the usual hijackers back outside – praying mantis, lizards, several garden spiders.

Now that we are all settled inside, I am still moving potted plants around to give them optimum light conditions. My heat is on so leaves are dropping early, especially the ferns. It’s going to be a long winter.

Tree leaves have also been making their way onto flower beds for mulch and a layer that hopefully decomposes into soil over the next few years. I will be adding wood chips from our local recycling center after the first hard frost.

If you want to plant, or move trees, this is a good time. I prefer planting into final spots in spring so my seedlings are now in pots and heeled into the nursery garden bed. That will give me all winter to decide on their final destination.

Fall is the time to save seeds for next year. Here I am collecting garlic chive seeds. (Photo by Charlotte Ekker Wiggins)

Fall is the time to save seeds for next year. Here I am collecting garlic chive seeds. (Photo by Charlotte Ekker Wiggins)

It’s been very dry so remember to water. An inch a week is a good measure, especially for woody plants, such as azaleas and evergreens. When watering, check for damaged branches and remove. Once winter ice moves in, the ice will cause more damage than necessary on those weak and damaged limbs. I take pruners with me so I can also trim out suckers and branches that are too long, especially along where I regularly walk. No point in putting that off until later when the ground is covered in ice and snow.

If you haven’t done so already, this is a good time to empty most of your composters. Most likely candidates to get the new rich soil amendment include asparagus and strawberry beds.  I also added compost to my deck pots to get them ready for my next crops. I still have red onions growing so I may scatter some lettuce and spinach seeds.

Still need to mound my rose crowns with 6 inches of soil or so before the first frost. I have mounds of mulch already piled nearby to scatter on the plants after I add a layer of leaf mulch for extra insulation.

My purple coneflowers bloomed well this year so I have trimmed a few seed heads to plant in my nursery bed next year. The rest I leave for winter bird food.

Have grass to mow? You should be on the downside of the mowing season. Make the last cut when you see grass has stopped growing. Let clippings lie where they’ve been cut to restore Nitrogen to the soil. Have fun mowing over the leaves to shred and move them to flower beds.

Don’t forget to stop and enjoy the fall colors. Trees, shrubs and some perennials take on a different color in fall, changing gardens into new, sometimes surprising color palettes. Take note of something you like and plant more next year.

Ok, it can snow now.

Charlotte

Ladybugs Winter Shelter

This is a homemade ladybug house my brother sent me one year for Christmas.

This is a homemade ladybug house my brother sent me one year for Christmas.

Ladybugs Winter Shelter

My one-acre limestone hillside garden has been chemical-free for decades so I have a pretty busy garden ecosystem that includes native ladybugs. One Christmas my brother sent me a couple of ladybug houses to encourage more ladybugs.

Excited to have the new housing, I did some research to find out how best to set them up. Besides placing them low to the ground, I found out I needed to fill them with leaves, which is where ladybugs like to winter over.

Ladybugs winter over in leaf litter so ladybug houses need leaves inside to encourage tenants.

Ladybugs winter over in leaf litter so ladybug houses need leaves inside to encourage tenants.

Now my ladybug house is ready to welcome native ladybugs looking for housing.

Now my ladybug house is ready to welcome native ladybugs looking for housing.

One of my neighbors has a house full of ladybugs but it turns out they are not the welcomed kind. She has the Asian ladybugs, a cousin of the native ladybugs. Can you tell the difference?

Native ladybug or Asian ladybug? See the M on the head? This is an Asian lady beetle.

Native ladybug or Asian ladybug? See the M on the head? This is an Asian lady beetle.

There are more than 400 native ladybugs in North America but they are harder to find as invasive species like Asian ladybugs move in, according to the Xerxes Society.

For more tips on gardening, beekeeping, cooking and easy home decor, subscribe to my weekly Garden Notes.

Charlotte

Bringing Plants Inside

Tropical and potted annuals lining up to get trimmed or moved to the compost pile. (Photo by Charlotte Ekker Wiggins)

Tropical and potted annuals lining up to get trimmed or moved to the compost pile. (Photo by Charlotte Ekker Wiggins)

Bringing Plants Inside

It is that time of year when I have to go through my tropical and potted plants and make a difficult decision: which ones will spend winter inside and which ones will head to the compost pile.

I confess, this is hard for me. I want to keep all of them, even the scraggly struggling ones, I just know if I had another couple of months I could get them to be full and beautiful again.

And no, the scraggly ones don’t necessarily get tossed. The deciding factor tends to be available space and what lighting the plant needs. If I can’t give it what it requires, I won’t make it struggle for a few months before i have to toss it out, better to do it now.

To get my potted plants ready for the move inside:

  1. Trim each plant of excess growth.

  2. Check for bugs; treat.

  3. Remove top 2 inches of soil; replace with new potting soil.

  4. Separate into lighting requirement piles.

  5. Clean bottom dish.

  6. 6. Add castors to bottom of heavy plants.

  7. Shake to remove hitchhikers.

Most of my plants have been with me for a number of years so they have favorite wintering spots already reserved. It’s the newcomers that I struggle with sneaking in, especially if they are small. The larger potted plants can easily take up most of the sunny window space, leaving the shorter plants struggling.

To help the smaller varieties, I use pot stands I pick up during the year. The stands elevate the smaller plants off the ground giving them closer exposure to winter sunlight.

I do - grouse is a good word - as I move furniture and accommodate my green guests. My cats enjoy finding hitchhikers among the branches but I would rather not be greeted by a lizard, or more commonly a frog, sitting on my kitchen counter.

And, wait until that first heavy snowfall when the temperatures are in the single digits and I’m warm and surrounded by flowering greenery. That makes it all worthwhile!

Charlotte

October Gardening Chores

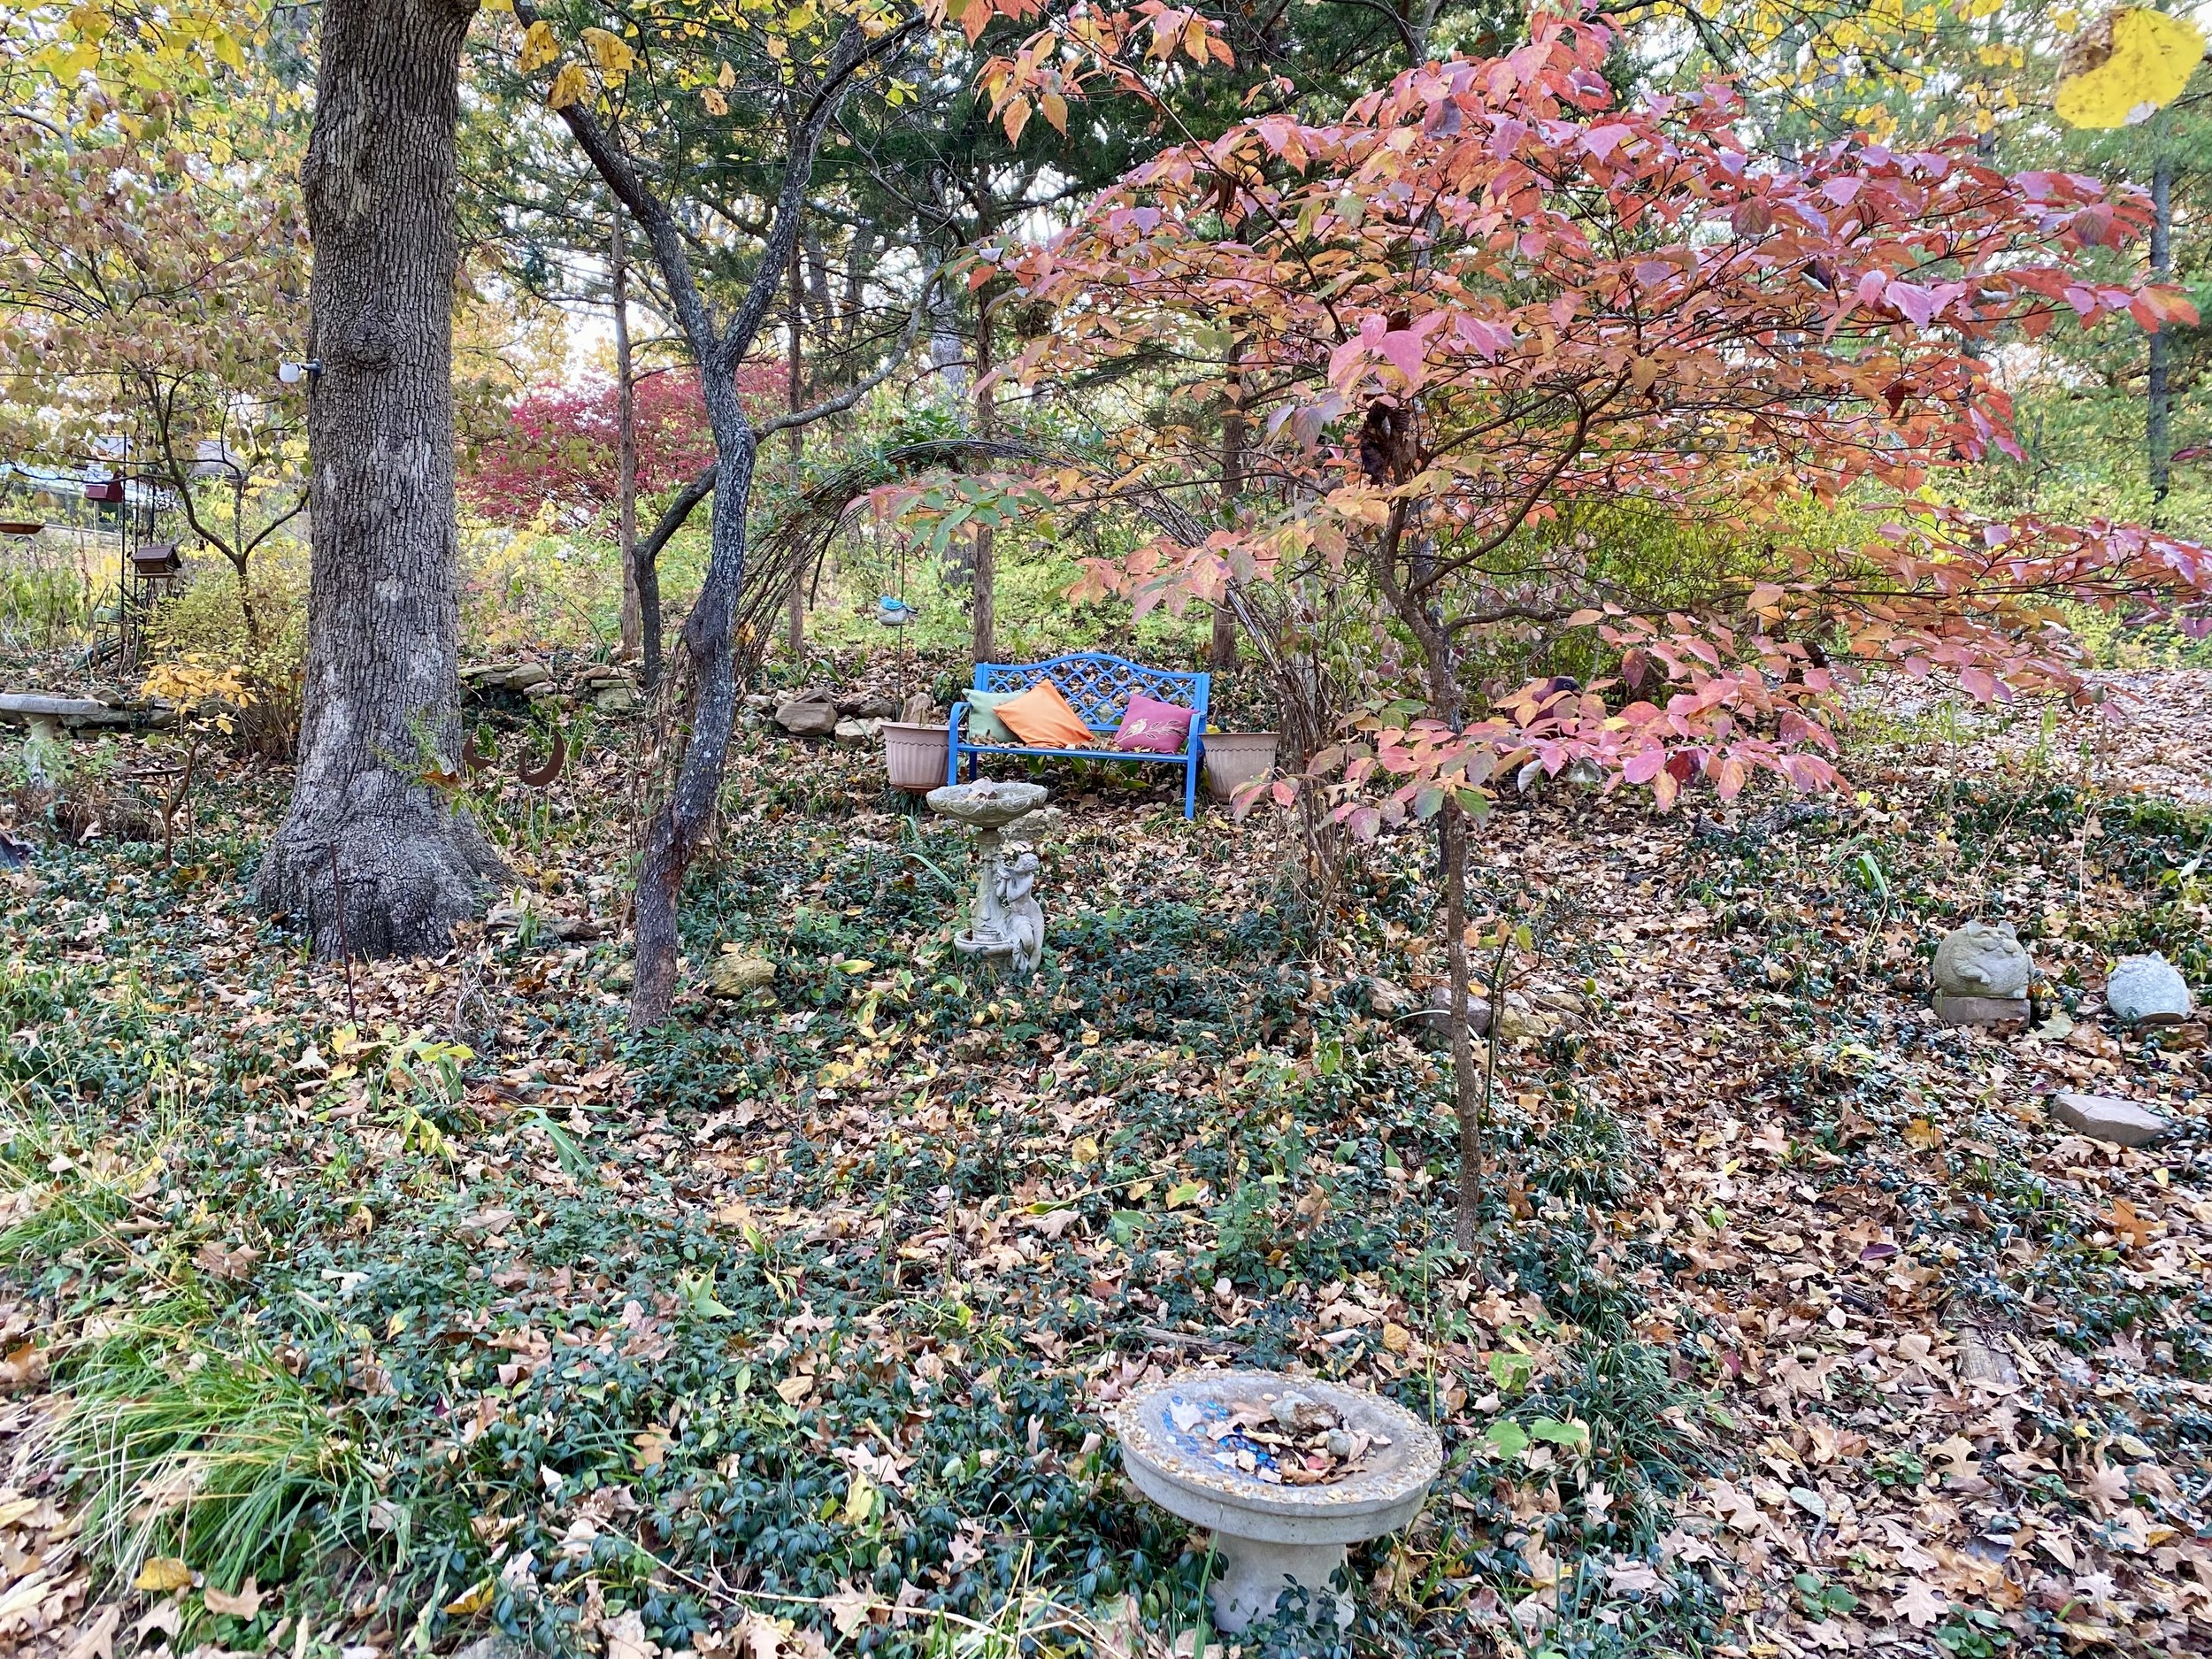
My native dogwoods are turning red, kicking off the display of fall color. (Photo by Charlotte Ekker Wiggins)

My native dogwoods are turning red, kicking off the display of fall color. (Photo by Charlotte Ekker Wiggins)

October Gardening Chores

Looks like we are going to have a long fall again this year. Besides the active sports season, forecasts this year for the peak of fall color are a good 3 weeks behind previous years, although we shouldn’t be in too much of a hurry to launch into winter. The winter forecasts are for a rough few months including seven major storms for USDA Hardiness zone 5b/6a.

I am gearing up to winterize my hillside garden, from trimming plants that will be coming inside to mulching flower beds. This year, I am also stashing away items for my winter kitchen.

1. Pick herbs before they have flowered to capture the full flavor. Wait until after they have flowered and cut the new herb sprouts to dry for later use. Except for basil.

2. Besides harvesting, this is the time to freeze extras for later use.

3. Start pruning and checking for any hitchhikers on plants that are coming inside for winter. To cut down on leaf drop, bring plants in a month before turning on the heat, which is usually early October.

4. For single plants in separate pots, consider combining them, watering well and then bringing them inside. Even if they only last for a couple of months, they will help to extend the growing season.

5. Water. Perennials, established trees, evergreens and azaleas need one inch of water a week. Water into the ground so the water hydrates plant roots. Keep watering until our first hard frost. For our part of the country, that usually around Halloween.

My little garden flags help me keep track of passing time. (Photo by Charlotte Ekker Wiggins)

My little garden flags help me keep track of passing time. (Photo by Charlotte Ekker Wiggins)

6. Stop fertilizing and pruning. Wait until January-February after the plants are dormant and you can better see their form.

7. If you have trees with fungus or other issues, collect those leaves and burn or bury into the ground. I leave most of my leaves on flower beds except for diseased ones, don’t want to spread that fungus. Those I bury in the ground.

8.If you haven’t cleaned up flower beds of spent plants, here’s your last chance to gather seeds. Leave some for the birds, they will eat them over winter. Leave the rest to clean up in spring. By then, most of the greenery will have broken down and become part of the garden mulch.

9. Plant spring bulbs. Add a little bone meal at the bottom of the hole to slowly feed the bulbs. Plant bulbs close together if you don’t mind digging them up in a couple of years to separate. If you would rather not, give them more space in between. Mark where you planted them so you don’t dig them up next year when planting something else.

10. Leave the falling leaves where they are. If you are worried about your grass, run the mower over them. Leaves return Nitrogen to the soil and make a wonderful amendment to flower beds and help retain moisture.

11. Plant trees and bushes; make sure to water daily until frost.

12. Stop long enough to enjoy the beauty of fall as leaves turn, native plants bloom and temperatures turn crisp and cool. A hot cup of tea with fresh honey sounds good about now!

Charlotte


Best Light Show

Missouri Botanical Garden’s Garden Glow changes the garden look. (Photo by Charlotte Ekker Wiggins)

Missouri Botanical Garden’s Garden Glow changes the garden look. (Photo by Charlotte Ekker Wiggins)

Best Light Show

If you are looking for something to do through early next year, add Missouri Botanical Garden to your list. Actually it should be on your list all year, it’s one of the world’s renown gardens only an hour or so from mid-Missouri.

The garden, also called Shaw’s Garden after founder Henry Shaw, has a wide range of special events all four seasons through the year, from the Best of Missouri Market coming up next weekend to a model train show around the holidays. That’s not to overlook the gardens themselves from the Japanese Gardens, the Kemper Home Gardens and the seasonal displays of favorites from daffodils to holly.

In fall, Missouri Botanical Garden holds Garden Glow, when the lovely gardens are getting ready for winter and covered in lights. Trees become new shapes; lit paths lead walkers through new imaginary spaces and, the best part of the show, nature adds to the wonder only as nature can do.

As we were walking by one of the light boxes, there she was, a tiny spider weaving her web back and forth in front of the bright spotlights.

At the foot of one of the displays, the best of the garden show. (Photo by Charlotte Ekker Wiggins)

At the foot of one of the displays, the best of the garden show. (Photo by Charlotte Ekker Wiggins)

As my friends and I bent down to get to her level, we watched quite clearly how she spun her web back and forth across the front of the lights. The lights made her new web very clear as she industriously moved her legs back and forth.

We watched a spider spinning her web in front of the lights! (Photo by Charlotte Ekker Wiggins)

We watched a spider spinning her web in front of the lights! (Photo by Charlotte Ekker Wiggins)

I could have sat there all night watching this spider. Luckily I have my own supply of spiders at home, where I can also watch nature at work.

Charlotte

Saddleback Caterpillars

This was my first meeting with a stinging saddleback caterpillar. (Photo by Charlotte Ekker Wiggins)

This was my first meeting with a stinging saddleback caterpillar. (Photo by Charlotte Ekker Wiggins)

Saddleback Caterpillars

Watch the sting!

No, I’m not talking about honey bees, although I have those in spades in my Missouri hillside garden. This sting comes from a tiny, about an inch long caterpillar, knows as the saddleback caterpillar Acharia stimulea because of the brown saddle-like marking on its back.

I happened to brush up against one earlier this fall in my garden as I was pulling out Japanese knotweed. The spots where it brushed me left not only a painful, bee-like sting but raised round welts that lasted a couple of days. The spot on my leg where I brushed against it was also painful.

I didn’t think much about it until later as I was trying to identify this “cute” little caterpillar and came across several warnings about its sting.

We all know before we have moths and butterflies we need to have caterpillars, even one with poisonous spines. This little creature certainly has evolved to protect itself; it has spines all over its body and both ends are marked as heads to throw off aggressors.

Another look at a saddleback caterpillar in my garden. (Photo by Charlotte Ekker Wiggins)

Another look at a saddleback caterpillar in my garden. (Photo by Charlotte Ekker Wiggins)

The saddleback caterpillar measures about an inch long. It has poisonous spines on four large projections (tubercles) and many smaller ones projecting from the sides of its body. This is not a caterpillar you will want to pick up with your fingers.

The saddleback caterpillar is a general feeder and is found on many plants including apples, asters, blueberries, citrus, corn, dogwoods, elms, grapes, linden, maples, oaks, Prunus species, sunflowers, and viburnums. My garden must be a veritable smorgasbord for them with a couple of exceptions.

The saddleback caterpillar is the beginning of what will become a fuzzy, dark brown moth, which I periodically see around my decks at night. The males show up early evening; the females later at night. Moths are part of our wonderful diverse population of pollinators.

It takes the caterpillar about 5 months to evolve into a moth. I’ve spotted a couple of places in my garden where there is a cocoon under some leaves but I’m going to leave them. Better the fuzzy moth than the prickly caterpillar!

For more tips on gardening, beekeeping, cooking and easy home decor, subscribe to my weekly Garden Notes.

Charlotte

Hummingbird Moth

This lovely hummingbird moth is the end result of the much maligned tobacco hornworm. (Photo by Charlotte Ekker Wiggins)

This lovely hummingbird moth is the end result of the much maligned tobacco hornworm. (Photo by Charlotte Ekker Wiggins)

Hummingbird Moth

Have you seen these lovely little moths in your garden, they look like baby hummingbirds?

They are actually the end result of a much-maligned caterpillar, the tobacco hornworm. I usually have several on my tomato plants but I’m guessing they are succumbing to the impact of neighborhood pesticides as are other pollinators. North American bird populations are down 30% since 1970. Birds depend on insects for their food.

Although I haven’t use pesticides in my Missouri hillside garden for decades, as a master gardener I know many of us overuse these products; don’t read the label and end up killing off other things besides what they originally wanted to eradicate.

It makes me sad.

For many years, I would have a good dozen to two dozen tomato and tobacco hornworms living on a couple of dedicated tomato plants. I would pick them off the tomato plants and give them a couple of set aside tomato plants all to themselves so they would have food as they grow.

Tomato hornworms turn into another pollinator, the lovely large Sphinx moth. Tobacco hornworms, a close cousin, turn into lovely hummingbird moths on my native phlox in the top photo.

What’s the difference?

The tobacco hornworms have 7 stripes down their sides and a curved horn.

Tomato hornworms have 8 stripes and a red horn on their back side.

Lovely tobacco hornworms turn into these beautiful hummingbird moths. (Photo by Charlotte Ekker Wiggins)

Lovely tobacco hornworms turn into these beautiful hummingbird moths. (Photo by Charlotte Ekker Wiggins)

In the past I have had dozens of hummingbird moths mid summer flitting through my native pink phlox. This year, however, I only spotted a few late spring.

I usually see evidence of their presence first as frass on the ground around the tomato plant.

Frass from a tobacco hornworm consuming tomato plant leaves. (Photo by Charlotte Ekker Wiggins)

Frass from a tobacco hornworm consuming tomato plant leaves. (Photo by Charlotte Ekker Wiggins)

Sometimes its hard to spot the green caterpillars among green stems so I then look for nibbling signs on green tomatoes.

Hornworms feed on green tomatoes as they grow. (Photo by Charlotte Ekker Wiggins)

Hornworms feed on green tomatoes as they grow. (Photo by Charlotte Ekker Wiggins)

By following the nibbled tomato fruit, I can usually find the hornworms close by.

My one tobacco hornworm this year, hopefully eating hearty. (Photo by Charlotte Ekker Wiggins)

My one tobacco hornworm this year, hopefully eating hearty. (Photo by Charlotte Ekker Wiggins)

The hornworms eat for about three weeks, then disappear as they pupate and eclose into lovely moths.

To keep myself in tomatoes, I move the chewed on plants back into the fold. When it is time to move plants inside for winter, I bring those tomato plants inside. By then the leaves have grown back and they are ready to fruit.

We don’t have to declare war on hornworms, we can coexist. They are just as valuable to our pollinator cadre of butterflies as Monarchs.

Stop using pesticides and insecticides. Stop maligning tomato and tobacco hornworms, it’s easy to help them and still have tomatoes.

I have been doing it for years.

Charlotte


Learn About Pollinators

Bumblebee on New England Asters are one of the many food pollinators. (Photo by Charlotte Ekker Wiggins)

Bumblebee on New England Asters are one of the many food pollinators. (Photo by Charlotte Ekker Wiggins)

Learn About Pollinators

Want to learn how to make a difference about the decline of birds and other pollinators?

Missouri’s Master Pollinator Steward program will be held in Jefferson City, Mo. starting November 4, 2019. The six-course program will be held on Mondays at the Cole County Extension Center and Thursdays at Runge Nature Center from 4:30 p.m. to 7:30 p.m.

Cost is $90 per person.

The program includes information on native bees, honey bees,

Online registration is open at http://www.cvent.com/d/xyqh3h. Alternatively, the extension center can take registration. Call 573-634-2824 (M-F 8AM to 4:30PM) or Coleco@missouri.edu (M-F 8AM to 4:30PM).

You can also host a program in your area, here’s how.

I was among the 11 authors who developed this program, which has won national awards and was featured in my April 11, 2019 TEDx talk at Misssouri S&T on why bugs matter. There are things we can all do to make our world a healthier place, this course is a good place to start!

Charlotte

Fiddle De Dee Fig

This fiddle leaf fig has spent the last year or so in my basement. (Photo by Charlotte Ekker Wiggins)

This fiddle leaf fig has spent the last year or so in my basement. (Photo by Charlotte Ekker Wiggins)

Fiddle Dee Dee Fig Philodendron

I had mixed feelings seeing this old friend leave. It was one of a couple of plants our local recreation center re-homed a year ago when they used the community lounge room for extra stationary bicycles.

These plants had been living on the south side of the room with a huge glass wall giving them sun exposure all year around. When the lounge was converted to exercise bicycles, the plants were in the way and needed to be moved.

The original offer was that these plants were being given away. I love having plants in my home, especially during winter when it’s cold outside and I am still surrounded by plants. I at least can pretend it’s not that cold.

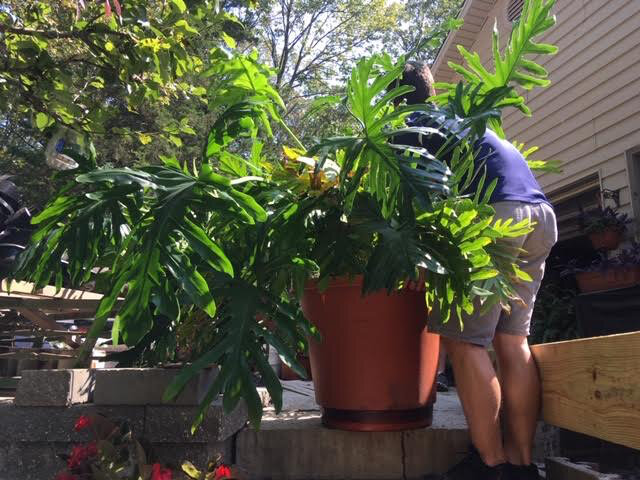
However as my handyman and I picked the large tropical plants up, the recreation center employee who cares for the plants asked if she could get two of them back later and I agreed. She wanted: a sago palm, which I don’t mind returning because the leaves are prickly and need undisturbed space, and the fiddle fig philodendron (in photo).

Both plants spent a cozy winter inside my house. The tropical sego palm had a spot in my den where it could visit with a couple of tropical grapefruit trees. If you have read “The Hidden Lives of Trees” you may have second thoughts about our relationship with trees. I suspect they had some interesting - exchanges - when I wasn’t around.

The fiddle fig spent winter in my torn up basement, the huge draping leaves giving my cats a fun place to hide when playing. I also enjoyed having the large spot of green in the middle of the stark, empty space, it warmed up the rooms while I waited for the work to begin. I like spending winter there, I have my books handy and a nice stash of lap quilts to keep warm.

Once the basement was finished, though, it was time for the fiddle fig to find other accommodations. Luckily about the same time our recreation center moved the exercise equipment out and returned the fireplace lounge back to community use. When I heard from the Mayor that he wanted to encourage people to use the space, I reminded the recreation center staff that I still had the two plants. They will definitely help warm up the space.

Two recreation center employees came by September 19, 2019 to pick up the plants and return them to their spot in the lounge.

The sago palm was easy; it took some muscle to get the fiddle fig back up my limestone hill.

Fiddle headed back up the stairs to return to our local recreation center. (Photo by Charlotte Ekker Wiggins)

Fiddle headed back up the stairs to return to our local recreation center. (Photo by Charlotte Ekker Wiggins)

Once lifted up the 12 steps - yes, we all counted - the fiddle fig was in the back of the pick up truck.

I enjoyed having this interesting philodendron around. The leaves are huge and I could always count on a few hiding a cat or two waiting to play hide and seek. The leaves are long and it has roots that sometime seek light by springing out from the center.

But now that the basement is finished, there isn’t room for this sprawling, growing plant so time to go home. k I was promised visitation rights.

Here is it, slowly on its way back to its original home. I was assured they would not be driving fast and tearing up the leaves in the process.

And off it goes, back to the community lounge where it originally lived. (Photo by Charlotte Ekker Wiggins)

And off it goes, back to the community lounge where it originally lived. (Photo by Charlotte Ekker Wiggins)

I think we are moving them back at just the right time. Temperatures should start to cool off as we leave summer behind, and hopefully the punishing weather as well.

I will stop in next week to see that they are nicely settled in.

In the meantime, happy fall.

Charlotte

Last Flowers of the Season

New England Asters are still blooming in my garden! (Photo by Charlotte Ekker Wiggins)

New England Asters are still blooming in my garden! (Photo by Charlotte Ekker Wiggins)

Last Flowers of the Season

For the first year in many years, I have a new flower still blooming after several snow storms and record low temperatures this fall.

I would venture to say the soil where I live in mid-Missouri is finally frozen although I haven’t actually tested it to confirm. After all, the official beginning of winter is only a few days away.

In the past, the last flowers to bloom in the USDA Hardiness zone 5b season were, appropriately enough, forget-me-nots. Those delicate blue flowers have established themselves in several growing beds along my walks. As soon as I see them in bloom, I know the growing season is fading.

This last growing season had a surprise. Even after the forget-me-nots turned to seed the New England Asters were in bloom. At first I thought it was because one group was in a protected area but when I checked two other congregations, they were all still in bloom.

I know they are hardy perennials but surely a good snowstorm, or two, would dampen their blooming enthusiasm.

Not so, they are a little worse for wear but still popping out a few flowers. I love their purple color and hardiness so I picked one little sprig to add to red geraniums now in bloom inside.

Funny how this tiny little bouquet cheers me when I see it every morning, makes me think about red tulips and my hillsides full of bright yellow, cheery daffodils. Spring is just around the corner, isn’t it?!

Charlotte

December Gardening Chores

Find a place to store garden tools where you can easily find them. (Photo by Charlotte Ekker Wiggins)

Find a place to store garden tools where you can easily find them. (Photo by Charlotte Ekker Wiggins)

December Gardening Chores

We have had record snow storms and low temperatures already and December is just showing up to the party. The ground where I live in USDA Hardiness zone 5b is still workable so I am hoping the moisture will replenish depleted water tables and still let me do a little last-minute garden work.

 Any broken branches and limbs? Get those trimmed before ice hits, or before someone runs into them visiting for the holidays. You know where they are but people knew to your property are bound to run into them.

 As soon as a hard frost hits, it will be time to mulch. Mulching maintains the soil at an even temperature. During winter, the point of mulching is to keep plants in hibernation. If you still have leaf piles, move those into flower beds, those will also make good mulch.

 To mulch trees, make a well around the tree trunk and leave an area the width of a tire between the tree trunk and the mulch. When mulching, don’t pile mulch up to the trunk or you will create an area for diseases. Leaving a little moat around the tree also reduces girdling.

 Have empty pots, garden carts, rakes leaning against the side of the house? It’s time to clean them off and store them for the season. The rakes, in particular, you don’t want to step on the tines and hit yourself on the side of the head. I have my shovels now hanging from where I usually end up leaving them at the end of a hard day of gardening, easier to find later.

 Leave the dry flowers for now. Birds will eat the seeds and the dry greenery will provide protection for the young shoots growing at the base of the plant.

 Did you plant mums this fall? Remember to water them every couple of weeks this first year. Once they make it through their first winter, mum roots will become established and won’t require regular watering through winter.

 If you saved seeds, this is the time to make sure they are marked and stored in a dry, cool place. Some people store them in a refrigerator. I use an old ice cooler in my garage to keep mice from snacking on the bags through winter.

Still have plants to get in the ground? Bury them in pots then moved to their final place next year. (Photo by Charlotte Ekker Wiggins)

Still have plants to get in the ground? Bury them in pots then moved to their final place next year. (Photo by Charlotte Ekker Wiggins)

Still have trees you haven’t planted? There’s still time so get them in the ground and water well.  If you are getting a live Christmas tree, dig the hole now so you can pop it in the ground right after Christmas.

 Let tap water settle overnight before using on house plants. Tap water can be too cold and may have additives that need to evaporate before being exposed to indoor plants. I fill my recycled milk jugs and let them stand overnight before pouring on inside plants.

 Have bulbs ready to bloom through winter? Paper white narcissus, hyacinths and Amaryllis  are all good choices to bloom when it’s cold outside. The first two can also be permanently planted outside and Amaryllis are repeat bloomers.

Make sure to make notes in your garden diary for next year projects, I seem to remember them this time of year as I am putting things away.

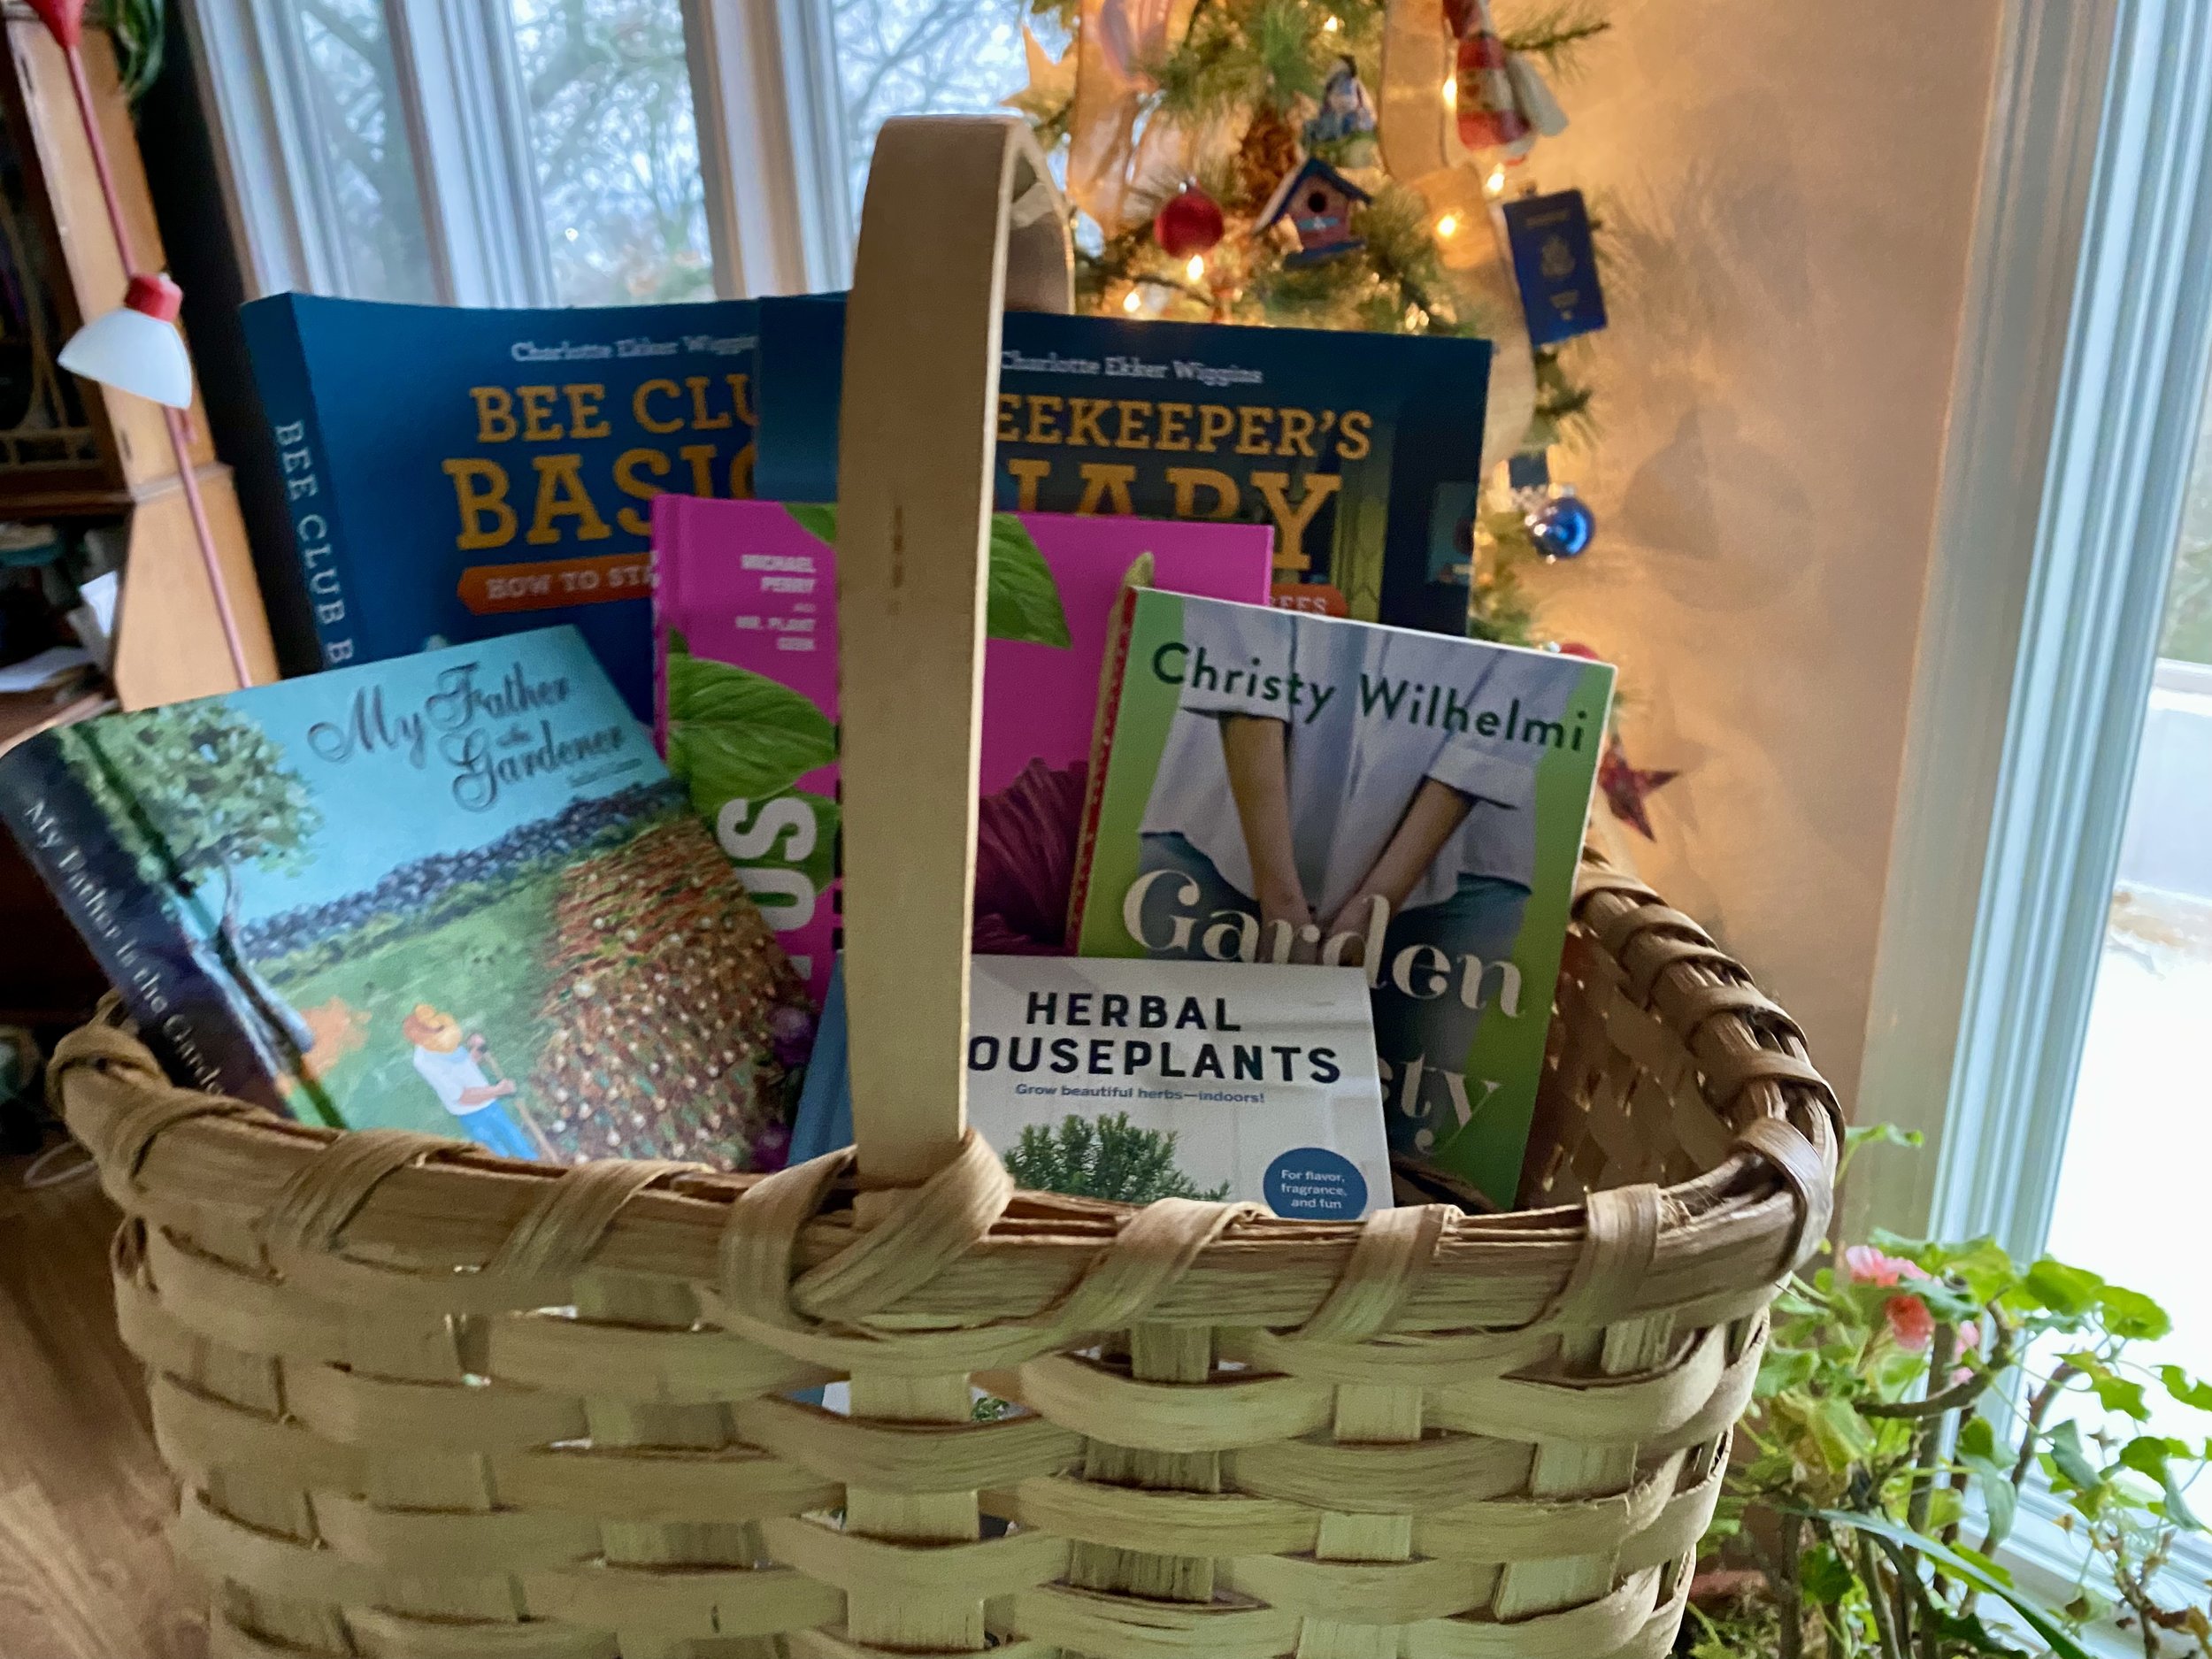
Give your gardening friends a gardening-related gift. It almost be winter but gardeners are planners and are already thinking about spring!

Charlotte

Stump Garden Seat

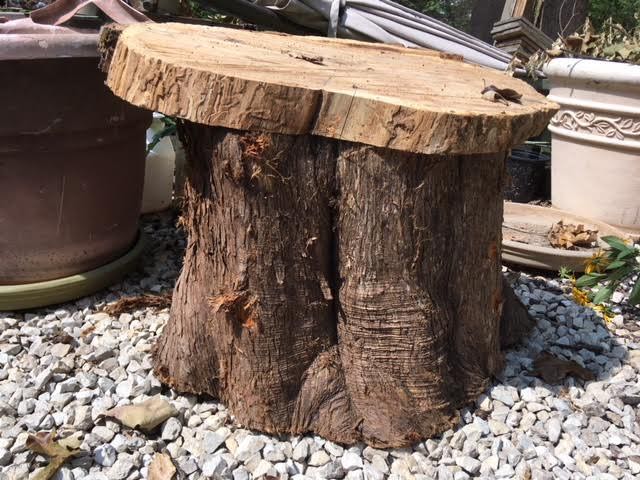
Cedar stump seat under my whimsical arch to nowhere. (Photo by Charlotte Ekker Wiggins)

Cedar stump seat under my whimsical arch to nowhere. (Photo by Charlotte Ekker Wiggins)

Stump Garden Seat

I’ve had a love affair with re-using tree stumps every since I can remember. When I had to cut a couple of dead trees out of my hillside garden, I had them cut the stumps to a table height so I can use them as handy surfaces. My old herb garden had a wooden seat with two tree stumps for the base.

So it will come as no surprise to anyone who knows me that my whimsical arbor that goes nowhere now has a huge cedar tree stump underneath it as a resting area with a smaller piece of cedar as the seat.

This all started when I was visiting our local recycling center and spotted the cut down cedar stump. I couldn’t get it into my car but a young man dropping off tree limbs volunteered to load it for me. Right next to the stump was another, smaller cedar piece in the same shape as the stump so I brought both home.

cedar tree stumps going home.jpg
Testing the smaller cedar piece on the cedar stump for a seat. (Photo by Charlotte Ekker Wiggins)

Testing the smaller cedar piece on the cedar stump for a seat. (Photo by Charlotte Ekker Wiggins)

Once home, my handyman moved it to the final location. After testing it out for several days, we settled on how the base would be oriented. The top cedar piece had to be shimmed underneath to make it level with the bottom cedar piece and the leaning hillside.

When the top piece was finally settled, we added the top with screws I tried to cover with wood filler. Not all screws went into the wood low enough for filler so you an still see a couple of them.

If this tree piece could talk! (Photo by Charlotte Ekker Wiggins)

If this tree piece could talk! (Photo by Charlotte Ekker Wiggins)

There are several amazing things about the seat. In addition to seeing the holes bugs left, the rings clearly show how old this cedar tree had been, more than 100 years old.

Rings in the cedar stump mark the age of the tree. (Photo by Charlotte Ekker Wiggins)

Rings in the cedar stump mark the age of the tree. (Photo by Charlotte Ekker Wiggins)


I didn’t want the elements to speed up the decomposing so I searched for a product that would help protect the seat.

No advertising here, this is the product I found through Amazon. (Photo by Charlotte Ekker Wiggins)

No advertising here, this is the product I found through Amazon. (Photo by Charlotte Ekker Wiggins)

Enter Rustoleum with their two-step process to protect materials from water. What attracted me to use this was the water beading on the grey center photo on their marketing information.

It takes two different sprays to protect the cedar tree stump.

Here is the seat after the base spray was added and yes, there was a little gray spot on the edge of the cedar seat:

cedar tree stump seat first coat.jpg

After waiting at least 30 minutes, then I sprayed the second finishing spray.

The wood treatment leaves a hazy film but it repels water. (Photo by Charlotte Ekker Wiggins)

The wood treatment leaves a hazy film but it repels water. (Photo by Charlotte Ekker Wiggins)

Not sure I like the milky look to the wood but it does seem to repel water and give it some protection from the elements. Not to mention once I wipe it off, it keeps the seat of my pants from getting wet!

Rain beads up on the cedar stump top now that it has been treated. (Photo by Charlotte Ekker Wiggins)

Rain beads up on the cedar stump top now that it has been treated. (Photo by Charlotte Ekker Wiggins)

Now it is ready to welcome garden visitors including butterflies and me who may want to sit down and enjoy the garden view from this vantage point.

Charlotte