They're In My Garden Now: Emerald Ash Borers

Emerald ash borer larvae in ash tree in my garden. (Photo by Charlotte Ekker Wiggins)

Emerald ash borer larvae in ash tree in my garden. (Photo by Charlotte Ekker Wiggins)

They’re In My Garden Now: Emerald Ash Borers

They are now in my garden taking out my ash trees - emerald ash borers. Emerald ash borers Agrilus planipennis Fairmaire are an exotic beetle from Asia that was discovered in North America near Detroit, Michigan in the summer of 2002. The adults look like grasshoppers from the Emerald City in Oz, iridescent green with large black eyes. The adult beetles nibble on ash foliage, causing little damage.

The larvae, however, is another story. The immature emerald ash borers feed on the inner bark of ash trees, disrupting the tree's ability to transport water and nutrients, eventually killing the tree.

No one knows for sure but the emerald ash borers probably arrived in the United States on solid wood packing material transported from Asia. It’s suspected they spread by hitchhiking on firewood transported among homes and recreation areas in at least 34 states.

I was working for US Forest Service when it was discovered in southeast Missouri in July 2008 in Wayne County. In September 2013, Missouri’s quarantine expanded to include all 114 counties and the City of St. Louis. The quarantine included not allowing firewood to be brought into Missouri for fear of hitchhiking bugs. It was interesting talking to incoming campers who didn’t understand why they couldn’t bring in their own firewood.

Woodpeckers remove slivers of ash tree bark as they eat larvae. (Photo by Charlotte Ekker Wiggins)

Woodpeckers remove slivers of ash tree bark as they eat larvae. (Photo by Charlotte Ekker Wiggins)

I didn’t know I had damage to my limestone hillside ash trees until I was walking through my garden checking on what wildflowers were still blooming. As I rounded one of my paths, I saw flecking. Flecking is caused by woodpeckers as they feed on emerald ash borer larvae living under the bark. Feeding starts at the top of the ash trees, where emerald ash borers prefer to settle in first. Woodpeckers will strip the bark to feed on the larvae.

With bees in my garden, insecticides is not an option so my only realistic choice is to cut down the ash trees, which I will be having done shortly.

University of Missouri Extension notes emerald ash borers are similar to Dutch elm disease that killed native American elm trees. This invasive bug is capable of eliminating all ash trees from our forests and cities. This makes it one of the most serious environmental threats now facing North American forests.

Confirmed emerald ash borers since July 24, 2018.

Confirmed emerald ash borers since July 24, 2018.

It is expected emerald ash borers will diminish ash trees in Missouri's forests to a very low level. Although ash trees account for just three percent of Missouri’s native forest, the fast-growing shade tree is popular for landscaping. On average, about 14 percent of trees lining streets in urban settings are ash. In some neighborhoods and parks, the figure reaches as high as 30 or 40 percent.

I’m told St. James, Mo. is loosing many of its old ash trees to emerald ash borers. Since its discovery, emerald ash borers have killed trees, created regulatory headaches and cost millions in control measures. It has killed hundreds of millions of ash trees in at least 34 states, caused regulatory agencies to enforce quarantines and fines and cost municipalities, property owners, nursery operators and forest products industries millions of dollars.

Well, at least we tried to keep them out.

Charlotte
A Touch of Winter

Welcome to snow-covered Bluebird Gardens. (Photo by Charlotte Ekker Wiggins)

Welcome to snow-covered Bluebird Gardens. (Photo by Charlotte Ekker Wiggins)

A Touch of Winter

Winter snuck into mid-Missouri earlier than usual fall 2018. Two snow storms, the second dropping 3-4 inches of snow, covered my garden in a lovely fluffy white blanket.

These snow storms inspire some of the quilts I carry including snow in the garden.

Enjoy this peek at my garden covered in snow, no need to bundle up.

BG winter front arbor.jpg

Blue bench suggests the color underneath snow. (Photo by Charlotte Ekker Wiggins.)

A compact dwarf plum tree holds onto its green color. (Photo by Charlotte Ekker Wiggins.)

A compact dwarf plum tree holds onto its green color. (Photo by Charlotte Ekker Wiggins.)

Pond water doesn’t freeze after the first snow. (Photo by Charlotte Ekker Wiggins)

Pond water doesn’t freeze after the first snow. (Photo by Charlotte Ekker Wiggins)

Cedar trees with a blanket of snow. (Photo by Charlotte Ekker Wiggins)

Cedar trees with a blanket of snow. (Photo by Charlotte Ekker Wiggins)

My honeybees have been tucked in for winter. They cluster during cold weather, eating honey for food and coming out to fly when temperatures are over 45F.

The southern apiary is tucked in for winter. (Photo by Charlotte Ekker Wiggins)

The southern apiary is tucked in for winter. (Photo by Charlotte Ekker Wiggins)

A birdhouse gets exposed after leaves have fallen. (Photo by Charlotte Ekker Wiggins)

A birdhouse gets exposed after leaves have fallen. (Photo by Charlotte Ekker Wiggins)

The view off the west side of my house. (Photo by Charlotte Ekker Wiggins)

The view off the west side of my house. (Photo by Charlotte Ekker Wiggins)

BG winter hives.jpg
BG winter shirley honey.jpg

Stay warm, winter isn’t officially here yet!

Charlotte

Missing Gardening Pick Ax

Do you see it hiding in the leaves and vinca? (Photo by Charlotte Ekker Wiggins)

Do you see it hiding in the leaves and vinca? (Photo by Charlotte Ekker Wiggins)

Missing Gardening Pick Ax

I garden on a Missouri limestone hill which means my main gardening tool is a pick ax. And a good set of sturdy boots.

When my last pick ax literally fell apart, I bought a new, improved one with a plastic handle and a weight I could better manage. The only problem was the handle was green, which meant as soon as I set it aside in the garden I couldn’t find it.

Enter my handyman who said he could fix that and sprayed the plastic handle a bright red. Now you should be able to find it wherever you leave it in the garden.

The next day as I was cleaning up, no pick ax ANYwhere!

Back track your steps and see if you can find it where you were working earlier, my handyman suggested. I did. Several times. Nothing.

Then earlier today, I saw it. Actually I saw the bottom of the pick ax sticking out next to a tree where I must have left it. And was it the red that caught my eye?

No, it was the original green still visible on the pick ax bottom.

The bottom of the pick ax stood out among the greenery. (Photo by Charlotte Ekker Wiggins)

The bottom of the pick ax stood out among the greenery. (Photo by Charlotte Ekker Wiggins)

Reminds me of my missing green claw glove that’s still somewhere in the garden. The claw gloves are also mainly green with black tips but now I’m wondering if painting them will make any difference in terms of finding them.

This pick ax was painted red all over!

My newly-painted gardening pick ax for easy spotting. (Photo by Charlotte Ekker Wiggins)

My newly-painted gardening pick ax for easy spotting. (Photo by Charlotte Ekker Wiggins)

Well, it’s back and now with hard frosts killing off most of the greenery, I should be able to more easily spot it - at least until next spring.

Charlotte

Too Hot to Handle

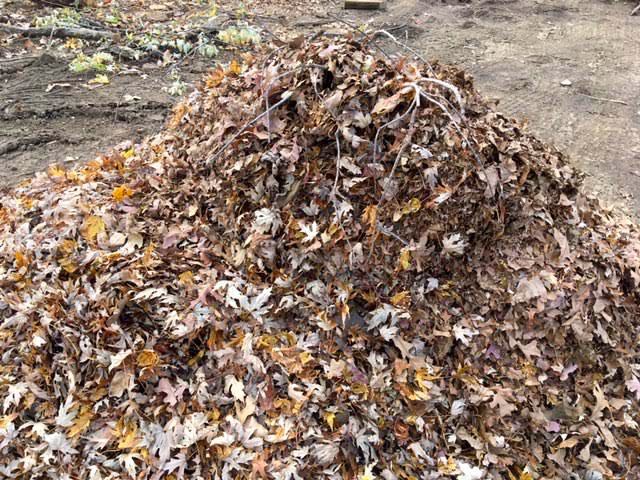
My leftover mulch pile, almost moved into the garden. (Photo by Charlotte Ekker Wiggins)

My leftover mulch pile, almost moved into the garden. (Photo by Charlotte Ekker Wiggins)

Too Hot to Handle

Mulching is as much a science as it is art. A landscaping friend used to say mulch was his best friend and garden tool, an easy way to finish off a garden project, hide unsightly landscaped areas and make a garden design look finished.

I like mulch for other reasons. Gardening on the side of a limestone hill, shredded tree bark makes for decomposing matter that quickly turns into planting areas. The key, though, is knowing when and where to use it.

When a friend first started bringing me mulch, I used it to cover and even out paths so that I could more easily navigate through my terraced garden beds. To make sure plants next to the mulch were not burned, I added cardboard first. Then newly-cut mulch, which still is generating heat, was added to help squelch unwanted plants.

My small piles of mulch come from the mother load, huge hills of chipped trees, leaves and branches dropped off at our local composting station up the hill from the recycling center.

Newly-chipped mulched at our local recycling center. (Photo by Charlotte Ekker Wiggins)

Newly-chipped mulched at our local recycling center. (Photo by Charlotte Ekker Wiggins)

During the growing season May-October, a loader on Wednesdays scoops the mulch and adds it to the back of trucks and trailers. My gardening buddy Tom is particular about which pile his and my mulch comes from but sometimes the on site loader makes the choice. This year, Tom warned me one of my loads might be extra hot because the mulch mounds at the composting station were literally smoking most of summer.

Curious about what that looked like, I drove by to take a peek.

New mulch pile literally smoking. (Photo by Charlotte Ekker Wiggins)

New mulch pile literally smoking. (Photo by Charlotte Ekker Wiggins)

Several times when I pulled into the composting area, a fire truck was pulling out so apparently the fire department was also keeping an eye on the smoldering mulch pile.

The point of sharing this is that if you put brand new chipped mulch that is still hot on flower beds, that heat will kill the plants so make sure the mulch is no longer smoking and is cool before it is applied to growing areas.

When I suspect my mulch pile is still hot, I spread it out thinly so that it cools off before I apply it to my flower beds. A good rain, and letting the pile sit over winter, are also good ways to make sure the mulch won’t be too hot to add to flower beds.

Mulch after smoldering most of this past summer. (Photo by Charlotte Ekker Wiggins)

Mulch after smoldering most of this past summer. (Photo by Charlotte Ekker Wiggins)

If you have any area that you want to clear of unwanted growth, then this hot mulch is the ticket.

Just make sure you are applying the right mulch to the correct location for the result you want to have in your garden.

Charlotte

Learn How to Help Pollinators

One of my honeybees visiting New England Asters. (Photo by Charlotte Ekker Wiggins)

One of my honeybees visiting New England Asters. (Photo by Charlotte Ekker Wiggins)

Learn How to Help Pollinators

Interested in helping pollinators, including honeybees? There is a brand new program in Missouri, indeed it is the first such independent program in the country, designed to help the wide range of Missouri pollinators.. Your local bee club can sponsor the program, get programming for half a year and generate revenue for club operations.

The Missouri Master Pollinator Steward Program officially launched fall of 2018. The six-session program is designed to teach participants about pollinators, why they are important and what participants can do to help them.

Local bee clubs can work with their local University of Missouri Extension offices to request the program in their area; to get class participants registered and to host the sessions, which include hands on activities.

The suggested cost of the program is $90 per person. The recommendation is that $25 goes back to the local bee club; another $25 is a required University of Missouri state fee. The remainder $40 is used to cover expenses like printing and supplies, and any surplus kept by that local University of Missouri Extension office. “Details of how funds will be dispersed is part of the discussion a bee club should have with their respective county extension center council,” according to Jim Quinn, University of Missouri Extension specialist and steering committee member.

For the past three years, the University of Missouri has sponsored a steering committee to develop the Master Pollinator Steward program. The purpose of the program was to capture those 9 out of 10 people who want to help pollinators but don’t want to keep honeybees, the largest of the pollinator groups.

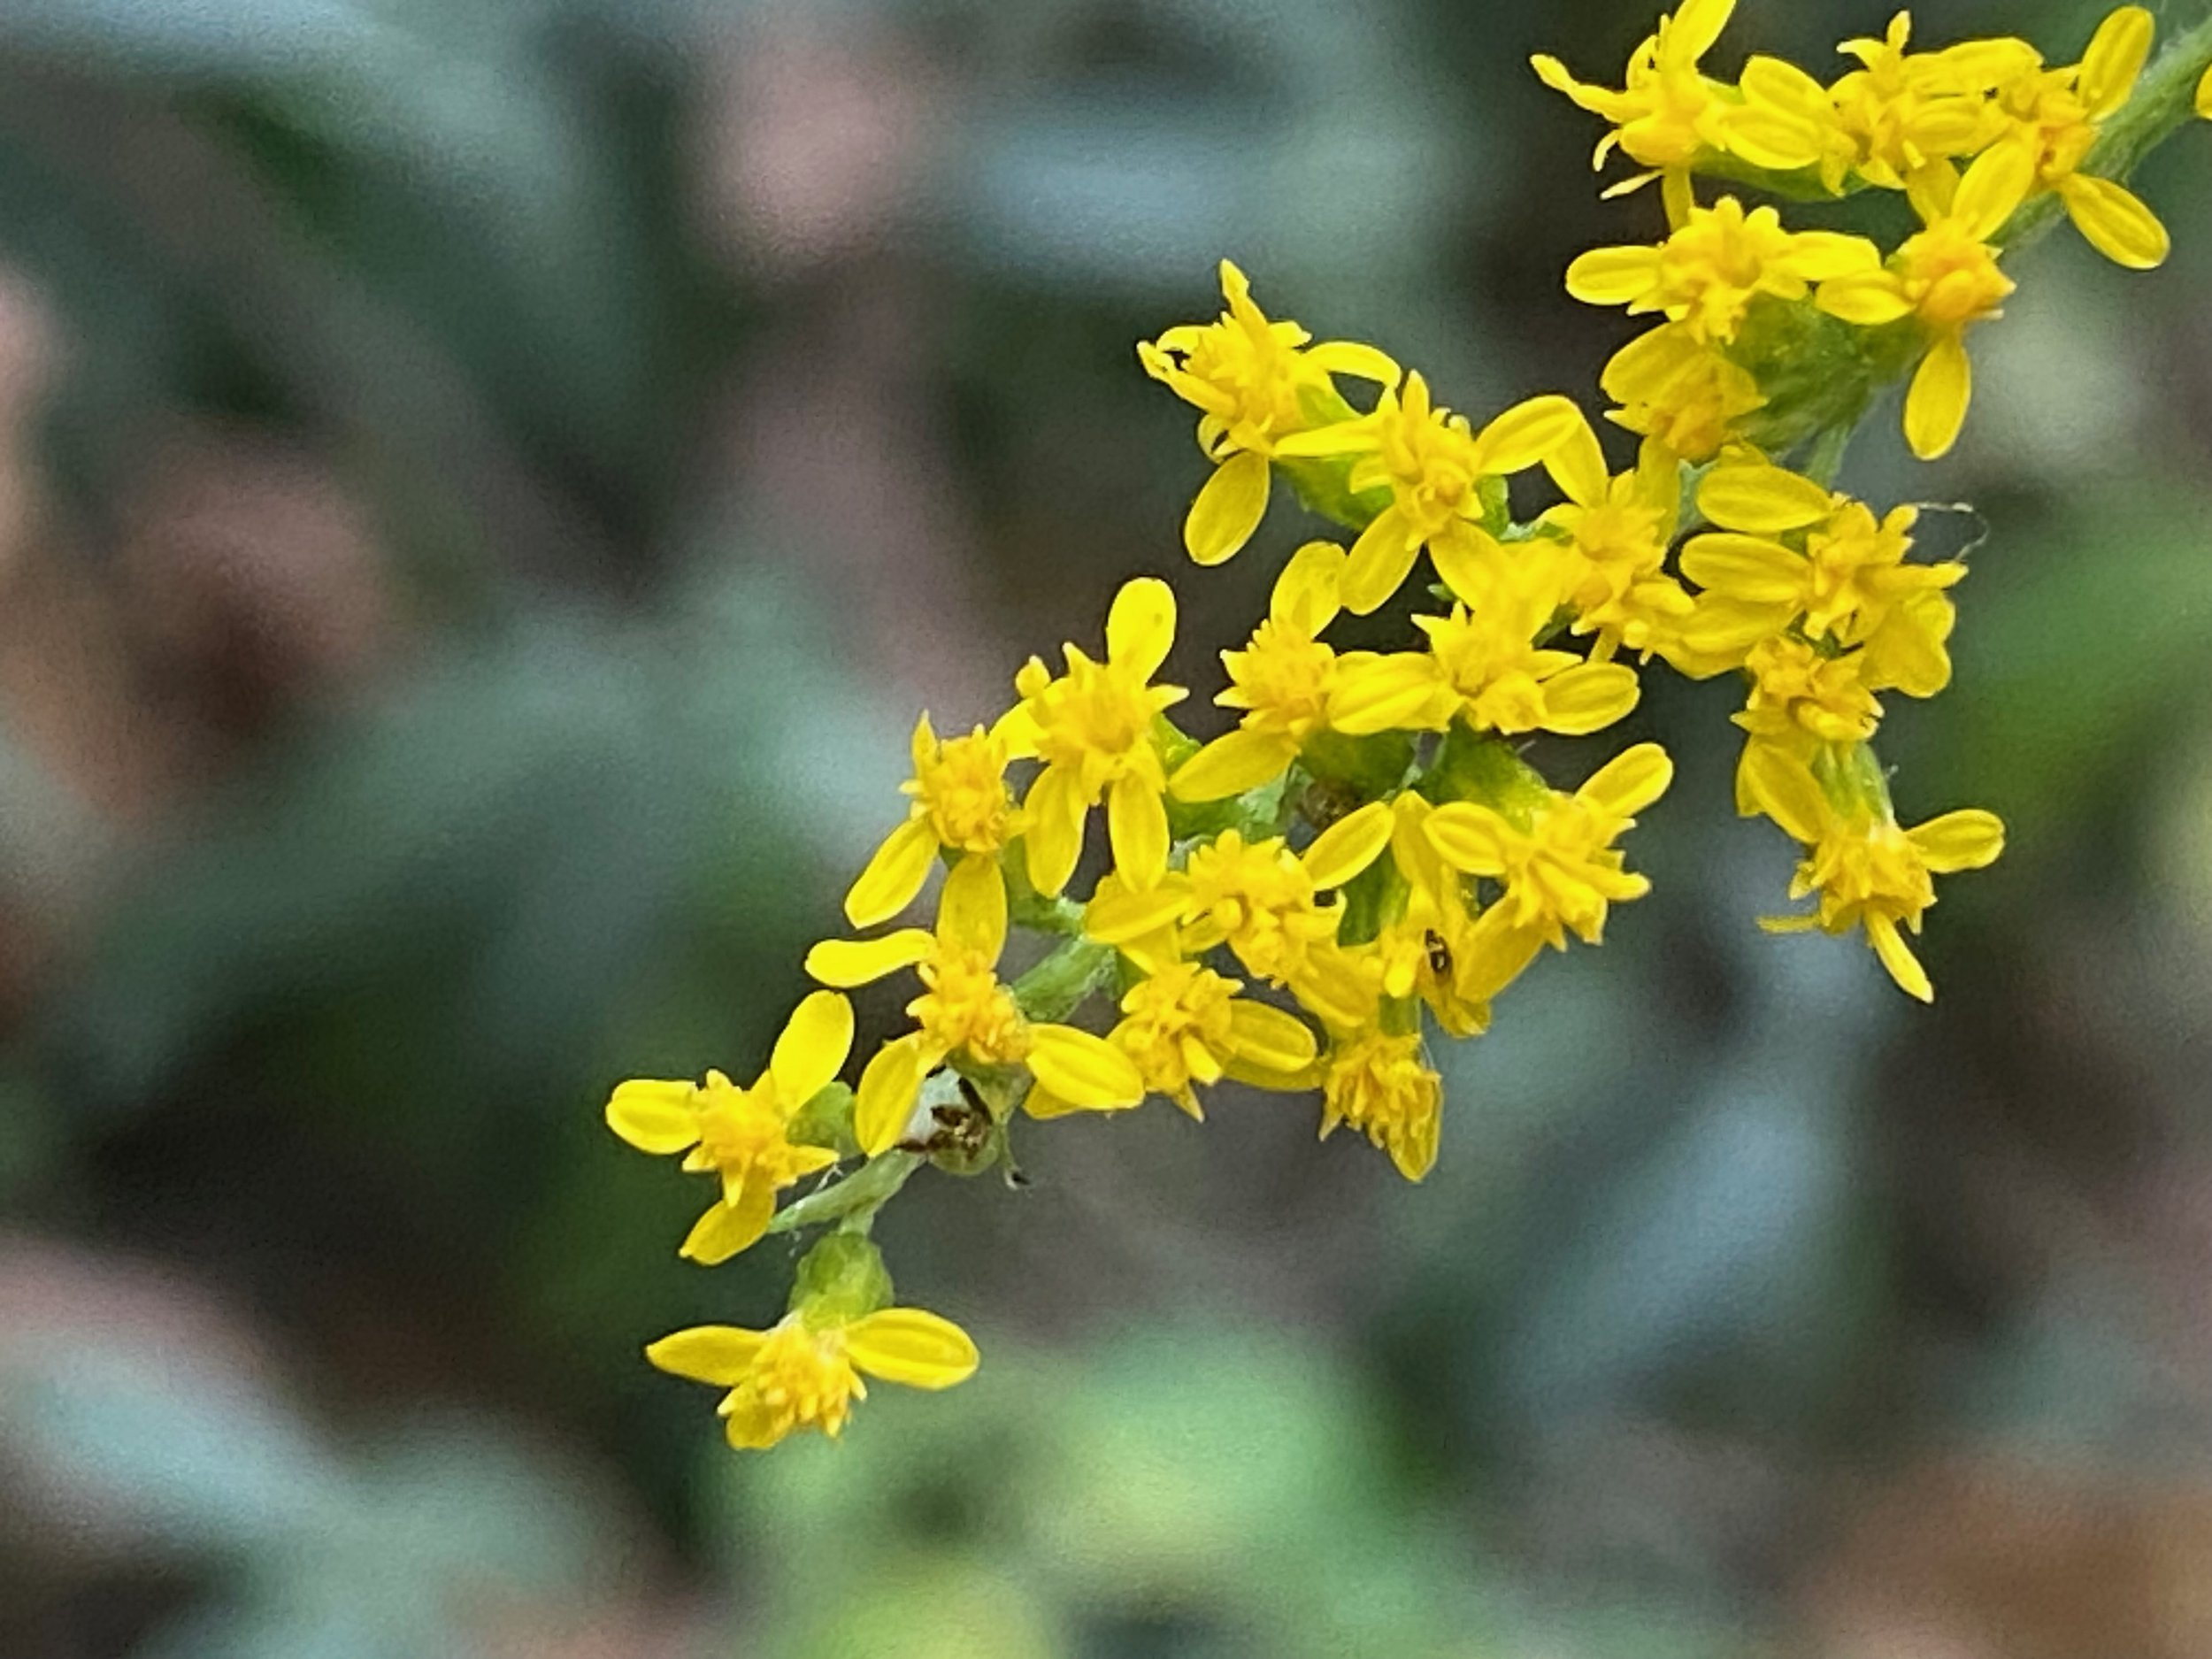
Goldenrod in formal flower bed provides bees fall food. (Photo by Charlotte Ekker Wiggins)

Goldenrod in formal flower bed provides bees fall food. (Photo by Charlotte Ekker Wiggins)

One out of every three bites of food we eat are pollinated by honeybees.

Lack of plant diversity and poor nutrition sources is one of the four major challenges to keeping bees alive worldwide. The other two are overuse of pesticides and pathogens carried by a tick-like mite called varroa. More than two dozen viruses have been identified that are vectored by the varroa mite, which deplete bees of their immune system.

“It’s been exciting to see this program evolve and to take it out for a test in May,” said former Missouri State Beekeepers Association President Valerie Duever, another working group member. “This program should be a great resource for local bee clubs and other groups interested in helping to restore Missouri’s foraging areas.”

Bees visit flowers to collect pollen and nectar, which becomes honey. Honey is what bees eat to stay alive through winter.

Other steering committee members include Travis Harper and Bob Pierce, MU Extension specialists; Mike Conroy, Sedalia Beekeeping Association; Jim Duever, Boone Regional Beekeeping Association; Bob Lee, Master Naturalist representative; Amber Edwards, Conservationist educator and myself. I helped to author the chapter on honeybees, reviewed some of the other chapters, tracked down photos and came up with hands on activities.

For more information on Missouri’s master pollinator steward program, visit https://extension2.missouri.edu/programs/programs-master-pollinator-steward 

Guidelines on how to set up a Master Pollinator Steward program class are here:http://extension.missouri.edu/pollinator/startup.aspx

A narrated overview of the program that can be used to share it has been posted here: https://youtu.be/0AvESofVLuI

For more information, contact Jim Quinn at quinnja@missouri.edu.

Charlotte


Shredded Leaf Mulch

Leaves in bags.jpg

Shredded Leaf Mulch

If you have a riding lawn mower you can have wonderful shredded leaf mulch. Shredded fall leaves, combined with grass clippings, will make rich soil conditioner that will retain water and return nitrogen into the soil that you can’t buy at any garden center.

This time of year, people are raking fall leaves and bagging shredded ones, then dumping them at our local composting station so let’s look at some options.

A standard pile of drying leaves that haven’t been shredded. (Photo by Charlotte Ekker Wiggins)

A standard pile of drying leaves that haven’t been shredded. (Photo by Charlotte Ekker Wiggins)

Dried leaves can be good garden mulch provided the leaves are fully dry and not still green, or yellow. The leaves that aren’t dry yet need to be dry before applying to a bed but both can be used if this pile is first run over by a riding lawn mower.

Bunched leaves holding moisture that haven’t bee shredded. (Photo by Charlotte Ekker Wiggins)

Bunched leaves holding moisture that haven’t bee shredded. (Photo by Charlotte Ekker Wiggins)

Here is another leaf pile, this from the inside of one of those paper bags. See the black spots on the leaves? I would be tempted to skip this leaf pile, those black spots are an indication of some kind of spores on the leaves I would rather not spread to my garden.

Shredded and unshredded leaves are a good combination. (Photo by Charlotte Ekker Wiggins)

Shredded and unshredded leaves are a good combination. (Photo by Charlotte Ekker Wiggins)

Now we are getting somewhere, this is a leaf pile with both shredded and regular dry leaves. This combination provides good immediate garden cover with the shredded leaves and will continue to work as the new leaves decompose.

Dry shredded and unshredded leaves combined with grass clippings. (Photo by Charlotte Ekker Wiggins)

Dry shredded and unshredded leaves combined with grass clippings. (Photo by Charlotte Ekker Wiggins)

A combination of dried leaves with grass clippings will also work as long as there are more dry leaves than clippings. Grass clippings will quickly remove nitrogen from the soil and generate heat so try to keep the mix at least even.

My favorite pile, shredded leaves and clippings. (Photo by Charlotte Ekker Wiggins)

My favorite pile, shredded leaves and clippings. (Photo by Charlotte Ekker Wiggins)

This pile would also make an excellent composter addition, a mixture of both “brown” and “green.”This is the shredded leaf pile I have been bagging and hauling home to add to new garden beds. A combination of shredded dried leaves with maybe a quarter grass clippings. I wear gloves as I pack the bags in case the mulch included poison ivy spores. Even so I still managed to get a long scratch on my right index finger.

I have also been raking my dried leaves in my garden and moving them to cover garden beds but this shredded mix is a real treat for my flowers and one that will keep on giving next year.

Charlotte

Homemade Bird Feeder Covers

Can you guess that this bird feeder top is homemade? (Photo by Charlotte Ekker Wiggins)

Can you guess that this bird feeder top is homemade? (Photo by Charlotte Ekker Wiggins)

Bird Feeder Covers

This doesn’t come under the heading of major world developments but it is an inconvenience for the birds visiting my garden feeders after a good rain, snow and ice storm. My sturdy metal bird feeders are rectangular in shape and don’t have protective covers to keep the seeds dry.

When I checked into the prices for plastic covers, I balked a bit at paying the $59.95 and more per cover. The $60 cover was the least expensive I found. Most of the plastic bird feeder covers were closer to $75 each with some fitting only custom bird feeders.

I headed down to one of my favorite local thrift stores, the Community Partnership Resale Shop, and found three potential bird feeder plastic top candidates for $1 each.

Three possible bird feeder covers to keep seed dry. (Photo by Charlotte Ekker Wiggins)

Three possible bird feeder covers to keep seed dry. (Photo by Charlotte Ekker Wiggins)

Two of these bowls started their life as some form of kitchen utensil. The third open wire shape was a hanging basket missing the hanging chains so I thought I could wrap plastic wrap around it if the other two don’t work. If the first two work out, I still have another hanging wire basket so it’s all good.

Using a half-inch drill bit to cut holes, the two plastic bowls were then attached to the top and caulked with what was supposed to be a clear caulk for bathrooms and wet surfaces.

Not exactly a clear caulk but it is keeping water out. (Photo by Charlotte Ekker Wiggins)

Not exactly a clear caulk but it is keeping water out. (Photo by Charlotte Ekker Wiggins)

After waiting a couple of days for the caulk to dry clear, I re-attached the bird feeder hanging rings and took them out for a test in the upcoming rain.

One of the plastic bowls now keeping bird seed dry. (Photo by Charlotte Ekker Wiggins)

One of the plastic bowls now keeping bird seed dry. (Photo by Charlotte Ekker Wiggins)

So far so good.

The bird feeder tops lift with the plastic bowls attached so I can easily refill them. On closer inspection, the bird seed seems to be staying drier with their plastic umbrellas. Now let’s see how these work over the cold and wet holidays and if the birds get used to their new bird feeder decor.

Squirrels like to visit my bird feeders, too, even with their new tops! (Photo by Charlotte Ekker Wiggins)

Squirrels like to visit my bird feeders, too, even with their new tops! (Photo by Charlotte Ekker Wiggins)

Strange-looking bird!

A wren takes refuge under the bird feeder cover during a snow storm. (Photo by Charlotte Ekker Wiggins)

A wren takes refuge under the bird feeder cover during a snow storm. (Photo by Charlotte Ekker Wiggins)

A sure sign of whether these work was during our first snow storm of the season.

Birds were sitting in the bird feeders taking refuge and getting a snack so I’m ready to say this worked quite well, don’t you think?

Charlotte

This Rose Truly Offers Double Delight

Double Delight hybrid tea rose has a lovely spicy scent. (Photo by Charlotte Ekker Wiggins)

Double Delight hybrid tea rose has a lovely spicy scent. (Photo by Charlotte Ekker Wiggins)

This Rose Truly Offers Double Delight

I am so enjoying this last rose bud from my garden. This hybrid rose was introduced to the Rose Hall of Fame in the mid-80s and won the All-American Rose award in 1977.

That’s a long time ago and something I missed when buying this rose. I picked it up on sale without knowing what kind of rose it was, not a problem for me because I love surprises.

One of the better growing conditions for roses is sunny days and cool evenings, which we have been having. I didn’t expect to see any roses blooming until I passed this rose bush and saw this bud falling over. The sides had a splash of pink while the bud looked yellow, similar to the colors in this vintage roses twin quilt.

Once in a vase, I had to check for a scent. Wish you could smell this rose, it’s fruity and delicious, just the way one would want a rose scent to be!

Double Delight hybrid tea rosebud a day after I picked it. (Photo by Charlotte Ekker Wiggins)

Double Delight hybrid tea rosebud a day after I picked it. (Photo by Charlotte Ekker Wiggins)

Don’t know how much red color the rose bud will have at this stage but I don’t care, my nose will happily spend the rest of the season enjoying this wonderful scent!

The Double Delight hybrid tea rose finally fully open! (Photo by Charlotte Ekker Wiggins)

The Double Delight hybrid tea rose finally fully open! (Photo by Charlotte Ekker Wiggins)

Once open, the Double Delight hybrid tea rose looks like a creamy white rose and lasts about a week as a cut rose.

Charlotte

How to Get Poinsettias Red Again

Poinsettia color comes from leaves changing by light deprivation. (Photo by Charlotte Ekker Wiggins)

Poinsettia color comes from leaves changing by light deprivation. (Photo by Charlotte Ekker Wiggins)

How to Get Poinsettias Red Again

Poinsettias are starting to pop up where I live, a sure sign of the holidays and as traditional to have around as Santa Claus. The poinsettia colors are from their leaves changing from green to red, for example, after the plant was deprived of light.

The poinsettia flowers are actually the tiny yellow pollen-covered centers.

Poinsettia flowers are the tiny centers where pollen can be found. (Photo by Charlotte Ekker Wiggins)

Poinsettia flowers are the tiny centers where pollen can be found. (Photo by Charlotte Ekker Wiggins)

There are a number of guides on how to get a poinsettia to turn colors again and I can attest that it is very simple.

This is a gift poinsettia from last year. It spent summer outside in a shady corner of my garden, then came in around September.

A one-year poinsettia after spending summer outside. (Photo by Charlotte Ekker Wiggins)

A one-year poinsettia after spending summer outside. (Photo by Charlotte Ekker Wiggins)

I have to confess, I wondered how much this plant would grow outside this summer. When I lived in Mexico City in the 1950s, I remember poinsettias the size of trees in our backyard. I half-mused what I would do if this gift poinsettia had a growth spurt.

The plant was placed in a window in room that doesn’t get evening light. I tried to remember to regularly water it but I missed it a few times because it’s not a room I have been in much recently. The neglect didn’t seem to hurt the plant.

See now what I see?

Second year poinsettia color.jpg

The leaves are starting to show signs of turning red, a sure sign that it has been deprived of light for the requisite 6-8 weeks that triggers the leaves to turn red.

I’m now hooked and regularly visit the plant during daylight to watch the transformation.

Interesting to watch the leaves turning color. (Photo by Charlotte Ekker Wiggins)

Interesting to watch the leaves turning color. (Photo by Charlotte Ekker Wiggins)

Looking forward to adding this plant to my holiday decorations, so glad it will be around a second year!

For more tips on gardening, beekeeping, cooking and easy home decor, subscribe to my weekly Garden Notes.

Charlotte

Raspberry Cedar Arbor

The raspberry cedar trellis borders the front of a soon to be raised garden bed. (Photo by Charlotte Ekker Wiggins)

The raspberry cedar trellis borders the front of a soon to be raised garden bed. (Photo by Charlotte Ekker Wiggins)

Raspberry Cedar Arbor

Old gardening books recommend growing raspberries in home gardens because they are delicate to move and hard to keep fresh. I decided to grow them because I love the berries and have had some in my garden in the past.

Helping the vines grow in a semi-orderly fashion has not been very - well, pretty. The recommendations are usually to build a flower bed with tall wires or to grow them along a wooden fence. Since I don’t like either, I decided to build a raspberry bed using cut down cedar branches.

I was inspired by my friend Tom’s garden. As a gift last year, he gave me an air compressor with a nail gun, a must to easily shape the cedar branches into fences, arbors and gates.

Frankly the part that takes the most time is cutting and collecting the branches. For several weeks, my pile of cut down cedar branches looked like I was getting ready to start a huge bonfire in the middle of my driveway.

Cut cedar branches in a pile waiting to become garden arbors. (Photo by Charlotte Ekker Wiggins)

Cut cedar branches in a pile waiting to become garden arbors. (Photo by Charlotte Ekker Wiggins)

At first I trimmed some of the branches, then decided to wait until after I had them attached. There is a bit of art and a good dab of carpentry skills to not nail my finger with the nail gun but it is not hard to do. I found the most challenging part was choosing cedar branches that best fit the openings between the vertical supports, similar to one of my Irish Chain quilt patterns.

Here is my finished raspberry cedar trellis, now installed in the center of what I have dubbed the “berry patch.” This is one of several beds in the area. Another bed has blueberries.

I started by making the two short sides, about 3 feet long. (Photo by Charlotte Ekker Wiggins)

I started by making the two short sides, about 3 feet long. (Photo by Charlotte Ekker Wiggins)

Each piece was made to size and separately, then tied together in the actual berry patch.

The large center arch was finished in the berry patch to make sure we had it covered.

Next came the almost 10-foot back fence. (Photo by Charlotte Ekker Wiggins)

Next came the almost 10-foot back fence. (Photo by Charlotte Ekker Wiggins)

You can add as few or as many cedar pieces as you want. I left an opening in the top to allow sun through.

This is the other short side of the cedar fence. (Photo by Charlotte Ekker Wiggins)

This is the other short side of the cedar fence. (Photo by Charlotte Ekker Wiggins)

My raspberry patch has milk jugs sunk into the soil to help keep the soil moist.

Cedar branches are woven inside the fence border. (Photo by Charlotte Ekker Wiggins)

Cedar branches are woven inside the fence border. (Photo by Charlotte Ekker Wiggins)

Established raspberry plants now wind their way around the cedar arbor. I also added a couple new potted raspberry plants that should fill up the bed nicely next year.

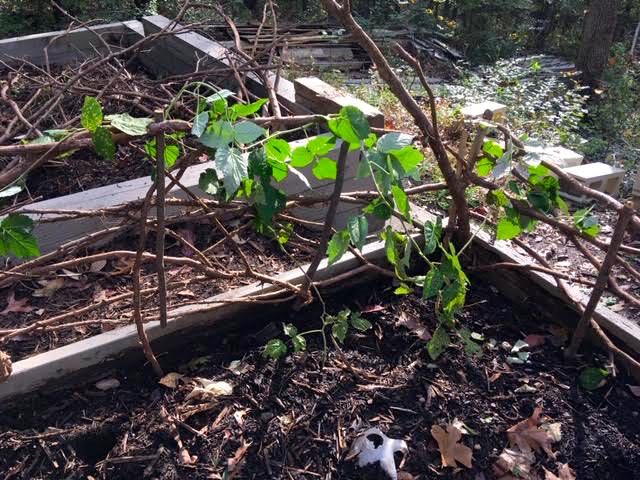
A raspberry now fills the corner of the cedar arbor. (Photo by Charlotte Ekker Wiggins)

A raspberry now fills the corner of the cedar arbor. (Photo by Charlotte Ekker Wiggins)

It may take several years before I have berry-producing canes but I don’t mind, I ook forward to watching this berry patch grow!

Charlotte

November Gardening Chores

Bring in favorite herbs to winter over in a sunny window, this is a rosemary. (Photo by Charlotte Ekker Wiggins)

Bring in favorite herbs to winter over in a sunny window, this is a rosemary. (Photo by Charlotte Ekker Wiggins)

November Gardening Chores

1. Not the highest item on my November gardening chores list but one I am looking forward to doing, which is getting my gardening books organized all in one place in my renovated basement library.  Even though it’s easy to assume all books are available online, that’s not true, especially the more scholarly horticultural books.

 Other gardening chores for this month include:

 2. Settling potted plants into windows that will give them the light conditions they need. Some potted herbs in particular need good sunlight over winter.

 3. Check the last of the garden center plant sales and bury the plants still in their pots into the ground. Make sure to water and mulch so they will successfully pull through winter.

 4. Dry leaves make good flowerbed mulch. Add a layer of aged mulch on top of leaves to develop a good protective layer.

 5. It’s been very dry so remember to water. An inch a week is a good measure, especially for woody plants, such as azaleas and evergreens. When watering, check for damaged branches and remove. Once winter ice moves in, the ice will cause more damage than necessary on those weak and damaged limbs. I take pruners with me so I can also trim out suckers and branches that are too long, especially along where I regularly walk. No point in putting that off until later when the ground is covered in ice and snow.

If you planted mums, remember to water them every other week through winter so they can get established. I planted this mum last fall and it nicely regrew on its own this year. (Photo by Charlotte Ekker Wiggins)

If you planted mums, remember to water them every other week through winter so they can get established. I planted this mum last fall and it nicely regrew on its own this year. (Photo by Charlotte Ekker Wiggins)

 6. Empty most of your composters on asparagus and strawberry beds. This year I will also feed my new raspberry and blueberry beds.

 7. If you have newly-planted roses, mound 6 inches of soil around rose crowns and add a layer of dry leaves covered in mulch for extra insulation.

 8. If you haven’t saved seeds for next year, split the difference with your local birds and collect half of your seed supply to dry. The other half will give birds a nice winter treat.

 9. You should be on the downside of the mowing season. Make the last cut when you see grass has stopped growing. Let clippings lie where they’ve been cut to restore Nitrogen to the soil. Have fun mowing over the leaves to shred and move them to flower beds.

 10. Did you pull a poinsettia through the year from last Christmas? I have two. They are now sitting in a room that doesn’t get evening light hoping the bracts will turn color in time for this holiday.

 11. Which reminds me, if you want your Christmas cactus to bloom next month, this is a good time to place it with your poinsettia. Mine started blooming in September because they are temporarily staying in my dining room as we finish the basement work. I’m good with the splashes of color any time of the year.

 12. Update your garden diary with what worked well and what you want to try next year. I have found it’s easier to do it now than to try to remember details mid-January.

 Charlotte


Forecasting Winter

What does this wooly worm say to you about winter? (Photo by Charlotte Ekker Wiggins)

What does this wooly worm say to you about winter? (Photo by Charlotte Ekker Wiggins)

Forecasting Winter

Shortly after moving to Missouri, one of my neighbors tried to explain the rules behind woolly worm forecasting. As I recall, all black means a rough winter ahead; honey brown bands mean mild periods where the bands are on the worm. If the woolly worm has spiky protrusions, watch for ice. If it’s well, “woollier” than normal, better bundle up.

If the first wooly worm I found in my garden a couple of weeks ago is any indication, we should have an above normal warm winter. The wooly worm was all brown, a sign that the winter will be milder than usual. I think.

Although woolly worms may be the most well known, there are other interesting forecasters in nature:

Higher and larger ant and termite mounds mean a colder than normal winter. If they’re rushing back and forth in straight lines, rain is coming. When they go in search of food in random patterns, the weather will be good.

About this time of year I think about this winter forecasting sign and say to myself I would like to meet the person who sat around watching ants and then comparing their behavior to winter patterns. Then again, maybe not.

Bees nests built higher than usual means cold weather ahead. They also cluster around, and in, the hive when stormy weather is approaching.

It’s true honeybees cluster – they don’t hibernate – inside a hive when stormy weather is approaching. As a beekeeper, it’s one of the ways I know bad weather is moving in. Bees also move up the hive through winter, eating the honey above them. My bees mid-September were already in their second of their three hive boxes so I moved them down to the first floor. That makes sure they have enough food for winter.

Is that a good predictor of weather? Probably not, it’s what bees do when daylight gets shorter.

If you need to know the temperature, count the number of chirps in a 14-second time span of cricket chirping. Add 40 to that number and you’ll be within one degree. In fact, many insects tend to be more active when it’s warmer, including the sounds they make.

If flies land and bite, rain is imminent.

When Katydids begin their chirping chorus, you can expect the first hard frost in 90 days.

Seeing more spiders than usual? That supposedly means abnormally cold temperatures ahead.

If spider webs are flying in the wind, there will be no rain. If a spider puts up a web, the upcoming weather will be fine. If the spider removes it, a storm is on its way.

There is also the Ozark tradition of opening a persimmon and checking the seed. A spoon shape inside indicates above average snowfall, a knife shape signals colder than normal temperatures and a fork shape means warmer than average temperatures.

My cats do a pretty good job of simulating this sleeping cat quilt and forecasting the weather for the upcoming day. If they don't get out of bed, I know it's cold outside.

Charlotte

Along Came A Spider

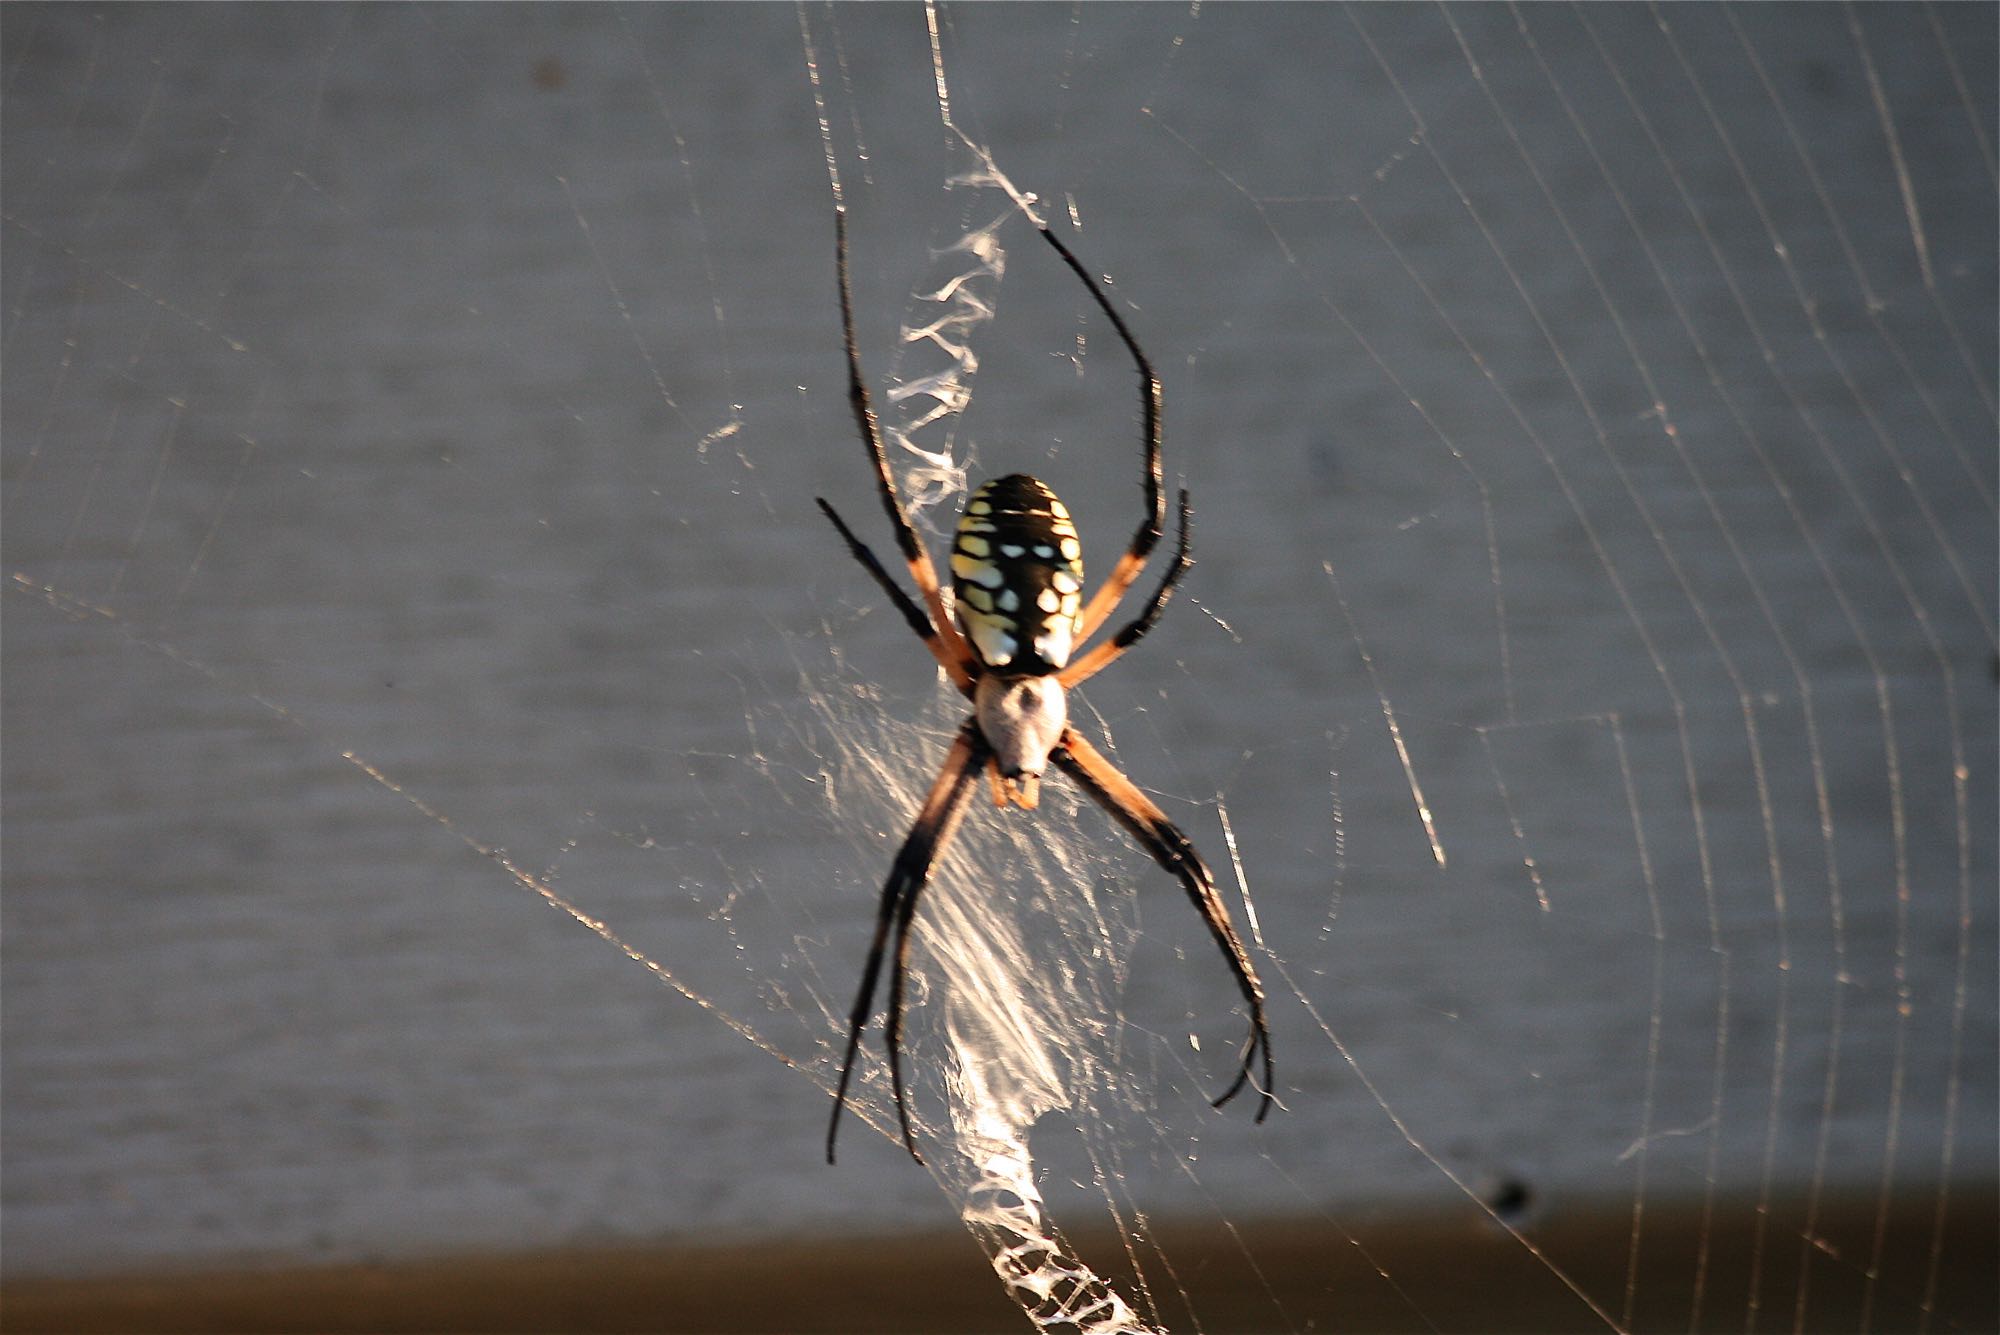
A Missouri garden spider weaving her zig zag web. (Photo by Charlotte Ekker Wiggins)

A Missouri garden spider weaving her zig zag web. (Photo by Charlotte Ekker Wiggins)

Along Came a Spider

It seems they show up all of a sudden, black and yellow garden spiders weaving webs in all sorts of inconvenient places.

I like spiders. One isn't charmed by E.B. White's "Charlotte's Web" without having at least a literary affinity to these amazing creatures. Did you know spider web silk is, weight for weight, stronger than steel?

Now that I have honeybees, I tend to patrol webs to release bees. I'm not always in time so a number of my bees have become stored food for baby spiders-to-be.

If you study any spider web, you will see they are not necessarily picky. Almost anything is fair game to get tangled in their web.

Spiders are the insect patrol and clean-up crew in gardens. According to Missouri Department of Conservation, spiders eat more insects than birds and bats combined. Because of this, spiders are a boon on agricultural lands, destroying huge numbers of crop-damaging insects. Since each spider in a field may consume a least one insect per day, their cumulative effect on insect populations is significant.

This wolf spider has set up her web outside my den door, look how hairy-looking she is. (Photo by Charlotte Ekker Wiggins)

This wolf spider has set up her web outside my den door, look how hairy-looking she is. (Photo by Charlotte Ekker Wiggins)

Spiders, along with ticks, mites, harvestmen and scorpions, belong to the class Arachnida. Unlike insects, which have six legs, spiders have eight. They have no antennae, and they have two-piece bodies. A spider has silk-spinning structures called spinnerets at the back end of its abdomen, and it usually has eight eyes of various sizes and shapes.

On one of my visits to work in Washington D.C., I stopped by the Smithsonian to see the Orkin bug corner at the Natural History Museum. The exhibits included a very detailed ant farm - more like an ant mansion, behind glass - several exhibits of termites and the kind of damage they can do to wood; a cockroach home and, by far the kids' favorite, the tarantulas. Think furry garden spiders only 10 to 15 times larger and quick-moving, which is part of their gruesome appeal.

The day I was visiting, the docent was an older lady who reminded me of my grandmother. She also wore a white lace collar over her dress and those old-fashioned, flower button earrings against her bluish gray hair. All of a sudden I heard her say in her quiet voice "and then the tarantula uses its fangs to s-u-c-k the brains out, just like a milk shake."

"EEEEEWWWW" came loudly in unison from kids surrounding her. I'm sure they could be heard all the way down to the first floor by the mastodon elephant replica.

This hay spider is ready to welcome Halloween. (Photo by Charlotte Ekker Wiggins)

This hay spider is ready to welcome Halloween. (Photo by Charlotte Ekker Wiggins)

Scientists predict that as our climate gets warmer, snakes will grow as long as buses and horses may shrink to the size of cats.

Although I find them fascinating, I know way too many people who don’t appreciate spiders in their gardens. We need to rethink how we co-exist with these wondrous creatures.

Charlotte

Thought for Today

So pretty, Missouri yellow wildflowers blooming along a roadside. (Photo by Charlotte Ekker Wiggins)

So pretty, Missouri yellow wildflowers blooming along a roadside. (Photo by Charlotte Ekker Wiggins)

Thought for Today

I have a friend going through a difficult time in her life. As i listened to her challenges, I was struck by the thought that we have become a society that enjoys tearing people down instead of lending a helping hand.

"People are like dirt. They can either nourish you and help you grow as a person or they can stunt your growth and make you wilt and die." — Plato

How about we all strive to be the people who nourish?

Charlotte

How to Dry Zinnia Seeds

Zinnia flowers drying on newspaper before I store them for next year. (Photo by Charlotte Ekker Wiggins)

Zinnia flowers drying on newspaper before I store them for next year. (Photo by Charlotte Ekker Wiggins)

How to Dry Zinnia Seeds

You can dry zinnia seeds through the growing season but there’s a tendency to do so in fall, maybe after the first frost.

I have been drying zinnia seeds for many years so I can attest it is easy to do. Start with picking off the dry flower heads, those have seeds that are already drying while still on the plant.

Spread the flower heads on a newspaper or paper towel on a tray in a dry space until all flower heads are dark and dry to the touch.

You can then store the flower heads as is so that you can plant the same zinnias in a patch. You can also remove the seeds and spread them out for a few days until they are all dry before storing.

If there is one annual in your garden, this is the one to plant. A variety of pollinators love it and they are so easy to plant. They will grow in most soils and require little water. Did I mention the bright colors?

One of my last zinnia bouquets for this growing season. (Photo by Charlotte Ekker Wiggins)

One of my last zinnia bouquets for this growing season. (Photo by Charlotte Ekker Wiggins)

I’m ready to plant these dried seeds, I’m going to save several seed heads so I can have patches of the same colored-zinnias. That way I can enjoy a different color each day of the week, like these flower days of the week kitchen towels!

Guess I need to get through fall and winter first…

Charlotte

Blue Dayflowers

Blue Dayflowers are one of the true blue flowers. (Photo by Charlotte Ekker Wiggins)

Blue Dayflowers are one of the true blue flowers. (Photo by Charlotte Ekker Wiggins)

Blue Dayflowers

If you’ve ever looked for sky blue perennial flowers - or any blue flowers - you know they are few and far between. Unless you start paying attention to your garden “weeds,” where you may find one of the prettiest true blue flowers around.

Dayflowers tend to appear mid-summer in my mid-Missouri garden, a little pop of blue showing up among flower beds and borders. This native from Asia is now prevalent through Missouri and listed as a Missouri wildflower.

Part of the spiderwort family, Commelinaceae blooms May through frost. The plant is named after Jan and Kaspar Commelin, distinguished Dutch botanists. According to Edgar Denison in “Missouri Wildflowers,” there was a third botanist who died young. The two larger petals represent the two surviving brothers and the smaller one the botanist who died at a young age.

A group of blue dayflowers adding color to a garden corner. (Photo by Charlotte Ekker Wiggins)

A group of blue dayflowers adding color to a garden corner. (Photo by Charlotte Ekker Wiggins)

What I love about these flowers is that they require little water and easily grow in both sun and shade.

The stems will sprawl through a flower bed, nicely filing in an area with their leaves. I found myself adding starts all through my garden this fall hoping they will return next year.

Who can argue with an easy to grow perennial that easily adds a dash of true blue to a garden?

Charlotte

Volunteer Cantaloupes

This volunteer cantaloupe grew itself with a little help from an old wooden arbor.

This volunteer cantaloupe grew itself with a little help from an old wooden arbor.

Volunteer Cantaloupes

I was going to title this how to easily grown cantaloupes but decided I can’t take that credit, either. These cantaloupes grew themselves, my best guess seeds that inadvertently ended up in the compost I added to the garden bed.

For years I had head cantaloupes were hard to grow in Missouri. Anything is hard to grow if one is trying to raise plants where the most one grows is rocks and there is little to no soil. After building and amending garden beds, my challenge was to encourage soil production through composting and mulching.

There were no plans for much to grow in this particular area this year besides buckwheat as a cover crop. When I saw a few rabbits in the garden area, I took that as a sign the garden bed was getting close to being ready for planting. It can take several months to years for the soil composition to be right for plants.

When the first vines started to appear, the leading speculation was these were cucumbers from last year. Since I love cucumbers, I let them grow, adding an old trellis to keep them off the ground.

One morning, my handyman took a look at the vine and said if it was a cucumber, it was a mighty round one. A few weeks later the verdict was this was definitely a cantaloupe!

To make sure the cantaloupe bottom didn’t rot, I placed a small piece of cardboard under it. Good thing because once picked, there was a black spot on the bottom where the cantaloupe was against the cardboard.

Cardboard tucked under the cantaloupe kept it from rotting as it was sitting on the vine.

Cardboard tucked under the cantaloupe kept it from rotting as it was sitting on the vine.

On the other side, a small crack had developed, about an inch long with a star-like pattern. A quick scoop of the knife and the spot was clean.

The other end had a 1-inch crack starting, which was easy to remove once fruit was picked.

The other end had a 1-inch crack starting, which was easy to remove once fruit was picked.

Now to prepare the cantaloupe for easy eating access. I remove the peel, then cut slices into smaller pieces so the cantaloupe can be used as the base for a fruit salad or all by itself.

Cut up cantaloupe stored in refrigerator makes for a delicious treat any time of day.

Cut up cantaloupe stored in refrigerator makes for a delicious treat any time of day.

You bet I save the seeds, only this time I will store them to deliberately plant them next year!

Charlotte

October Gardening Chores

Fall is a good time to scope out where garden structures will add support for nearby growing plants. I can’t relocate or kill this wild grapevine so now up it goes! (Photo by Charlotte Ekker Wiggins)

Fall is a good time to scope out where garden structures will add support for nearby growing plants. I can’t relocate or kill this wild grapevine so now up it goes! (Photo by Charlotte Ekker Wiggins)

October Gardening Chores

It’s going to seem odd but it is now time to start enjoying garden bounty. With the longest 2018 spring in Missouri recorded history, produce is appearing in my garden. Finally.

1. From cherry tomatoes, onions, a variety of herbs and a volunteer cantaloupe, I don’t have much to gather this year but I will enjoy what I have. Besides harvesting, this is the time to freeze extras for later use.

2. Pick herbs before they have flowered to capture the full flavor. I also wait until after they have flowered and cut the new herb sprouts to dry for later use. Except for basil. A little packrat took all of my basil drying in my garage. I caught and relocated the pack rat and am now waiting for more basil to grow.

3. Start pruning and checking for any hitchhikers on plants that are coming inside for winter. To cut down on leaf drop, bring plants in a month before turning on the heat, which is usually early October.

4. For single plants in separate pots, consider combining them, watering well and the bringing them inside. Even if they only last for a couple of months, they will help to extend the growing season.

5. Water. Perennials, established trees, evergreens and azaleas need one inch of water a week. Water into the ground so the water hydrates plant roots. Keep watering until our first hard frost. For USDA hardiness zone 5d, that is usually around Halloween.

6. Stop fertilizing and pruning. Wait until January-February after the plants are dormant and you can better see their form.

7. If you have trees with fungus or other issues, collect those leaves and burn or bury into the ground. I leave most of my leaves on flower beds except for diseased ones, don’t want to spread that fungus.

8.If you haven’t cleaned up flower beds of spent plants, here’s your last chance to gather seeds. Birds will take the rest after frost. Leave the rest to clean up in spring. By then, most of the greenery will have broken down and become part of the garden mulch.

A volunteer cantalope grew in my berry patch this year, the vines weaving over an arbor. (Photo by Charlotte Ekker Wiggins)

A volunteer cantalope grew in my berry patch this year, the vines weaving over an arbor. (Photo by Charlotte Ekker Wiggins)

9. Plant spring bulbs. Add a little bone meal at the bottom of the hole to slowly feed the bulbs. Plant bulbs close together if you don’t mind digging them up in a couple of years to separate. If you would rather not, give them some space in between. Mark where you planted them so you don’t dig them up next year when planting something else.

10. Leave the falling leaves where they are. If you are worried about your grass, run the mower over them. 11. Plant trees and bushes; make sure to water daily until frost.

12. Leaves return Nitrogen to the soil and make a wonderful amendment to flower beds and help retain moisture.

13. Stop long enough to enjoy the beauty of fall as leaves turn, native plants bloom and temperatures turn crisp and cool. A hot cup of tea sounds good about now!

Charlotte

Lily Pad 2.0

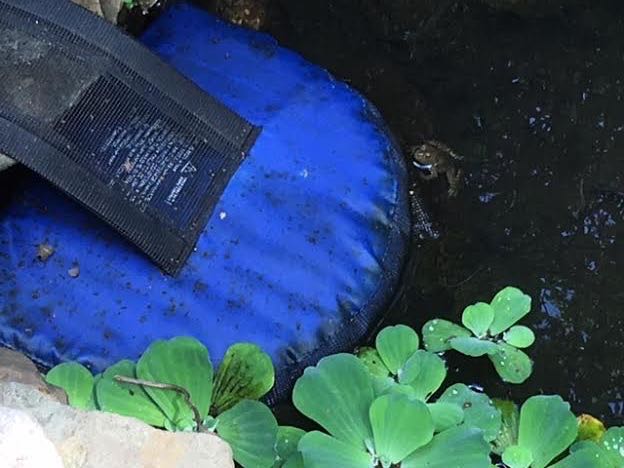
Norman the frog hanging on to the side of the blue escape shelf now in one of my ponds. (Photo by Charlotte Ekker Wiggins)

Norman the frog hanging on to the side of the blue escape shelf now in one of my ponds. (Photo by Charlotte Ekker Wiggins)

Lily Pad 2.0

One of my favorite sounds to hear in my garden is that of frogs. I love the deep resounding notes of the bullfrogs and the melodious drawn out chirping of spring peepers before they jump back into the water or hide under water lilies as I walk by.

As I was going to a yard sale last year, I spotted something I thought my frogs might use, a blue escape shelf normally placed in swimming pools. If a wild animal falls into a pool there is no way for it to swim out safely so these escape shelves are designed to attach to a pool corner for a safe exit.

I don’t have a pool but I do have a small pond so I installed the shelf earlier this spring thinking it might come in handy if a turtle or rabbit fell in.

I now have two “frogs” in my little pond, one on each side of the tiny watering hole. (Photo by Charlotte Ekker Wiggins)

I now have two “frogs” in my little pond, one on each side of the tiny watering hole. (Photo by Charlotte Ekker Wiggins)

For the past 3 months, the escape shelf has been occupied by a young bull frog. All day, actually, from when I go out in the morning to feed the goldfish to before sunset when I wrap up garden work.

I walk by him a good few dozen times, dragging all manner of items - shovels, pick axes, boxes of plants, water in buckets, swinging the garden instruments over the pond to clear the small walking path. The frog - I have named him Norman - sits on his new blue lily pad, unflinching.

A few times he may reverse direction, or scoot up closer to the edge of the escape shelf but rarely does he jump into the pond.

This is typically how Norman spends his days in my pond, sitting on the blue escape. (Photo by Charlotte Ekker Wiggins)

This is typically how Norman spends his days in my pond, sitting on the blue escape. (Photo by Charlotte Ekker Wiggins)

I stopped the other day to say good morning as I was feeding the fish. No response. No movement, his little green back still turned towards me as he sat.

One of my cats prefers to watch a mouse game on my cell phone and birds singing on my laptop. I suppose it only makes sense that now a frog would prefer an escape shelf to the traditional lily pad.

Charlotte

Visiting Spring Bulbs

Missouri bulbs gifted to my brother in bloom settled into their Virginia flower bed.

Missouri bulbs gifted to my brother in bloom settled into their Virginia flower bed.

Visiting Spring Bulbs

The anticipation was exciting and it had nothing to do with Christmas. My brother in Virginia was doing some garden remodeling and asked if he could send back some of the daffodil bulbs I had gifted him over the years. That way the bulbs could visit "home" for a couple of years and once his new flower beds were ready, the daffodil bulbs could make the trip back to their new garden spot maybe with me in tow. Well, no maybes about it, I will be returning with the bulbs, our family loves nothing more than to spend time together in the garden.

Need you even ask was my original answer. Actually I brought a suitcase full back when I visited earlier in fall and already had those settled in. During that gardening time together, we had discussed whether I should set up a special garden beds for the bulbs.

After much thought, my brother said no, "I'll just go shopping when I'm ready," meaning he will browse my garden and pick out the daffodil bulbs he wants back when he's ready. I suspect he will also be checking out another favorite perennial, day lilies. He’s never been very interested in tulips, and neither have I. Mice tend to snack on the bulbs and most tulips don’t bloom well the second year except for one tiny patch that has now bloomed for several years in a row at the side of my driveway.

I didn't hear much for several weeks. then my sister-in-law broke the news that two boxes were heading my way, and they weighed 70 lbs.

How many bulbs in 70 lbs, I would ask. No one seemed to know including my gardening friend Tom. "Oh, you're in trouble now," was his only answer so I decided not to worry about it until the boxes arrived.

Two boxes of bulbs from Virginia weighing 70 lbs ready to vacation in my Missouri garden.

Two boxes of bulbs from Virginia weighing 70 lbs ready to vacation in my Missouri garden.

The boxes were intact and undamaged so I peeked inside the bags. Surprise, there were more than just daffodil bulbs.

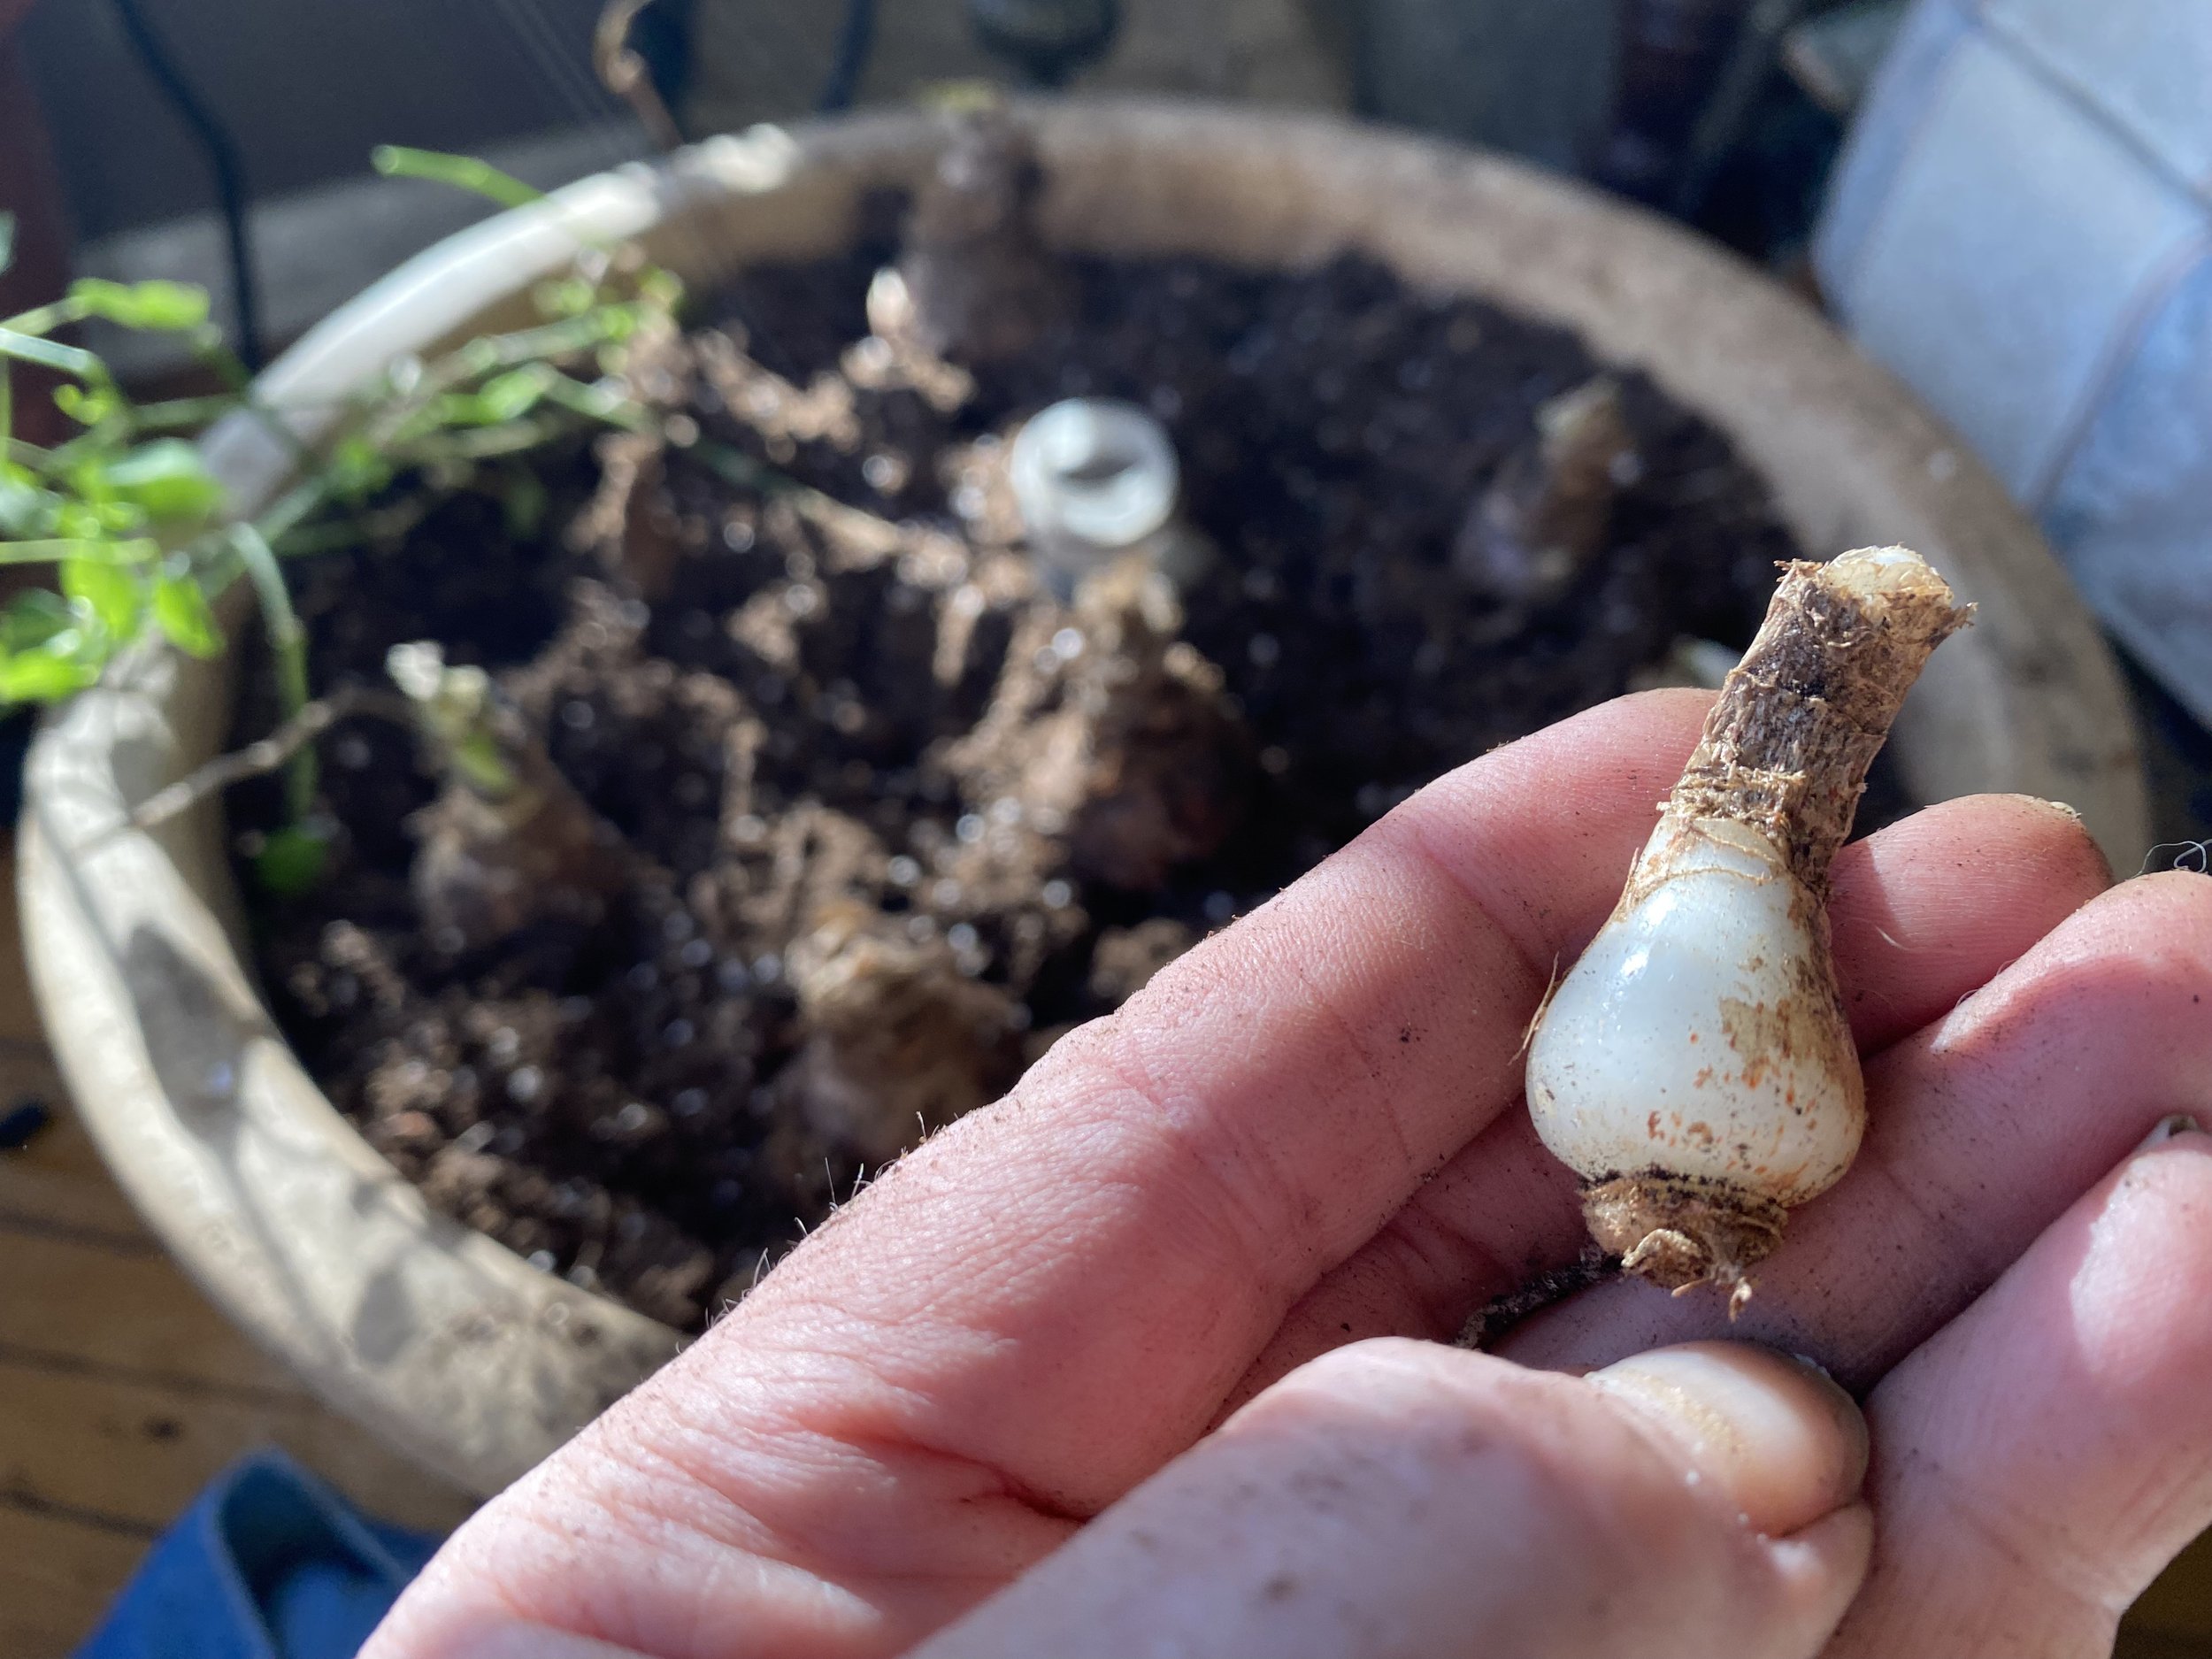
The daffodil bulbs had decided to start growing.

Visiting bulbs.jpg
Spring bulbs sprouting need to be planted in the ground so roots can keep bulbs fed.

Spring bulbs sprouting need to be planted in the ground so roots can keep bulbs fed.

Another bag has iris rhizomes so those will be tucked into a flower bed and heavily mulched until spring. After they get established, they will be moved to their final garden spots next fall.

visiting bulbs iris.jpg

To plant, I will add compost to the bottom of the planting holes along with bone meal so the bulb roots will have access to nutrients. They already have a head start since all bulbs have roots and some green shoots.

Although the green tops may be nipped once cold weather moves in, the daffodil bulbs should settle in for winter and continue to store food in the bulbs for use when they bloom in spring.

Settling daffodil bulbs in ground mixing soil with compost, then watering after they are covered.

Settling daffodil bulbs in ground mixing soil with compost, then watering after they are covered.

The temperatures for the next week are forecast to be in the 60s so good time to get all of these visitors settled into their temporary accommodations.

Welcome home, daffodils!

Charlotte