The Dirt on Soil

Leaves are a good soil additive, helping to keep soil from packing too densely, especially Missouri clay.

Leaves are a good soil additive, helping to keep soil from packing too densely, especially Missouri clay.

The Dirt on Soil

Did you know there are more microorganisms in a tablespoon of soil than there are people on earth? Some people think of soil as dirt, or as a farm, or as something one buys at a home and garden center in a plastic bag but soil is an amazing recycling operation, a constant re-combining of minerals and decaying plants and animals.

An average soil sample is 45 percent minerals, 25 percent water, 25 percent air, and five percent organic matter. Different-sized mineral particles, such as sand, silt, and clay, give soil its texture.

How fast water interacts, or doesn’t interact with those mineral particles, determines how well different plant varieties can pull the nutrition they need. Then there are the good soil organisms and the bad ones that, once out of balance, can turn soil communities into infertile landscapes.

To find out what kind of soil you have, you can do a quick soil test at home:

1. Fill a quart jar one-third full with topsoil and add water until the jar is almost full. Screw on the lid and shake the mixture until all the clumps of soil have dissolved.

2. Set the jar on a windowsill and watch as the larger particles begin to sink to the bottom. In a minute or two, the sand portion of the soil will have settled to the jar bottom. Mark the level of sand on the jar side. A colored magic marker will work, you can wash it off later.

3. Leave the jar undisturbed for several hours. The finer silt particles will gradually settle.

4. Leave the jar overnight. The next layer above the silt will be clay. Mark the thickness of that layer. On top of the clay should be a thin layer of organic matter. Some of this organic matter may still be floating in the water. In fact, the jar should be murky and full of floating organic sediments. If not, you probably need to add organic matter to improve the soil's fertility and structure.

One of the easiest soil amendments for flower beds is to add weathered wood chips. The wood chips break down into added organic matter and, once in decomposed form, are a wonderful planting medium for many plants. 

One of the easiest soil amendments for flower beds is to add weathered wood chips. The wood chips break down into added organic matter and, once in decomposed form, are a wonderful planting medium for many plants. 

Not sure what you are seeing? I can understand, sometimes it all looks like a big muddy blob. Take a good look until your eyes can distinguish between colors. Give up? Ok, but don’t toss it down the sink, pour it on a flower bed, there is another way.

Collect about 6 scoops or 1.5 cups of soil from 6-8 points from a good 4-6 inches below ground from around your garden in a plastic bag and take it down to your local University of Missouri Extension Office. For $15, they will send the samples off to a lab. In a couple of weeks, you will get a very detailed analysis back with a detailed report of your soil including ph levels and recommendations of what you need to do, if any, to improve your soil.

The report will also help guide you in what you can plant in your soil conditions and how to amend your soil for optimum growing conditions. Take your time with whatever you do, most soil amendments take time.

Charlotte

Peach Miniature Rose Now Two Months Later

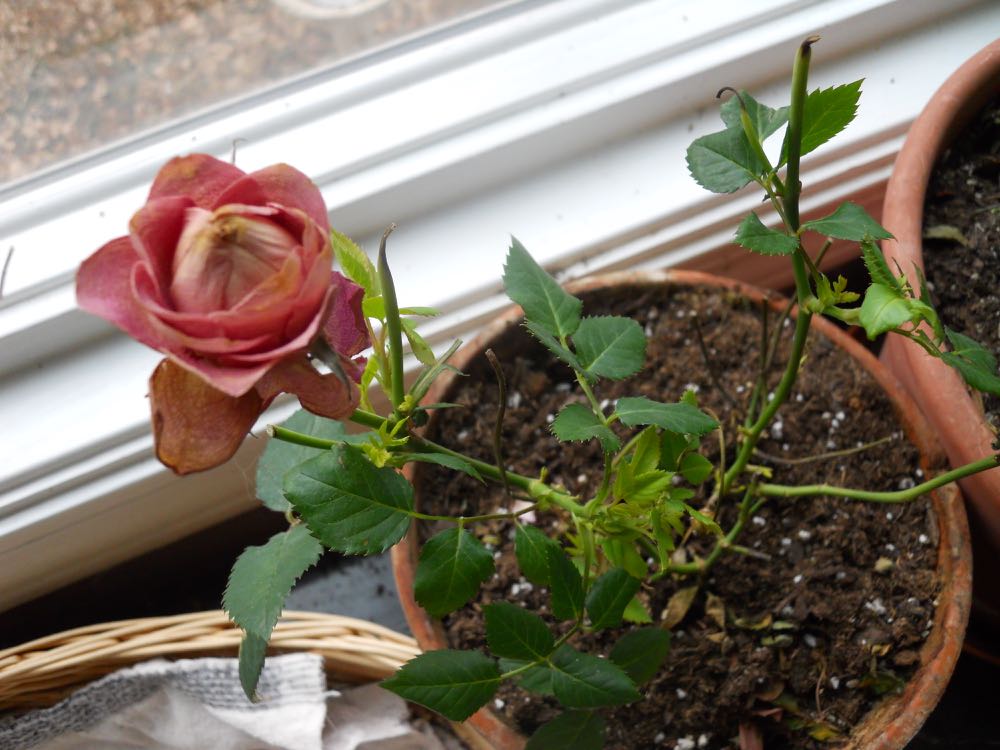
Another bud is getting ready to bloom on this peach miniature rose!

Another bud is getting ready to bloom on this peach miniature rose!

Peach Miniature Rose Now Two Months Later

So it's been two months since I brought this marked down miniature rose home. It was the last one at the grocery store, marked down to $2.49, covered in  dried up rose buds and only one I could leave on the shrub to remind me of the peach color.

I have posted several sets of photos to show you how this little shrub rose can be not only salvaged but easily grown through winter and encouraged to re-bloom.

Once the danger of frost is over, I will be moving this and a few other miniature roses to their permanent home outside. In the meantime, I love seeing how many buds are popping up.

On this morning there were a total of four rose buds starting on this plant.

On this morning there were a total of four rose buds starting on this plant.

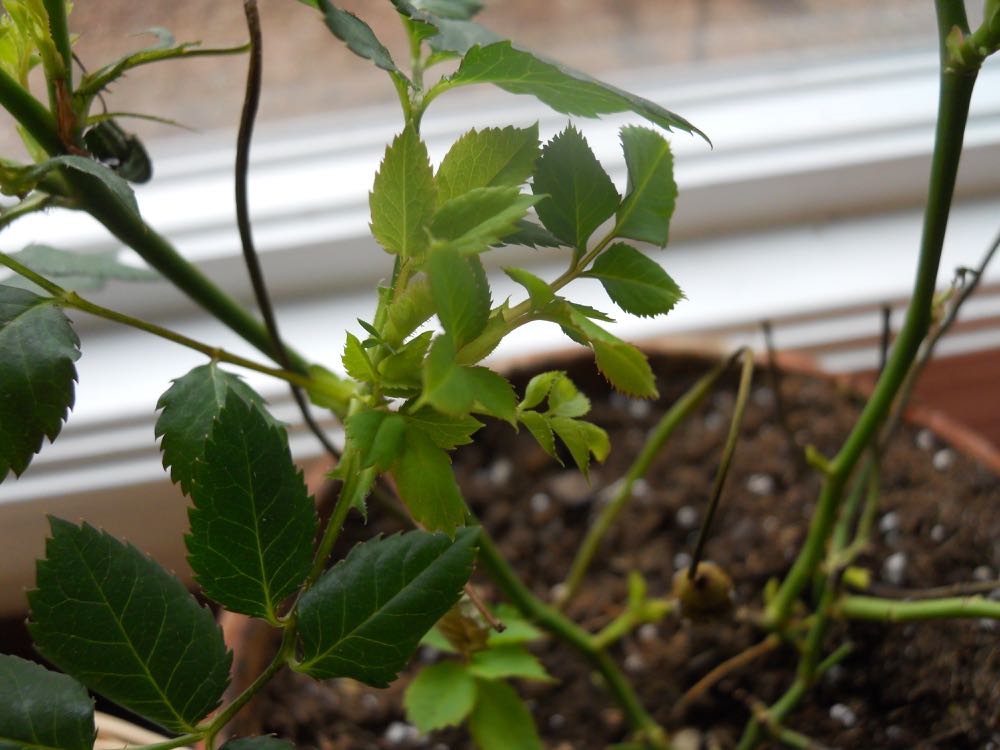
Without the restrictions of other plants in the pot, this little rose shrub has a more normal green color.

The flowers are also returning to a more normal size as opposed to the smaller size that comes from placing four rose plants in one pot. Epigenetics, my brother said when I was describing the transformation, the plant is responding to its new surroundings.

So nice to see this little plant so healthy and doing so well, there's even a faint scent.

So nice to see this little plant so healthy and doing so well, there's even a faint scent.

Now do you believe that you, too can grow miniature roses?

Charlotte

New Use for Letter Opener

Old-fashioned letter openers have a new purpose for opening seed packets.

Old-fashioned letter openers have a new purpose for opening seed packets.

New Use for Letter Opener

If you've ever grabbed a handful of seed envelopes and headed out to the garden, you know what I'm going to reference here. Sometimes it is best to turn around, head back inside, take a deep breath and start again, and by that I mean set those seed packets on the counter and get them carefully open before heading back out into the garden.

I don't know how many times I have headed out and then tried to open the seed envelopes in the garden, only to loose half the seeds in the process. Doesn't matter how, it's a combination of spilling, spreading and scattering, at times all in the same spot.

So when I discovered the repurposing of this old favorite letter opening tool, I was quite pleased. It's an old gift, one end rather flat so the tip easily fits under the flaps of envelopes so one can open envelopes without getting paper cuts. Not only will old letter openers work very well to quickly unseal seed packets, but they will leave the opening cleanly open so I'm not tearing off half of the envelope and seeds will easily spill out as I walk out to the garden spot.

Letter opener makes opening seed packets easy and prevents spilling seeds.

Letter opener makes opening seed packets easy and prevents spilling seeds.

Another benefit is that I can then store the half-filled seed packets in a relatively orderly fashion so I can find them again as I spread more seeds, as opposed to scrambling around for the leftover envelopes and loosing more seeds in the process.

Yes, pretty happy with this little discovery if I say so myself.

I suspect my garden will be as well, now more seeds may end up where they're supposed to be!

Charlotte

Miniature Rose Starts Blooming!

I just added a new buddy to Hazel's pot, an onion start to keep bugs away.

I just added a new buddy to Hazel's pot, an onion start to keep bugs away.

Miniature Rose Starts Blooming

Isn't that little rose just peachy? Such a welcome sight after watching a heavy blanket of snow covering my mid-Missouri garden earlier. It was sunny and 81F two days ago, now back to winter, yet another reason why I surround myself with indoor greenery, I have at least one place where I can rely on seeing green every day through winter.

So for those of you eyeing those marked down after a holiday miniature roses, go back and take another look. Hazel, this now blooming miniature rose was the last one at a local grocery store marked down to $2.49 after Christmas. She was wrapped up in that shiny gift paper in a small 4" pot, the flower buds dried up or about to die, with only one bud possibly still growing, here are the little plants once I watered them and settled them in the window while I looked for a larger pot:

This is Hazel on December 29, 2017 right after I brought her home from a local grocery store sale.

This is Hazel on December 29, 2017 right after I brought her home from a local grocery store sale.

Friends tell me they have little luck growing roses but I find them to be easy to grow, especially miniature roses. The miniature varieties are actually shrub roses, which means they are hardier stock, bloom longer and can more easily adapt to a variety of soils. 

I don't recommend growing miniature roses inside unless you have room for large soil containers because they need to pull a lot of soil nutrients but you can certainly pick up a few on sale now and grow them inside until the danger of frost is over in May, then condition them to grow permanently outside.

Once I had Hazel watered, I found a pot larger than the one she was in, added some broken flower pot shards in the bottom, new potting soil and my concoction of dried coffee grounds, banana peels, epsom salts and crushed eggs shells, then more potting soil and the roses. More potting soil, tapped gently, then sprayed water with a spray bottle until wet so I don't over water.

Back to the window to be turned towards the sun and checked daily. The plant is in a window facing southwest next to Miriam, the cherry tomato also growing and producing delicious cherry tomatoes midwinter inside.

I watch the color of the leaves to make sure they don't start turning light green, that means the plant needs more nitrogen. Getting new potting soil with added composting materials should prevent that from happening but I still monitor, just in case.

Success is seeing the first signs of flower buds and here they were, a little less than 2 months after I brought the plant home.

This was the first bud that became the rose you saw on top, and there is a second one forming.

This was the first bud that became the rose you saw on top, and there is a second one forming.

So growing roses is not hard, or expensive, you just have to pick the right variety and time when you buy them.

Charlotte

Miriam Tomato Fruit

My inside tomato plant is not only growing fruit but the fruit is ripening enough to pick.

My inside tomato plant is not only growing fruit but the fruit is ripening enough to pick.

Miriam the mysterious tomato plant has two ripe cherry-size tomatoes ready to pick.

Miriam the mysterious tomato plant has two ripe cherry-size tomatoes ready to pick.

Miriam Tomato Fruit

Miriam my tomato plant continues to grow, spending this Missouri winter in one of my sunny bay windows with Hazel the miniature rose I picked up on sale right after Christmas getting ready to bloom.

I have been wintering over one tomato plant for years, a wonderful way to have fresh tomatoes without having to resort to buying tasteless ones or having to invest in huge greenhouses, hoop houses or other large gardening contraptions that quickly get abandoned because they can't be maintained.

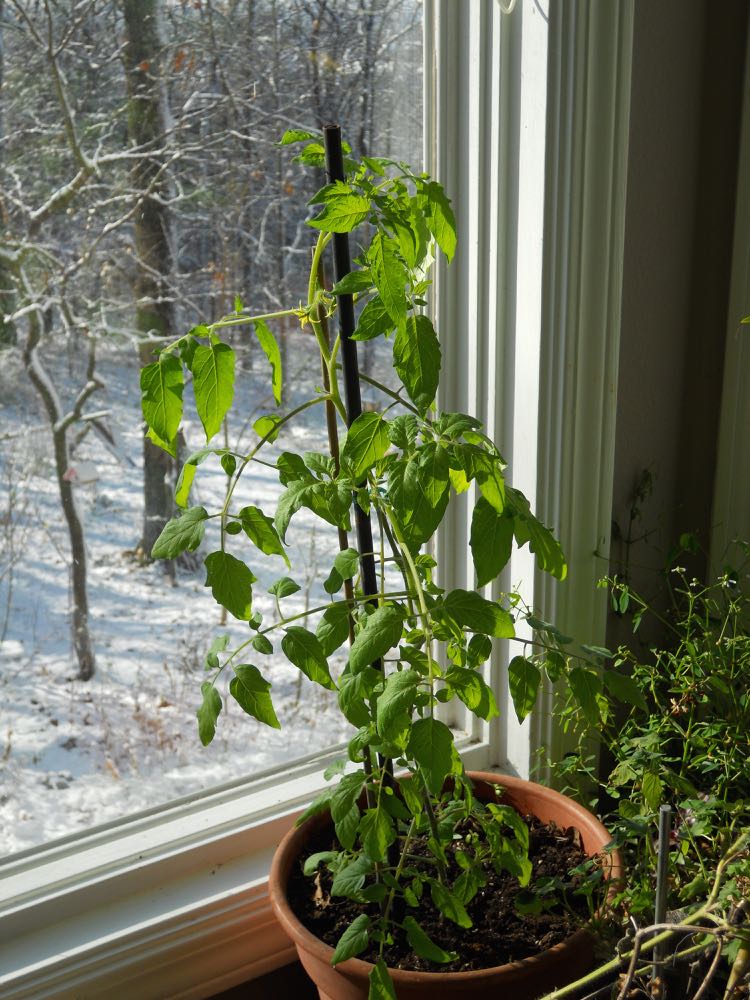
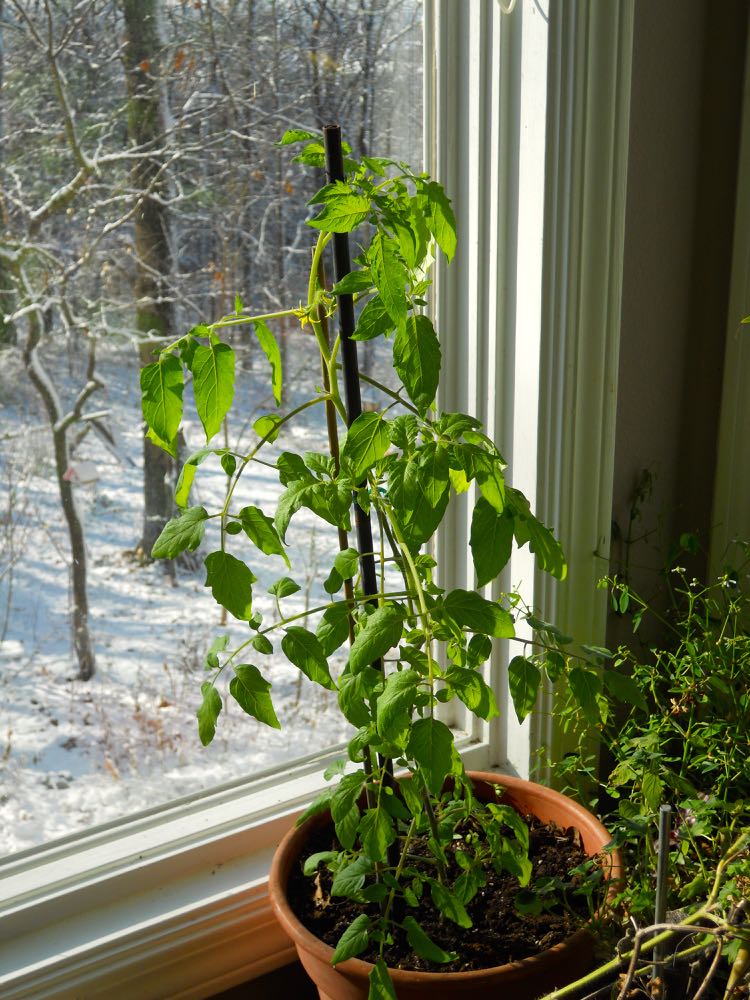
This was a mysterious tomato start from a friend's garden I found growing outside last fall in one of my flower beds. I usually plan to have a tomato plant to bring in for winter but I was running behind last year until I saw a little 3-inch seedling among hyssop starts. So far I have determined this is a cherry tomato plant of some sort, and that I guessed well on what growing conditions it needed so far. I've had to stake the plant twice so far and by the looks of it, may have to stake it yet again, the plant is now a good 4-feet tall.

Three days ago, I added some worm castings to the tomato plant soil to enrich the soil and add nitrogen. Tomato plants are heavy feeders meaning they can quickly deplete the soil of nutrients. With a plant growing in a small container, that is especially true so it's important to keep the soil enriched with compost and other natural amendments. 

Why did I add the worm castings? The tomato plant leaves were starting to look a little more  yellow green for my taste so I didn't think it would hurt to give the soil a little healthy boost.

Besides making sure the plant is watered every day , there has been little additional care required. Well, except for now, I need to pick those two lovely cherry red tomatoes and give them a taste.

Here's a closer look of the two ripe cherry-size tomatoes that have ripened in my window.

Here's a closer look of the two ripe cherry-size tomatoes that have ripened in my window.

They didn't even make it to the kitchen, ate them right there in the window.

What do you think, winter grown tomatoes don't have any taste?

Wrong, they were absolutely delicious, warm right off the vine and perfectly ripe. Can't wait for the next ones!

Charlotte

Miriam Tomato Plant Update

This is Miriam, the mysterious tomato plant when I started to feature her in my gardening column.

This is Miriam, the mysterious tomato plant when I started to feature her in my gardening column.

Miriam Tomato Plant Update

Let's see, it's been three months since Miriam the tomato seedling was potted and brought inside. I call her the mystery tomato because I don't know what kind of tomato she is, and her original owner Tom can't remember, either. Now you know and we will all be surprised once the tomatoes ripen.

Most people have told me they assume they can't grow tomatoes inside in a pot, tomatoes can only grow on a farm. Or outside in a garden plot.

Contrary to popular belief, tomatoes can be grown in a pot indoors. And yes, Miriam has baby tomatoes and appears to be growing even more. Since I mentioned growing, Miriam is also now almost 3-feet tall so I had to stake her with longer rods to keep her stems from falling over.

Miriam Tomato spends her winter days keeping Razel Rose company in one of my bay windows.

Miriam Tomato spends her winter days keeping Razel Rose company in one of my bay windows.

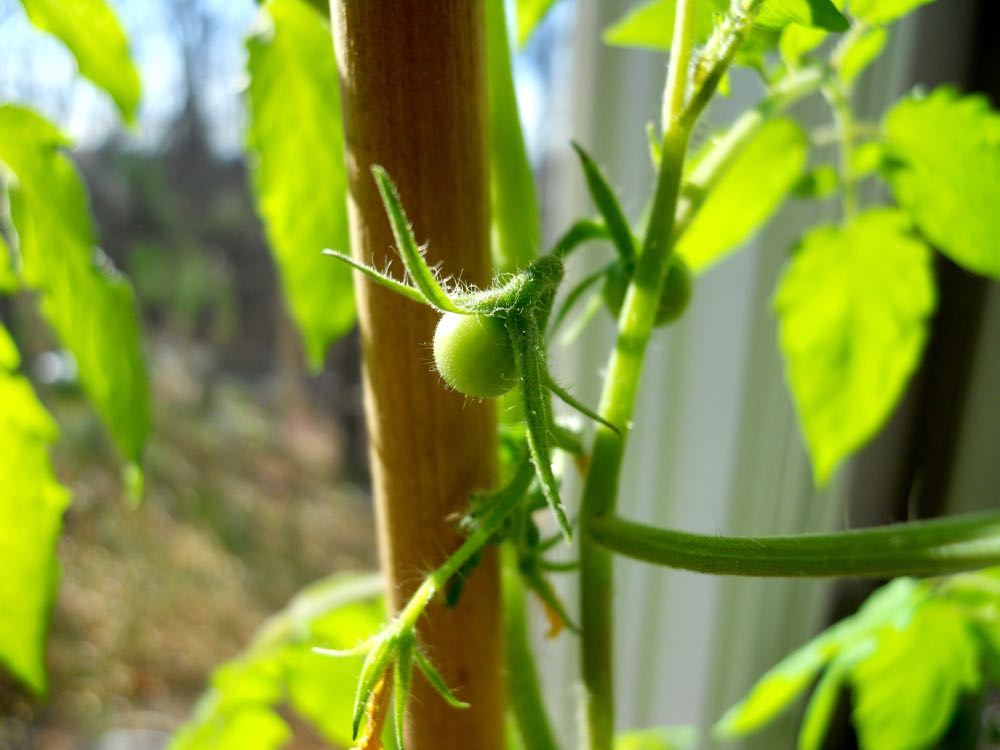
When I first spotted fruit, there were three. Now there are more than five, in part due to my hand pollinating the delicate yellow flowers with a Q-tip.

Miriam Tomato has officially set fruit and should be having ripened tomatoes in a few weeks.

Miriam Tomato has officially set fruit and should be having ripened tomatoes in a few weeks.

Outside in a garden, tomato plants would be pollinated by bees moving pollen from one flower to the next. Since I don't have bees inside over winter, Miriam needed a little help to set fruit.

As long as we have sun every once in awhile this winter, the fruit will turn color. If not, I can either pick them and use them green, or place them inside a brown paper bag and add an apple to accelerate the ripening process.

Miriam Tomato also has new flowers branching off the stems, more tomatoes in the works!

Miriam Tomato also has new flowers branching off the stems, more tomatoes in the works!

Assuming nothing untoward happens to Miriam, such as a cat knocking her over, she will go outside after the danger of the last frost of the season, around May. I may re-pot her then into a larger pot with compost to keep her happy but so far, she seems to be doing quite well.

Have you tried to grow a tomato inside over winter?

Charlotte

Miniature Rose Plant Update

This is Hazel, my miniature peach rose right after I brought her home, the last rose at the store.

This is Hazel, my miniature peach rose right after I brought her home, the last rose at the store.

Miniature Rose Plant Update

Right after Christmas, I picked up this peach-colored miniature rose for $2.49 at a local grocery store floral section. It was the last one remaining from a group of miniature roses that had included red and white "peppermint" ones; solid red ones, a few white ones and a couple of the peach-colored ones.

Miniature roses like this are actually tiny repeat-blooming shrub roses, hardier than hybrid tea roses and the easiest roses for me to grow. I have a number of them scattered throughout my USDA Hardiness zone 5b one-acre hillside garden planted among other perennials. Last year, I also started a miniature rose border with several different-colored tiny shrubs. Purchased on sale, of course, part of the fun is the plant treasure hunting!

When I saw this lone plant on sale, I couldn't pass it up. We were heading into record cold weather and having something in bloom, even something tiny, cheers me up any time of the year but in winter. Well, it's a must. You should see my living and dining room, it's a veritable jungle.

Even though I have heard some people say they can't grow miniature roses inside over winter, I have had very good luck pulling miniature roses through the cold months. The trick is to give the plant cut up banana peels and crushed egg shells in the bottom of the new, larger pot in new potting soil, and to not overwater.

So here's Hazel about a month after I brought her home. I finally cut off the peach rose bud before I took this picture so she can focus her energy in growing new leaves.

This is Hazel about a month later, sprouting new growth next to her friend, Miriam, a tomato plant.

This is Hazel about a month later, sprouting new growth next to her friend, Miriam, a tomato plant.

I check her every morning for bugs, just in case something has found her tender leaves to munch on. Although I try to not have plant bugs - the white mealy bugs are the worst, second only to scale - I keep a close eye to jump on anything that may be getting a start.

If she were growing outside, I would add onion sets around her to keep bugs away and add a basil or two for good measure. Inside my house, she's going to have to depend on my good eyesight and soapy water if she gets unwanted visitors.

Charlotte

Online Master Gardener Classes

Master gardener training provides basic concepts for gardening inside and outside.

Master gardener training provides basic concepts for gardening inside and outside.

Online Master Gardener training class begins

COLUMBIA, Mo. – A new session of online core training to become a certified Master Gardener begins January 22, 2018.

“The motto of the Master Gardener program is ‘Helping others learn to grow,’” said David Trinklein, state horticulture specialist for University of Missouri Extension.

The popularity of the online classes has grown steadily since University of Missouri (MU) Extension began offering them in 2013. In the past, some people had to travel many miles to attend Master Gardener classes.

“These classes represent a viable option for people who can’t take the weekly classes in person,” Trinklein said.

Trinklein and MU Extension regional horticulture specialist Sarah Denkler teach the 14 online sessions. Classes are delivered as a series of scripted and narrated PowerPoint presentations. To pass the course, participants need a composite score of 70 percent on chapter quizzes.

Subjects include basic botany, soils and plant nutrition, vegetable gardening, fruit production, insects and diseases, landscaping and landscape plants, turf management, and pesticide safety.

Core training is the first step toward Master Gardener certification. Trainees must also complete a minimum of 30 hours of volunteer service, Trinklein said. Local Master Gardener chapters help online trainees find volunteer opportunities to meet the service hour requirements.

“There are Master Gardener programs in every state of the union and in most provinces of Canada,” Trinklein said.

The registration deadline for the online spring session is Jan. 15, 2018. Classes begin Jan. 22, 2018.

For more information, including registration instructions, go to extension2.missouri.edu/missouri-master-gardener-core-training.

The course also may be taken for personal enrichment only (no volunteer requirement) for a higher registration fee. For details, visit extension2.missouri.edu/courses/horticulture-for-the-homeowner.

"For more than 100 years, University of Missouri Extension has extended university-based knowledge beyond the campus into all counties of the state. In doing so, extension has strengthened families, businesses and communities."

Charlotte

Miriam Tomato Plant Has Fruit!

Miriam tomato plant tomato.jpg

Miriam Tomato Plant Has Fruit!

So excited, I almost feel like I should send out baby announcements!

For those of you just joining this saga, every year I winter over one tomato plant in my sunny, inside bay window. Tomatoes are originally from tropical Peru, where they grow as perennials, or plants that live for many consecutive years.

I don't grow a traditional garden or farm a large plot, I have more in common with urban area residents who want fresh herbs and a few favorite vegetables handy during the growing season. I call it my pot garden since I grow those on my deck but that's a whole different story.

I have been growing a tomato in a pot inside over winter for a good 20 years. About a decade ago, I had a tomato plant that survived for 4 years living on my deck during summer and wintering over in my living room. One of my cats knocked it over and broke the main stem or I think it would have happily lived a few more years as long as I brought it inside over winter.

Last year when I posted the tomato plant I heard from some of my newspaper gardening article readers that it was impossible or I was "cheating" so here we go again, proof that yes, you can grow a tomato plant successfully indoors over winter.

Miriam tomato plant flowers.jpg

This year, I was behind getting a tomato plant ready to move inside and initially thought I would skip it. As I was mulching flowers beds, however, I found a tiny, 2-inch high unidentified tomato seedling valiantly growing so I pulled it out and named it "Miriam." I do know the seedling came from my gardening friend Tom's place but he doesn't remember what species was in the hyssop plant starts he gave me.

After adding crushed egg shells to the bottom of the pot and adding new potting soil, Miriam settled into her new digs in one of my bay windows.

Miriam the seedling is now almost 3 feet tall with flowers. Not just flowers but flowers I pollinated with a Q-tip, and now there is fruit, I never tire of finding the first tomato forming.

At first I thought it was just one tomato. As I was taking photos,  I noticed a second one, and then a tiny third one so my pollinating technique is working again.

Outside, tomatoes depend on native bees to move pollen from one flower to another one. Since Miriam has spent her entire flowering life inside without bees, it was hard to guess whether my fumbling pollination technique would take. 

Miriam tomato plant in bay window.jpg

In another few weeks, we should have confirmation of what kind of tomato plant she is. As far as I'm concerned, she's a winner!

Charlotte

January Gardening Chores

One of my favorite native plant catalogs to order from Missouri Wildflowers Nursery.

One of my favorite native plant catalogs to order from Missouri Wildflowers Nursery.

January Gardening Chores

You bet there are gardening chores in January, it’s the one month when a gardener can sit back and do some of the most important work: dreaming and planning. Most of mid-Missouri is in USDA Hardiness Zone 5b which means the last frost is in May and the first frost around Halloween, although climate change is making spring and fall seasons longer and shortening our summers and winters.

1.     If you haven’t ordered your favorite gardening catalogs, get them ordered. Look for catalogs with detailed plant descriptions and good photographs so you can use them for reference.  One of my favorites is the Missouri Wildflowers Nursery catalog, it has lovely pictures with a quick guide on what growing conditions the plants require.

2.     Order favorite seed catalogs. Some companies will send free catalogs if you ordered from them before; others will charge for a catalog if you are a new customers. Plant seeds locally-adapted. Baker Creek Heirloom Seeds Company is a favorite seed catalog from Mansfield, Missouri.

3.     Review your garden diary from last year. If you’ve missed a few entries, add them now. Underline items you wanted to get done this year. I make a list, then decide which projects I want to tackle,  I also carry over the ones I didn’t get to last year, or drop them off the master list. This is a good time to dream.

4.     Identify what plants you want to add this year so you have a shopping list. Focus on adding native plants, once established they will be low care and tend to require less water than other plants.

5.     Read. Whether it’s Missouri Gardener Magazine, which provides good local gardening information and gardening books, catch up on what you couldn’t get to last year. I keep a pile of gardening books from our local library’s semi-annual book sale just for snowy, cold and blustery winter days.

Remember to water new chrysanthemums so they can get strong roots established.

Remember to water new chrysanthemums so they can get strong roots established.

6.     On warm days, remember to water mums planted this past year. New mums need a gallon a month to keep their roots moist their first year. Once established, mums will become perennials and deter bugs from around where they are planted.

7.     Remove any broken limbs in pathways to keep walkways clear and safe.

8.     Pile mulch and leaves on garden beds if they’ve been blown off by winter winds.

9.     Check inside plants for any hitchhiking bugs and remove. Make sure the plants, not the bugs, are getting their sunlight needs met. If not, move the plants. Water with diluted fertilizer. Prune as necessary.

10. Drop your garden pruners and other garden tools off to get sharpened, this is a slow time of year and this will give you a head start on the season.

11. When feeding birds, add a little sand in the bird feeder mix. Birds need sand to help them digest seeds. Also ensure they have an available water source. Feed suet on cold days.

12. If you have fish in an outside pond, make sure it has a hole in the ice so fish will get oxygen.

Anything else you do for your January gardening chores?

Charlotte

13 Tips to Grow Miniature Roses Inside

This little miniature rose was on clearance for $2.49 mid-December and now has new growth.

This little miniature rose was on clearance for $2.49 mid-December and now has new growth.

13 Tips to Grow Miniature Roses Inside

Have you seen miniature roses on sale during winter and passed them by because someone told you they can't be grown inside? Not only can they be grown inside over winter like herbs but they will grow and be ready for blooming outside as soon as the danger of frost is over.

Of all roses, miniature roses are the easiest, and most versatile, to grow. They will do well in pots as well as the garden; are disease and pest resistant shrubs, are long-lasting blooms and are edible so I can add a little flower to garnish a plate and dessert.

There are a few things to remember when growing miniature roses inside:

13 Tips to Grow Miniature Roses Inside

1. Growers place several plants together in the smallest pots possible when selling miniature roses wholesale. When you get or buy one, find a pot that is the next size, preferably at least longer than the pot the miniature rose came in. Miniature rose roots need room to grow.

2. If you want to get several plants, you can separate the ones grouped in the original pot.

3. Before planting, add broken pots or about an inch of broken shards at the bottom to help with drainage.

4. After adding about an inch of new potting soil, I also add a banana peel and crushed dry egg shells, then fill the pot up half full. Spray the soil with water.

5. Add the miniature rose, then fill around it with more potting soil. Press soil gently to pack it around the roots. Spray lightly again. 

6. Cut off all flowers and buds so the plant's energy goes into settling into their new pot. I kept one flower on my peach miniature rose for the photos. If you want to keep one to enjoy that's ok, it will be our little secret.

7. Add a saucer under the pot and place it in a sunny southern or western window. Expect some leaves and buds to fall off before the plant settles into its new growing pot.

8. Keep the miniature rose on the drier side, winter over-watering is the leading cause of killing off the plant. I keep it moist with a spray bottle every other day. Before spraying, I slip a pointing finger into the soil to test the soil moisture so that I am not getting the soil too wet.

9. This is 3 weeks after I first brought the miniature rose on sale home. New leaves are growing nicely and the soil has remained on the dry side.

New growth is starting to show on this miniature peach-colored rose, a good sign!

New growth is starting to show on this miniature peach-colored rose, a good sign!

Miniature roses have a long flowering habit and, in the garden, are one of the easiest roses to grow so it's worth pulling them through winter until you can set them outside.

I enjoy cut miniature roses in desk top flower vases all by themselves; they're also sweet mixed with other garden flowers.

One of the many reasons I like miniature roses, they are a wonderful addition to desk vases.

One of the many reasons I like miniature roses, they are a wonderful addition to desk vases.

Living in USDA Hardiness zone 5b, our last frost date is Mother's Day, which is May 13, 2018. That means these miniature roses need to be kept alive and happy for about 4 months before they get to be planted outside.

10. Last year, I pulled a brown bag full of marked down for 49 cents Valentine's Day red miniature roses through spring and moved them later out into the garden. Although some had roses and buds, I cut those off to prevent the plant from being stressed trying to bud and settle into a new pot. I wanted them to focus first on root growth.

These red miniature roses were on sale after Valentine's day for 49 cents, a great buy any time!

These red miniature roses were on sale after Valentine's day for 49 cents, a great buy any time!

11. Start with new potting soil and add compost or worm castings if you have access to any. Roses are "heavy feeders," which means they require a lot of soil nutrients to successfully grow.

12. Use one fourth of the recommended soluble fertilizer when you water with the spray bottle. Foliar feeding will help get nutrients into the plant but make sure to dry if the leaves remain wet after about 10 minutes. Wet leaves can encourage pests and diseases.

My new peach miniature rose is keeping Miriam, my tomato plant company in a bay window.

My new peach miniature rose is keeping Miriam, my tomato plant company in a bay window.

So here's my little peach miniature rose in the bay window keeping my winter tomato plant, Miriam, company. I've been told I can't grow tomato plants inside in winter, either, but I have for years and had tomatoes, too.

13. Check the miniature roses regularly to make sure they are doing ok. I check mine daily; look under the leaves for any bugs; check the moisture in the soil; enjoy that one little rose you left on. I do!

Charlotte

2018 Gardening Calendar

If you don’t keep a garden diary, this is a good time to start. You can keep track of what worked well, and what didn’t, as well as other major garden changes, through a diary. I started mine in 1985 and included wildlife observations. (Photo by Cha…

If you don’t keep a garden diary, this is a good time to start. You can keep track of what worked well, and what didn’t, as well as other major garden changes, through a diary. I started mine in 1985 and included wildlife observations. (Photo by Charlotte Ekker Wiggins)

2018 Gardening Calendar

To keep my major gardening chores organized, years ago I developed a gardening calendar associated with federal holidays to help me remember important milestones. This came in handy when I worked away from home full-time because it helped me get supplies and plan ahead for what I wanted to get done on those long weekends.

I live in USDA Hardiness Zone 5b, which is the US "belt." Here's my calendar for 2018:

Jan. 1 New Years:  Spray inside plants for hitchhiking bugs; remove dead branches. Mark garden catalogs for possible projects.

Jan. 15 Martin Luther King Day: Check plants wintering inside are getting enough sunlight; move them around and give watered down fertilizer. Mark gardening calendars for items to order. Check deck pots outside for moisture and add compost.

Feb. 14 Valentine's Day: Prune fruit trees. Clean and repair garden implements; wash flower pots; repair bird houses. Start looking for blooming crocus.

Feb. 19 President's Day: Plant onion sets, lettuce, spinach, radishes either in garden or in deck containers.

March 17 St. Patrick's Day: Plant potatoes, snow peas, Brussels sprouts and broccoli; start tomato and pepper seedlings.

March 20 Spring Equinox: Prune and compost roses. Add compost to raised garden beds. Plant more lettuce, spinach, radishes, onions.

April 1 Easter: Plant tree seedlings and native wildflowers. Update garden diary for bulbs I need to divide and move this fall; mark locations so can find them when it’s time to dig them up.

April 23 Earth Day: Plant last of my spinach, peas and lettuce. Cover garden with tulle to keep deer out. Start pinching mums back once a week.

May 13 Mother's Day: Last day of frost so everything can get moved outside. Leave delicate plants outside for a few hours for the first few days to get them used to outside conditions. Leave seedlings in containers outside for a few days before moving them permanently into the garden.

May 28 Memorial Day: Last day to plant anything from seed in garden including basil, pumpkins, cucumbers and zucchini. Compact fruit trees, bushes and perennials also get planted so they can benefit from June showers.

June 17 Father's Day: Last weekend to plant perennials.

July 4 Independence Day: Last day for planting beans. Last weekend for pinching back Mums so they bloom bushy this fall.

Sept. 3 Labor Day: Harvest fall crops; check for bugs; add compost, and start getting raised garden beds ready for winter.

Oct. 8 Columbus Day: Trim deck plants. Start moving them inside house for winter.

Oct. 31 Halloween: First fall hard frost. Add compost to raised bed gardens.

Keep track of the changes in your garden by taking photos from the same spots, especially if you have made major changes. Gardens change all on their own, too. (Photos by Charlotte Ekker Wiggins)

Keep track of the changes in your garden by taking photos from the same spots, especially if you have made major changes. Gardens change all on their own, too. (Photos by Charlotte Ekker Wiggins)

Nov. 11 Veterans Day: Clean and store pots, garden tools; toss out torn gardening gloves; mark envelopes with saved seeds; update garden diary. If there's been a hard frost, good time to mulch plant beds so soil temperature doesn't fluctuate. Check for spring bulbs on sale.

Nov. 22 Thanksgiving: If ground is frozen, mulch garden beds.

Dec. 21 Winter Solstice: Water first year mums and pansies once a month through winter. Make sure winter birds have defrosted water to drink.

Dec. 25 Christmas: Make a note on who admires your Christmas cactus to give starts to next year.

Happy New Year!

Charlotte


Winter Tomato Plant

Miriam, my 2017-2018 winter tomato plant, is starting to flower in one of my bay windows.

Miriam, my 2017-2018 winter tomato plant, is starting to flower in one of my bay windows.

Winter Tomato Plant

Most people have tropical plants and some herbs growing inside over winter. I do as well but I also add one tomato plant to my indoor winter garden.

This year's winter tomato plant was literally a last minute planting. I found the little seedling growing in a flower bed where I had planted hyssop starts from a friend's garden so this wasn't even a tomato start from my garden.

Over the years, I have added a tomato plant to my inside garden to winter over with my other tropical plants. Some years this one tomato plant makes it through spring to spend a second year outside providing me delicious fruits. In their native habitat of Peru, tomatoes grow as perennials, living for many years to produce fruit without the plant dying off and having to be re-grown every year.

I was so busy with other things this year I forgot to set aside a tomato plant to winter over inside. Usually it's a plant that was sacrificed to feed tomato hornworms early summer so that by moving inside time in October, the tomato plant is starting to recover. I didn't have many hornworms this year so I didn't have to segregate a tomato plant from the rest.

When I recognized the seedling growing in a flower bed, I pulled the seedling out of the ground, brought it inside, plopped it into a six-inch pot with fresh potting soil and stuck it in a southwest inside window.

At Christmas, I noticed the first flowers on the now 2-foot high plant so it must be happy where I plopped it. Time to do a little pollinating!

How to Pollinate Inside Tomato Plant

The absence of pollinating insects can be a problem when growing indoor tomatoes so hand pollinating is helpful. In nature, bees and other pollinators move the pollen from one flower to the next, matchmakers in the plant's scheme to survive by producing fruit with seeds. Since I don't have tiny pollinators available, I will be doing the honors.

One way to help a winter tomato plant pollinate is to tap the stems lightly when flowers are in bloom to spread pollen. That's easy enough to do but not a reliable way to hand pollinate.

I have also used a cotton swab tapped into each flower to move the pollen around. That's a better way and ensures the pollen ends up where it needs to be.

Besides giving the plant watered down fertilizer every couple of weeks, I turn the plant daily so each side gets adequate sun and flower and fruit production is even.

Miriam is now staked to keep the plant upright.

The full Miriam, now about 3-foot tall and needing a taller stake to keep leaning into as she grows.

The full Miriam, now about 3-foot tall and needing a taller stake to keep leaning into as she grows.

Miriam the tomato plant is keeping other tropicals company this winter season. A banana plant, right, and several tropical hibiscus plants give one of my reading nooks a nice garden flavor.

And yes, I have my chairs facing the windows instead of the inside of the room. That way I can sit and enjoy the view without having to turn the chairs. When friends visit, I turn them back into the room or we've been known to sit as the chairs are and enjoy the view together.

Miriam the tomato plant spends her days in this window with southeastern exposure. (Photo by Charlotte Ekker Wiggins)

Miriam the tomato plant spends her days in this window with southeastern exposure. (Photo by Charlotte Ekker Wiggins)

Will this tomato plant have tomatoes?

With a little care, winter growing tomatoes will produce in about the same time as their outdoor counterparts so yes, I should have some tomatoes by March.

Charlotte

Christmas Cacti or Cactuses

One of my Christmas cactus currently in bloom, see the smooth edges of the leaves?

One of my Christmas cactus currently in bloom, see the smooth edges of the leaves?

Christmas Cacti or Cactuses

Or should I say Christmas "cacti?" I have a tendency to call them "cactuses," too. Whatever you call them, these living plants from where I grew up in Brazil, north of Rio de Janeiro, are a favorite of a number of friends of mine. They like to compare photos, and tips, for keeping these South American plants happy and in bloom so here are a few photos of mine currently in bloom.

Christmas versus Thanksgiving Cactus

First, there are two kinds of Christmas cactus that often get confused. The original Christmas cactus (Schlumbergera bridgesii) is no longer available on the commercial market so if someone has a start from grandmother, most likely it is a true Christmas cactus. The leaves of the old-fashioned Christmas cactus are rounded.

By comparison, the Thanksgiving cactus (Schlumbergera truncata) has pointed ends on the green fronds. They also tend to bloom earlier than the old-fashioned Christmas cactus, like this white version that was in bloom a month ago.

This is a Thanksgiving cactus, note the spikes on the green leaves.

This is a Thanksgiving cactus, note the spikes on the green leaves.

There is a third popular cactus available commercially and that one blooms in spring so it's sold as an Easter cactus.

Cactus Care

These tropical plants prefer indirect southern exposure. They will tolerate low light, but perform best in bright, indirect light in the home. Brighter light is beneficial during the winter, but full summer sun can result in pale plants. If you have them outside in the summer, keep plants in a semi-shady location.

Christmas cacti prefer temperatures of 70 to 80 F for their April to September growing season.

According to Dr. David Trinklein, University of Missouri Extension, Christmas cacti do not grow well in a wet root environment. Christmas cacti tolerate under watering better than overwatering. Water only when the growing medium is dry to the touch. If you put a saucer under the pot to collect drainage water, empty it to keep excess water from wicking back into the pot. Failure to do so results in a soggy root environment, which is an open invitation to root rot.

Reduce watering from fall through spring. Only fertilize plants during their growth period of early spring through late summer. Use a regular fertilizer at one-quarter strength or a houseplant fertilizer according to label directions.

Keep Christmas cacti slightly pot-bound to induce prolific flowering. Repotting may be necessary every three years. Use a porous, well-drained potting mix. Commercial mixes made for epiphytes are good choices. Make regular peat-lite mixes into epiphytic mixes by adding perlite or sterile sharp sand to increase porosity.

How to Get Christmas Cacti to Rebloom

Reblooming Christmas cacti can be challenging, Trinklein said. The cacti are short-day plants. However, temperature affects their response to day length. In fact, Trinklein says, flowering will occur regardless of day length under cool night conditions (50-55 F).

Prolific flowering occurs when plants are exposed to cool nights with at least 13 hours of darkness. Reduce water to slightly stress the plant at this time to improve flowering. Expose holiday cacti to short days, cool nights and dry conditions in mid-October for full bloom during the holiday season.

Wish I could tell you I follow these rules but I don't. I leave the plants in the same window all year and sometimes forget to check on them to water. They are kept in the cool basement during summer with a southern exposure, which triggers their blooming by mid-November.

When the pots are in bloom, I bring them upstairs so I can enjoy them but keep them with the same southern exposure. Sudden changes in temperature, light or other factors, such as excessive drying of the growing medium, can cause Christmas cacti to drop unopened flower buds.

Poor flowering also happens when stray light interrupts the required long periods of darkness during short-day treatment. Interior home lights, streetlights and even car lights can disrupt the required dark period and cause disappointing flowering.

Christmas cacti are prone to root rot, another reason to water sparingly. Avoid overwatering and maintain strict sanitation. Remove common insect pests, which include mealybug and scale.

Another Thanksgiving cactus in bloom, this one looks red and white in bright light.

Another Thanksgiving cactus in bloom, this one looks red and white in bright light.

I started several Thanksgiving and Christmas cacti in hanging baskets. When a piece falls off because I over watered, I plant the piece back in the hanging basket and most of them easily root to start a new plant with very little care. This red Thanksgiving cactus in the hanging basket has some of the dead cactus pieces in the front, turned brown. 

If you have friends who admire your Christmas cactus, consider taking snips to make starts and get them rooted for next year gifts. Remember to label them so you know what color they are. It can take 3-4 years before a plant is mature enough to start blooming.

Newest Christmas Cactus Addition

One of my master gardener colleagues earlier this summer mentioned she had a Christmas cactus that needed a new home. Without knowing what color or size it was, I volunteered to adopt it. To my delight, the plant was huge. Another friend told me these can live for decades so I found a plant stand to better display the beauty of the plant and now I'm looking for a pot to cover the plastic one.

This is a very old Christmas cactus, I feel so lucky to now be the caretaker of this lovely plant.

This is a very old Christmas cactus, I feel so lucky to now be the caretaker of this lovely plant.

I placed the plant in my southern exposure basement window, not expecting any blooms for this holiday. To my surprise, buds started within weeks of the plant settling in and now it's covered in blooms, just in time for Christmas.

Charlotte

Rose Pruning

Inspiration to learn how to prune roses, it is relatively simple once you follow a few steps.

Inspiration to learn how to prune roses, it is relatively simple once you follow a few steps.

Rose Pruning

Ok, it’s that time! If you are one of those people who have wondered through the year when you should be pruning your roses, the time is now. I look for green stems by St. Patrick’s Day, a good way to remember what time of year roses should be pruned.

To prune roses, start with sharp trimmers cleaned with alcohol so you are not spreading last year’s diseases. I use old socks soaked in rubbing alcohol to wipe down my trimmers. I also make sure the trimmers have been sharpened so the cuts are clean; using dull trimmers will cause stem tissue damage to the plant and invite diseases as well as slow down growth.

Now pruning anything can be nerve-racking. The good thing to remember is that most plants, including roses, are forgiving so take a deep breath.

The second tip is to take your time.  When I first started pruning, I tied pieces of yarn and old bread ties where I was thinking of cutting. I would adjust the cutting plan before actually making the cut. If I made a cut and didn't like it, I would remind myself of tip number one.

After trying several different approaches, here is how I start. I first remove any and all dead stems, that usually gives a better view of what's left behind and what you should trim next. Go slowly; some branches that are dead may only be dormant. If in doubt, first scrape the branch gently with your fingernail to expose what's underneath. If it's green, that branch is still alive.

Some branches may be yellow green; that means it may be dying but it could rally with a little help so don’t give up on it just yet. Definitely mark that rose for a little extra soil conditioning and give each plant ¼ cup dried coffee grounds, half to one banana peel and 2 tablespoons Epsom salt mixed together. I also add crushed egg shells and dried orange peels when I have them. Feed once a month through the growing season.

You want to keep a shape that leaves air circulating through the center so remove branches that crisscross or are in-growing.

Now that the dead branches are gone, and then the criss-crossing ones have been removed, what is left is almost done.

Look for the pink nodes facing outwards, that's where you want to cut to encourage growth.

Look for the pink nodes facing outwards, that's where you want to cut to encourage growth.

Look carefully at what is growing where. Find the pink nodes facing outwards, that’s where the plant will grow. Cut the branch 1/4 inch above the swollen bud at a 45 degree angle, that will encourage the branch to grow outward.

In general, also follow the following guidelines:

If you want your rose bush to be about the same size as it was last year, cut it down by half.

If you want a smaller shrub, prune to one third of its original size.

If you want something larger, prune to two thirds of its original size.

If this is your first year growing roses, prune much lighter at first; I usually wait until at least the second year before doing any pruning.

Charlotte

Blooming Semi-Dwarf Pear Tree

The first blooms on my semi-dwarf Bartlett pear tree enticing my honeybees.

The first blooms on my semi-dwarf Bartlett pear tree enticing my honeybees.

Blooming Semi-Dwarf Pear Tree

I almost cringed at the news, the forecaster called for temperatures to dip into the low 20s and snow.

It's been a record mild winter in Missouri this year, with spring a good 3 weeks earlier than previous years. Besides bees setting up house almost a month early, my compact dwarf fruit trees are also blooming early, not a good development when winter has not finished with us yet.

The biggest impact will be on my semi-dwarf Bartlett pear tree, planted next to my driveway in 1984. This tree had not produced fruit for so long I had actually forgotten I had planted it there until 30 years later when in 2010, I finally saw it in bloom.

What a sight. At first I thought it was snow. That's what one gets from looking out the window without glasses on. On closer inspection, and finding one's glasses, I realized my pear tree had finally found it's bloom.

Another close up of the clustered semi-dwarf flowering Bartlett pear tree blossoms.

Another close up of the clustered semi-dwarf flowering Bartlett pear tree blossoms.

The flowers of Bartlett pears are so pretty, reminiscent of small single roses.

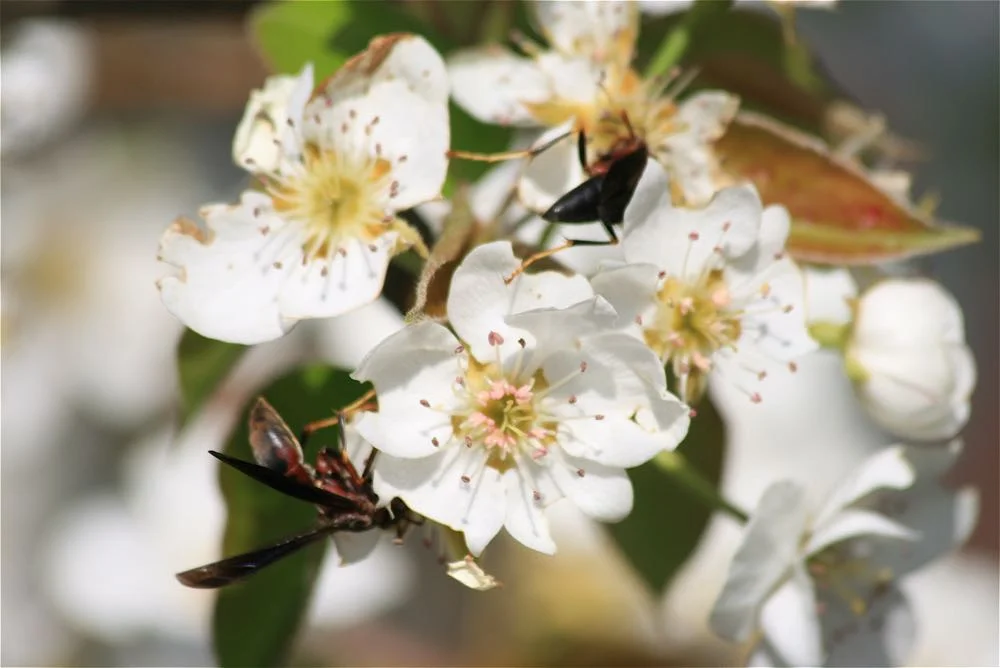
That first year the pear tree bloomed, I had also cleaned out my birdhouses and found an increased number of small wasps nests. As I looked through dozens of pictures I took of the pear tree, I realized the pollination was courtesy of the wasps that had taken up residence in the birdhouses. I haven't looked at wasps the same since.

One of the pictures I took the first year my Bartlett pear tree bloomed thanks to visiting wasps.

One of the pictures I took the first year my Bartlett pear tree bloomed thanks to visiting wasps.

We don't think of wasps as pollinators but they part of the family of insects, birds, bats and other insects and animals that form that fascinating family of pollinators. That was the same year I added honeybees to my garden later in the year. They have joined the wasps visiting the Bartlett pear tree in bloom as well.

Every year since, I wander through the flower beds checking out to see how soon my bees find the rest of the flowering compact dwarf fruit trees. I usually find at least one bee beats me to the flowers.

This is a semi-dwarf Bartlett pear tree full of flowers this year, even though its too early.

This is a semi-dwarf Bartlett pear tree full of flowers this year, even though its too early.

On this particular cloudy, overcast day, I didn't see any bees among the flowers but I still enjoyed looking at all of the white.

When one has waited 30 years to see a tree in bloom, one doesn't get tired of finally seeing flowers. And one does cringe at the thought that all of these beautiful possible pears will be gone if a freeze hits the area.

My beautifully-blooming Bartlett pear tree next to my driveway.

My beautifully-blooming Bartlett pear tree next to my driveway.

My other fruit trees are small enough that I can cover them in coats and sheets but this pear tree is too big to protect.

So every morning, I go outside and check to see if the blooms have made it, hoping that this year in spite of the late winter, I will still get pears later. That's excluding the battle with the squirrels.

Well, one battle at a time.

Charlotte


Recycled Pussy Willows

Pussy Willow buds are soft as cat fur and when in bloom are wonderful sources of pollen for bees.

Pussy Willow buds are soft as cat fur and when in bloom are wonderful sources of pollen for bees.

Recycled Pussy Willows

I have always wanted to add these charming perennials to my garden but just never found them on sale. 

This sprig came from a cut down bush dropped off at our local recycling center, the branches still fresh and green. Worth a try to get them rooted, especially since now I have a place where I can put them safely away from curious cat paws looking for a new play toy.

Trimmed at an angle, the pussy willow branches are now in a pot hopefully rooting.

Trimmed at an angle, the pussy willow branches are now in a pot hopefully rooting.

Many shrub branches can be started like this. Cut the branch about 8 inches long with a 45-degree clean angle cut and remove any greenery that will be under the soil.

I added a little root cutting stimulator, make a small hole in the damp potting soil and added the pussy willow branch. I added several in case not all of them take but I am told these plants are easy to root. Once I know they have started, I will move them into individual pots.

Pussy willows are one of the first flowering trees in late winter and early spring. Having more pollen sources in my garden for my bees will help them have more food sources at a time when little is available.

These can also be rooted in a jar of water but I had the extra potting soil available.

In another 4 weeks or so, I will peek to see if the roots have started.

Charlotte

Tree Pruning Time

Prune trees above the growing node but make sure your pruners are sharp; i set these pruners aside so I don't tear more of the tropical hibiscus while pruning.

Prune trees above the growing node but make sure your pruners are sharp; i set these pruners aside so I don't tear more of the tropical hibiscus while pruning.

It’s time to prune trees if you haven’t already. Although I appreciate well-shaped trees and bushes, I have to work myself into a certain state to prune. There is something counter-intuitive about cutting off branches to make something grow a better, fuller shape.

I start pruning in January when my tropical hibiscus have dropped most of their leaves in my living room. The leafless tree shape is easier to see and I can do the trimming in phases so I don’t traumatize it. Basically you don’t want to trim more than a quarter of the total tree branches at once so mark them before cutting so you don’t cut too much.

Start with some simple branches to cut off:

1.     Mark and remove dead branches.

2.     Mark and remove branches that are unsafe. This can be branches that are unsafe for people who may be around them as well as branches that are unsafe for the tree itself. Branches that cross are not good for fruit trees, for example. Branches with a low clearance are not safe for people who may mow lawns nearby.

3.     When choosing branches to remove, mark branches so new buds are facing outwards. It took me awhile to get this concept under my belt but basically don’t cut above growing nodes that will force a new branch inward. The nodes should be pointing in the direction you want the new branch to grow.

4.     Don’t cut right at the growth node, trim at a 45 degree angle about 1/8th of an inch above the growth node.

Coming up next, tips for pruning fruit trees.

Charlotte


New Missouri Garden Journal and Calendar Garden Gift Idea

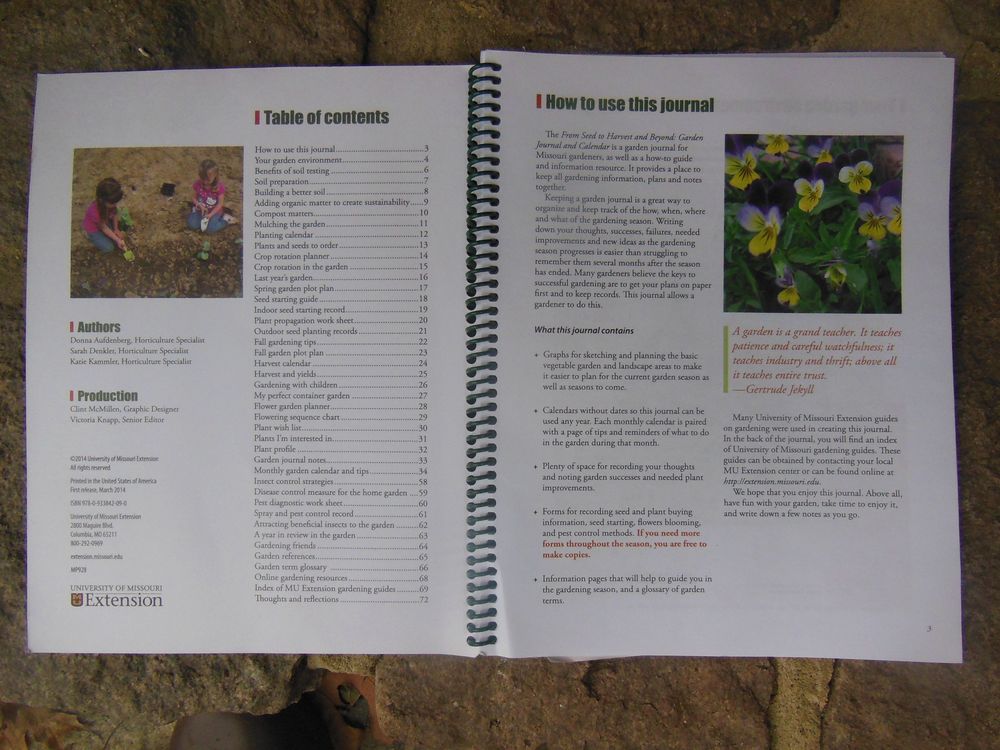
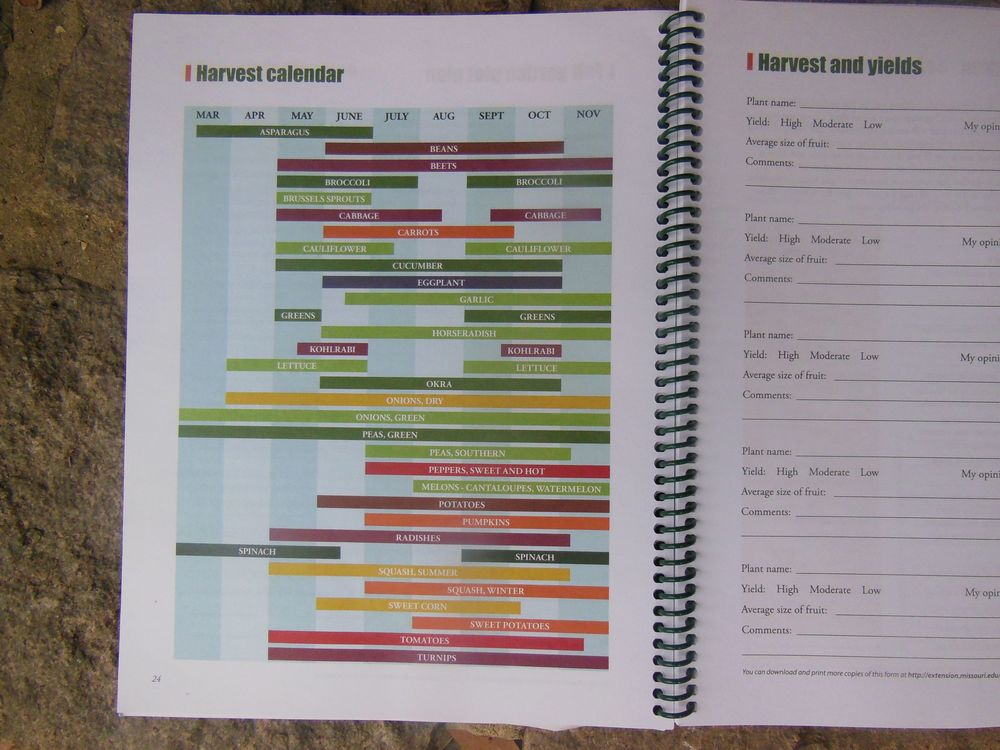
Finding a guide to Missouri gardening used to be almost as hard as finding vintage gardening books in mint condition. "From Seed to Harvest and Beyond: Garden Journal and Calendar" is a brand new, 76-page spiral-bound book written for, and by, Missouri gardeners.

The journal includes graphs for designing gardens, container gardening, planning a flower garden, monthly listing of gardening chores, pages about pests and diseases, and a place to write your own gardening notes.

I ordered one because I wanted to try their planting guide. The one I hand write I can barely read, not that my handwriting in their journal will be any better but at least I will start with something legible.

Cost for the journal $15 each; another $7 for shipping available from University of Missouri Extension. 

To make this a fun garden gift, add something personal – handmade jam or whatever your gift specialty is, or pick up seed packets still available at most garden centers. This time of year they are usually on sale. Most seeds are viable for at least 2 years.

You can also order a lovely free catalog from Baker Seed Company, Marshfield, Missouri. They specialize in rare and heirloom seeds. Their catalog would make a great companion to this garden journal and calendar.