January Gardening Tips

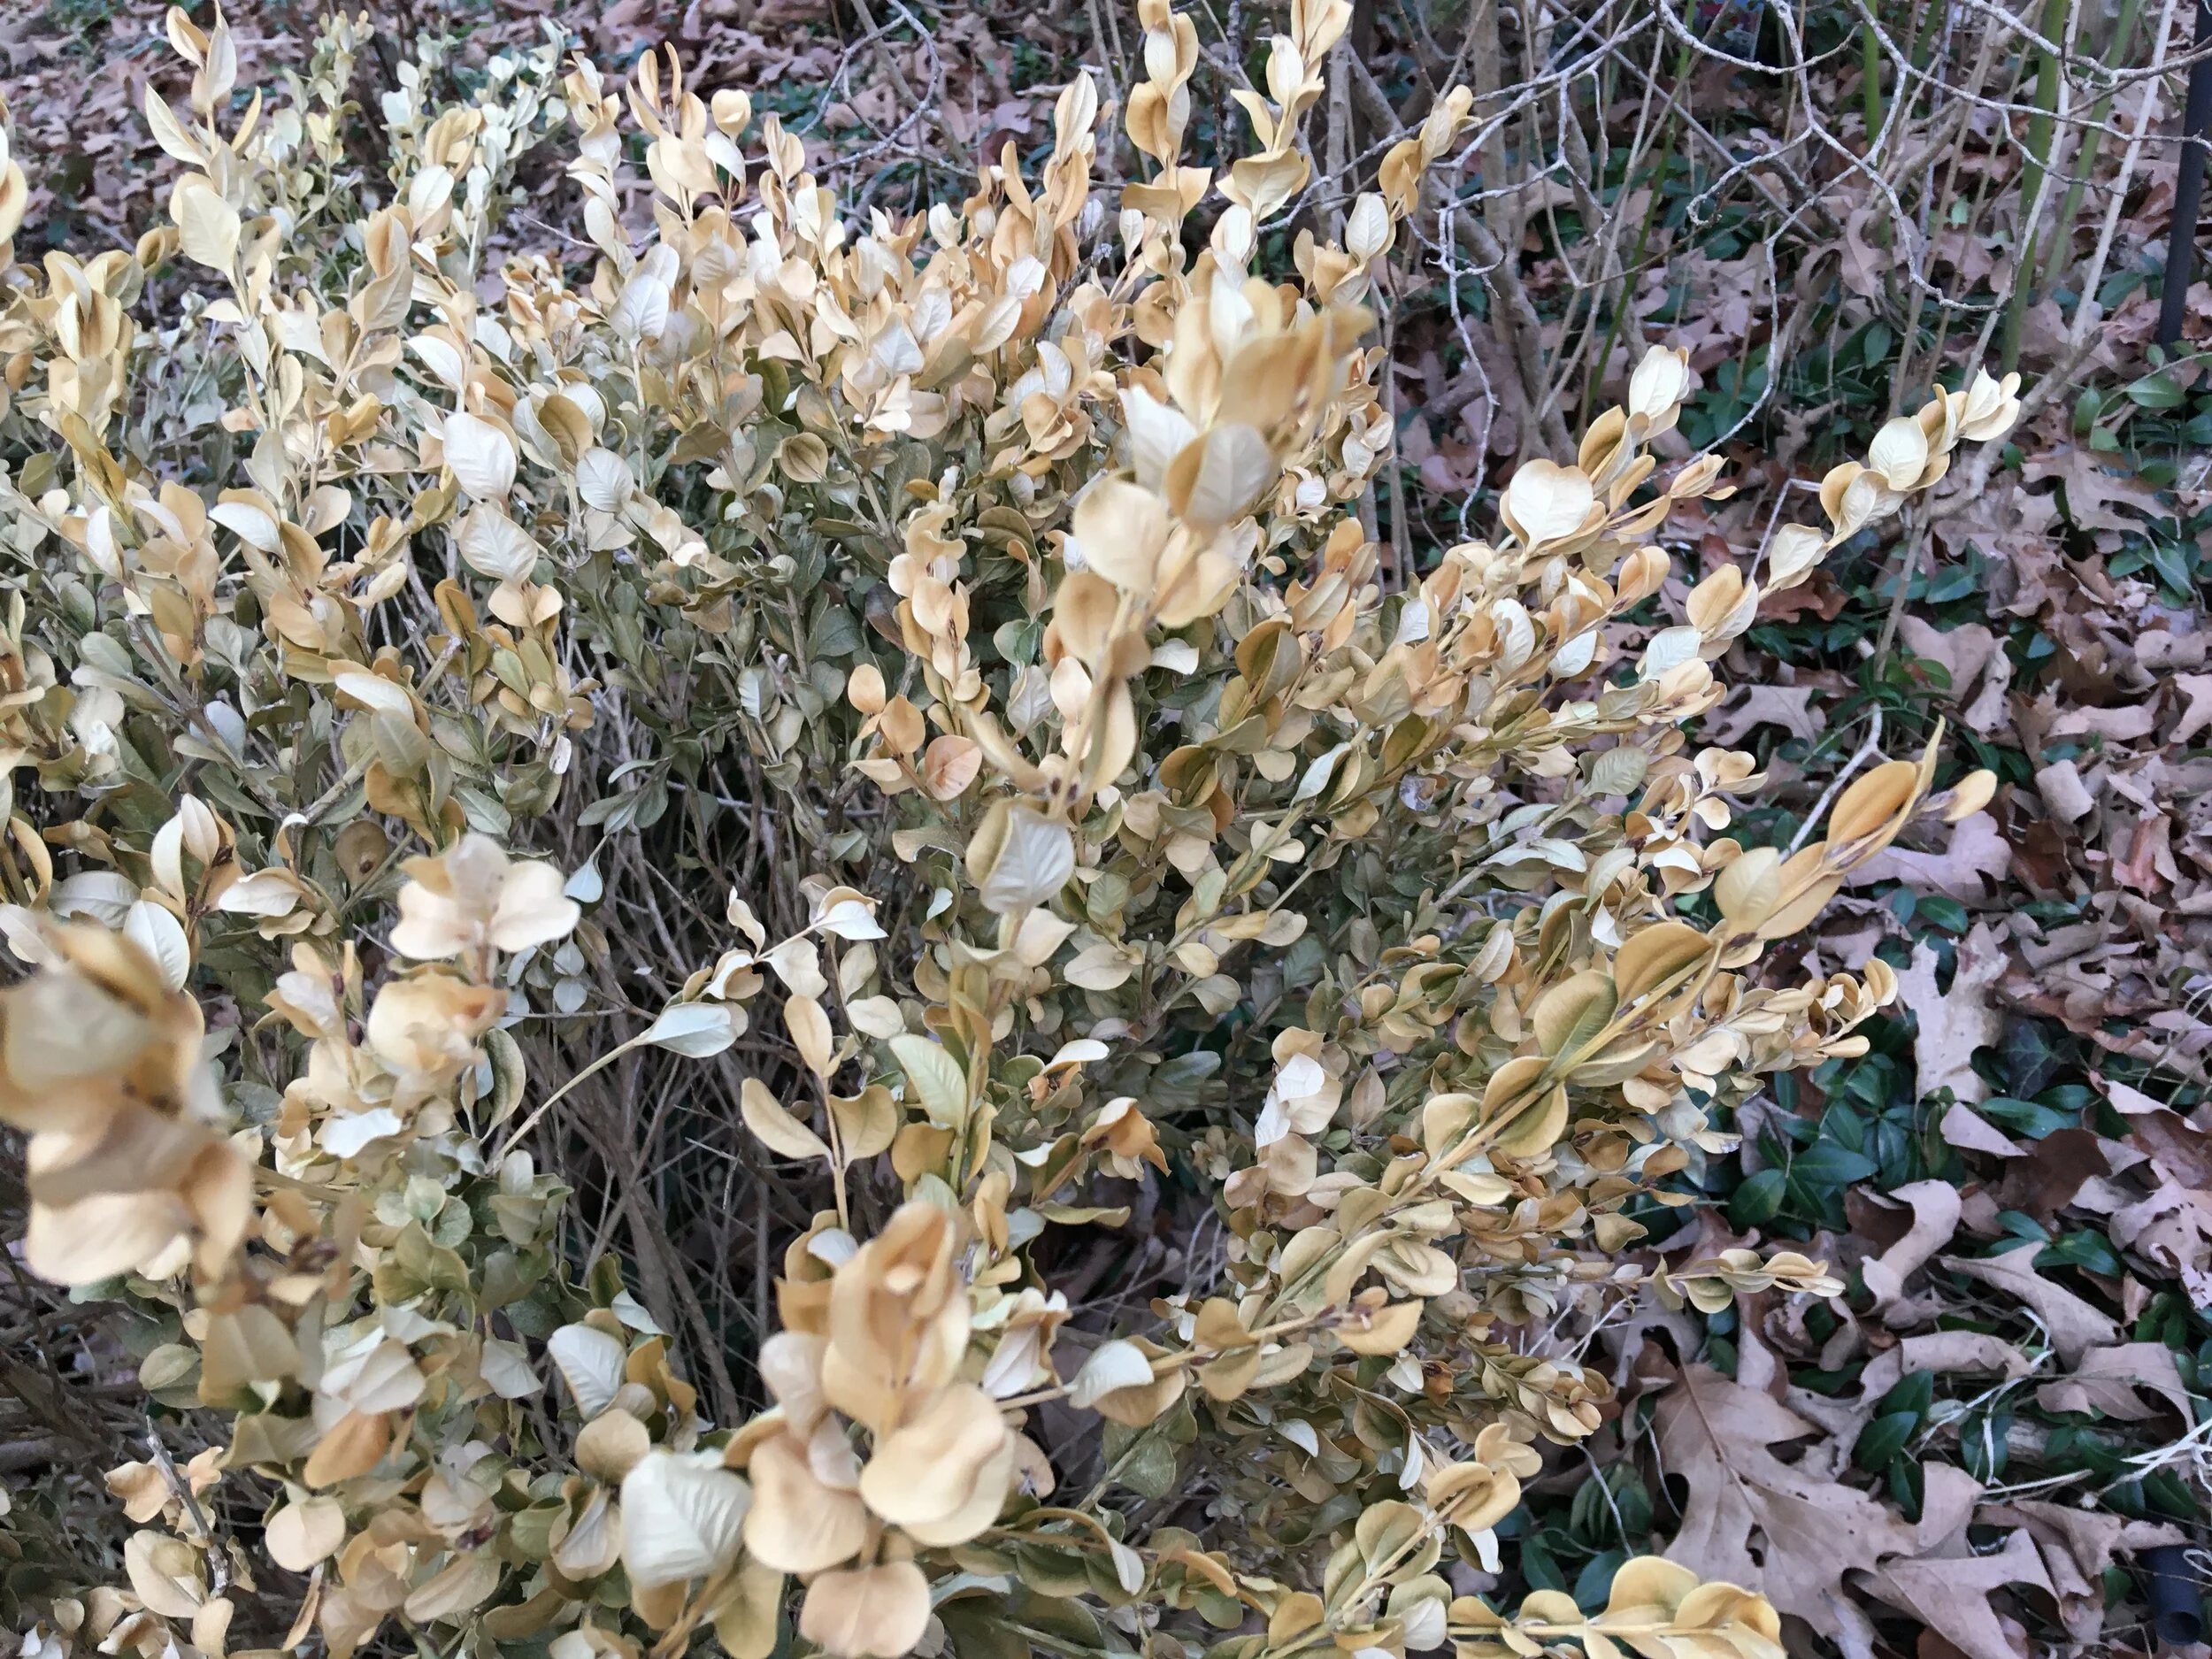
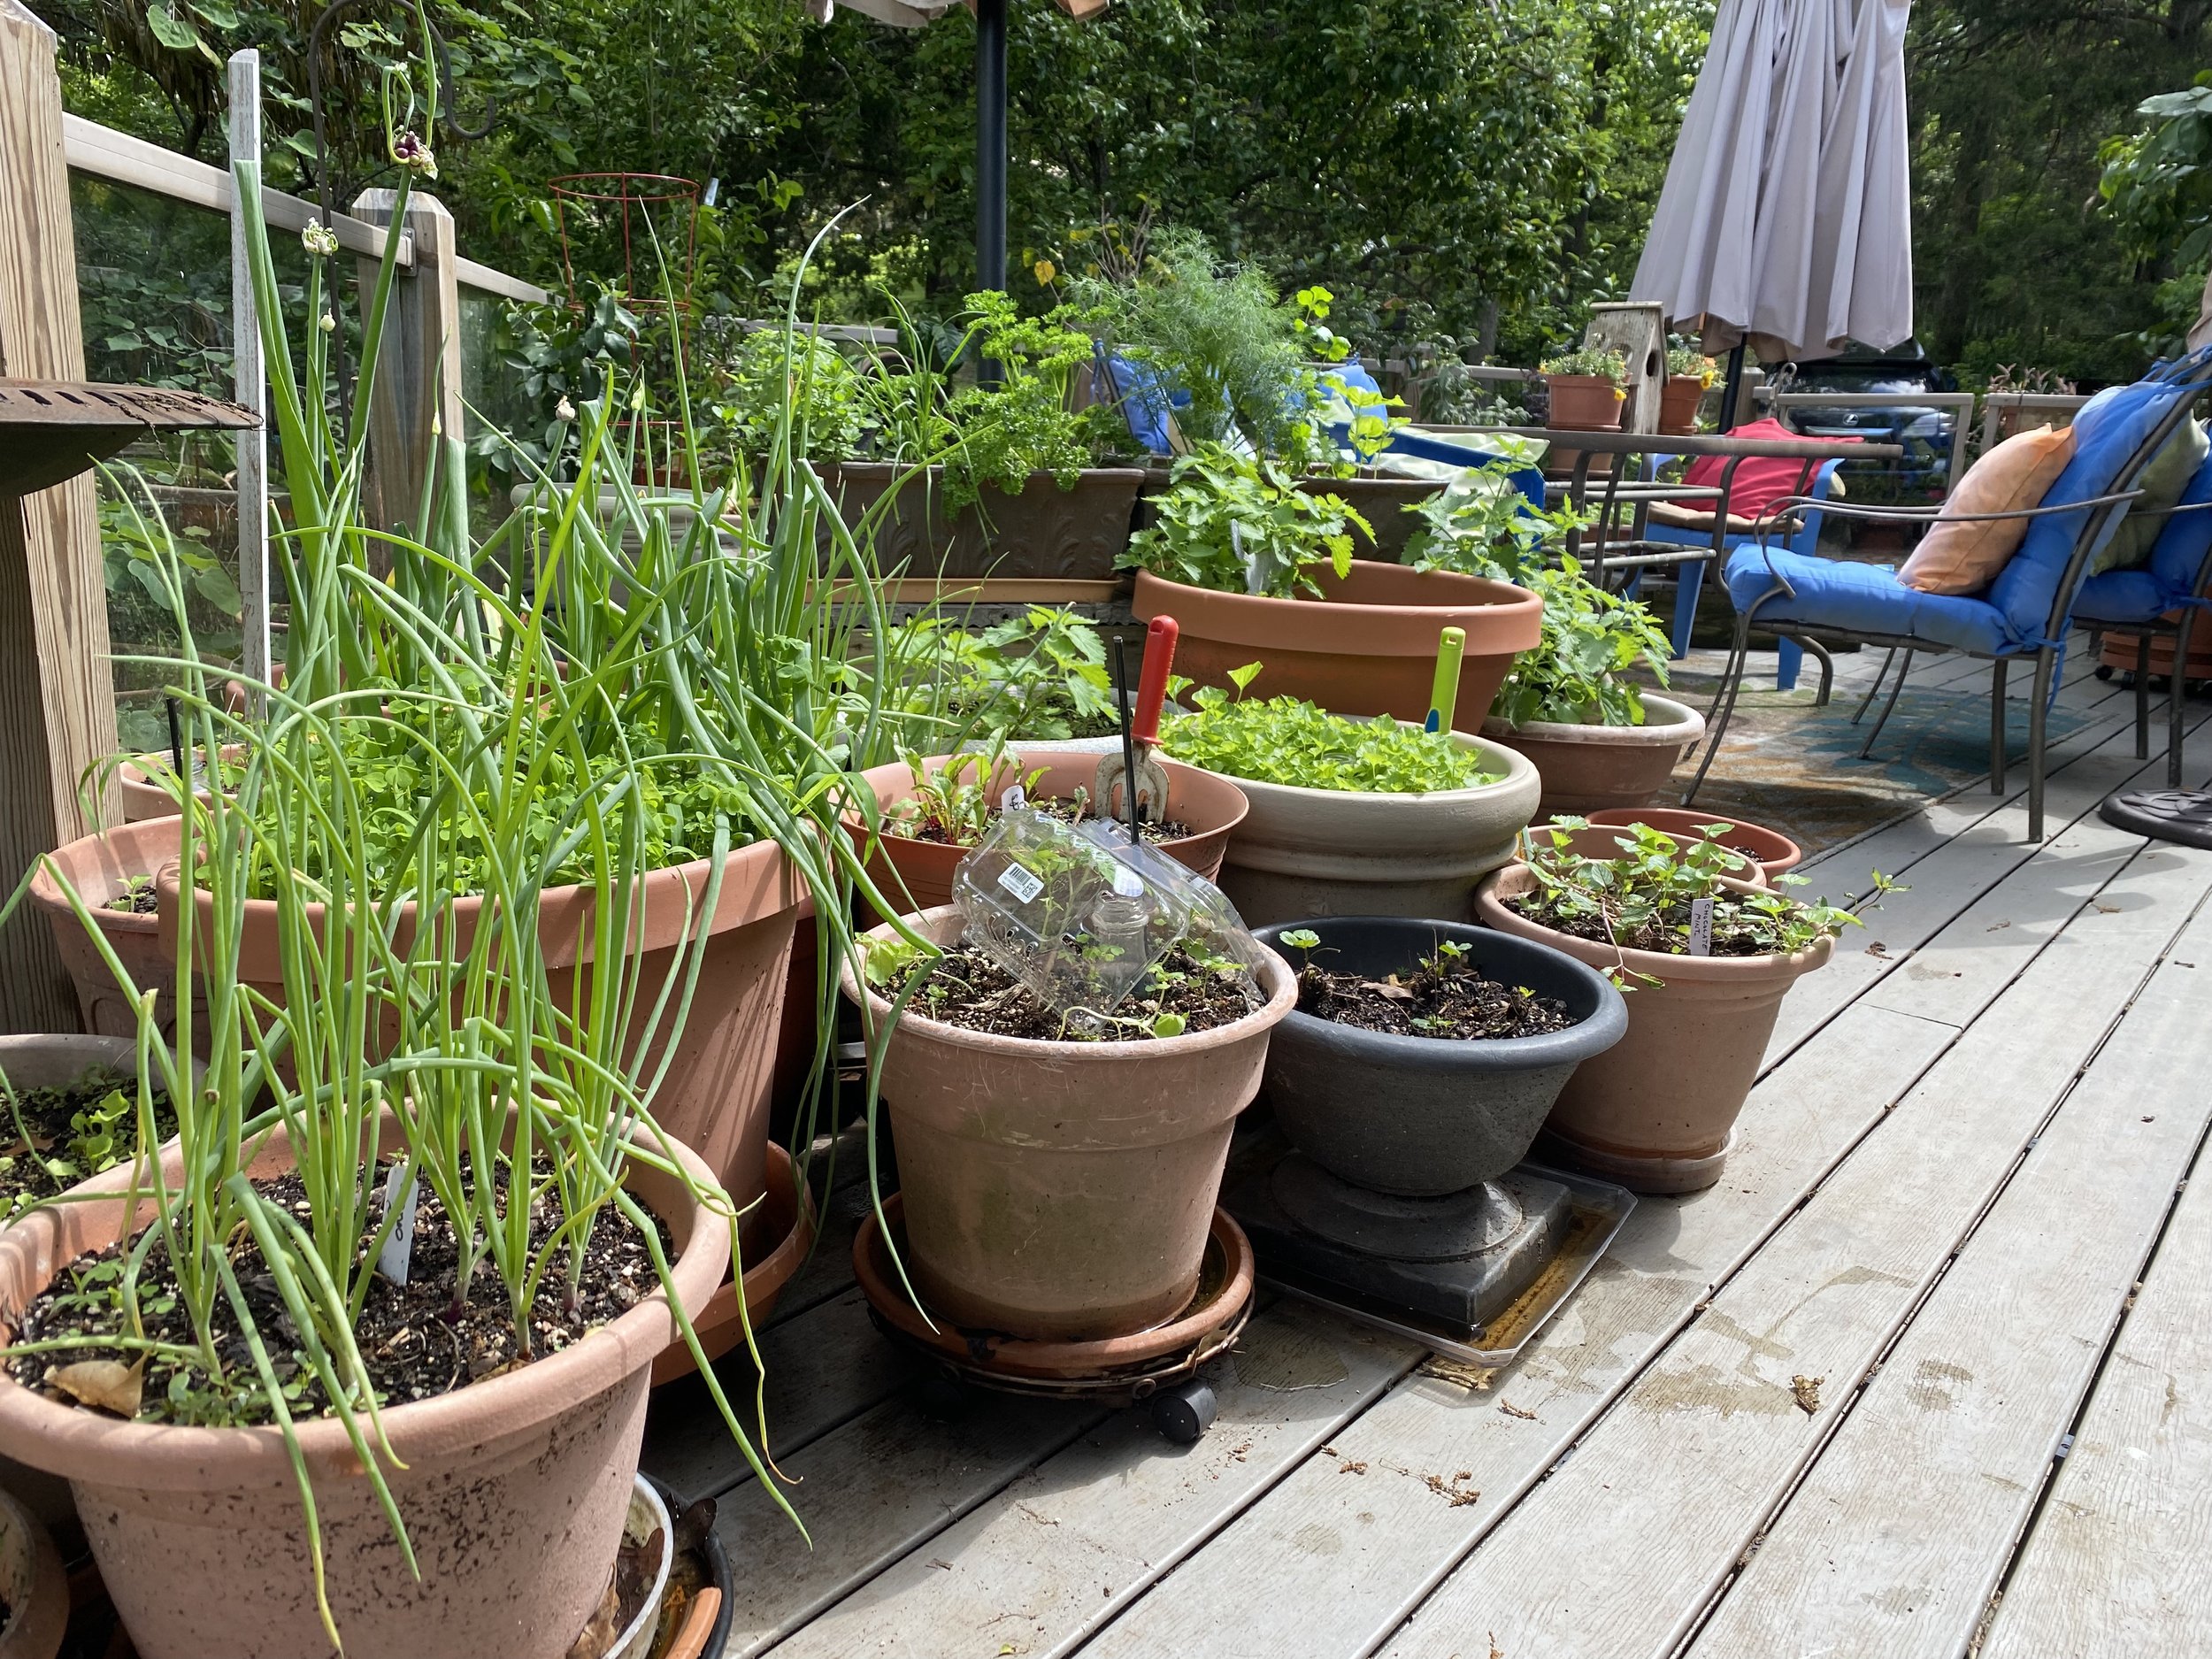
Keep newly-planted mums, right, mulched and watered through winter. (Photo by Charlotte Ekker Wiggins

January Gardening Tips

January used to be the month when a gardener could sit back and do some of the most important work: planning. We’ve had record high temperatures in USDA Hardiness Zone 5, turning growing conditions into early spring rather than winter. I have roses and lilacs budding and bees looking for something to do.

According to US Department of Agriculture, the Hardiness Zones are based on the average annual minimum winter temperature divided into 10-degree F zones, which give a range of temperatures for a certain plant or tree. The hardiness zones for the Midwest fluctuate more than other zones but average Zones 4,5 and 6. The zones for Missouri can be found here.

These zones are averaged over 13 years and adjusted accordingly. There may be major adjustments in a couple of years due to our rapidly changing climate. Predictions for the Midwest have included longer springs and falls, shorter winters and summers; and higher summer temperatures. These changes are occurring very fast, challenging nature to adjust.

The following are some of my January gardening tips and chores:

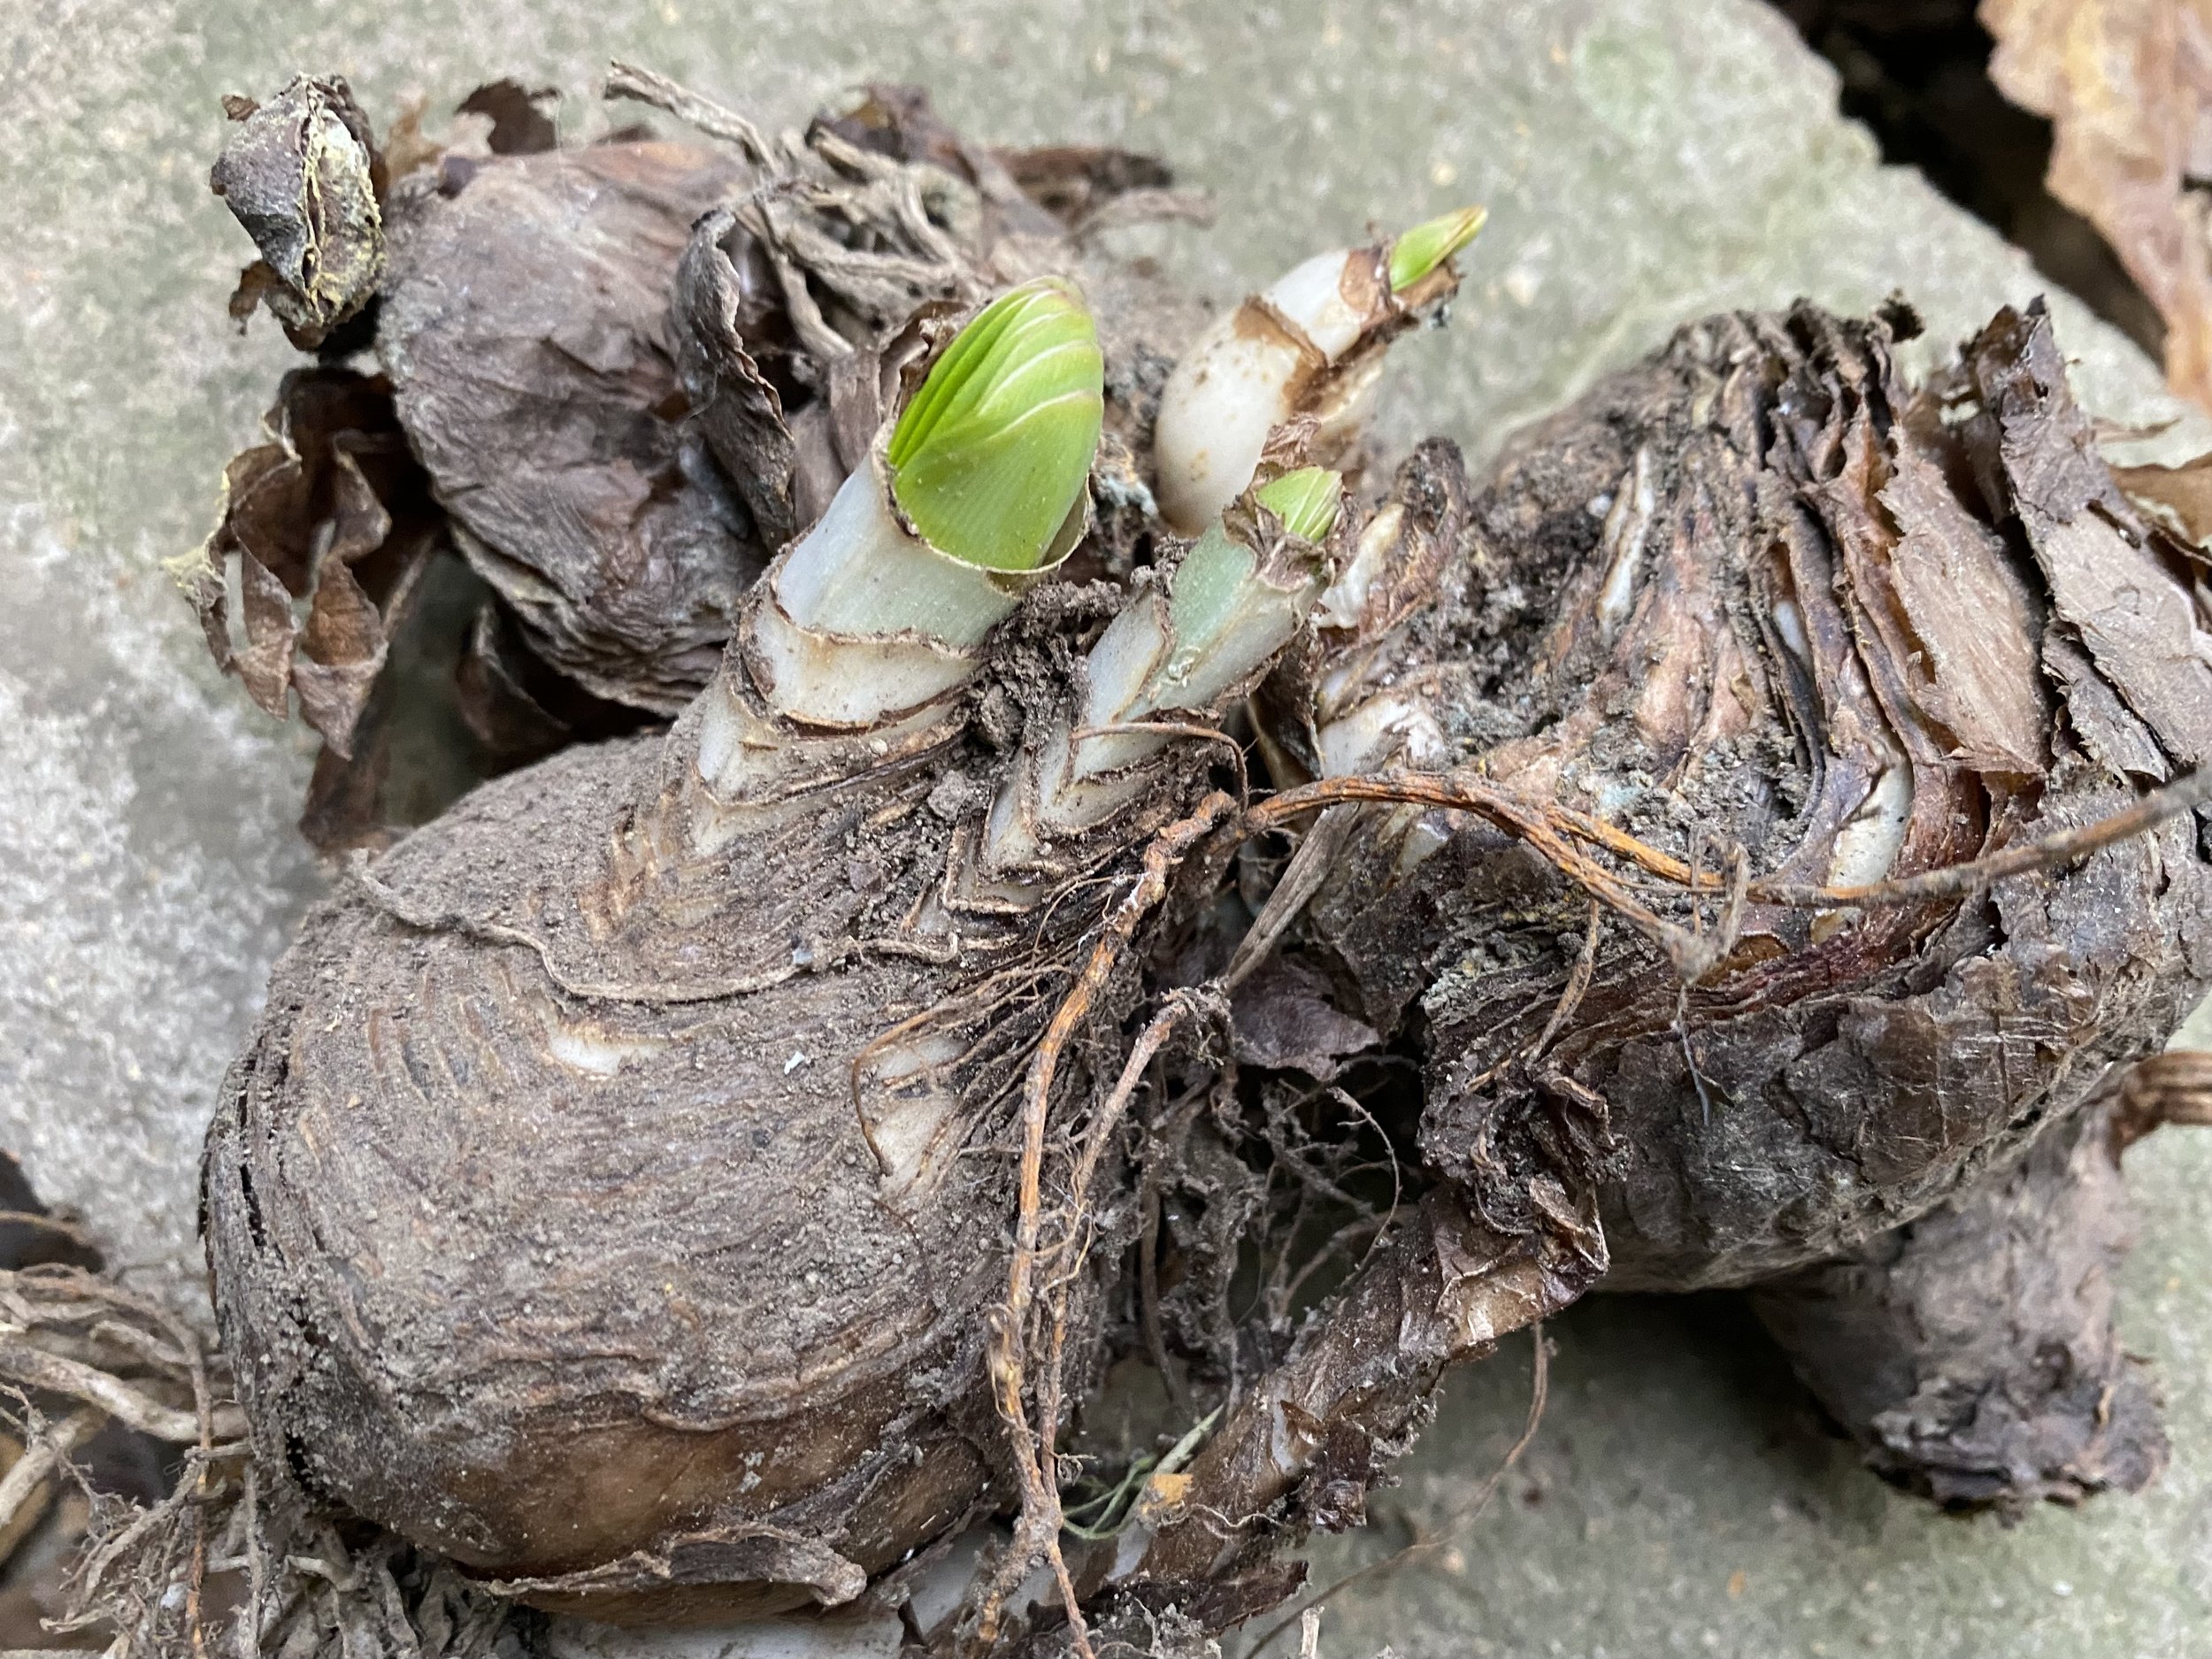
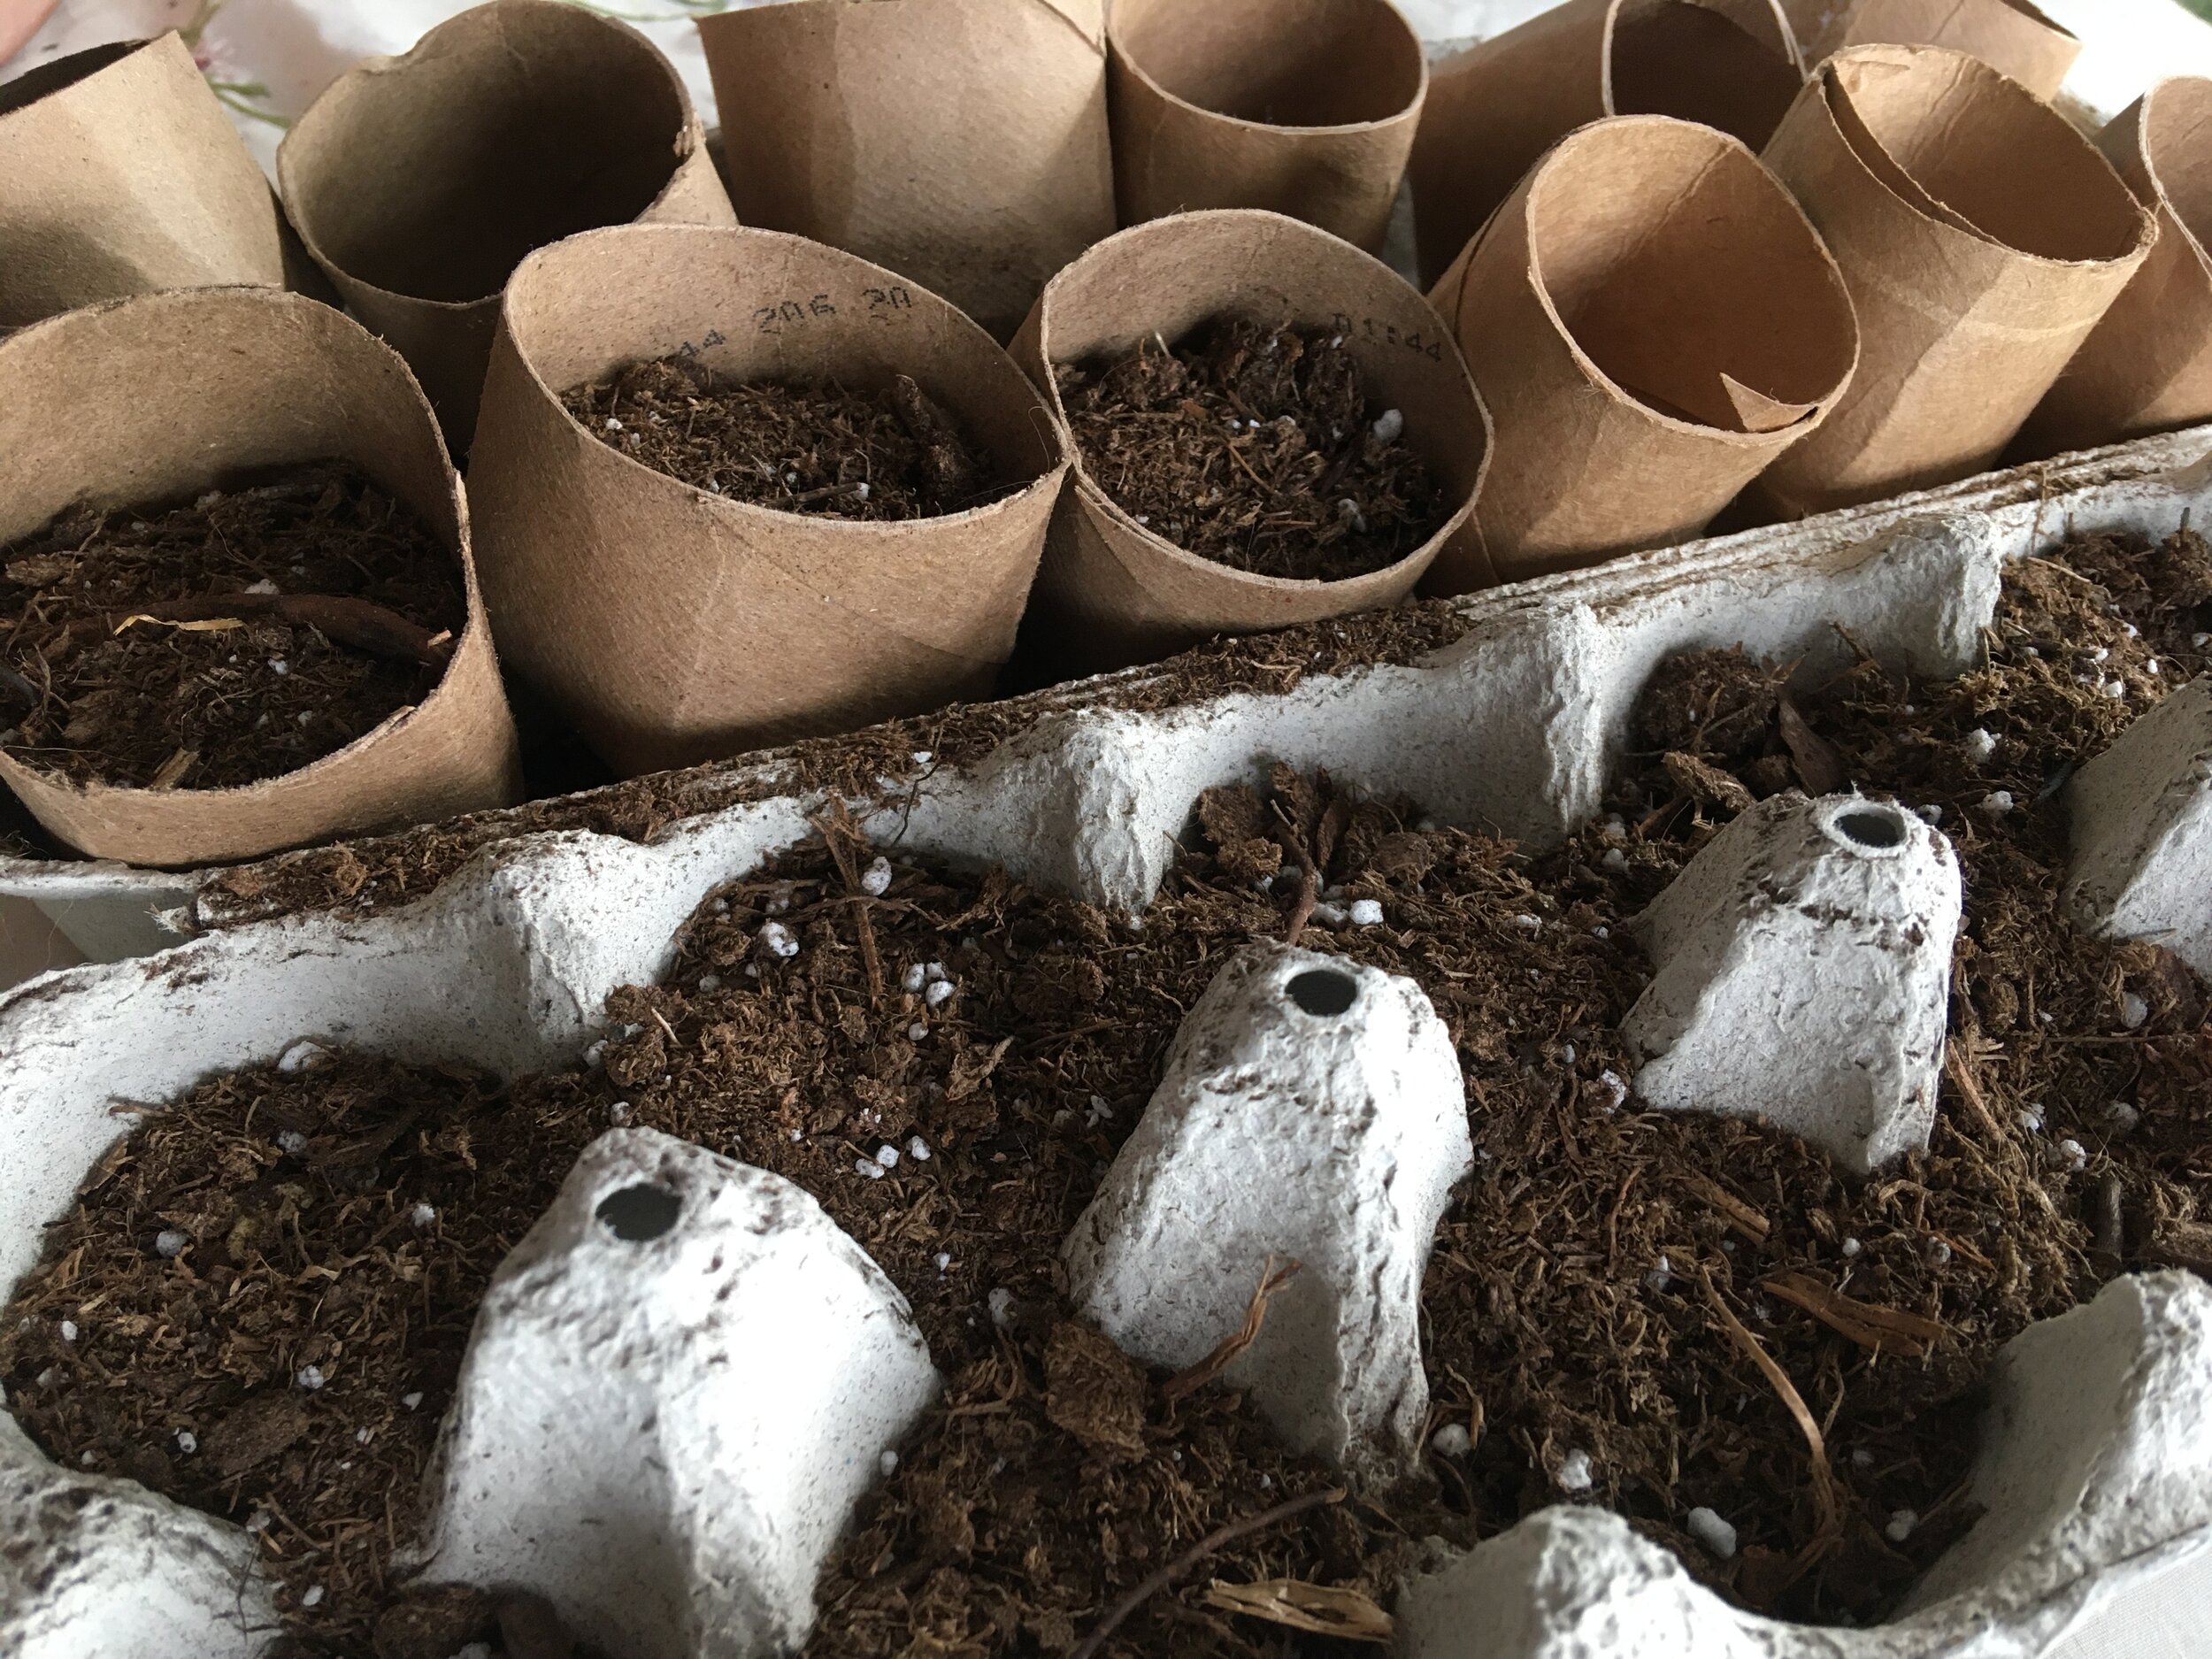
1.  We have winter storms in our New Year’s forecast so I got the last of my bulbs in the still soft ground before winter makes its first appearance and freezes the ground.

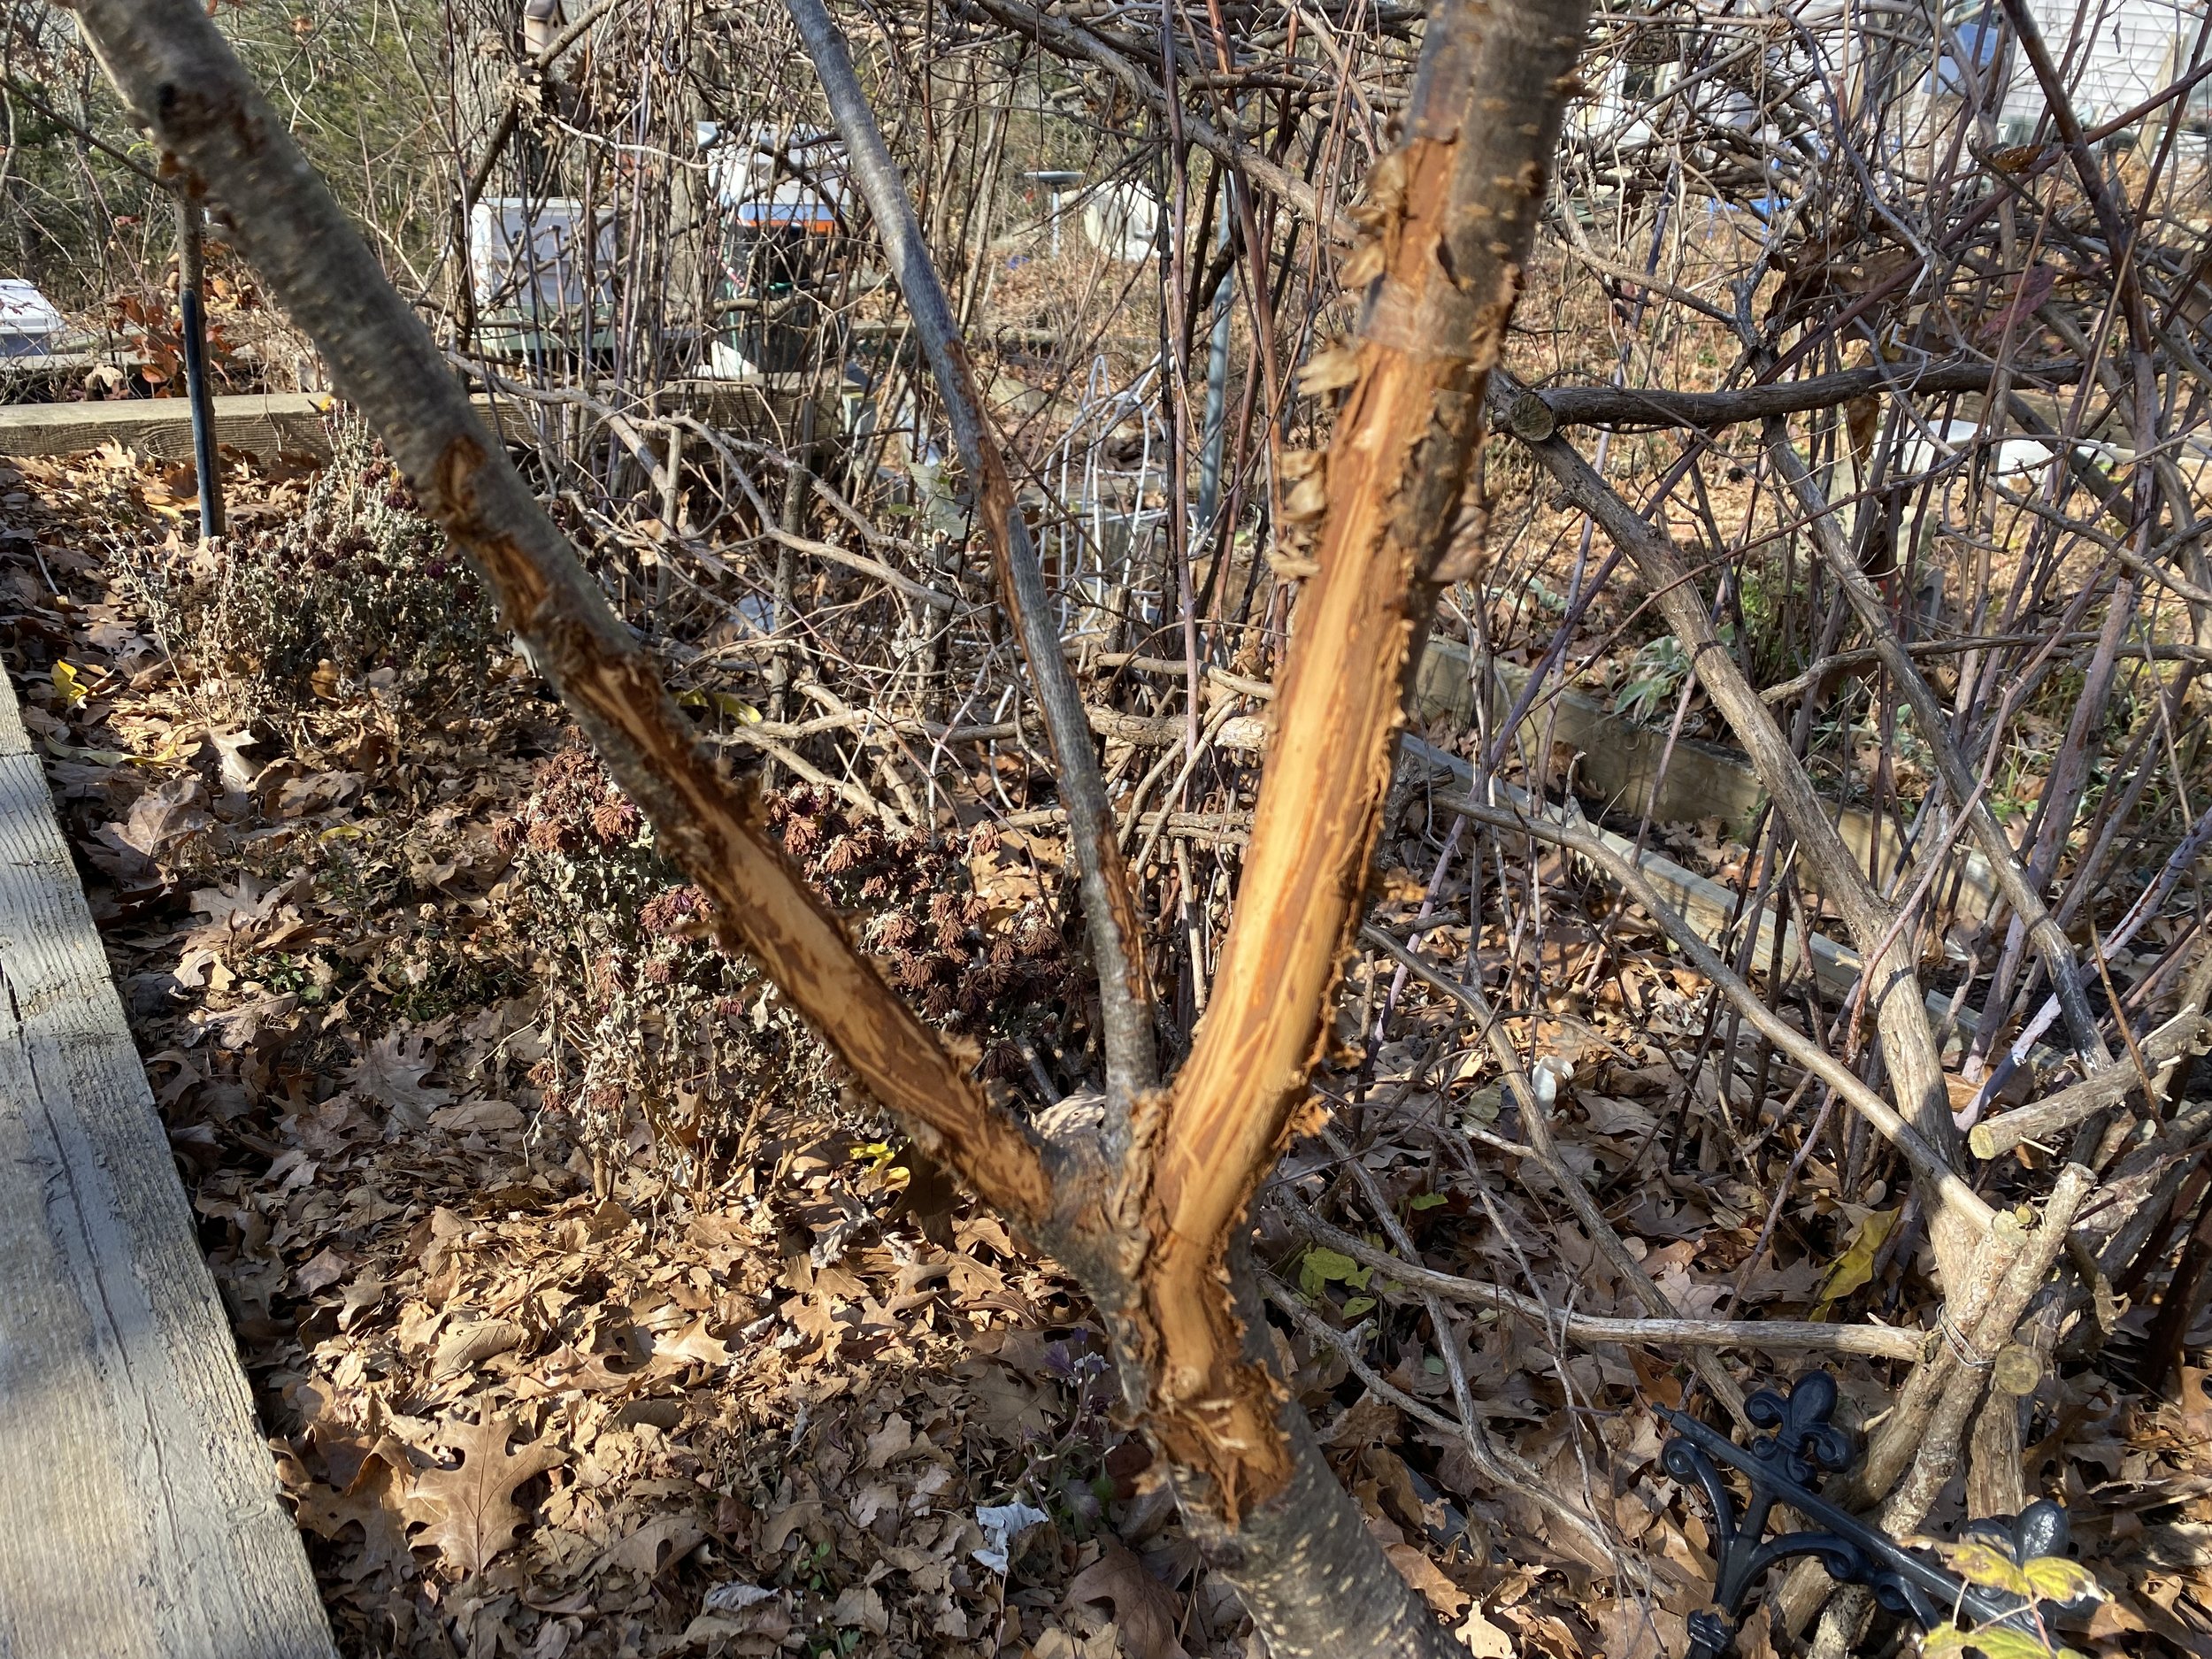
2. I also mulch roses, new seedlings, newly-planted mums and my nursery stash to protect them from changing temperatures.

3. Review your garden diary from last year. Underline items you want to get done this year. I also carry over the ones I didn’t get to last year, or drop them off the master list. This is a good time to dream.

4. Identify what plants you want to add this year and note what soil and sun requirements they will need. Focus on adding native plants. Once established, native plants will be low care and excel in local soil and weather conditions. Natives also have a relationship with local insects, pollinators and birds.

5. Plan on expanding flowerbeds to start removing grass from your property. Expanding flowerbeds will give you areas to plant vegetables as well as flowers and provide more food for pollinators. One way to start expanding flowerbeds is to place cardboard along the existing flowerbed edge and then move the flower bed border early spring. Mulch on the cardboard will keep the garden looking nice and help restore healthy soil conditions.

 6. Order catalogs you have used in the past and share catalogs you don’t need or use. One of my favorites is the Missouri Wildflowers Nursery Native Plants catalog, it has lovely pictures with a quick guide on what growing conditions native plants require and they offer great plant starts.

7. Order locally-adapted seed catalogs. Baker Creek Heirloom Seeds is a favorite seed catalog from Mansfield, Missouri.

8. Read. Whether it is gardening books, gardening catalogs and beekeeping books, catch up on what you couldn’t get to last year.

9. Remove broken limbs in pathways to keep walkways clear and safe.

10. On warm days, pile mulch and leaves on garden beds if they’ve been blown off by winter winds. Mulch will help keep the soil temperature even and reduce the thawing and heaving that causes plant damage.

11. Check inside plants for any hitchhiking bugs and remove. Make sure they are getting their sunlight needs met. If not, move them. Water with diluted fertilizer. Prune as necessary, I use metal sewing thread snips. The thread snips make it easy to trim plants and keep them bushy.

12. Drop your garden pruners and other garden tools to get sharpened. Home and garden centers with service departments can usually sharpen tools.

13.  Start scouting where you can install rain barrels and totes to collect rain water off your gutter system. Observe what happens to rain and photograph so you can refer to the rain pattern later.

14. Enjoy the lower winter activity; even gardeners need time to rejuvenate.

Charlotte

Treating Tree Wounds

Deer have rubbed their velvet off on one of my fruit trees. (Photo by Charlotte Ekker Wiggins)

Treating Tree Wounds

Most days, I will walk around my one acre hillside garden to observe changes and developments. And this one was not a happy sight.

Deer had rubbed the velvet off their antlers on several of my fruit trees, a common practice this time of year.

Usually one can leave these gashes alone but our winter temperatures have been unseasonably warm, giving bugs a chance to do some damage as well.

I used tree sealer since the weather has been too warm. (Photo by Charlotte Ekker Wiggins)

It took me checking with 4 home and garden centers before I found this last an of tree pruning sealer. It protects the open areas until they heal so I applied this to all of the damaged trees I could find.

I usually let nature take its course but these gashes where too big to ignore. I hope this helps my trees recuperate or certainly survive.

Charlotte

Planting Coneflower Seeds

Milk jugs are perfect tiny greenhouses to start wildflower seeds. (Photo by Charlotte Ekker Wiggins)

Planting Coneflower Seeds

I’ve had this on my to do list for some time now but never seemed to have enough empty gallon milk jugs saved up to try it.

This year, I collected several and set off to get my purple coneflower seeds started for next year.

Yes, it’s December and in USDA Hardiness zone 5, the best time to plant many wildflower seeds. Some species need the exposure to winter temperatures to germinate, and purple coneflowers are one of those species.

Now I’ve sowed seeds directly into the garden as well. The challenge with that is my stakes get moved during winter so when spring arrives, I may or may not be able to find where those seeds were scattered.

Purple coneflower starts from the end of the season. (Photo by Charlotte Ekker Wiggins)

I had two purple coneflowers with starts so I settled those into one of these milk cartoons so they could winter over with some protection.

To get the milk cartons ready, cut them in the middle but below the handle, leaving 2-inches under the handle as a hinge.

Make several holes in the bottom so excess water won’t accumulate.

Fill with fresh potting soil. Mist soil so it’s hydrated but not wet.

Scatter seeds over the soil. Add a light soil topping.

Once seeds are covered, I taped up the milk jugs with duct tape. (Photo by Charlotte Ekker Wiggins)

Gently hinge the top over the cut bottom and wrap with duct tape. Frankly this was the hardest step to do, in the first round I had more duct tape around my hand than I did the milk jugs.

With a little practice, you will get the duct tape where it needs to go, sealing the milk jug back together.

Two months later there are signs of greenery. (Photo by Charlotte Ekker Wiggins)

Place the milk jugs where they will get rain water but some protection. I have mine tucked away near a trunk seat between my bay windows.

The milk jugs are tucked into the side of the house. (Photo by Charlotte Ekker Wiggins)

If you’re in a drought area you may want to add a little water. Otherwise, the regular rain and snow will take care of watering. Make sure to periodically peek to make sure there is moisture just in case.

Good seeds to start include native milkweed, purple coneflowers and asters.

Next spring, after the danger of frost is over, the new seedlings should be ready to plant into the ground, hardier and ready to grow. Can’t wait!

Charlotte

Planting Bulbs

One of the few bulbs I plant every year, crocus are a harbinger of spring, (Photo by Charlotte Ekker Wiggins)

Planting Bulbs

Thank goodness for warm weather in USDA Hardiness zone 5. Although it is unusual, it does give me extra time to get some spring bulbs into the ground.

Bulbs collect sun energy through leaves and store it in the bulbs. A majority of bulbs are planted in the fall so they can be exposed to cold temperatures. The cold resets them so as soon as the spring warms up the ground the bulbs start to grow with first blooms, then green leaves.

This time of year you can find spring-planting bulbs on sale. Look for the signs of growth starting. Some bulbs may be dry by now and won’t grow.

When choosing bulbs on sale, make sure to see growth starting. (Photo by Charlotte Ekker Wiggins)

Now in my garage I have a couple of boxes of mixed daffodils and surprise lilies that i still need to plant. They won’t winter over so they need to find a home next week.

The surprise lilies look dead but a little pawing through the bulbs finds some getting a head start. That’s why I don’t toss much out and plant them instead, they all deserve a chance to survive.

Don’t toss out brown bulbs, they are saving energy for growth. (Photo by Charlotte Ekker Wiggins)

One of the products I do add to my fall bulb planting is bone meal. Bone meal will feed the bulb roots as they start to grown and settle in getting ready for spring growth. It doesn’t have to be an organic brand; I found these on deep discount at a local farm and garden center going out of business.

Add bone meal when planting bulbs, it helps feed them as they store energy. (Photo by Charlotte Ekker Wiggins)

Although I love tulips, I rarely plant those because the local wildlife like to snack on them.

Daffodils are toxic so they survive the onslaught and keep multiplying from year to year. They do need to be dug up and spread out every once in awhile but they are easy to plant and give back for many years.

Charlotte

Spring Pot Garden

This was my 2020 pot garden with peas, lettuce and spinach. (Photo by Charlotte Ekker Wiggins)

This was my 2020 pot garden with peas, lettuce and spinach. (Photo by Charlotte Ekker Wiggins)

Spring Pot Garden

It’s not officially spring yet but I have a start on what I call my spring pot garden. Planting in pots is a very easy way to get a handy garden growing without having to set up raised beds and new garden spots. And you can easily move it to capture better sunny spots or get them out of the way.

I have been using pots for a couple of decades now so some of my pots look well-loved. I added compost last fall so that melting snow and rain could help keep the soil hydrated and invigorated.

If you are just starting, start with a basic potting soil without added fertilizer if you can find it. That way you can supplement as needed and better control what you are providing your plants. You don’t need fertilizer for seedlings.

This year I once again planted a personal favorite, radishes, and used cut up blinds with Garden Markers to note what was in the pot.

Radish seedlings are getting a good start in my 2021 pot garden. (Photo by Charlotte Ekker Wiggins)

Radish seedlings are getting a good start in my 2021 pot garden. (Photo by Charlotte Ekker Wiggins)

I also enjoy fresh grown greens so I have lettuce and spinach in other pots, currently sitting on the edge of my unfinished rebuilt deck.

I collect good castors so that I can easily move the pots when I need to relocate them.

Punctured plastic bottles help keep my pot garden hydrated. (Photo by Charlotte Ekker Wiggins)

Punctured plastic bottles help keep my pot garden hydrated. (Photo by Charlotte Ekker Wiggins)

The other curiosity about my pots are the plastic bottles sitting in the middle. Those have holes around the sides and bottom to help keep the soil hydrated. When watering, I place the water in the plastic bottle and let it slowly trickle into the soil.

So far the radishes are starting to come up and I see some teeny tiny lettuce plants. Other people herald spring with interesting traditions, this one is mine!

Charlotte

Compost Beer

Pour old beer into compost to help speed up the decomposition. (Photo by Charlotte Ekker Wiggins)

Pour old beer into compost to help speed up the decomposition. (Photo by Charlotte Ekker Wiggins)

Compost Beer

Perhaps I should start explaining why I have old beer. Really old beer. My handyman found it in an old basement cabinet, one that used to sit in my tiny living room and was moved in home remodeling. Our best guess is the beer was at least 25 years old, vestiges of days when I entertained much more than I do now.

You should really throw this away, my handyman said as he handed me almost a dozen cans.

I had a better idea. I fed it first to my composters, then diluted it and gave some of my large plants - well, a party. And why not. Beer has sugar and yeast that will keep the soil microbes happy, and they in turn will keep my plants happy.

Beer is normally recommended for slug patrol. Since I haven’t had an issue with slugs thought the plants would enjoy it.

Party on!

Charlotte

March Gardening Chores

First crocus of 2021 in bloom February 26, 2021. Come on spring! (Photo by Charlotte Ekker Wiggins)

First crocus of 2021 in bloom February 26, 2021. Come on spring! (Photo by Charlotte Ekker Wiggins)

March Gardening Chores

March is the beginning of spring and daffodil days in my garden, so many daffodils that one of my neighbors used to refer to my garden as “Daffodilland.” The weather can also be a little challenging in USDA Hardiness zone 5 so March can be a hit and miss month in terms of getting a lot done.

1. The forecast for March 2021 is an early spring so better get a move on getting birdhouses repaired and hanging in my garden. Attracting birds is a great way to manage unwanted bugs without using insecticides and pesticides.

The birdhouses also serve as homes for paper wasps, a wonderful pollinator we often find on porches and other unwanted areas. By giving them an alternative home, they can still pollinate our gardens without getting in the way.

2.     Prune and fertilize roses. On the first warm day, I remove all dead branches so the new growth will have room. I also add coffee grounds, banana peels, Epsom salts and crushed egg shells mixed into the soil around the base of the plants. Gently, you don’t want to tear up the roots. Also a good time to mulch.

3.     Plant onion sets around roses to keep bugs at bay. Three for miniature roses, 5-6 for the larger roses.

4. Prune fruit trees. Nothing elaborate, I make sure the branches don’t cross and are open in the center. Also mulch. Make a tire around the base leaving the space up at the tree trunk open.

5.     My hellebores and ‘Autumn Joy’ Sedum get the old greenery cut off so any new growth gets to shine. The Sedum starts look like tiny green roses close to the ground.

This is a good time to remodel your birdhouses to keep your natural pest control happy. (Photo by Charlotte Ekker Wiggins)

This is a good time to remodel your birdhouses to keep your natural pest control happy. (Photo by Charlotte Ekker Wiggins)

6.     Mulch. My over-wintering mulch pile is ready to spread over new areas that need cover for the season and areas that lost cover over winter. Good time to load up the wheelbarrow and keep a supply at hand.

7.     If you didn’t get your lettuce and spinach out in February, get them planted this month.

8.     March and St. Patrick’s Day is also the time to plant potatoes, radishes and carrots.

9.     The last frost day for this zone is Mother’s Day in May so it’s a little too early to get much else planted and much too early to move tropical plants outside, even if you are ready to toss them out on their aggravating dropping leaves by now. Give them a little rainwater and that will help tide them over for another month or so.

10.  Also check inside plants for bugs. Look under leaves and if you see white bugs, clean off with a damp cloth wet with water and dishwashing liquid. Spray soil with a few drops of dishwashing liquid in water in a spray bottle to get rid of eggs. Start watering with ¼ strength fertilizer since days are getting longer.

11. Take time to enjoy the sunshine and look for spring-blooming plants!

 Charlotte

Garden Markers

IMG_8587.JPG

Garden Markers

Oh, my, where have these been all of my life??

I have to confess, I used to use black magic markers, only to find them either faded or wiped off before I did whatever I was going to do with what was supposedly labeled. And then I saw these Garden Markers, indelible black ink for writing on all sorts of garden-related items. And permanent so they should not disappear!

Old blind slats make great handy plant labels used with Garden Markers. (Photo by Charlotte Ekker Wiggins)

Old blind slats make great handy plant labels used with Garden Markers. (Photo by Charlotte Ekker Wiggins)

If you don’t mark your plants, it’s helpful to do so especially in seedling stage. I’ve tried a number of options over the years and keep coming back to this simple one: repurposed, cut up blinds. Not only do I like the size but they tend to last longer than popsicle sticks, paint sticks and other wood products, even after the wood has been treated.

So to make these handy, I store both the blind slats and the Garden Marker in an old glass milk bottle I used to put flowers in.

This old glass milk bottle nicely holds my Garden Marker and blind pieces for labels. (Photo by Charlotte Ekker Wiggins)

This old glass milk bottle nicely holds my Garden Marker and blind pieces for labels. (Photo by Charlotte Ekker Wiggins)

If I find something better for the Garden Marker and blind pieces, I may give the milk bottle flowers again. In the meantime, I’m ready for spring!

Charlotte

Toilet Paper Roll Pots

Toilet paper rolls cut in half make excellent seed starting pots. (Photo by Charlotte Ekker Wiggins)

Toilet paper rolls cut in half make excellent seed starting pots. (Photo by Charlotte Ekker Wiggins)

Toilet Paper Roll Pots

If you haven’t already, this is a good time to start saving your toilet paper and paper towel rolls to make compostable seed pots.

The rolls are not only hardy enough to help seedlings grow but they can be buried in the ground, seedlings and pot, when they are ready to go outside.

To make these seed pots, cut the toilet paper roll in half. Then gently fold the half and make a 1/4 inch cut on each folded side. Refold and make similar cuts on the edge of the other fold.

Tuck the folds as you would a box.

Fill with new potting soil.

Before planting, I spray soil with water so the seedlings can easily settle in.

Cardboard egg cartons are a good place to start your seeds. (Photo by Charlotte Ekker Wiggins)

Cardboard egg cartons are a good place to start your seeds. (Photo by Charlotte Ekker Wiggins)

For small seeds, I start them in cardboard egg cartons. When they are big enough, I can easily move them into the toilet paper roll pots.

The cardboard egg carton lid serves as a nice place to store the toilet paper rolls ready for the seedling transfer.

You can also start seeds in your toilet paper roll pots and keep them warm and moist. (Photo by Charlotte Ekker Wiggins)

You can also start seeds in your toilet paper roll pots and keep them warm and moist. (Photo by Charlotte Ekker Wiggins)

If you don’t have access to extra cardboard egg cartons, you can use a clear covered plastic container to start seeds in the toilet paper roll pots.

The trick is to keep the seeds warm and moist until they sprout.

Make small holes in the bottom of the clear top container so that the seeds don’t get too wet.

All of these kitchen items can be repurposed into seed starting options. (Photo by Charlotte Ekker Wiggins)

All of these kitchen items can be repurposed into seed starting options. (Photo by Charlotte Ekker Wiggins)

There are several kitchen items you can repurpose for gardening. My biggest challenge is finding somewhere to put them as I save them before using!

Charlotte

Dead Shrub Pruning

Dead boxwood branches make for great color in dried wreaths. (Photo by Charlotte Ekker Wiggins)

Dead boxwood branches make for great color in dried wreaths. (Photo by Charlotte Ekker Wiggins)

Dead Shrub Pruning

February is my month to start pruning shrubs; that’s assuming the weather cooperates to allow me out in the garden. With below zero temperatures earlier this month, pruning trees and shrubs was not high on my priority list. The key is to trim the plants while they are still dormant.

When pruning anything, I start by removing dead branches. I don’t worry about the shape just yet. if a branch is dead it needs to be removed regardless of what shape remains. Then I can trim other branches to shape the plant, if necessary.

The easiest plants to prune are those that remain green through winter, such as boxwoods. It’s easier to see what part of the shrub is not doing well and holding its color.

ThiS is a boxwood that didn’t make the transplant but the branches add yellow to dried wreaths. (Photo by Charlotte Ekker Wiggins)

ThiS is a boxwood that didn’t make the transplant but the branches add yellow to dried wreaths. (Photo by Charlotte Ekker Wiggins)

Another shrub I prune in February are Autumn Joy Sedum perennials. Usually by this time of year only the dry flower stalks remain, a great addition to dried flower wreaths.

Various forms of spirea also have dried flower heads that can be pruned this time of year. I cut those shrubs back to encourage more compact growth so they don’t spill over into paths.

Yellow Forsythias get pruned and their cut limbs are brought inside to place in water. They force quite nicely and bloom after a couple of weeks.

If my dwarf fruit trees need pruning, those limbs get saved to put in water to force them to bloom inside. I’ve had mixed luck with that but I keep trying.

These yellow boxwood branches add a lovely touch of yellow. (Photo by Charlotte Ekker Wiggins)

These yellow boxwood branches add a lovely touch of yellow. (Photo by Charlotte Ekker Wiggins)

Once pruned, I go back through the pile and see if there is anything I can add to my dried grapevine wreaths to update the wreaths.

This past year, I almost threw out the dried yellow boxwood branches i trimmed off one of my boxwoods. They nicely added a burst of color to my dried door wreaths.

If I add something that is edible, usually wildlife will find it and remove it out of the wreaths. I don’t mind sharing, it just gives me another opportunity to try something else.

Charlotte

Feed Ground Birds Suet

These two Blue Jays found my serving of suet for ground feeding birds. (Photo by Charlotte Ekker Wiggins)

These two Blue Jays found my serving of suet for ground feeding birds. (Photo by Charlotte Ekker Wiggins)

Feed Ground Birds Suet

A robin was flying into one of my suet holders on the side of a tree earlier this week. Temperatures were record low, barely above zero, and my heart went out to the bird. i’ve hand raised robins over the years and found them to be smart and engaging birds. i wasn’t sure why this one was in my garden by himself but he definitely was hungry.

Woodpeckers at the suet feeding stations tied to my oak trees. (Photo by Charlotte Ekker Wiggins)

Woodpeckers at the suet feeding stations tied to my oak trees. (Photo by Charlotte Ekker Wiggins)

Watching birds in my garden is one of my favorite pastimes. i maintain a bird feeding station outside my living room window with two large bird feeders, a couple of bird baths and several suet feeders. i keep them stocked more in winter than any other time of the year; winter is when the birds seem to need the help the most.

As i was watching the robin, a Bluebird joined him under where the woodpeckers were helping themselves to suet. They were waiting for suet leftovers to fall to the ground but I wasn’t seeing too many. That gave me an idea.

Kitchen grater makes quick work of cutitng up suet. (Photo by Charlotte Ekker Wiggins)

Kitchen grater makes quick work of cutitng up suet. (Photo by Charlotte Ekker Wiggins)

Using a kitchen grater, i turned a suet pack into smaller pieces so the ground nesting birds could get suet. Suet helps birds keep their metabolism up in cold weather.

Since we are in for record low temperatures over the next few days, I thought they would appreciate getting more ready access to suet pieces.

If you don’t have a grater, a kitchen knife will work just as well. (Photo by Charlotte Ekker Wiggins)

If you don’t have a grater, a kitchen knife will work just as well. (Photo by Charlotte Ekker Wiggins)

if you don’t have a grater, a kitchen knife will work, too. just be careful as you shave off the suet pieces.

I tried putting a suet pack in the freezer for a few minutes; that helped make the suet shaving easier but it was harder to cut off the pieces. Now I keep the suet in the garage, which makes the suet packs hard enough to easily shave without worrying that I might lose a thumb.

Scattered suet and a little peanut butter for the ground feeding birds. (Photo by Charlotte Ekker Wiggins)

Scattered suet and a little peanut butter for the ground feeding birds. (Photo by Charlotte Ekker Wiggins)

To serve, i scattered the suet under the two suet holders tied to a tree where ground feeding birds would normally pick up on woodpecker leftovers.

It doesn’t take long for the word to get around that there are goodies on the ground.

The robin that inspired my feeding ground nesting birds now can get some. (Photo by Charlotte Ekker Wiggins)

The robin that inspired my feeding ground nesting birds now can get some. (Photo by Charlotte Ekker Wiggins)

Not only did I later see the robin getting a ground suet snack but an Eastern Bluebird pair were also helping themselves. Eastern Bluebirds start looking for nesting sites this time of year. Maybe the suet will encourage this new pair to settle somewhere in my garden.

Why birds? Birds collect caterpillars for baby bird food. By doing so, they help keep bug populations under control without my having to use chemicals.

Plus they are fun to watch!

Charlotte

Seed Saving Saves

Time to start saving common household items for seed starting. (Photo by Charlotte Ekker Wiggins)

Time to start saving common household items for seed starting. (Photo by Charlotte Ekker Wiggins)

Seed Saving Saves

Another snow storm has started where I live, making it hard to even remember what my hillside looked like when it was green and a fully deployed garden. Luckily enough, there is something we can all do to get a start on this growing season. If you haven’t started yet, it’s time to save some common household items for starting seeds.

You can certainly buy a number of seed starting products from cardboard seed cups to seed starting trays. However, we have most of what we need in our recycling pile and the items are serving a dual purpose:

  1. Toilet paper tubes, cut in half and quickly folded on one end, can be used as seed starting pots. Once the plant growing in it is ready to go outside, the whole plant and pot can be planted in the ground.

  2. Cardboard egg cartons. I like these for smaller seeds. When large enough, the carton can be cut to move the small plants to larger containers or directly planted outside.

  3. Milk cartons, cut in half, can provide early seed starts by working as tiny greenhouses. These work well for seeds that need exposure to cold to grow.

  4. Clear lettuce containers can also be used to start seeds since the lids retain warmth forming a small greenhouse.

  5. The white plastic with clear lids work well to store seeds still in their packets. I keep vegetable seeds in one, herbs in another and mark it on the outside for easy retrieval.

Are you ready to start seeds?

Charlotte

February Gardening Jobs

Time to find Hellebores, or Lenten Roses, in bloom. (Photo by Charlotte Ekker Wiggins)

Time to find Hellebores, or Lenten Roses, in bloom. (Photo by Charlotte Ekker Wiggins)

February Gardening Jobs

January is ending in continued rain with the promise of colder temperatures early February. The ground where I live still hasn’t frozen this winter so I may sneak some trees still in their pots into the garden on a dry day. Some of our big box stores have seed offerings and seed starting kits for sale, something I try to stay away from so that I’m not tempted to bring all of them home.

I live in USDA Hardiness Zone 5b-6A, inching more towards 6A based on recent past winters. I chose plants for zone 5 since the zone classification is an average of temperatures over 13 years.

The following are my February gardening chores or jobs:

  • Locate downed tree trunks and use them to border flower beds. As the tree trunks decompose, they will improve the soil.

  • Pressure is on so if you haven’t made a dent in your reading pile, get a start, spring is only 47 days away.

  •  If you haven’t ordered your favorite gardening catalogs, get them ordered. Look for catalogs with detailed plant descriptions and good photographs so you can use them for reference.  Missouri Wildflowers Catalog has lovely pictures, even old catalogs are still good references. www.mowildflowers.net. For heirloom seeds, try Baker Creek Heirloom Seeds at www.rareseeds.com, both are Missouri nurseries.

  • Review last year’s garden diary entries. If you’ve missed a few entries, add them now. Underline items you wanted to get done this year. I make a list, then decide which projects I want to tackle. I also carry over the ones I didn’t get to last year, or drop them off the master list. This is a good time to dream.

  • Focus on adding native plants. Once established, they will be low care and tend to require less water than other plants and they will feed the native pollinators. They are connected. Check out George O. White State Forest Nursery, they may still have some seedlings left. Order even if they say sold out, you may still get the seedlings if the previous person didn’t pay for their order.

  • On warm days, remember to water mums planted this past year. New mums need a gallon a month to keep their roots moist their first year. Once established, mums will become perennials and deter bugs from around where they are planted.

  • Pile mulch and leaves on garden beds if they’ve been blown off by winter winds.

  • Check inside plants for any hitchhiking bugs and remove. Make sure they are getting their sunlight needs met. If not, move them. Water with diluted fertilizer. Prune as necessary.

  • Drop your garden pruners and other garden tools off to get sharpened, this is a slow time of year and this will give you a head start on the season.

  • When feeding birds, add a little sand in the bird feeder mix. Birds need sand to help them digest seeds. Also ensure they have an available water source. Feed suet on cold days.

  • If you have fish in an outside pond, make sure it has a hole in the ice so fish will get oxygen.

Start looking for spring bulbs popping up out of the ground. (Photo by Charlotte Ekker Wiggins)

Start looking for spring bulbs popping up out of the ground. (Photo by Charlotte Ekker Wiggins)

You should start seeing spring bulbs popping up, love to see the new greenery.

Charlotte

Homemade Seed Tape

Paper towels make a good base for saving seeds to plant later. (Photo by Charlotte Ekker Wiggins)

Paper towels make a good base for saving seeds to plant later. (Charlotte Ekker Wiggins photoo)

Homemade Seed Tape

Do you remember seed tape?

It was popular a couple of decades ago and sold as an easy way to garden. The package someone gave me for Christmas back then included 1x8 foot tissue paper with seeds glued between two layers. I planted the roll but nothing grew from it that year.

But the concept stayed in the back of my mind.

Then one year when I was traveling I saved some seeds in a paper towel and a new idea was born. I can make my own version of seed tape and ensure it’s from a stock I like.

Two years ago, I started to save my favorite tomato seeds from the plants I was growing. My experiment was with cherry tomatoes, which I grow every year in pots.

Favorite tomato seeds can be pricey to make sure you know the source. (Photo by Charlotte Ekker Wiggins)

Favorite tomato seeds can be pricey to make sure you know the source. (Photo by Charlotte Ekker Wiggins)

Now it’s easy to say why bother until you start to see the prices for tomato seeds.

So how do you save the seeds?

Open the fruit you want to collect seeds from and spread them across a paper towel. Label. Allow to dry. Other fruit you can try include strawberries, green peppers and - what else would you like to try?

Don’t forget to label the seeds as they dry, then cut out the corner and store in an envelope. (Photo by Charlotte Ekker Wiggins)

Don’t forget to label the seeds as they dry, then cut out the corner and store in an envelope. (Photo by Charlotte Ekker Wiggins)

Once dry, save in paper envelopes. You can recycle envelopes by cutting them in half and taping the cut end. Remember to label the outside of envelope. Store in a dry place until it’s time to plant.

You can also do this with other seeds.

Charlotte

How to Buy Seeds Online

Buy seeds online only from known and US sources. (Photo by Charlotte Ekker Wiggins)

Buy seeds online only from known and US sources. (Photo by Charlotte Ekker Wiggins)

How to Buy Seeds Online

Did you happen to get mysterious seeds through the mail last year? Most of those packages were shipped from China, unmarked without content identification. According to the National Gardening Bureau, they became a national security risk because of the possibility that if planted, the seeds were bringing in new diseases or noxious weeds. Now those mysterious packages have been attributed to “brushing scams,” overseas companies sending inexpensive seeds so they could “claim” an address as the basis for a fake positive online product review they post.

In other words, buy seeds and plants from known and trusted online sources. If you receive unsolicited seed or plant shipments, do not plant.

When shopping online, it’s so much easier today to scam people so here are tips on how to get what you think you’re paying for:

1. Know the merchant and their reputation. Several years ago a friend toured the Seed Saver Exchange headquarters and spoke highly of them so I now know they are a reliable seed source.

2. Avoid offers that seem “too good to be true.” If they seem too good, they are.

3. Make sure the site is secure. Does the URL start with https and not just http?

4. Know or research the vendor, especially if going through a third party like Amazon. Since the flood of unsolicited seeds last year, Amazon has been removing listings for live plants and seeds that are offered and fulfilled by residents or companies outside of North America.

5. Ask around. Talk to your friends and other gardeners. What do they buy and where do they shop and why?

6. Peruse the catalog or website. Get to know that company and what they specialize in. There is a huge variety of companies and each serves an important niche.

7. Know your limits or your garden’s limits. All experienced gardeners can tell you that buying too many seeds or plants is the most common problem. Especially now when most of us are dreaming of spring and can easily overbuy.

8. Buy seed now for fall too. Don’t buy just for spring because succession sowing is important for season-long harvest and there are wonderful vegetables like cabbage and kale that are great for fall plantings.

9. Note how many seeds are in each package and plan ahead. If you can use 25 of the same tomato variety, that’s great! You can always store leftovers for next year but be aware that the germination rate will decline slightly, even if properly stored. Maybe you want to share or swap seeds with a gardening friend? National Seed Swap Day is January 30, 2021.

10.             Pay attention to growing zones and conditions. No one wants you disappointed by trying to grow something that simply won’t grow in your garden’s conditions.

11.             Try something new! Step out of your comfort zone and try at least one new seed each year…you never know, it might be your favorite!

12.             Order early if possible and be patient. Seed companies are likely to experience delays in times of high demand. Be aware of that company’s current timeline for shipping. They will be transparent. Sign up for or subscribe to that company’s communications to stay informed and up-to-date.

13.             Keep records. Keep track of what you ordered, what you planted, what worked well, what didn’t work, which tastes you preferred, etc. Next year this time, you’ll be glad you did!

Charlotte

Start Composting

One of the bowls of kitchen scraps headed to my composters. (Photo by Charlotte Ekker Wiggins)

One of the bowls of kitchen scraps headed to my composters. (Photo by Charlotte Ekker Wiggins)

Start Composting

There are many ways you can start gardening and composting is my first recommendation. Why?

Regardless of the seeds you select, the space you have and even your level of experience you need to first and foremost feed your soil. That’s right, before you do anything you need to collect kitchen scraps to feed to your soil.

Soil is actually a fascinating ecosystem full of micronutrients and creatures that live at different temperatures in soil. Did you know there are more living entities in a tablespoon of soil than humans currently living on earth? And all of those micro creatures work together to provide the environment for our plants to grow and generate food for us to eat.

The good news is you have everything you need to compost already.

Plastic bag in a freezer drawer is a good way to start composting. (Photo by Charlotte Ekker Wiggins)

Plastic bag in a freezer drawer is a good way to start composting. (Photo by Charlotte Ekker Wiggins)

  1. Open your freezer. Do you have a movable basket that pulls out? Great, that’s your composting bin.

  2. Do you have plastic bags from shopping? Cover your bin with one and now you have your kitchen scrap collecting bag.

  3. Once you finish cooking and meals, put your kitchen scraps in the plastic bag. Once it’s full, it’s time to take it outside. At first you can just dig a hole and empty the frozen kitchen scraps into the hole in a garden bed. Space the holes about 4 feet apart and water in. I used to place a rock or brick over the spot to keep wildlife shoppers from digging it up.

  4. As you get into the habit of collecting kitchen scraps, you can graduate to either making a composter out of a plastic container or buy one, adding leaves and grass to your kitchen scraps to generate organic matter. Once it turns to a crumbly black, you can then scatter it on your garden. That organic mixture will feed your soil and make it ready for a new growing season.

IMG_7471.JPG

And think of all of the cost and space you will save in your garbage by recycling kitchen scraps!

Charlotte

Saving Pumpkin Seeds

These are baking pumpkin seeds drying on hardware cloth. (Photo by Charlotte Ekker Wiggins)

These are baking pumpkin seeds drying on hardware cloth. (Photo by Charlotte Ekker Wiggins)

Saving Pumpkin ‘Seeds

If you toss pumpkins after Halloween, think again. With very little effort, you can harvest seeds and have not only something to share at Christmas but a source for growing more pumpkins next year. And you know what you are getting, not wondering if the seeds have been treated with anything.

There are a number of cute drying racks on the market, i have a small one myself that was a gift and I use it to dry herbs for my homemade teas. The good news is that we all have things around our house, and apiary, that we can repurpose without having to buy anything.

For example, I have screened inner covers i use in my bee hives in summer to help give the hive ventilation. Those are pulled off in the fall so I repurpose them as seed drying racks.

This beehive screened inner cover does double duty as a drying rack. (photo by Charlotte Ekker Wiggins)

This beehive screened inner cover does double duty as a drying rack. (photo by Charlotte Ekker Wiggins)

In this photo I have a paper towel-lined cardboard box on the bottom with Jack O Lantern pumpkin seeds topped by a screened inner cover with baking pumpkin seeds drying.

You can also use old window screens or anything that has a screen that allows air to circulate.

Paper towels and newspapers work well to absorb moisture. Remember to label. (Photo by Charlotte Ekker Wiggins)

Paper towels and newspapers work well to absorb moisture. Remember to label. (Photo by Charlotte Ekker Wiggins)

How to Save Pumpkin Seeds

Remove the pumpkin seeds. You can wash them but I don’t, I remove as much of the pulp as i can and then spread the seeds on paper towels or newspaper. The pulp is mainly moisture so it quickly dries up.

Remember to label the seeds if you have two or more varieties, I use a marker on the corner of the paper towel or newspaper.

These are pumpkin seeds from a white pumpkin drying on newspaper. (Photo by Charlotte Ekker Wiggins)

These are pumpkin seeds from a white pumpkin drying on newspaper. (Photo by Charlotte Ekker Wiggins)

These are seeds from a white pumpkin freshly harvested and drying on a sheet of newspaper in a cardboard box. I’m going to guess in our current cold weather it could take these seeds a couple of weeks to dry.

The critical part of the process is to make sure air can get to them.

If you have a warmer spot where they can sit that can also help speed up the drying process.

Save paper envelopes to repurpose for storing dried seeds,. (Photo by Charlotte Ekker Wiggins)

Save paper envelopes to repurpose for storing dried seeds,. (Photo by Charlotte Ekker Wiggins)

Once dried, I save them in repurposed envelopes. Paper is better than plastic to discourage moisture. And once again, remember to label the envelopes.

The paper envelopes also fit nicely in my little seed saving plastic tote.

Cardboard boxes also make good seed drying containers. (Photo by Charlotte Ekker Wiggins)

Cardboard boxes also make good seed drying containers. (Photo by Charlotte Ekker Wiggins)

This is how a tower of drying seeds looks like. Not pretty but very practical and effective and most of the items are repurposed.

Can you leave your pumpkins outside for awhile before you harvest? You can if your weather is not going to go below freezing for any length of time. And remember that wildlife such as squirrels are not going to wait for you to help yourself first to the pumpkin seeds.

Squirrels made holes in pumpkins to remove the seeds. (Photo by Charlotte Ekker Wiggins)

Squirrels made holes in pumpkins to remove the seeds. (Photo by Charlotte Ekker Wiggins)

Once dry, you can then share seeds with family and friends. I sent baking pumpkin seeds to friends in my 2020 Christmas cards, the directions said only 120 days to pumpkin pie!

Charlotte

January Gardening Chores

Snow covers ice on my mid-Missouri limestone hillside garden. (Photo by Charlotte Ekker Wiggins)

Snow covers ice on my mid-Missouri limestone hillside garden. (Photo by Charlotte Ekker Wiggins)

January Gardening Chores

January used to be the month when a gardener could sit back and do some of the most important work: planning. We’ve had record high temperatures in USDA Hardiness Zone 5, turning growing conditions into early spring rather than winter. I had forsythia and vinca blooming right before this New Year’s 2021 ice and snow storm, the first time since I started keeping a garden diary in 1982.

According to US Department of Agriculture, the Hardiness Zones are based on the average annual minimum winter temperature divided into 10-degree F zones, which give a range of temperatures for a certain plant or tree. The hardiness zones for the Midwest fluctuate more than other zones but average Zones 4,5 and 6. The zones for Missouri can be found here.

These zones are averaged over 13 years and adjusted accordingly. There may be major adjustments in a couple of years due to our rapidly changing climate. Predictions for the Midwest have included longer springs and falls, shorter winters and summers; and higher summer temperatures. These changes are occurring very fast, challenging nature to adjust.

The following are some of my January gardening tips and chores:

1.         Review your garden diary from last year. Underline items you want to get done this year. I also carry over the ones I didn’t get to last year, or drop them off the master list. This is a good time to dream.

2.         Identify what plants you want to add this year and note what soil and sun requirements they will need. Focus on adding native plants. Once established, native plants will be low care and excel in local soil and weather conditions.

3.         Plan on expanding flowerbeds to start removing grass from your property. Expanding flowerbeds will give you areas to plant vegetables as well as flowers and provide more food for pollinators. One way to start expanding flowerbeds is to place cardboard along the existing flowerbed edge and then move the flower bed border early spring. Mulch on the cardboard will keep the garden looking nice and help restore healthy soil conditions.

 4.        Order catalogs you have used in the past and share catalogs you don’t need or use. One of my favorites is the Missouri Wildflowers Nursery Native Plants catalog, it has lovely pictures with a quick guide on what growing conditions native plants require and they offer great plant starts.

5.         Order locally-adapted seed catalogs. Baker Creek Heirloom Seeds is a favorite seed catalog from Mansfield, Missouri.

7.         Read. Whether it’s 2 Million Blossoms, a new quarterly focused on pollinators, to new gardening books, catch up on what you couldn’t get to last year.

8.         Remove broken limbs in pathways to keep walkways clear and safe.

9.         On warm days, pile mulch and leaves on garden beds if they’ve been blown off by winter winds. Mulch will help keep the soil temperature even and reduce the thawing and heaving that causes plant damage.

10.       Check inside plants for any hitchhiking bugs and remove. Make sure they are getting their sunlight needs met. If not, move them. Water with diluted fertilizer. Prune as necessary, I use metal sewing thread snips. The thread snips make it easy to trim plants and keep them bushy.

12.       Drop your garden pruners and other garden tools to get sharpened. Home and garden centers with service departments can usually sharpen tools.

13.  Start scouting where you can install rain barrels and totes to collect rain water off your gutter system. Observe what happens to rain and photograph so you can refer to the rain pattern later.

14. Water newly-planted chrysanthemums so they can get their roots established.

15. Enjoy the calm and peace of winter, Even gardeners need time to rejuvenate.

Charlotte

Soil Testing

The wonderful world of soils and all of the microorganisms that live in it. (Photo by Charlotte Ekker Wiggins)

The wonderful world of soils and all of the microorganisms that live in it. (Photo by Charlotte Ekker Wiggins)

Soil Testing

As spring fever hits, this is the perfect time to get soil tested. Of all of the things we can do to make our gardens better, getting soil tested is by far the most important step to take.

A test will help assess the current state of soil and make recommendations of how to improve it for what you want to plant.

I did my first soil test through the University of Missouri Extension a couple of decades ago and repeat it every 2-3 years. Working a Missouri limestone hillside into a garden, it’s helpful to monitor how the soil amendments I have added change the soil composition.

Soil is assessed on a scale of 1-14. A middle seven is neutral. The chart extremes are sweet, higher than 7+ and bitter, lower than 7.

To successfully grow most plants, you want a good solid seven. On either end, blueberries and hydrangeas prefer a little more acid growing conditions; butterfly bushes and lilacs prefer sweeter soil.

How to Collect Soil

Using a freezer bag, collect 1 1/2 cups of soil from 6-8 spots around the garden from about 6 inches deep - if you can dig that deep.

Seal it up and take it to your local University of Missouri Extension office with $15. You will need to tell them what kind of plants you want to raise to get the most out of your soil test results.

Within a couple of weeks, the soil test report will be emailed to you with the results and recommendations, as appropriate.

The following are a couple of soil test examples, starting with a home garden.

Example Home Garden Soil Test

This home garden soil test shows recommendations at bottom. (Photo by Charlotte Ekker Wiggins)

This home garden soil test shows recommendations at bottom. (Photo by Charlotte Ekker Wiggins)

The soil test results are a little different for a field soil test.

Example Field Soil Test

A field test soil example covers more elements. (Photo by Charlotte Ekker Wiggins)

A field test soil example covers more elements. (Photo by Charlotte Ekker Wiggins)


My One Acre Limestone Hillside Soil Test April 2019

Over the years, friends have asked how I grow what I grow on a limestone hillside garden, where my first neighbors said “nothing would grow.” For 35 years i have concentrated on adding organic matter to existing soil and being kind to the soil I do have.

My limestone hillside garden soil test from April 2019. (Photo by Charlotte Ekker Wiggins)

My limestone hillside garden soil test from April 2019. (Photo by Charlotte Ekker Wiggins)

How to Improve Soil

At first blush, my Missouri limestone hillside garden should be acidic because I let the oak leaves fall on garden beds and only rake those that get in my way. Leaves, by the way, are excellent mulch and provide winter cover for a number of beneficial insects.

To improve my soil - well, actually to create soil - I added wood chips from our local recycling center along with compost. In addition, shredded leaves with grass clippings were also incorporated. These were added after the wood chips and shredded leaves had sat for a few months.

And to naturally enrich the soil, I have wildlife branch piles that have encouraged rabbits, which add to enriching the soil. And they’re big. I snuck out into my apiary at 4 a.m. to close up a hive a couple of weeks ago and was astounded at the wildlife moving around, including one very large rabbit.

Maybe it was because I was standing down hill and the rabbit was uphill but that was one big “bun bun.”

Regardless of your soil test results, the best way to improve soil is to compost. Compost helps to feed the microorganisms in soil that keep plants healthy. You can start by composting kitchen scraps and gradually move to composters and composting bins. It really is the best thing you can do for your soil and plants!

Charlotte

Garden Terrace Wall

Finished garden terrace wall corner facing the house. (Photo by Charlotte Ekker Wiggins)

Finished garden terrace wall corner facing the house. (Photo by Charlotte Ekker Wiggins)

Garden Terrace Wall

My southern garden now has a garden terrace wall that will provide an easier planting area, connect this space to the rest of my garden making it more easily accessible and holding in soil. When one gardens on a limestone hillside, keeping soil in one place is a huge consideration.

This garden terrace wall has another benefit. It is repurposing wood from a house deck we had to tear down a couple of years ago. Because it would take too much time to separate the adjoining boards, my handyman suggested we use them as is for the garden wall.

The garden terrace is longer and deeper away from the house. It basically expands an existing garden bed in a relatively flat space. Oh joy!

The right side of the garden terrace wall away from the house. (Photo by Charlotte Ekker Wiggins)

The right side of the garden terrace wall away from the house. (Photo by Charlotte Ekker Wiggins)

The new garden terrace wall also makes use of rotted cedar posts on the most southern wall, which i will paint to treat the wood.

Inside the wall I am adding tree trunks and limbs to establish a wood base that will retain water. Once the bottom is full of wood, top soil will go in finished by wood chip mulch.

Garden terrace wall corner farthest away from the house. (Photo by Charlotte Ekker Wiggins)

Garden terrace wall corner farthest away from the house. (Photo by Charlotte Ekker Wiggins)

Here is the long view of the garden terrace wall where the tree trunks are going in. Old tree trunks, visible to the left, have worked well maintaining moisture in the old flower bed to the left.

I am filling the terrace wall with tree trunks to absorb water. (Photo by Charlotte Ekker Wiggins)

I am filling the terrace wall with tree trunks to absorb water. (Photo by Charlotte Ekker Wiggins)

We also repurposed an old set of stairs, now connecting the garden paths through my garden at the bottom of the terrace wall.

Don’t worry about the bee hives and leaving concrete blocks on the left, all will be settled back into their spaces once we have the tree trunks in the terrace wall.

Steps now greet me at the bottom of the long garden path. (Photo by Charlotte Ekker Wiggins)

Steps now greet me at the bottom of the long garden path. (Photo by Charlotte Ekker Wiggins)

This has also opened up this new garden area for not only planting but just enjoying the space. I can easily now sit on the edge to work the soil and watch the bees.

Charlotte