Best Gardener Gift Idea

This is one of our custom gardener gift sets, ready to ship for Valentine's Day.

This is one of our custom gardener gift sets, ready to ship for Valentine's Day.

Best Gardener Gift Ideas

Periodically friends will ask what is a good gardener gift idea and I have several to recommend.

Most gardeners don't have enough good gloves. If they do, they are worn by now, or held on to in spite of the frayed edges, because they have some sentimental value. The best gardening gloves have reinforced fingers but still breath through cotton. I also like the longer cuffs to cover my arms when I'm wrestling shrubs and especially rose bushes.

I've packaged a pair of my favorite gardening gloves in this custom gardener gift set to make gift giving easier. 

Sneak peek at what's inside this custom gardener gift kit, the book has a charming book mark.

Sneak peek at what's inside this custom gardener gift kit, the book has a charming book mark.

Isn't this adorable? Cute bookmark is attached to the book so you don't misplace it.

Isn't this adorable? Cute bookmark is attached to the book so you don't misplace it.

In addition to the wonderful leather gloves, this custom gardener gift set includes a beautiful book with fun recipes; four fabric coasters; thread snips that can be used in the garden to dead head flowers; some wildflower seeds and our long-lasting, handmade gardener soap.

There are also three Bluebird Gardens honey samplers but I was going to leave that as a surprise.

Sorry, it's no longer avaiable, I sent it to a colleague as a thank you gift.

Charlotte

Miniature Rose Starts Blooming!

I just added a new buddy to Hazel's pot, an onion start to keep bugs away.

I just added a new buddy to Hazel's pot, an onion start to keep bugs away.

Miniature Rose Starts Blooming

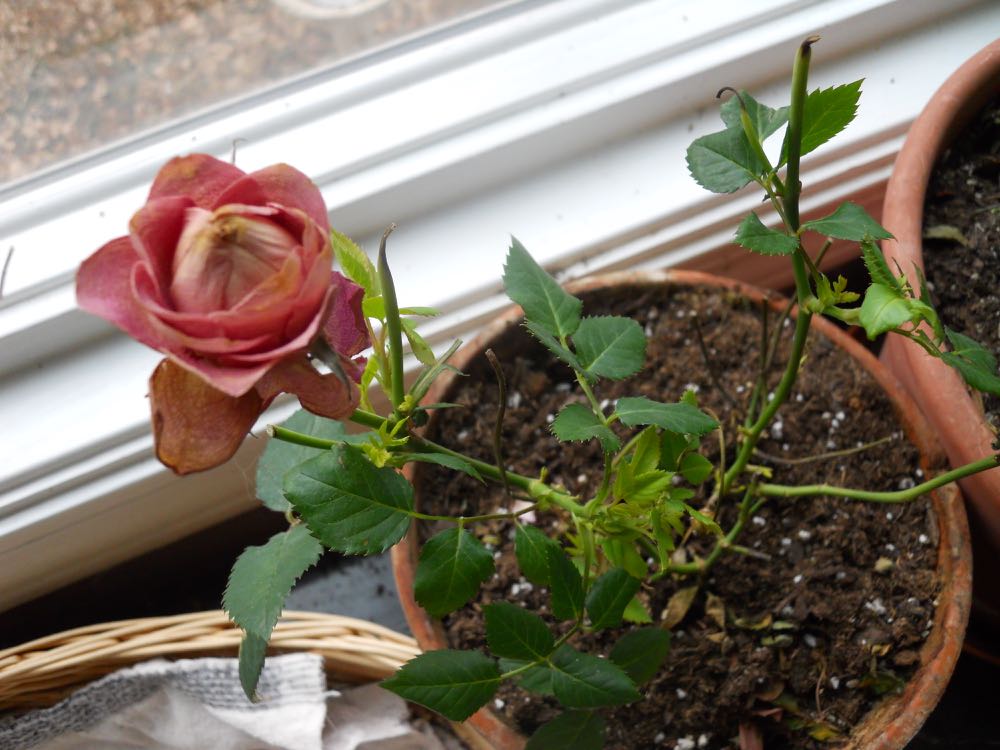
Isn't that little rose just peachy? Such a welcome sight after watching a heavy blanket of snow covering my mid-Missouri garden earlier. It was sunny and 81F two days ago, now back to winter, yet another reason why I surround myself with indoor greenery, I have at least one place where I can rely on seeing green every day through winter.

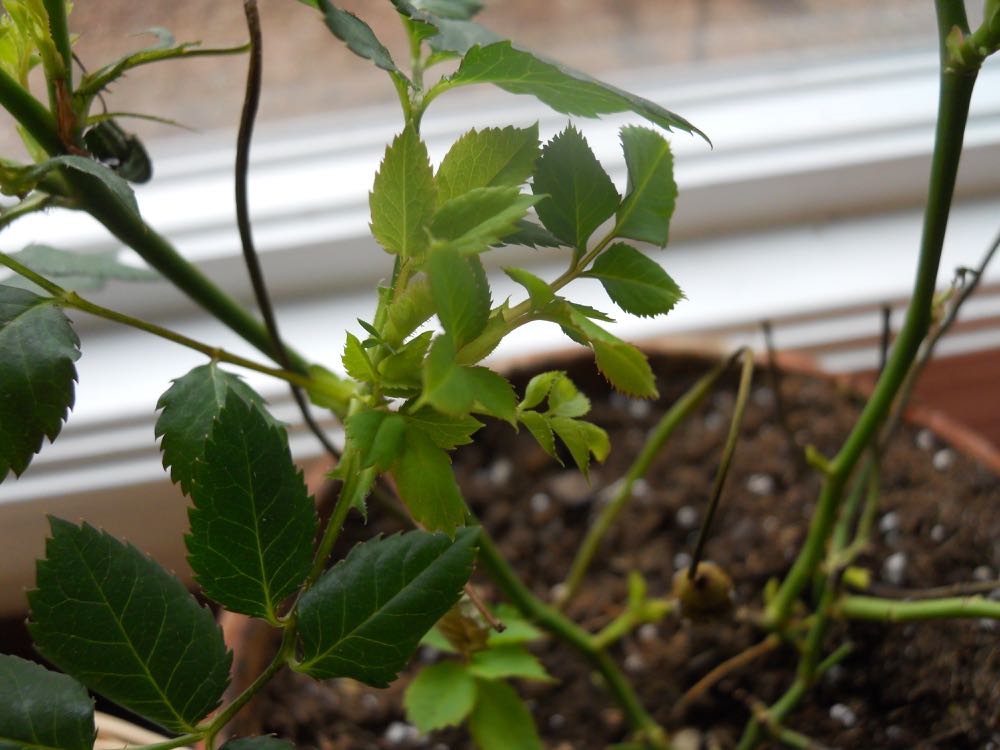
So for those of you eyeing those marked down after a holiday miniature roses, go back and take another look. Hazel, this now blooming miniature rose was the last one at a local grocery store marked down to $2.49 after Christmas. She was wrapped up in that shiny gift paper in a small 4" pot, the flower buds dried up or about to die, with only one bud possibly still growing, here are the little plants once I watered them and settled them in the window while I looked for a larger pot:

This is Hazel on December 29, 2017 right after I brought her home from a local grocery store sale.

This is Hazel on December 29, 2017 right after I brought her home from a local grocery store sale.

Friends tell me they have little luck growing roses but I find them to be easy to grow, especially miniature roses. The miniature varieties are actually shrub roses, which means they are hardier stock, bloom longer and can more easily adapt to a variety of soils. 

I don't recommend growing miniature roses inside unless you have room for large soil containers because they need to pull a lot of soil nutrients but you can certainly pick up a few on sale now and grow them inside until the danger of frost is over in May, then condition them to grow permanently outside.

Once I had Hazel watered, I found a pot larger than the one she was in, added some broken flower pot shards in the bottom, new potting soil and my concoction of dried coffee grounds, banana peels, epsom salts and crushed eggs shells, then more potting soil and the roses. More potting soil, tapped gently, then sprayed water with a spray bottle until wet so I don't over water.

Back to the window to be turned towards the sun and checked daily. The plant is in a window facing southwest next to Miriam, the cherry tomato also growing and producing delicious cherry tomatoes midwinter inside.

I watch the color of the leaves to make sure they don't start turning light green, that means the plant needs more nitrogen. Getting new potting soil with added composting materials should prevent that from happening but I still monitor, just in case.

Success is seeing the first signs of flower buds and here they were, a little less than 2 months after I brought the plant home.

This was the first bud that became the rose you saw on top, and there is a second one forming.

This was the first bud that became the rose you saw on top, and there is a second one forming.

So growing roses is not hard, or expensive, you just have to pick the right variety and time when you buy them.

Charlotte

Miriam Tomato Fruit

My inside tomato plant is not only growing fruit but the fruit is ripening enough to pick.

My inside tomato plant is not only growing fruit but the fruit is ripening enough to pick.

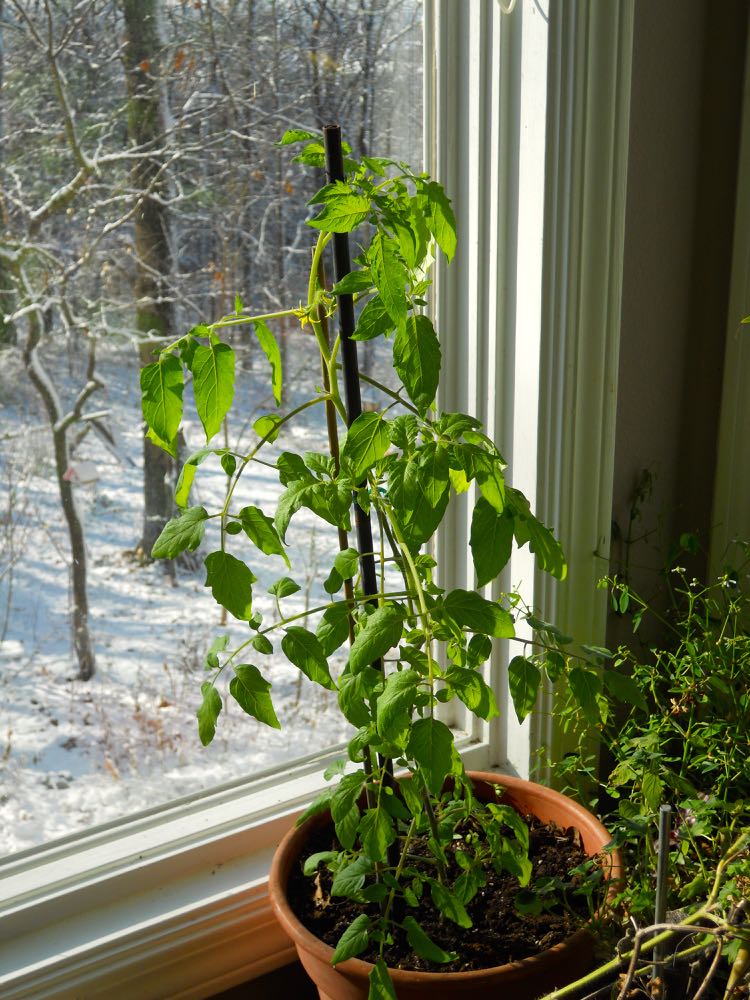
Miriam the mysterious tomato plant has two ripe cherry-size tomatoes ready to pick.

Miriam the mysterious tomato plant has two ripe cherry-size tomatoes ready to pick.

Miriam Tomato Fruit

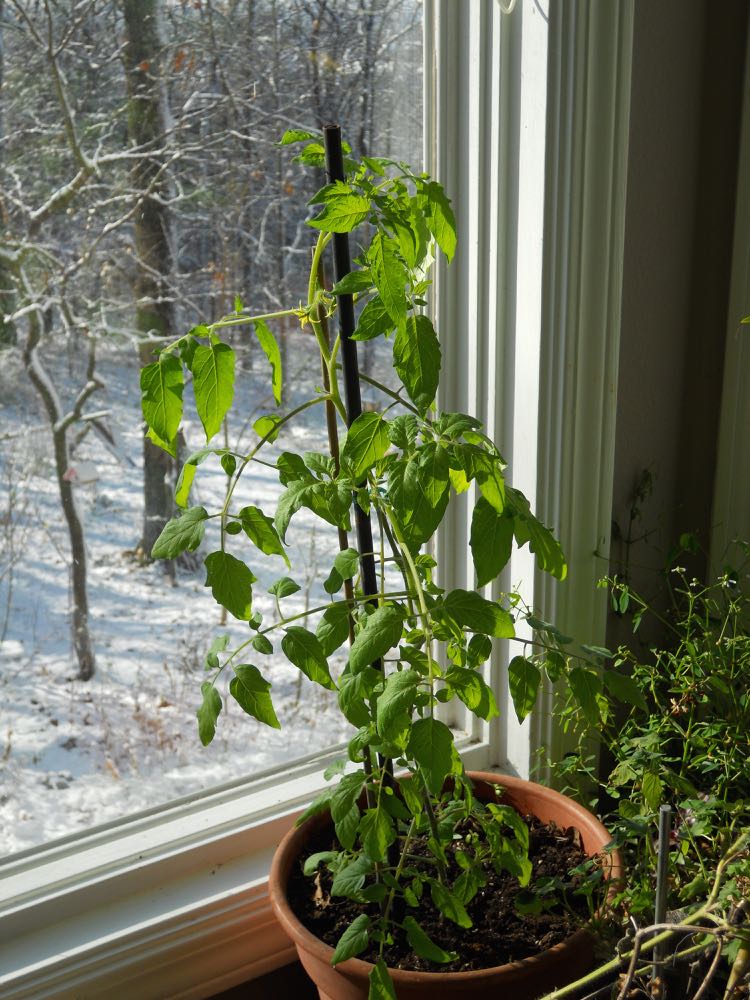
Miriam my tomato plant continues to grow, spending this Missouri winter in one of my sunny bay windows with Hazel the miniature rose I picked up on sale right after Christmas getting ready to bloom.

I have been wintering over one tomato plant for years, a wonderful way to have fresh tomatoes without having to resort to buying tasteless ones or having to invest in huge greenhouses, hoop houses or other large gardening contraptions that quickly get abandoned because they can't be maintained.

This was a mysterious tomato start from a friend's garden I found growing outside last fall in one of my flower beds. I usually plan to have a tomato plant to bring in for winter but I was running behind last year until I saw a little 3-inch seedling among hyssop starts. So far I have determined this is a cherry tomato plant of some sort, and that I guessed well on what growing conditions it needed so far. I've had to stake the plant twice so far and by the looks of it, may have to stake it yet again, the plant is now a good 4-feet tall.

Three days ago, I added some worm castings to the tomato plant soil to enrich the soil and add nitrogen. Tomato plants are heavy feeders meaning they can quickly deplete the soil of nutrients. With a plant growing in a small container, that is especially true so it's important to keep the soil enriched with compost and other natural amendments. 

Why did I add the worm castings? The tomato plant leaves were starting to look a little more  yellow green for my taste so I didn't think it would hurt to give the soil a little healthy boost.

Besides making sure the plant is watered every day , there has been little additional care required. Well, except for now, I need to pick those two lovely cherry red tomatoes and give them a taste.

Here's a closer look of the two ripe cherry-size tomatoes that have ripened in my window.

Here's a closer look of the two ripe cherry-size tomatoes that have ripened in my window.

They didn't even make it to the kitchen, ate them right there in the window.

What do you think, winter grown tomatoes don't have any taste?

Wrong, they were absolutely delicious, warm right off the vine and perfectly ripe. Can't wait for the next ones!

Charlotte

February Gardening Chores

February is a good time to check your seed stash for viable seeds you can still use this year.

February is a good time to check your seed stash for viable seeds you can still use this year.

February Gardening Chores

Pressure is on so if you haven’t made a dent in your reading pile, get a start, spring is only two months away. Most of mid-Missouri is in USDA Hardiness Zone 5b which, with climate changing, means spring will start earlier than in the past and along with fall, last longer.

1.         If you haven’t ordered your favorite gardening catalogs, get them ordered. Look for catalogs with detailed plant descriptions and good photographs so you can use them for reference.  Missouri Wildflowers Catalog has lovely pictures, even old catalogs are still good references. www.mowildflowers.net. For heirloom seeds, try Baker Creek Heirloom Seeds at www.rareseeds.com, both are Missouri nurseries.

2.         Now for a great Native Plant Guide, you can download the Prairie Moon Catalog online. This guide out of Winona, Minnesota offers North American Native seeds and plants along with a guide on how to get wildflower seeds to grow, how to plant bare root plants, seed combinations and a plant/insect interaction guide so you know what plants attract what pollinators.

3.         Review last year’s garden diary entries. If you’ve missed a few entries, add them now. Underline items you wanted to get done this year. I make a list, then decide which projects I want to tackle. I also carry over the ones I didn’t get to last year, or drop them off the master list. This is a good time to dream.

4.         Focus on adding native plants. Once established, they will be low care and tend to require less water than other plants and they will feed the native pollinators. They are connected.

5.         Read. Whether it’s Missouri Gardener Magazine, which provides good local gardening information and gardening books, catch up on what you couldn’t get to last year. I keep a pile of gardening books from our local library’s semi-annual book sale just for snowy, cold winter days.

Prairie Moon Nursery's Native Plant Guide has a nice how to for planting wildflowers.

Prairie Moon Nursery's Native Plant Guide has a nice how to for planting wildflowers.

6.         On warm days, remember to water mums planted this past year. New mums need a gallon a month to keep their roots moist their first year. Once established, mums will become perennials and deter bugs from around where they are planted.

7.         Remove any broken limbs in pathways to keep walkways clear and safe.

8.         Pile mulch and leaves on garden beds if they’ve been blown off by winter winds.

9.         Check inside plants for any hitchhiking bugs and remove. Make sure they are getting their sunlight needs met. If not, move them. Water with diluted fertilizer. Prune as necessary.

10.       Drop your garden pruners and other garden tools off to get sharpened, this is a slow time of year and this will give you a head start on the season.

11.       When feeding birds, add a little sand in the birdfeeder mix. Birds need sand to help them digest seeds. Also ensure they have an available water source. Feed suet on cold days.

12.       If you have fish in an outside pond, make sure it has a hole in the ice so fish will get oxygen.

What else would you add to this list?

Charlotte


Miriam Tomato Plant Update

This is Miriam, the mysterious tomato plant when I started to feature her in my gardening column.

This is Miriam, the mysterious tomato plant when I started to feature her in my gardening column.

Miriam Tomato Plant Update

Let's see, it's been three months since Miriam the tomato seedling was potted and brought inside. I call her the mystery tomato because I don't know what kind of tomato she is, and her original owner Tom can't remember, either. Now you know and we will all be surprised once the tomatoes ripen.

Most people have told me they assume they can't grow tomatoes inside in a pot, tomatoes can only grow on a farm. Or outside in a garden plot.

Contrary to popular belief, tomatoes can be grown in a pot indoors. And yes, Miriam has baby tomatoes and appears to be growing even more. Since I mentioned growing, Miriam is also now almost 3-feet tall so I had to stake her with longer rods to keep her stems from falling over.

Miriam Tomato spends her winter days keeping Razel Rose company in one of my bay windows.

Miriam Tomato spends her winter days keeping Razel Rose company in one of my bay windows.

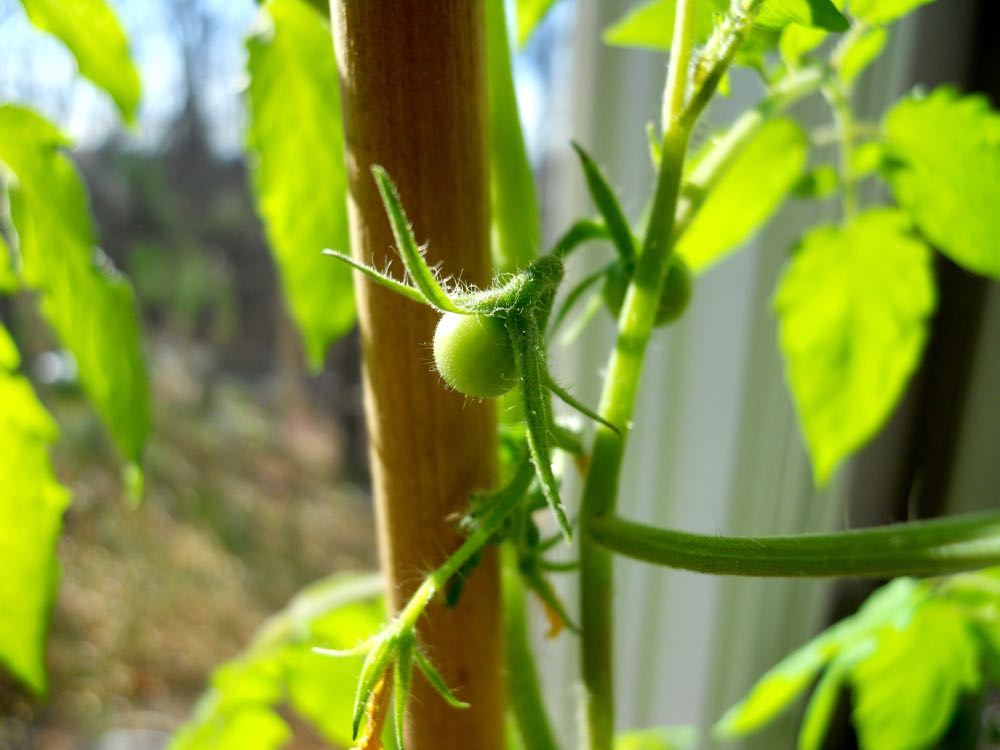
When I first spotted fruit, there were three. Now there are more than five, in part due to my hand pollinating the delicate yellow flowers with a Q-tip.

Miriam Tomato has officially set fruit and should be having ripened tomatoes in a few weeks.

Miriam Tomato has officially set fruit and should be having ripened tomatoes in a few weeks.

Outside in a garden, tomato plants would be pollinated by bees moving pollen from one flower to the next. Since I don't have bees inside over winter, Miriam needed a little help to set fruit.

As long as we have sun every once in awhile this winter, the fruit will turn color. If not, I can either pick them and use them green, or place them inside a brown paper bag and add an apple to accelerate the ripening process.

Miriam Tomato also has new flowers branching off the stems, more tomatoes in the works!

Miriam Tomato also has new flowers branching off the stems, more tomatoes in the works!

Assuming nothing untoward happens to Miriam, such as a cat knocking her over, she will go outside after the danger of the last frost of the season, around May. I may re-pot her then into a larger pot with compost to keep her happy but so far, she seems to be doing quite well.

Have you tried to grow a tomato inside over winter?

Charlotte

Miniature Rose Plant Update

This is Hazel, my miniature peach rose right after I brought her home, the last rose at the store.

This is Hazel, my miniature peach rose right after I brought her home, the last rose at the store.

Miniature Rose Plant Update

Right after Christmas, I picked up this peach-colored miniature rose for $2.49 at a local grocery store floral section. It was the last one remaining from a group of miniature roses that had included red and white "peppermint" ones; solid red ones, a few white ones and a couple of the peach-colored ones.

Miniature roses like this are actually tiny repeat-blooming shrub roses, hardier than hybrid tea roses and the easiest roses for me to grow. I have a number of them scattered throughout my USDA Hardiness zone 5b one-acre hillside garden planted among other perennials. Last year, I also started a miniature rose border with several different-colored tiny shrubs. Purchased on sale, of course, part of the fun is the plant treasure hunting!

When I saw this lone plant on sale, I couldn't pass it up. We were heading into record cold weather and having something in bloom, even something tiny, cheers me up any time of the year but in winter. Well, it's a must. You should see my living and dining room, it's a veritable jungle.

Even though I have heard some people say they can't grow miniature roses inside over winter, I have had very good luck pulling miniature roses through the cold months. The trick is to give the plant cut up banana peels and crushed egg shells in the bottom of the new, larger pot in new potting soil, and to not overwater.

So here's Hazel about a month after I brought her home. I finally cut off the peach rose bud before I took this picture so she can focus her energy in growing new leaves.

This is Hazel about a month later, sprouting new growth next to her friend, Miriam, a tomato plant.

This is Hazel about a month later, sprouting new growth next to her friend, Miriam, a tomato plant.

I check her every morning for bugs, just in case something has found her tender leaves to munch on. Although I try to not have plant bugs - the white mealy bugs are the worst, second only to scale - I keep a close eye to jump on anything that may be getting a start.

If she were growing outside, I would add onion sets around her to keep bugs away and add a basil or two for good measure. Inside my house, she's going to have to depend on my good eyesight and soapy water if she gets unwanted visitors.

Charlotte

Harriet's Orchid

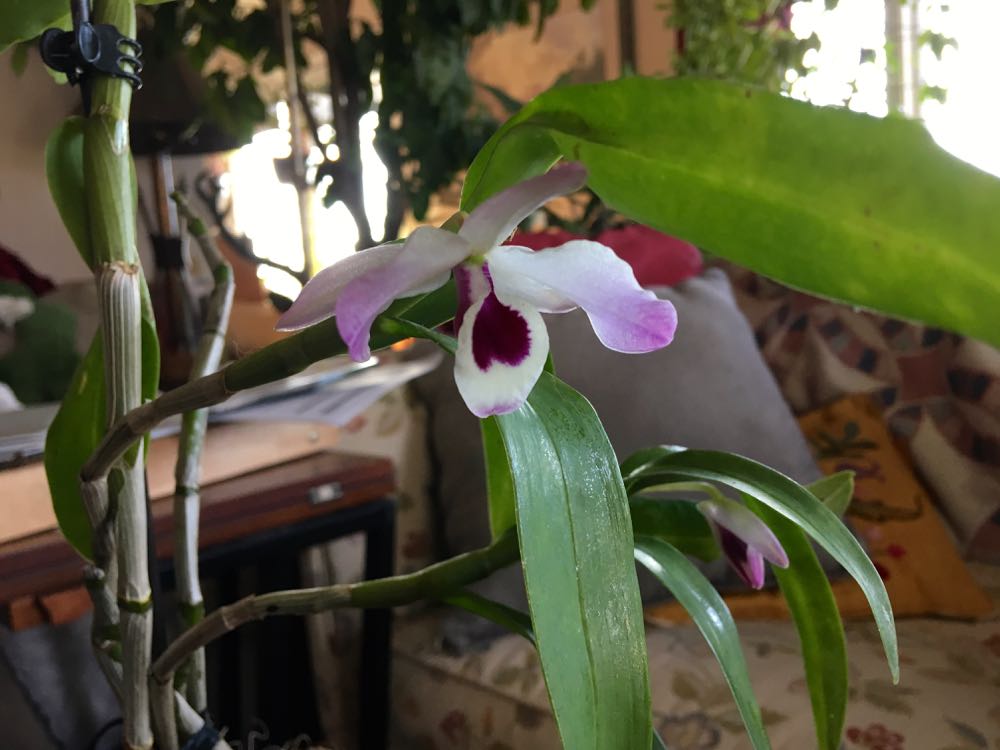
This orchid from Burma is from my master gardener friend Harriet Bain, love the delicate flower!

This orchid from Burma is from my master gardener friend Harriet Bain, love the delicate flower!

Harriet's Orchid

In the middle of life's challenges, fresh flowers have always boosted my spirits. When those flowers are still on the plant, even better!

Last fall, a master gardener friend offered some of her orchids for sale as a fundraiser for our local chapter. Sight unseen, I put in my bid. Harriet is a wonderful gardener and if she had orchids, I knew it would be fun to have a start.

We waited until the last possible day for the hand-off, the day before our first winter storm was moving in. Besides two Australian orchids in large pots, she handed me one orchid in a small 4-inch clay pot. It's a dendrobium, she said, from Burma, her home country.

Once home, I tucked the orchids in my basement away from direct light. They were in the same southwest window as other re-blooming orchids so I left them there as I tried to identify if Burma had a signature orchid. When I looked up the orchids from Burma, I was delighted with the variety and possibilities, there really is something amazing about flowers that feel like a soft plastic but look so delicate.

No point in trying to guess what kind of flowers would be blooming so I settled for being pleasantly surprised. No, I wasn't going to ask Harriet, that would spoil the surprise!

Orchid Flowers from Burma

As I was watering my orchids this morning, Harriet's orchid caught my attention. Actually a flower had appeared, and then I saw a second bud. Dendrobium nobile Is "one of the most beautiful epiphyte or lithophytes dendrobium species found from the Chinese Himalayas, Assam, eastern Himalayas, Nepal, Bhutan, Myanmar, Thailand, Laos and Vietnam that is found in tropical evergreen forest and primary mountain forest at an elevations of 200 to 2000 meters," according to Bhaskar Bora. Bora notes in his biography that he is an Indian businessman who likes to collect orchids as a hobby. 

I do as well. I have a little collection of phalaenopsis or moth orchids I have adopted over the years. One of the easiest orchids to grow, moth orchids are also a popular gift flower. I buy them after they have finished blooming and give them some "tender loving care" until they're ready to bloom again. It can take almost a year to get them blooming again so it is a labor of love. There is a wonderful feeling of accomplishment when I see the new growth and know I helped coax it into flowering again.

I was so excited about seeing Harriet's orchid bloom, I bought it a little special container to set it in and moved it to my den coffee table so I could enjoy it when I was sitting nearby.

Harriet's Orchid has two flowers, one in bloom and one in bud. I celebrated by buying a container.

Harriet's Orchid has two flowers, one in bloom and one in bud. I celebrated by buying a container.

Tip for Growing Orchids

Clay pots are fine. Actually clay pots are preferred for orchids because they wick away extra moisture that can easily rot roots. When we grew up in Brazil, I remember cattleya orchids that covered our backyard trees. My father watered them with a hose to get them hydrated but not too wet. The water easily fell off the large orchids clinging to tree bark.

Taking those memories, and experience, as a clue, I carefully checked the orchid roots every week and made sure I wasn't over-watering. When temperatures hit record lows a few weeks back, I moved the orchids up to my dining room. That was helpful when I lost heat for a couple of days, not sure they would have survived sitting on cold basement concrete.

Most orchids like indirect light, much as African violets and Chocolate Soldiers do. Besides periodically checking for bugs, that's all that you need to do with orchids. I do add a pinch of fertilizer to rain water once a month, and keep them away from heat and drafts. Short of that, there is little more than one needs to do.

Considering what we had just been through without heat, and it still flowered, I decided to get the orchid a decorative container. This little metal florist vase caught my eye for a simple whimsical reason, it has feet. 

Love the feet on this recycled container from a local thrift shop for $2 for Harriet's Orchid.

Love the feet on this recycled container from a local thrift shop for $2 for Harriet's Orchid.

I picked the previously-owned container for $2 at our local thrift shop called The Community Partnership Resale Shop. The sale of donated items funds a non-profit that helps families with special need children so I shop there first when I'm looking for unusual pieces. My rule is I have to take a box to donate before I can bring a new box home but I waived that rule for this special occasion.

It didn't take me long to find this flower container, it was sitting on a corner of the store shelves as if it was waiting for me. I think Harriet would approve, don't you?

Charlotte

Online Master Gardener Classes

Master gardener training provides basic concepts for gardening inside and outside.

Master gardener training provides basic concepts for gardening inside and outside.

Online Master Gardener training class begins

COLUMBIA, Mo. – A new session of online core training to become a certified Master Gardener begins January 22, 2018.

“The motto of the Master Gardener program is ‘Helping others learn to grow,’” said David Trinklein, state horticulture specialist for University of Missouri Extension.

The popularity of the online classes has grown steadily since University of Missouri (MU) Extension began offering them in 2013. In the past, some people had to travel many miles to attend Master Gardener classes.

“These classes represent a viable option for people who can’t take the weekly classes in person,” Trinklein said.

Trinklein and MU Extension regional horticulture specialist Sarah Denkler teach the 14 online sessions. Classes are delivered as a series of scripted and narrated PowerPoint presentations. To pass the course, participants need a composite score of 70 percent on chapter quizzes.

Subjects include basic botany, soils and plant nutrition, vegetable gardening, fruit production, insects and diseases, landscaping and landscape plants, turf management, and pesticide safety.

Core training is the first step toward Master Gardener certification. Trainees must also complete a minimum of 30 hours of volunteer service, Trinklein said. Local Master Gardener chapters help online trainees find volunteer opportunities to meet the service hour requirements.

“There are Master Gardener programs in every state of the union and in most provinces of Canada,” Trinklein said.

The registration deadline for the online spring session is Jan. 15, 2018. Classes begin Jan. 22, 2018.

For more information, including registration instructions, go to extension2.missouri.edu/missouri-master-gardener-core-training.

The course also may be taken for personal enrichment only (no volunteer requirement) for a higher registration fee. For details, visit extension2.missouri.edu/courses/horticulture-for-the-homeowner.

"For more than 100 years, University of Missouri Extension has extended university-based knowledge beyond the campus into all counties of the state. In doing so, extension has strengthened families, businesses and communities."

Charlotte

Miriam Tomato Plant Has Fruit!

Miriam tomato plant tomato.jpg

Miriam Tomato Plant Has Fruit!

So excited, I almost feel like I should send out baby announcements!

For those of you just joining this saga, every year I winter over one tomato plant in my sunny, inside bay window. Tomatoes are originally from tropical Peru, where they grow as perennials, or plants that live for many consecutive years.

I don't grow a traditional garden or farm a large plot, I have more in common with urban area residents who want fresh herbs and a few favorite vegetables handy during the growing season. I call it my pot garden since I grow those on my deck but that's a whole different story.

I have been growing a tomato in a pot inside over winter for a good 20 years. About a decade ago, I had a tomato plant that survived for 4 years living on my deck during summer and wintering over in my living room. One of my cats knocked it over and broke the main stem or I think it would have happily lived a few more years as long as I brought it inside over winter.

Last year when I posted the tomato plant I heard from some of my newspaper gardening article readers that it was impossible or I was "cheating" so here we go again, proof that yes, you can grow a tomato plant successfully indoors over winter.

Miriam tomato plant flowers.jpg

This year, I was behind getting a tomato plant ready to move inside and initially thought I would skip it. As I was mulching flowers beds, however, I found a tiny, 2-inch high unidentified tomato seedling valiantly growing so I pulled it out and named it "Miriam." I do know the seedling came from my gardening friend Tom's place but he doesn't remember what species was in the hyssop plant starts he gave me.

After adding crushed egg shells to the bottom of the pot and adding new potting soil, Miriam settled into her new digs in one of my bay windows.

Miriam the seedling is now almost 3 feet tall with flowers. Not just flowers but flowers I pollinated with a Q-tip, and now there is fruit, I never tire of finding the first tomato forming.

At first I thought it was just one tomato. As I was taking photos,  I noticed a second one, and then a tiny third one so my pollinating technique is working again.

Outside, tomatoes depend on native bees to move pollen from one flower to another one. Since Miriam has spent her entire flowering life inside without bees, it was hard to guess whether my fumbling pollination technique would take. 

Miriam tomato plant in bay window.jpg

In another few weeks, we should have confirmation of what kind of tomato plant she is. As far as I'm concerned, she's a winner!

Charlotte

January Gardening Chores

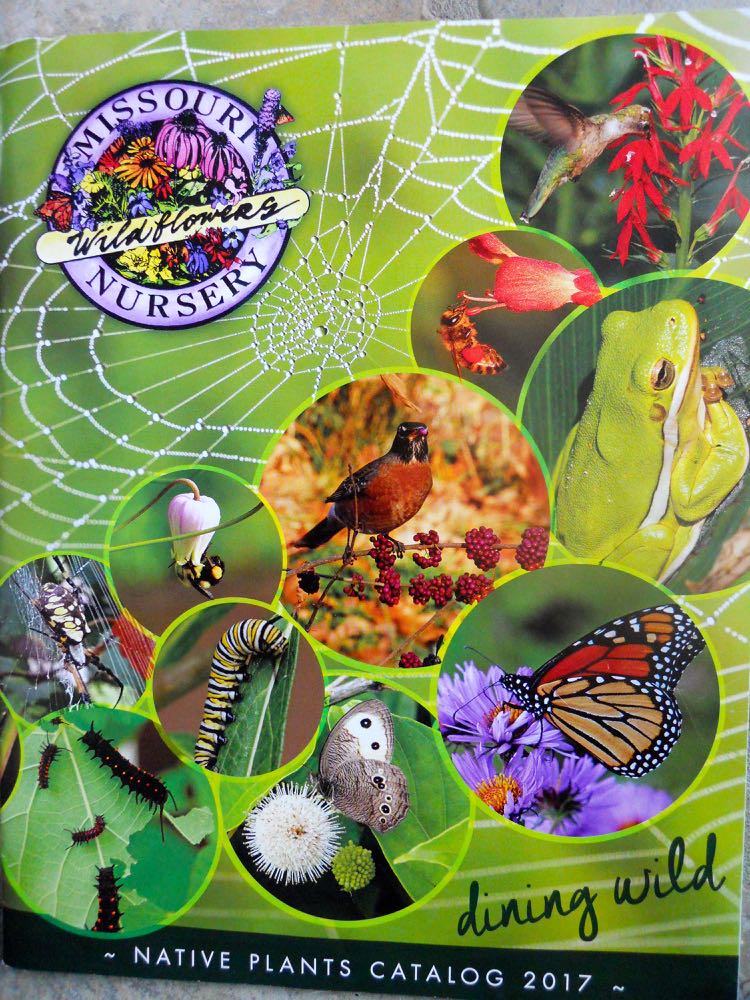
One of my favorite native plant catalogs to order from Missouri Wildflowers Nursery.

One of my favorite native plant catalogs to order from Missouri Wildflowers Nursery.

January Gardening Chores

You bet there are gardening chores in January, it’s the one month when a gardener can sit back and do some of the most important work: dreaming and planning. Most of mid-Missouri is in USDA Hardiness Zone 5b which means the last frost is in May and the first frost around Halloween, although climate change is making spring and fall seasons longer and shortening our summers and winters.

1.     If you haven’t ordered your favorite gardening catalogs, get them ordered. Look for catalogs with detailed plant descriptions and good photographs so you can use them for reference.  One of my favorites is the Missouri Wildflowers Nursery catalog, it has lovely pictures with a quick guide on what growing conditions the plants require.

2.     Order favorite seed catalogs. Some companies will send free catalogs if you ordered from them before; others will charge for a catalog if you are a new customers. Plant seeds locally-adapted. Baker Creek Heirloom Seeds Company is a favorite seed catalog from Mansfield, Missouri.

3.     Review your garden diary from last year. If you’ve missed a few entries, add them now. Underline items you wanted to get done this year. I make a list, then decide which projects I want to tackle,  I also carry over the ones I didn’t get to last year, or drop them off the master list. This is a good time to dream.

4.     Identify what plants you want to add this year so you have a shopping list. Focus on adding native plants, once established they will be low care and tend to require less water than other plants.

5.     Read. Whether it’s Missouri Gardener Magazine, which provides good local gardening information and gardening books, catch up on what you couldn’t get to last year. I keep a pile of gardening books from our local library’s semi-annual book sale just for snowy, cold and blustery winter days.

Remember to water new chrysanthemums so they can get strong roots established.

Remember to water new chrysanthemums so they can get strong roots established.

6.     On warm days, remember to water mums planted this past year. New mums need a gallon a month to keep their roots moist their first year. Once established, mums will become perennials and deter bugs from around where they are planted.

7.     Remove any broken limbs in pathways to keep walkways clear and safe.

8.     Pile mulch and leaves on garden beds if they’ve been blown off by winter winds.

9.     Check inside plants for any hitchhiking bugs and remove. Make sure the plants, not the bugs, are getting their sunlight needs met. If not, move the plants. Water with diluted fertilizer. Prune as necessary.

10. Drop your garden pruners and other garden tools off to get sharpened, this is a slow time of year and this will give you a head start on the season.

11. When feeding birds, add a little sand in the bird feeder mix. Birds need sand to help them digest seeds. Also ensure they have an available water source. Feed suet on cold days.

12. If you have fish in an outside pond, make sure it has a hole in the ice so fish will get oxygen.

Anything else you do for your January gardening chores?

Charlotte

13 Tips to Grow Miniature Roses Inside

This little miniature rose was on clearance for $2.49 mid-December and now has new growth.

This little miniature rose was on clearance for $2.49 mid-December and now has new growth.

13 Tips to Grow Miniature Roses Inside

Have you seen miniature roses on sale during winter and passed them by because someone told you they can't be grown inside? Not only can they be grown inside over winter like herbs but they will grow and be ready for blooming outside as soon as the danger of frost is over.

Of all roses, miniature roses are the easiest, and most versatile, to grow. They will do well in pots as well as the garden; are disease and pest resistant shrubs, are long-lasting blooms and are edible so I can add a little flower to garnish a plate and dessert.

There are a few things to remember when growing miniature roses inside:

13 Tips to Grow Miniature Roses Inside

1. Growers place several plants together in the smallest pots possible when selling miniature roses wholesale. When you get or buy one, find a pot that is the next size, preferably at least longer than the pot the miniature rose came in. Miniature rose roots need room to grow.

2. If you want to get several plants, you can separate the ones grouped in the original pot.

3. Before planting, add broken pots or about an inch of broken shards at the bottom to help with drainage.

4. After adding about an inch of new potting soil, I also add a banana peel and crushed dry egg shells, then fill the pot up half full. Spray the soil with water.

5. Add the miniature rose, then fill around it with more potting soil. Press soil gently to pack it around the roots. Spray lightly again. 

6. Cut off all flowers and buds so the plant's energy goes into settling into their new pot. I kept one flower on my peach miniature rose for the photos. If you want to keep one to enjoy that's ok, it will be our little secret.

7. Add a saucer under the pot and place it in a sunny southern or western window. Expect some leaves and buds to fall off before the plant settles into its new growing pot.

8. Keep the miniature rose on the drier side, winter over-watering is the leading cause of killing off the plant. I keep it moist with a spray bottle every other day. Before spraying, I slip a pointing finger into the soil to test the soil moisture so that I am not getting the soil too wet.

9. This is 3 weeks after I first brought the miniature rose on sale home. New leaves are growing nicely and the soil has remained on the dry side.

New growth is starting to show on this miniature peach-colored rose, a good sign!

New growth is starting to show on this miniature peach-colored rose, a good sign!

Miniature roses have a long flowering habit and, in the garden, are one of the easiest roses to grow so it's worth pulling them through winter until you can set them outside.

I enjoy cut miniature roses in desk top flower vases all by themselves; they're also sweet mixed with other garden flowers.

One of the many reasons I like miniature roses, they are a wonderful addition to desk vases.

One of the many reasons I like miniature roses, they are a wonderful addition to desk vases.

Living in USDA Hardiness zone 5b, our last frost date is Mother's Day, which is May 13, 2018. That means these miniature roses need to be kept alive and happy for about 4 months before they get to be planted outside.

10. Last year, I pulled a brown bag full of marked down for 49 cents Valentine's Day red miniature roses through spring and moved them later out into the garden. Although some had roses and buds, I cut those off to prevent the plant from being stressed trying to bud and settle into a new pot. I wanted them to focus first on root growth.

These red miniature roses were on sale after Valentine's day for 49 cents, a great buy any time!

These red miniature roses were on sale after Valentine's day for 49 cents, a great buy any time!

11. Start with new potting soil and add compost or worm castings if you have access to any. Roses are "heavy feeders," which means they require a lot of soil nutrients to successfully grow.

12. Use one fourth of the recommended soluble fertilizer when you water with the spray bottle. Foliar feeding will help get nutrients into the plant but make sure to dry if the leaves remain wet after about 10 minutes. Wet leaves can encourage pests and diseases.

My new peach miniature rose is keeping Miriam, my tomato plant company in a bay window.

My new peach miniature rose is keeping Miriam, my tomato plant company in a bay window.

So here's my little peach miniature rose in the bay window keeping my winter tomato plant, Miriam, company. I've been told I can't grow tomato plants inside in winter, either, but I have for years and had tomatoes, too.

13. Check the miniature roses regularly to make sure they are doing ok. I check mine daily; look under the leaves for any bugs; check the moisture in the soil; enjoy that one little rose you left on. I do!

Charlotte

Recycle Cut Christmas Trees

Some of the cut Christmas trees left at Rolla Recycling Center to become mulch.

Some of the cut Christmas trees left at Rolla Recycling Center to become mulch.

Recycle Cut Christmas Trees

Some friends are finally taking down their fresh cut Christmas trees and tossing them into garbage piles. That's a shame because these trees can easily be recycled and keep contributing in a variety of ways through the rest of winter.

The following are seven ways cut Christmas trees can be used now that all ornaments, lights, tinsel and cats have been removed:

1. Cut branches off and pile them into a small teepee shape at the corner of your property for wildlife refugees. I keep several piles around my one-acre hillside and keep them "refreshed" with twigs and other cover through the seasons so wildlife have a protected hiding space. In spring, it's fun to see what comes out of those refuges. Last spring, I saw a number of rabbits making the wildlife piles home.

2. Cut Christmas trees also make good bird cover under bird feeders. If you don't like having a whole tree at a bird feeder, cut off branches and use the branches to provide a green safe space at the foot of a bird feeder. 

3. Better yet, use the cut Christmas tree as a bird feeder. Place the tree up against a post or tie it to another tree and add orange slices, strung popcorn, old cranberries and even a bird feeder to give birds a safe place to eat. One of the most beautiful garden sights in snow is to see red cardinal birds in the evergreen branches of a cut Christmas tree!

4. Striped Christmas tree trunks can be set aside to weather and then used as fence posts and bird feeder poles.

Chipped trees and donated branches become a gardener's dream, a pile of potential mulch!

Chipped trees and donated branches become a gardener's dream, a pile of potential mulch!

5. Donate your cut Christmas tree to your local recycling center. The Rolla Recycling Center collects trees and chips them up into huge mulch piles that sit through the rest of winter waiting for spring. When weather warms up, residents can stop by on Wednesdays to have the loader fill their pick-ups and trailers with the chipped wood for garden mulch.

The mulch is also available the rest of the week but you have to shovel your own so Wednesdays become a popular day to visit the recycling center.

6. Tie a weight on the cut Christmas tree and sink it in your ponds for fish cover. Evergreen trees make good cover for baby fish as well as providing safe hiding spaces for larger fish trying to get away from predators.

7. Two years ago, a local garden center was giving away their cut Christmas trees so I picked several up and used them for a wind break around my honeybee hives.

Cut Christmas trees also make good wind breaks around honeybee hives facing the south.

Cut Christmas trees also make good wind breaks around honeybee hives facing the south.

In the photo I have the trees pulled away from hive entrances so the honeybees can easily take their winter cleansing flights. As soon as the temperatures dropped to make them cluster back inside the hives, I moved the cut Christmas trees back in front of the hives for a wind break.

Here's a closer look of one of my hives with bees taking cleansing flights.

Here's a closer look of one of my hives with bees taking cleansing flights.

It takes a while for evergreen trees to dry out, even if they aren't placed in water so you have about half a year of good use before the branches become brittle.

Charlotte

Favorite Wildflowers Catalog

Aren't these lovely Missouri wildflowers photo? And they include growing suggestions, too!

Aren't these lovely Missouri wildflowers photo? And they include growing suggestions, too!

Favorite Wildflowers Catalog

It's that time of year when I go through my old gardening catalogs and decide which ones I want to re-order. My garden is still snow-covered and we're actually hearing the term "bomb cyclone" in the forecast, it's enough to make me want to hide in the colorful gardening catalog pages.

One of my favorites - there is absolutely no doubt about this catalog, I have it hole punched and part of my gardening diary - my favorite gardening catalog and one of the best references for Missouri native plants and wildflowers is this particular catalog.

Just look at those wonderful pictures, don't they make you want to walk through that garden and plant everything on those pages?

I have most of the native plants already in my garden, some from starts from this nursery although I am waiting to finish preparing the appropriate planting beds for the ones I still don't have. I want to add rose verbena this year to several existing flower beds, just love the way those plants grow. And who doesn't love that lovely lavender color? 

The wildflowers have a little rating system with the stars that denotes good for formal locations.

The wildflowers have a little rating system with the stars that denotes good for formal locations.

This marvelous catalog is from Missouri Wildflowers Nursery in Jefferson City. The star rating system is handy for people who want native plants for more "formal" landscaping. That means they will behave in a flower bed as opposed to native plants that are downright unruly, in this rating system the one-star plants:

"One star plants are often desired for their wildlife or plant community value, but not for the front yard. They are usually tall. It takes serious creativity to find a place for them in a formal situation."

Our local chamber of commerce used to have a native wildflower garden at the entrance of the visitor center but ended up removing it after "unruly" plants started to grow. Visitors loved the native plant beds but the staff thought it looked messy.

Don't worry, I moved my share of native plants from there to my gardens.

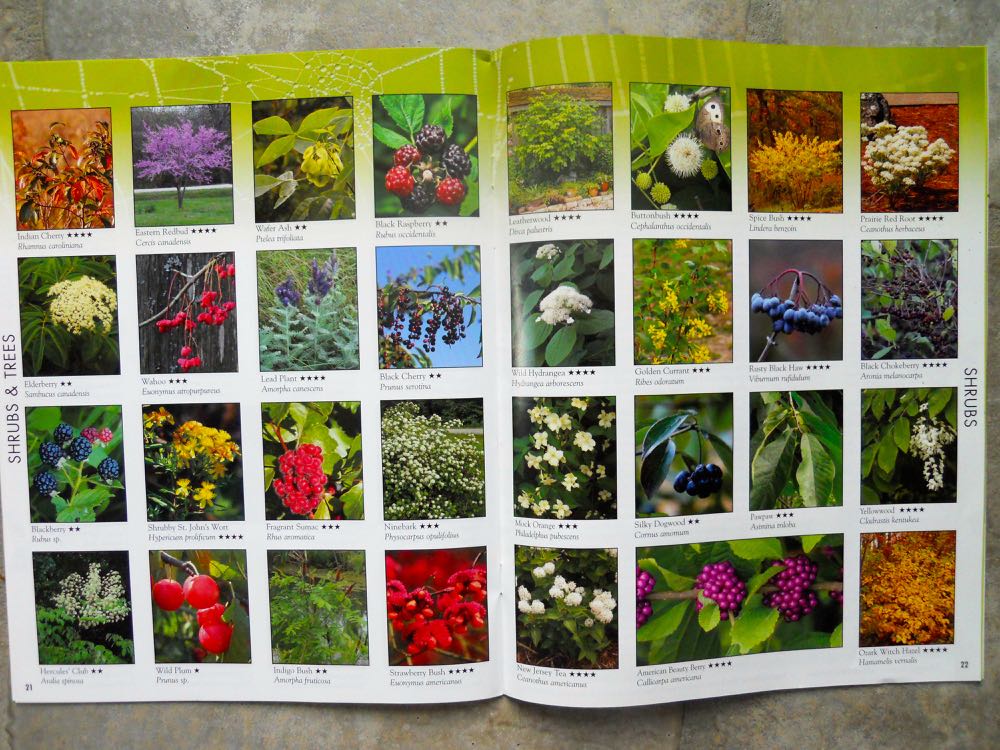
The shrub section is even more colorful, look at all of the wonderful shrub varieties!

The shrub section is even more colorful, look at all of the wonderful shrub varieties!

And speaking of finding the right place, I have a generous list of shrubs I want to add to my landscape if I can just find the best place to put them. At the head of my list, buttonbush, which is a wonderful bee pollen and nectar shrub.

Over the years I have been adding elderberries and they are doing well on my limestone hillside garden. 

So here's the next one I want to try to plant, buttonbush, a great plant for bee pollen and nectar.

So here's the next one I want to try to plant, buttonbush, a great plant for bee pollen and nectar.

And their handy price list and selection guide has a nice summary of best planting conditions along with the star rating system, all conveniently in one place so one can place the order and refer to the critical information.

My favorite is the little column at the right side of the left page which tells me what pollinators are attracted to each plant variety.

The detailed planting guide is a great reference, too, I check that before I plant any wildflowers.

The detailed planting guide is a great reference, too, I check that before I plant any wildflowers.

In case you don't know where to start, this catalog also has suggested plant groupings for hummingbirds, bees, birds, butterflies, rain gardens, forest wildflowers, prairie plants and glade plantings. Each grouping of 10 plants covers about 25 square feet and can be ordered as seedlings.

The Missouri Wildflowers Nursery 2018 catalog will be available February 2018.

The Missouri Wildflowers Nursery 2018 catalog will be available February 2018.

For those of you who visit the nursery, you can recycle your plastic pots there:

Missouri Wildflowers Nursery, 9814 Pleasant Hill Road, Jefferson City, Mo. You can reach them at mowildflrs@socket.net and by calling (573) 496-3492.

Tell Pamela I sent you!

Charlotte

2018 Gardening Calendar

If you don’t keep a garden diary, this is a good time to start. You can keep track of what worked well, and what didn’t, as well as other major garden changes, through a diary. I started mine in 1985 and included wildlife observations. (Photo by Cha…

If you don’t keep a garden diary, this is a good time to start. You can keep track of what worked well, and what didn’t, as well as other major garden changes, through a diary. I started mine in 1985 and included wildlife observations. (Photo by Charlotte Ekker Wiggins)

2018 Gardening Calendar

To keep my major gardening chores organized, years ago I developed a gardening calendar associated with federal holidays to help me remember important milestones. This came in handy when I worked away from home full-time because it helped me get supplies and plan ahead for what I wanted to get done on those long weekends.

I live in USDA Hardiness Zone 5b, which is the US "belt." Here's my calendar for 2018:

Jan. 1 New Years:  Spray inside plants for hitchhiking bugs; remove dead branches. Mark garden catalogs for possible projects.

Jan. 15 Martin Luther King Day: Check plants wintering inside are getting enough sunlight; move them around and give watered down fertilizer. Mark gardening calendars for items to order. Check deck pots outside for moisture and add compost.

Feb. 14 Valentine's Day: Prune fruit trees. Clean and repair garden implements; wash flower pots; repair bird houses. Start looking for blooming crocus.

Feb. 19 President's Day: Plant onion sets, lettuce, spinach, radishes either in garden or in deck containers.

March 17 St. Patrick's Day: Plant potatoes, snow peas, Brussels sprouts and broccoli; start tomato and pepper seedlings.

March 20 Spring Equinox: Prune and compost roses. Add compost to raised garden beds. Plant more lettuce, spinach, radishes, onions.

April 1 Easter: Plant tree seedlings and native wildflowers. Update garden diary for bulbs I need to divide and move this fall; mark locations so can find them when it’s time to dig them up.

April 23 Earth Day: Plant last of my spinach, peas and lettuce. Cover garden with tulle to keep deer out. Start pinching mums back once a week.

May 13 Mother's Day: Last day of frost so everything can get moved outside. Leave delicate plants outside for a few hours for the first few days to get them used to outside conditions. Leave seedlings in containers outside for a few days before moving them permanently into the garden.

May 28 Memorial Day: Last day to plant anything from seed in garden including basil, pumpkins, cucumbers and zucchini. Compact fruit trees, bushes and perennials also get planted so they can benefit from June showers.

June 17 Father's Day: Last weekend to plant perennials.

July 4 Independence Day: Last day for planting beans. Last weekend for pinching back Mums so they bloom bushy this fall.

Sept. 3 Labor Day: Harvest fall crops; check for bugs; add compost, and start getting raised garden beds ready for winter.

Oct. 8 Columbus Day: Trim deck plants. Start moving them inside house for winter.

Oct. 31 Halloween: First fall hard frost. Add compost to raised bed gardens.

Keep track of the changes in your garden by taking photos from the same spots, especially if you have made major changes. Gardens change all on their own, too. (Photos by Charlotte Ekker Wiggins)

Keep track of the changes in your garden by taking photos from the same spots, especially if you have made major changes. Gardens change all on their own, too. (Photos by Charlotte Ekker Wiggins)

Nov. 11 Veterans Day: Clean and store pots, garden tools; toss out torn gardening gloves; mark envelopes with saved seeds; update garden diary. If there's been a hard frost, good time to mulch plant beds so soil temperature doesn't fluctuate. Check for spring bulbs on sale.

Nov. 22 Thanksgiving: If ground is frozen, mulch garden beds.

Dec. 21 Winter Solstice: Water first year mums and pansies once a month through winter. Make sure winter birds have defrosted water to drink.

Dec. 25 Christmas: Make a note on who admires your Christmas cactus to give starts to next year.

Happy New Year!

Charlotte


Best Missouri Gardening Magazine

A sample of Missouri Gardener magazines, these are from my library, I use them for reference.

A sample of Missouri Gardener magazines, these are from my library, I use them for reference.

Best Missouri Gardening Magazine

If I had only one gardening and landscaping magazine I could order, it would be Missouri Gardener magazine. Besides what every gardener enjoys, beautiful photography, this bi-monthly publication offers a variety of information from region-specific tips to plant insect and disease identification and what I love, inspiration through features about other lovely and interesting gardens.

I first became aware of this magazine in a doctor's office. I had just leafed through another waiting room staple, Birds and Blooms Magazine and was wanting something with more substance when I saw a copy of Missouri Gardener. Not only could I enjoy beautiful photography but this publication had the details I was looking for, how to plant a rock garden, ward off pests, even a recipe to cook with cilantro. I have kept all of mine handy so I can access the different seasonal information when I am doing my garden planning, and some of the feature articles are just sheer inspiration.

Wondering about the USDA Hardiness zones? Missouri Gardener magazine explains the zones.

Wondering about the USDA Hardiness zones? Missouri Gardener magazine explains the zones.

In the January-February 2017 edition, for example, there was a good article about the US Department of Agriculture (USDA) Hardiness zones and what they mean. As someone who lives on a Missouri limestone hillside on the second highest point in the county, I was intrigued to discover USDA zone 5b dips down from Missouri's center to pull in where I live. Just looking at a map, I would never have guessed that my growing area had more in common with the northern part of the state.

There are a variety of herb uses including cooking with them, this article has tips and a recipe.

There are a variety of herb uses including cooking with them, this article has tips and a recipe.


That same publication had an interesting article about one of my favorite herbs, Cilantro, including a pesto recipe I want to try. Now I have three recipes with cilantro to try, perfect reason to keep growing it!

Love large color photographs of plant pests and diseases, makes identification so much easier.

Love large color photographs of plant pests and diseases, makes identification so much easier.

Pests can decimate the best plants so knowing how to identify them, and then what to do to discourage them, also comes in handy. Most other publications I have seen have tiny, maybe even black and white photos, which doesn't help when trying to identify tiny pests. 

Larger, color photographs are easier to help with pest identification and also the kind of damage one will see on the plant itself. If I can't see the bugs, the symptoms of the presence of the bugs will help me with a correct identification.

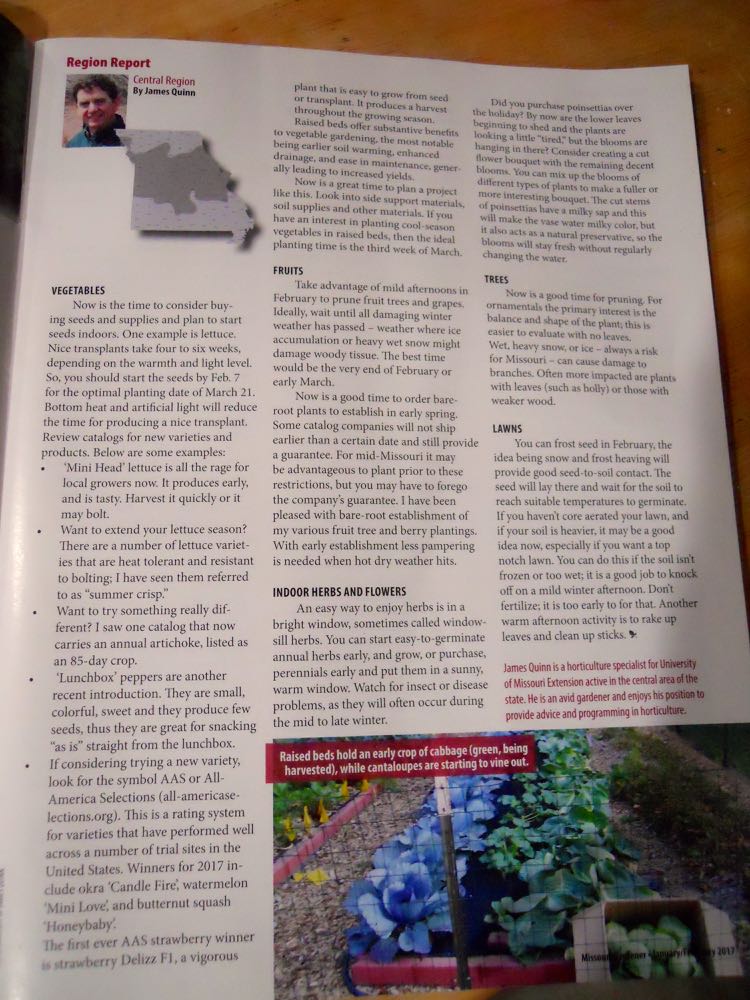
James Quinn, a University of Missouri Extension horticulture expert, offers tips for my area.

James Quinn, a University of Missouri Extension horticulture expert, offers tips for my area.

Throughout the glossy publication, beautiful photography as well as helpful hints. I live in the Central Region so my master gardener colleague James Quinn provides good gardening tips.


Fun to talk to gardening groups around the state and collect upcoming events for this calendar.

Fun to talk to gardening groups around the state and collect upcoming events for this calendar.

I would be remiss if I don't mention the upcoming calendar of events that is both in print and online. As the editor of that section, I spend a lot of time tracking down upcoming gardening-related activities that would be fun to attend. The deadline for this calendar is 4-6 months ahead of the publication date so if you don't see your favorite event listed, it's because the details were not available at publication time.

You don't live in Missouri? Good news, state-by-state gardening has similar publications for more than 21 other midwest and southern states. Cost for an annual subscription is $19.95. Did I mention the subscription includes a card for 10% off purchases from participating businesses?

There are some other perks. By subscribing, you will get monthly enewsletters with tips and updated information. There is an online State By State Gardening bookstore with a nice selection of state-specific reference books, hard to find at least for Missouri, and mogardener.com is an online forum where you can ask questions and get access to other articles, videos, recipes and more.

One of my feature articles in Missouri Gardener about a lovely forest garden in Newburg, Mo.

One of my feature articles in Missouri Gardener about a lovely forest garden in Newburg, Mo.

I am delighted to be a contributing writer but I would subscribe even if I wasn't associated with it, it's a good resource for timely local gardening and landscaping information.

Ready to subscribe?

Charlotte

Snowflowers

Autumn Sedum "Joy" covered in snow was the inspiration for my calling them snowflowers.

Autumn Sedum "Joy" covered in snow was the inspiration for my calling them snowflowers.

Snowflowers

You don't know about snowflowers? That's okay because they only "grow" in my hillside garden when it becomes magical after a good snow fall. 

If you've ever walked through a garden after a snow, you will see trees, shrubs and flower beds transformed by ice and snow hanging onto the remnants of blooming flowers and stems. I deliberately leave my flower stems uncut so birds can enjoy the seeds in winter. After seeing them covered in snow, I now say I leave them uncut so that I can also find more snowflowers.

A border of mums turns into a white snow-covered hedge of small snowflowers.

A border of mums turns into a white snow-covered hedge of small snowflowers.

After a good snowfall, I like to walk through my garden and try to recall what plant is sitting under the blanket of snow. Sometimes it's easy to spot the original plant, like the Autumn Sedum "Joy" that transforms itself every season. In spring, it's low to the ground sprouting in the shape of rosettes. By summer, it's a 2-foot succulent plant with pink flowers. By fall, the pink flowers have dried and turned a burnt orange, providing the perfect landing spot for snow to stick and become white caps on the orange base.

These mint plants alter entirely once covered in a sprinkling of snow.

These mint plants alter entirely once covered in a sprinkling of snow.

Sometimes I don't know what the original plant was, like these perennial mints that take on a whole new look once covered in snow. I know they are a mint because the stems are square and hollow but I haven't made much progress in terms of identifying what kind of mint.

I live in USDA's hardiness zone 5b, which is North America's gardening belt. We had a parched fall so the snowfall is a welcome sight to help replenish the water tables and hopefully end the fall drought.

One more snowflower, this one on still-green leaves of my white tree rose. Love the pop of green peeking out from under the white tops, the tree rose looks like it still has white flowers.

One of my white tree roses covered in snow. This one kept its leaves even after the first snowfall.

One of my white tree roses covered in snow. This one kept its leaves even after the first snowfall.

Snow changes my whole garden. I look forward the morning sunshine after a snowfall, the whole landscape changes.

The front of my garden covered in snow. When the sun shines, the garden is magical!

The front of my garden covered in snow. When the sun shines, the garden is magical!

Another advantage of having a snowy garden, with snowflowers there is no watering or weeding required.

Charlotte

Winter Tomato Plant

Miriam, my 2017-2018 winter tomato plant, is starting to flower in one of my bay windows.

Miriam, my 2017-2018 winter tomato plant, is starting to flower in one of my bay windows.

Winter Tomato Plant

Most people have tropical plants and some herbs growing inside over winter. I do as well but I also add one tomato plant to my indoor winter garden.

This year's winter tomato plant was literally a last minute planting. I found the little seedling growing in a flower bed where I had planted hyssop starts from a friend's garden so this wasn't even a tomato start from my garden.

Over the years, I have added a tomato plant to my inside garden to winter over with my other tropical plants. Some years this one tomato plant makes it through spring to spend a second year outside providing me delicious fruits. In their native habitat of Peru, tomatoes grow as perennials, living for many years to produce fruit without the plant dying off and having to be re-grown every year.

I was so busy with other things this year I forgot to set aside a tomato plant to winter over inside. Usually it's a plant that was sacrificed to feed tomato hornworms early summer so that by moving inside time in October, the tomato plant is starting to recover. I didn't have many hornworms this year so I didn't have to segregate a tomato plant from the rest.

When I recognized the seedling growing in a flower bed, I pulled the seedling out of the ground, brought it inside, plopped it into a six-inch pot with fresh potting soil and stuck it in a southwest inside window.

At Christmas, I noticed the first flowers on the now 2-foot high plant so it must be happy where I plopped it. Time to do a little pollinating!

How to Pollinate Inside Tomato Plant

The absence of pollinating insects can be a problem when growing indoor tomatoes so hand pollinating is helpful. In nature, bees and other pollinators move the pollen from one flower to the next, matchmakers in the plant's scheme to survive by producing fruit with seeds. Since I don't have tiny pollinators available, I will be doing the honors.

One way to help a winter tomato plant pollinate is to tap the stems lightly when flowers are in bloom to spread pollen. That's easy enough to do but not a reliable way to hand pollinate.

I have also used a cotton swab tapped into each flower to move the pollen around. That's a better way and ensures the pollen ends up where it needs to be.

Besides giving the plant watered down fertilizer every couple of weeks, I turn the plant daily so each side gets adequate sun and flower and fruit production is even.

Miriam is now staked to keep the plant upright.

The full Miriam, now about 3-foot tall and needing a taller stake to keep leaning into as she grows.

The full Miriam, now about 3-foot tall and needing a taller stake to keep leaning into as she grows.

Miriam the tomato plant is keeping other tropicals company this winter season. A banana plant, right, and several tropical hibiscus plants give one of my reading nooks a nice garden flavor.

And yes, I have my chairs facing the windows instead of the inside of the room. That way I can sit and enjoy the view without having to turn the chairs. When friends visit, I turn them back into the room or we've been known to sit as the chairs are and enjoy the view together.

Miriam the tomato plant spends her days in this window with southeastern exposure. (Photo by Charlotte Ekker Wiggins)

Miriam the tomato plant spends her days in this window with southeastern exposure. (Photo by Charlotte Ekker Wiggins)

Will this tomato plant have tomatoes?

With a little care, winter growing tomatoes will produce in about the same time as their outdoor counterparts so yes, I should have some tomatoes by March.

Charlotte

Christmas Cacti or Cactuses

One of my Christmas cactus currently in bloom, see the smooth edges of the leaves?

One of my Christmas cactus currently in bloom, see the smooth edges of the leaves?

Christmas Cacti or Cactuses

Or should I say Christmas "cacti?" I have a tendency to call them "cactuses," too. Whatever you call them, these living plants from where I grew up in Brazil, north of Rio de Janeiro, are a favorite of a number of friends of mine. They like to compare photos, and tips, for keeping these South American plants happy and in bloom so here are a few photos of mine currently in bloom.

Christmas versus Thanksgiving Cactus

First, there are two kinds of Christmas cactus that often get confused. The original Christmas cactus (Schlumbergera bridgesii) is no longer available on the commercial market so if someone has a start from grandmother, most likely it is a true Christmas cactus. The leaves of the old-fashioned Christmas cactus are rounded.

By comparison, the Thanksgiving cactus (Schlumbergera truncata) has pointed ends on the green fronds. They also tend to bloom earlier than the old-fashioned Christmas cactus, like this white version that was in bloom a month ago.

This is a Thanksgiving cactus, note the spikes on the green leaves.

This is a Thanksgiving cactus, note the spikes on the green leaves.

There is a third popular cactus available commercially and that one blooms in spring so it's sold as an Easter cactus.

Cactus Care

These tropical plants prefer indirect southern exposure. They will tolerate low light, but perform best in bright, indirect light in the home. Brighter light is beneficial during the winter, but full summer sun can result in pale plants. If you have them outside in the summer, keep plants in a semi-shady location.

Christmas cacti prefer temperatures of 70 to 80 F for their April to September growing season.

According to Dr. David Trinklein, University of Missouri Extension, Christmas cacti do not grow well in a wet root environment. Christmas cacti tolerate under watering better than overwatering. Water only when the growing medium is dry to the touch. If you put a saucer under the pot to collect drainage water, empty it to keep excess water from wicking back into the pot. Failure to do so results in a soggy root environment, which is an open invitation to root rot.

Reduce watering from fall through spring. Only fertilize plants during their growth period of early spring through late summer. Use a regular fertilizer at one-quarter strength or a houseplant fertilizer according to label directions.

Keep Christmas cacti slightly pot-bound to induce prolific flowering. Repotting may be necessary every three years. Use a porous, well-drained potting mix. Commercial mixes made for epiphytes are good choices. Make regular peat-lite mixes into epiphytic mixes by adding perlite or sterile sharp sand to increase porosity.

How to Get Christmas Cacti to Rebloom

Reblooming Christmas cacti can be challenging, Trinklein said. The cacti are short-day plants. However, temperature affects their response to day length. In fact, Trinklein says, flowering will occur regardless of day length under cool night conditions (50-55 F).

Prolific flowering occurs when plants are exposed to cool nights with at least 13 hours of darkness. Reduce water to slightly stress the plant at this time to improve flowering. Expose holiday cacti to short days, cool nights and dry conditions in mid-October for full bloom during the holiday season.

Wish I could tell you I follow these rules but I don't. I leave the plants in the same window all year and sometimes forget to check on them to water. They are kept in the cool basement during summer with a southern exposure, which triggers their blooming by mid-November.

When the pots are in bloom, I bring them upstairs so I can enjoy them but keep them with the same southern exposure. Sudden changes in temperature, light or other factors, such as excessive drying of the growing medium, can cause Christmas cacti to drop unopened flower buds.

Poor flowering also happens when stray light interrupts the required long periods of darkness during short-day treatment. Interior home lights, streetlights and even car lights can disrupt the required dark period and cause disappointing flowering.

Christmas cacti are prone to root rot, another reason to water sparingly. Avoid overwatering and maintain strict sanitation. Remove common insect pests, which include mealybug and scale.

Another Thanksgiving cactus in bloom, this one looks red and white in bright light.

Another Thanksgiving cactus in bloom, this one looks red and white in bright light.

I started several Thanksgiving and Christmas cacti in hanging baskets. When a piece falls off because I over watered, I plant the piece back in the hanging basket and most of them easily root to start a new plant with very little care. This red Thanksgiving cactus in the hanging basket has some of the dead cactus pieces in the front, turned brown. 
If you have friends who admire your Christmas cactus, consider taking snips to make starts and get them rooted for next year gifts. Remember to label them so you know what color they are. It can take 3-4 years before a plant is mature enough to start blooming.

Newest Christmas Cactus Addition

One of my master gardener colleagues earlier this summer mentioned she had a Christmas cactus that needed a new home. Without knowing what color or size it was, I volunteered to adopt it. To my delight, the plant was huge. Another friend told me these can live for decades so I found a plant stand to better display the beauty of the plant and now I'm looking for a pot to cover the plastic one.

This is a very old Christmas cactus, I feel so lucky to now be the caretaker of this lovely plant.

This is a very old Christmas cactus, I feel so lucky to now be the caretaker of this lovely plant.

I placed the plant in my southern exposure basement window, not expecting any blooms for this holiday. To my surprise, buds started within weeks of the plant settling in and now it's covered in blooms, just in time for Christmas.

Charlotte

Sheets Over Apricot Trees

Bed sheet covers a compact dwarf apricot tree.

Bed sheet covers a compact dwarf apricot tree.

Sheets Over Apricot Trees

Even though we had a mild winter last year, we also had a last hurrah of cold weather right after my compact dwarf apricot trees bloomed. As our climate continues to rapidly change, we can expect even more erratic weather patterns so knowing how to protect plants from radical temperature fluctuations will come in handy.

Freezing temperatures are not good news for any blooming plants and trees but anything below 27F means there will be no fruit later in the year.

Having missed several years of fruit because of late frosts, I have tested a number of combinations of items around the house to protect the fruit blooms during freezing weather. Last year, I tried bed sheets by themselves. This year, I combined bed sheets with the lightweight fleece blankets I use for furniture covers to keep cat hair off my chairs.

I first carefully draped the compact dwarf apricot trees with the fleece blanket, then draped them with the sheet I then tucked underneath and pinned closed with quilting pins.

Only once did I sneak outside at night to double check that the pins were holding the sheets closed. They were. That next morning, there were good signs that the combination of fleece and sheet was working.

Flowering apricot blooms peek out from under sheets covering a light fleece blanket.

Flowering apricot blooms peek out from under sheets covering a light fleece blanket.

Peeking out of the corner of the sheet, I saw the end of one of the tree branches still showing the lovely pink blooms of the apricot blossoms. It was day 3 of the 5 days of cold weather so we still had a couple of more days to go but that was encouraging to know they had made it this far.

Peeking under the sheet, the apricot flowers inside looked even better.

The combination of a sheet over the fleece blanket kept the apricot tree blooms protected!

The combination of a sheet over the fleece blanket kept the apricot tree blooms protected!

By the time the low front had moved through, the flowers had pulled through safely and my bees were once again pollinating the apricot tree flowers.

The sheets by themselves are not enough but the combination of sheet wrapping around the lightweight fleece did work.

To recap then, winter jackets work, and so do bed sheets over lightweight fleece blankets.  Next, checking on using corn sacks as frost protection for compact dwarf fruit trees.

Charlotte

Rose Pruning

Inspiration to learn how to prune roses, it is relatively simple once you follow a few steps.

Inspiration to learn how to prune roses, it is relatively simple once you follow a few steps.

Rose Pruning

Ok, it’s that time! If you are one of those people who have wondered through the year when you should be pruning your roses, the time is now. I look for green stems by St. Patrick’s Day, a good way to remember what time of year roses should be pruned.

To prune roses, start with sharp trimmers cleaned with alcohol so you are not spreading last year’s diseases. I use old socks soaked in rubbing alcohol to wipe down my trimmers. I also make sure the trimmers have been sharpened so the cuts are clean; using dull trimmers will cause stem tissue damage to the plant and invite diseases as well as slow down growth.

Now pruning anything can be nerve-racking. The good thing to remember is that most plants, including roses, are forgiving so take a deep breath.

The second tip is to take your time.  When I first started pruning, I tied pieces of yarn and old bread ties where I was thinking of cutting. I would adjust the cutting plan before actually making the cut. If I made a cut and didn't like it, I would remind myself of tip number one.

After trying several different approaches, here is how I start. I first remove any and all dead stems, that usually gives a better view of what's left behind and what you should trim next. Go slowly; some branches that are dead may only be dormant. If in doubt, first scrape the branch gently with your fingernail to expose what's underneath. If it's green, that branch is still alive.

Some branches may be yellow green; that means it may be dying but it could rally with a little help so don’t give up on it just yet. Definitely mark that rose for a little extra soil conditioning and give each plant ¼ cup dried coffee grounds, half to one banana peel and 2 tablespoons Epsom salt mixed together. I also add crushed egg shells and dried orange peels when I have them. Feed once a month through the growing season.

You want to keep a shape that leaves air circulating through the center so remove branches that crisscross or are in-growing.

Now that the dead branches are gone, and then the criss-crossing ones have been removed, what is left is almost done.

Look for the pink nodes facing outwards, that's where you want to cut to encourage growth.

Look for the pink nodes facing outwards, that's where you want to cut to encourage growth.

Look carefully at what is growing where. Find the pink nodes facing outwards, that’s where the plant will grow. Cut the branch 1/4 inch above the swollen bud at a 45 degree angle, that will encourage the branch to grow outward.

In general, also follow the following guidelines:

If you want your rose bush to be about the same size as it was last year, cut it down by half.

If you want a smaller shrub, prune to one third of its original size.

If you want something larger, prune to two thirds of its original size.

If this is your first year growing roses, prune much lighter at first; I usually wait until at least the second year before doing any pruning.

Charlotte