Where to Store Amaryllis Bulbs

This Amaryllis is going dormant as its leaves turn yellow. (Photo by Charlotte Ekker Wiggins)

“I live in an apartment. Where can I put an amaryllis plant to go dormant. If I put the bulb in my crisper do I have to put the bulb in a bag.” — Donna

Where to Store Amaryllis Bulbs

Hi Donna, do NOT put your Amaryllis bulb in your refrigerator crisper, this is a tropical plant and the cold will kill it.

Keep the Amaryllis bulb watered in a pot in a window until all of the green leaves turn yellow and die off.

If you don’t have a window, keep it as close to sunlight as you can so the leaves can collect sun and store it in the bulb. Let it go dormant on its own time.

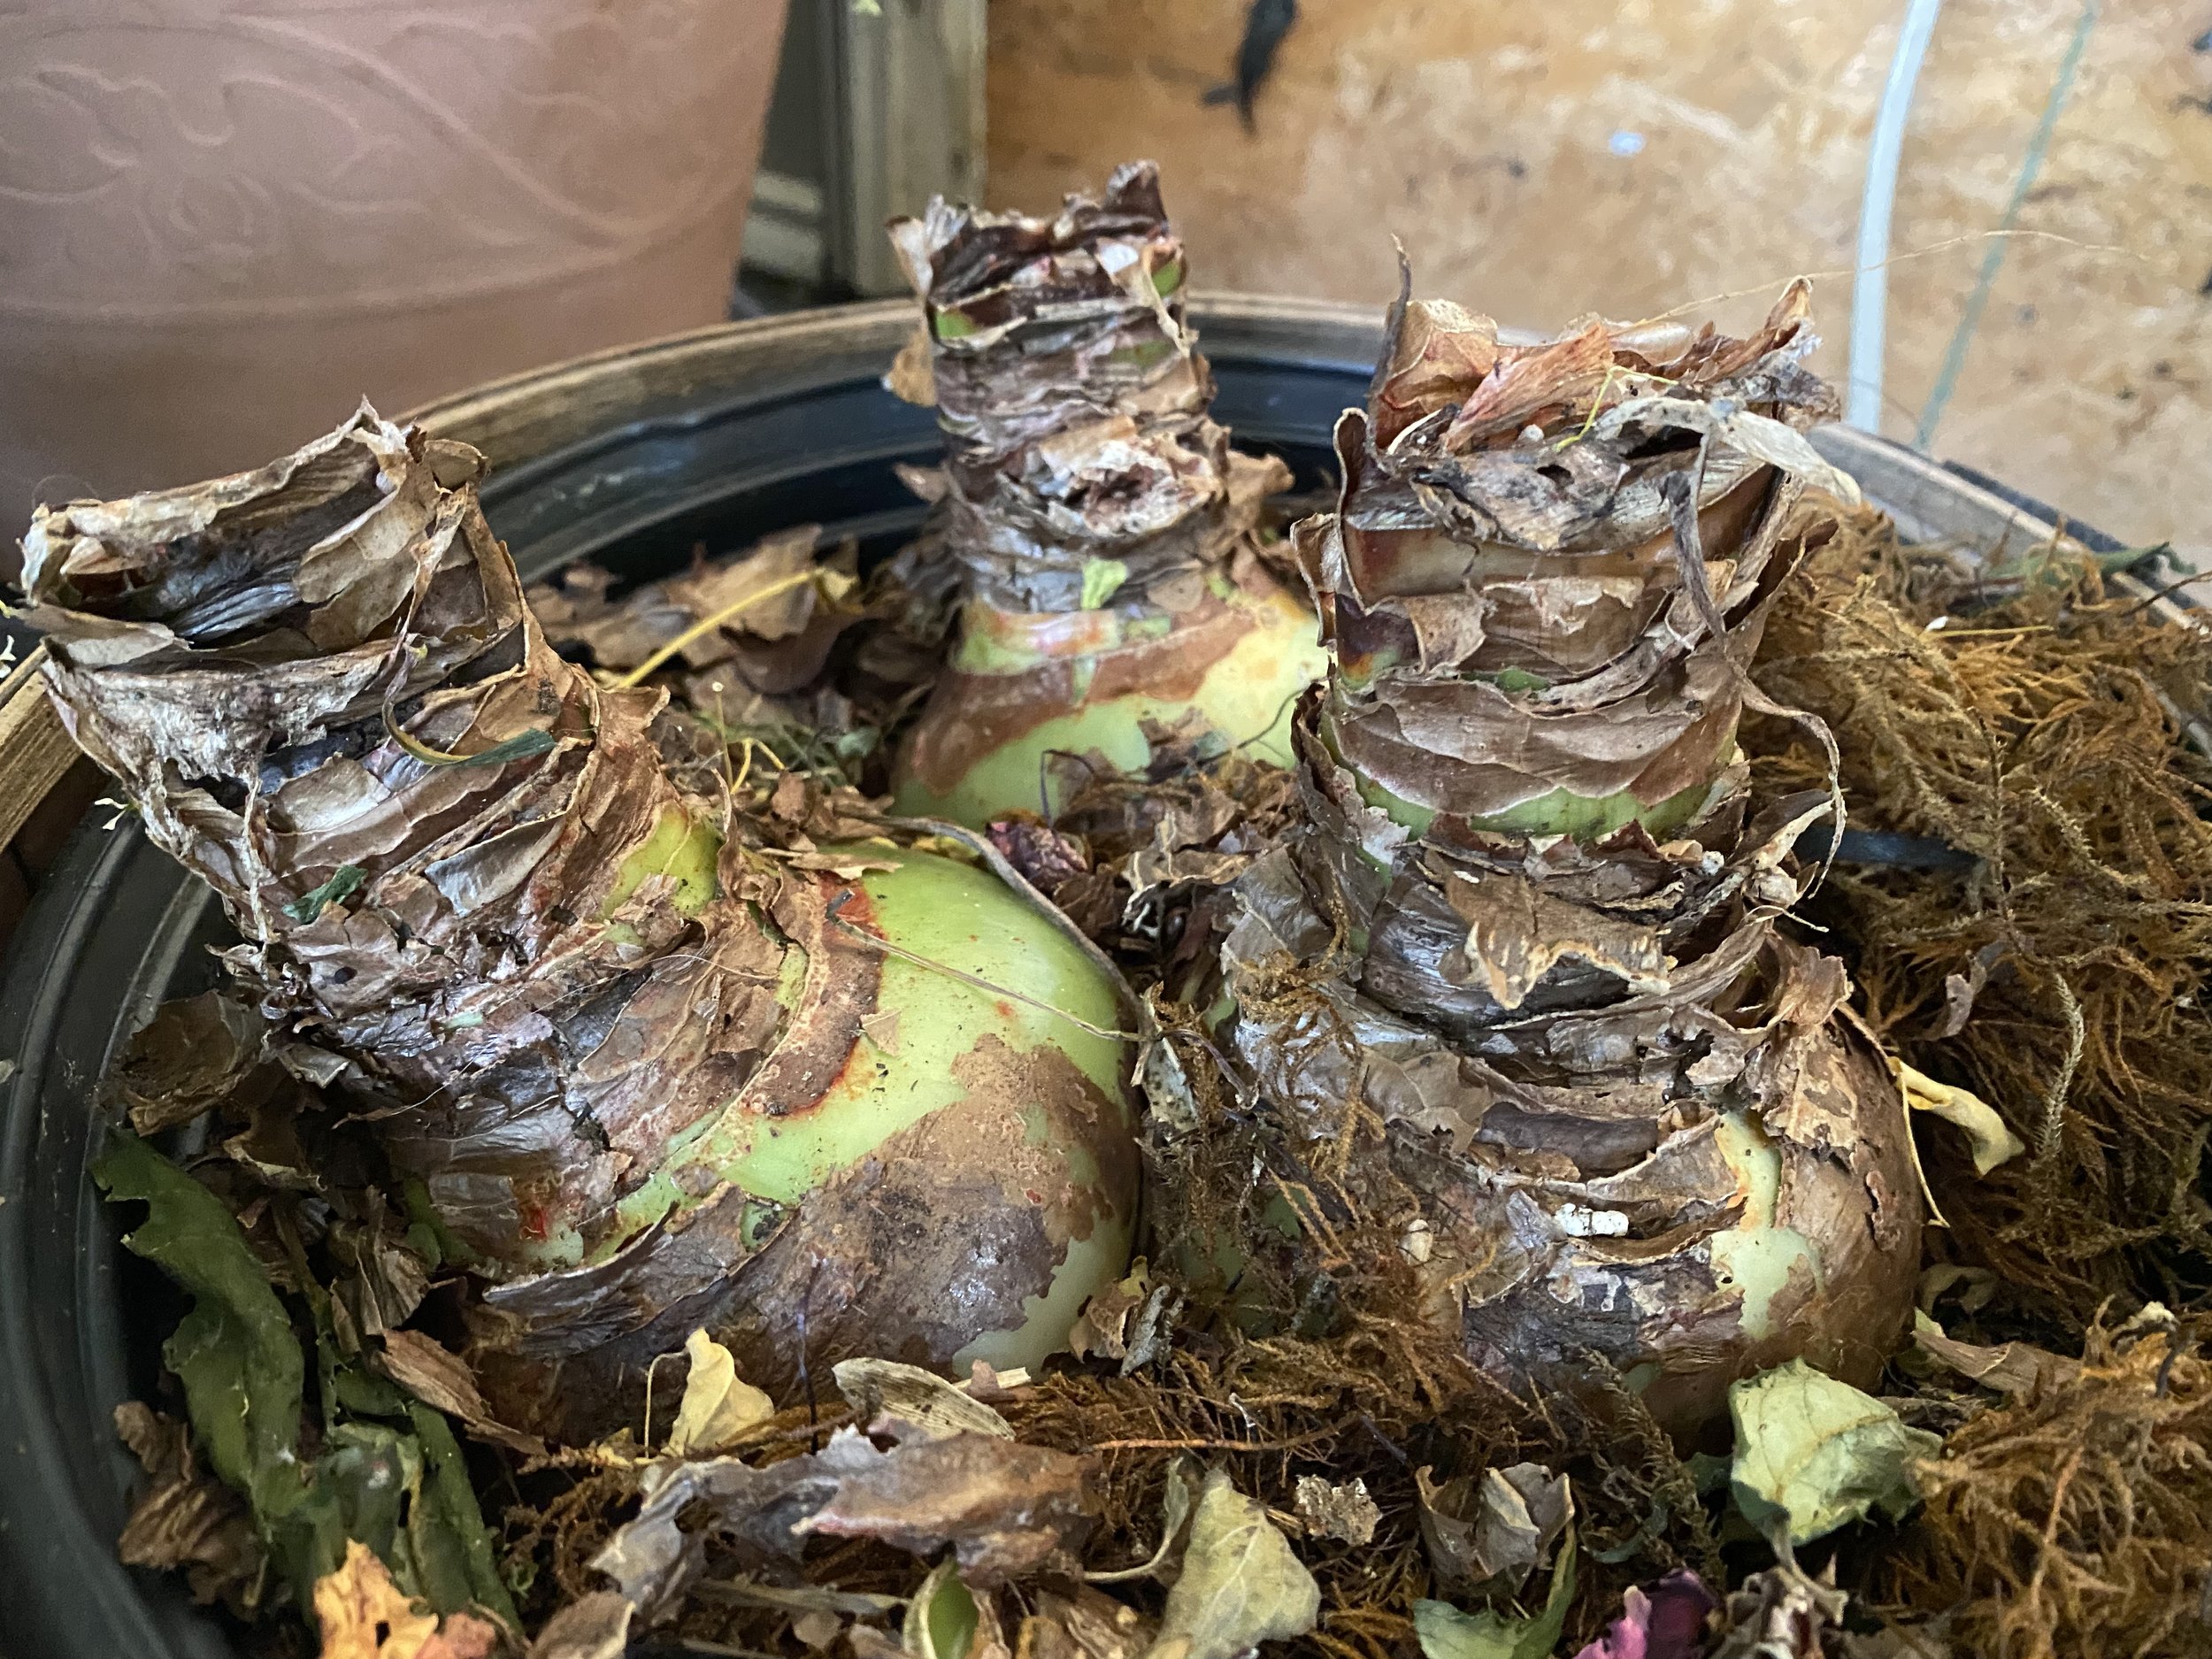
These Amaryllis bulbs are ready for a nap for a few weeks. (Photo by Charlotte Ekker Wiggins)

You can place the Amaryllis bulb in a brown bag after all of the greenery has died back.

Leave it in a closet or in a cabinet at room temperature.

I leave mine in a pot and don’t water it for 6-8 weeks, then repot it when I start to see new growth.

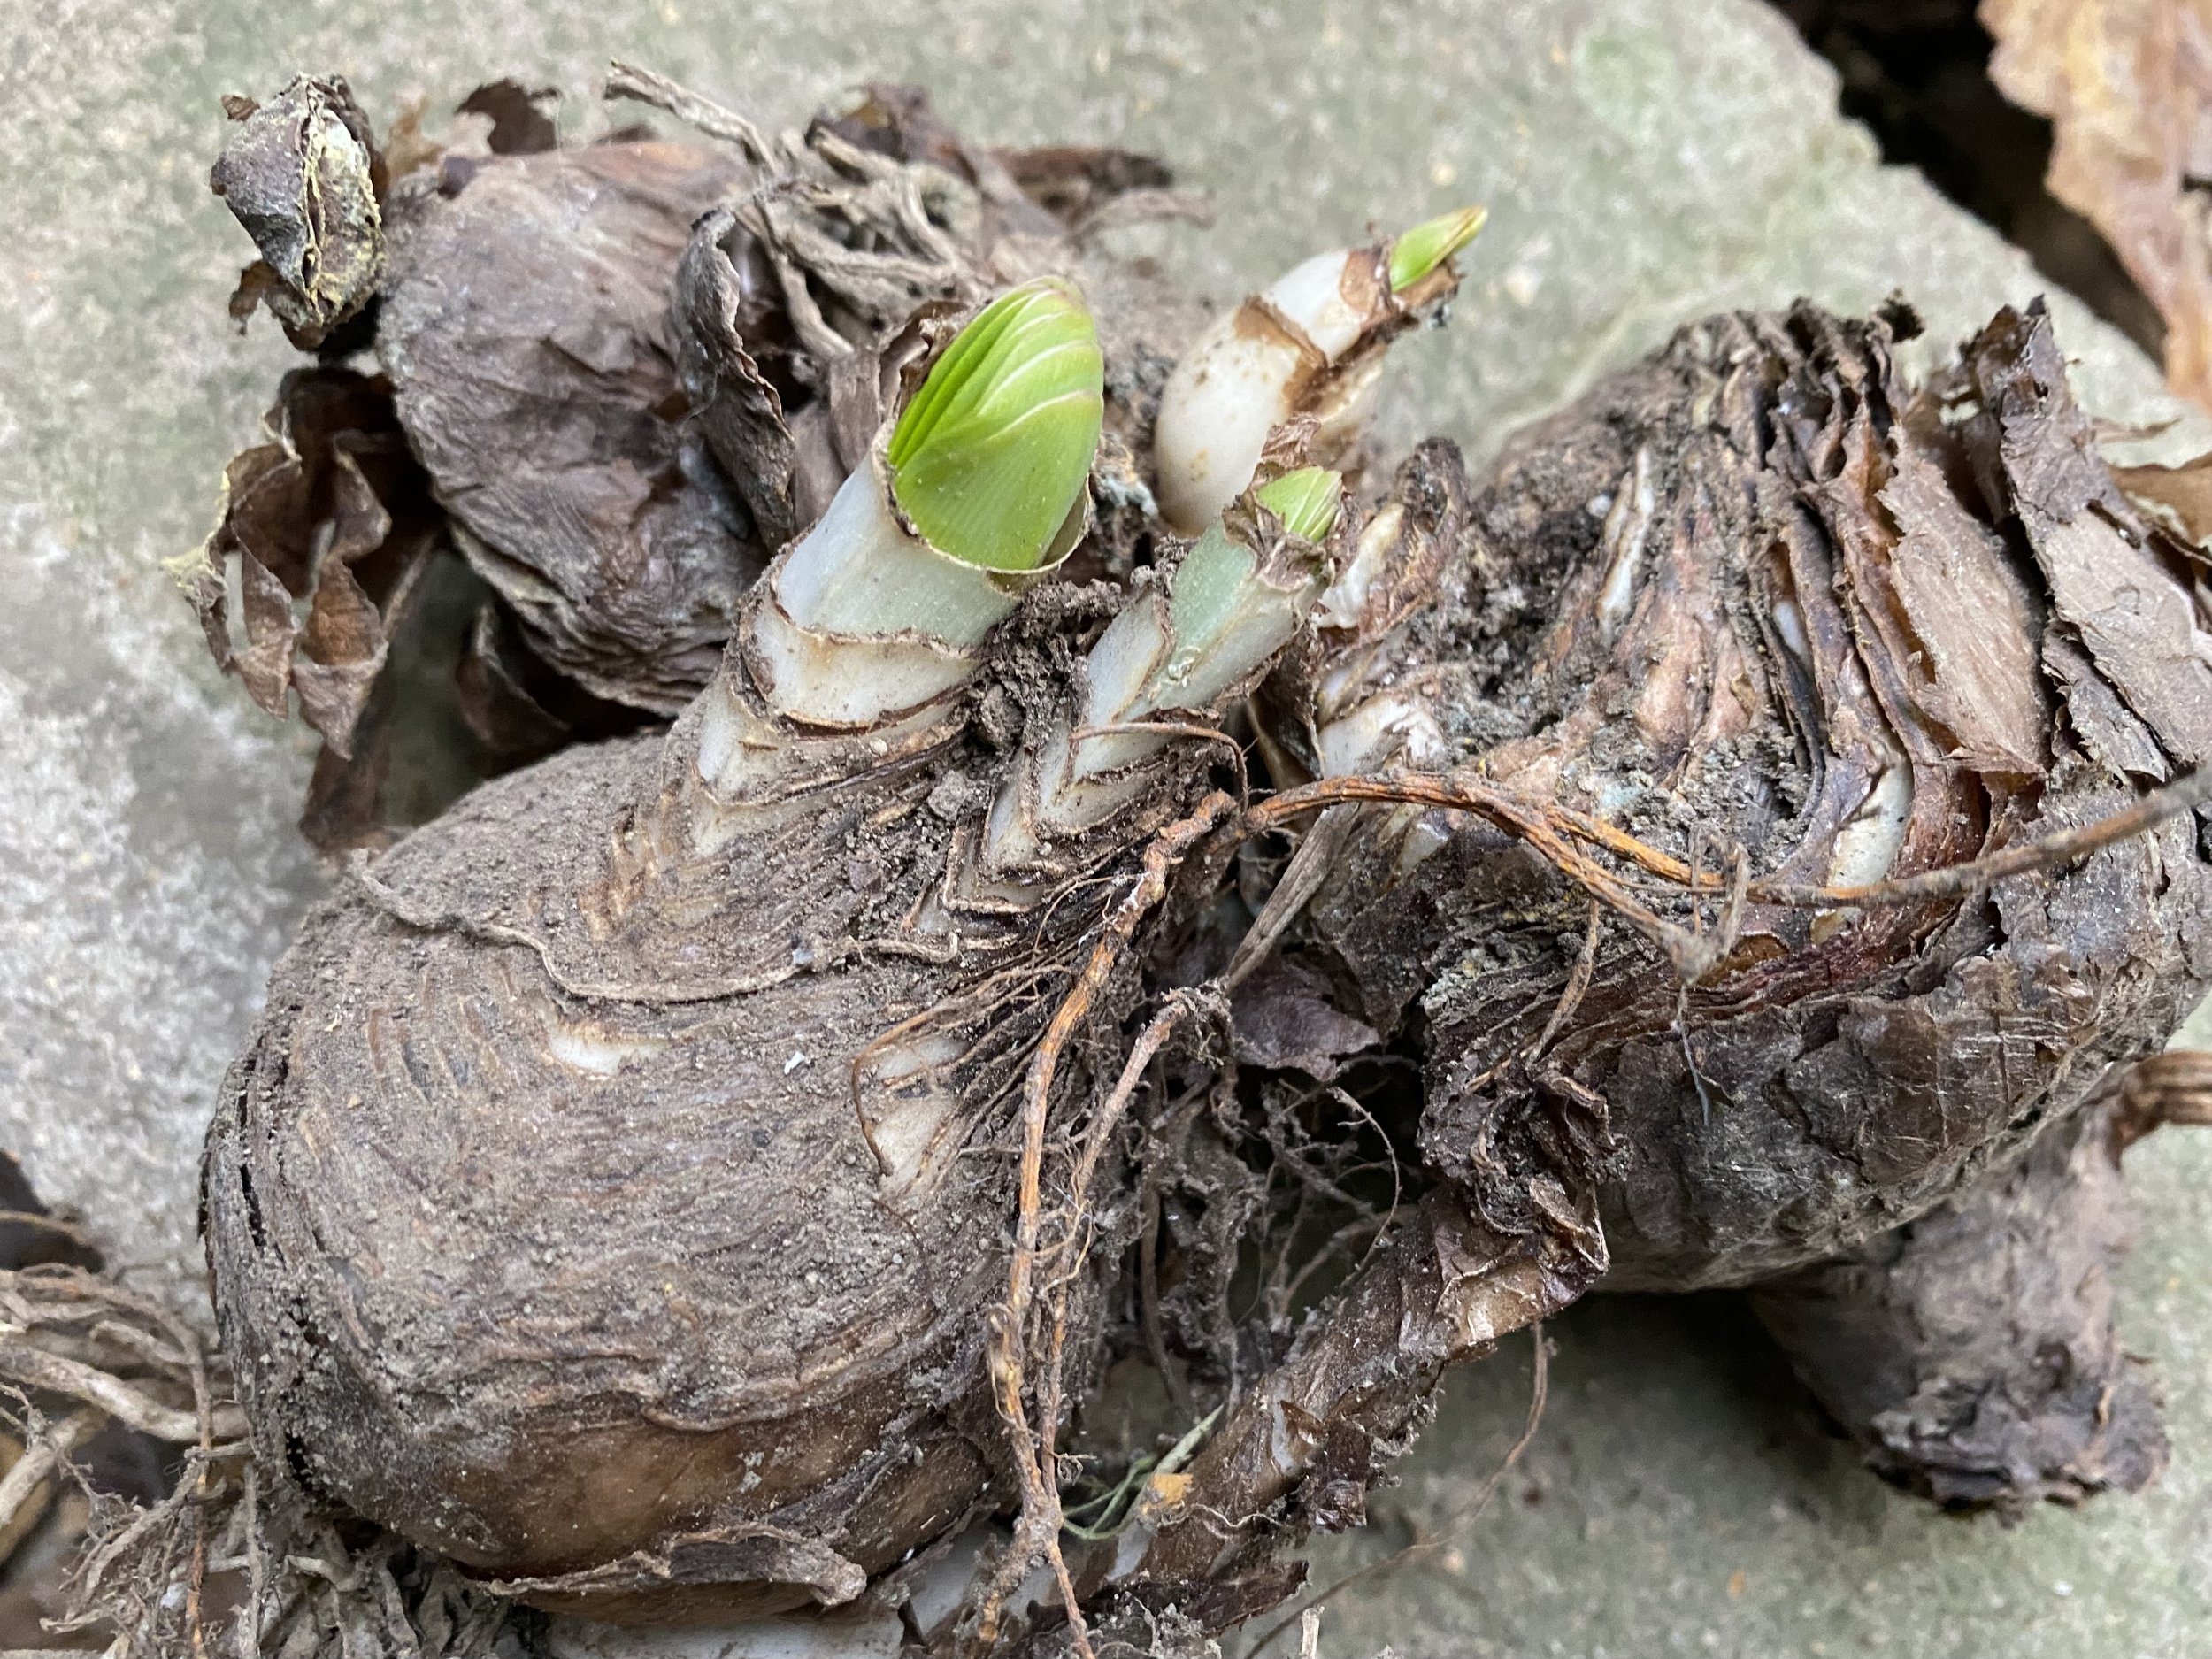
This Amaryllis is starting to regrow, see the bud on the left? (Photo by Charlotte Ekker Wiggi

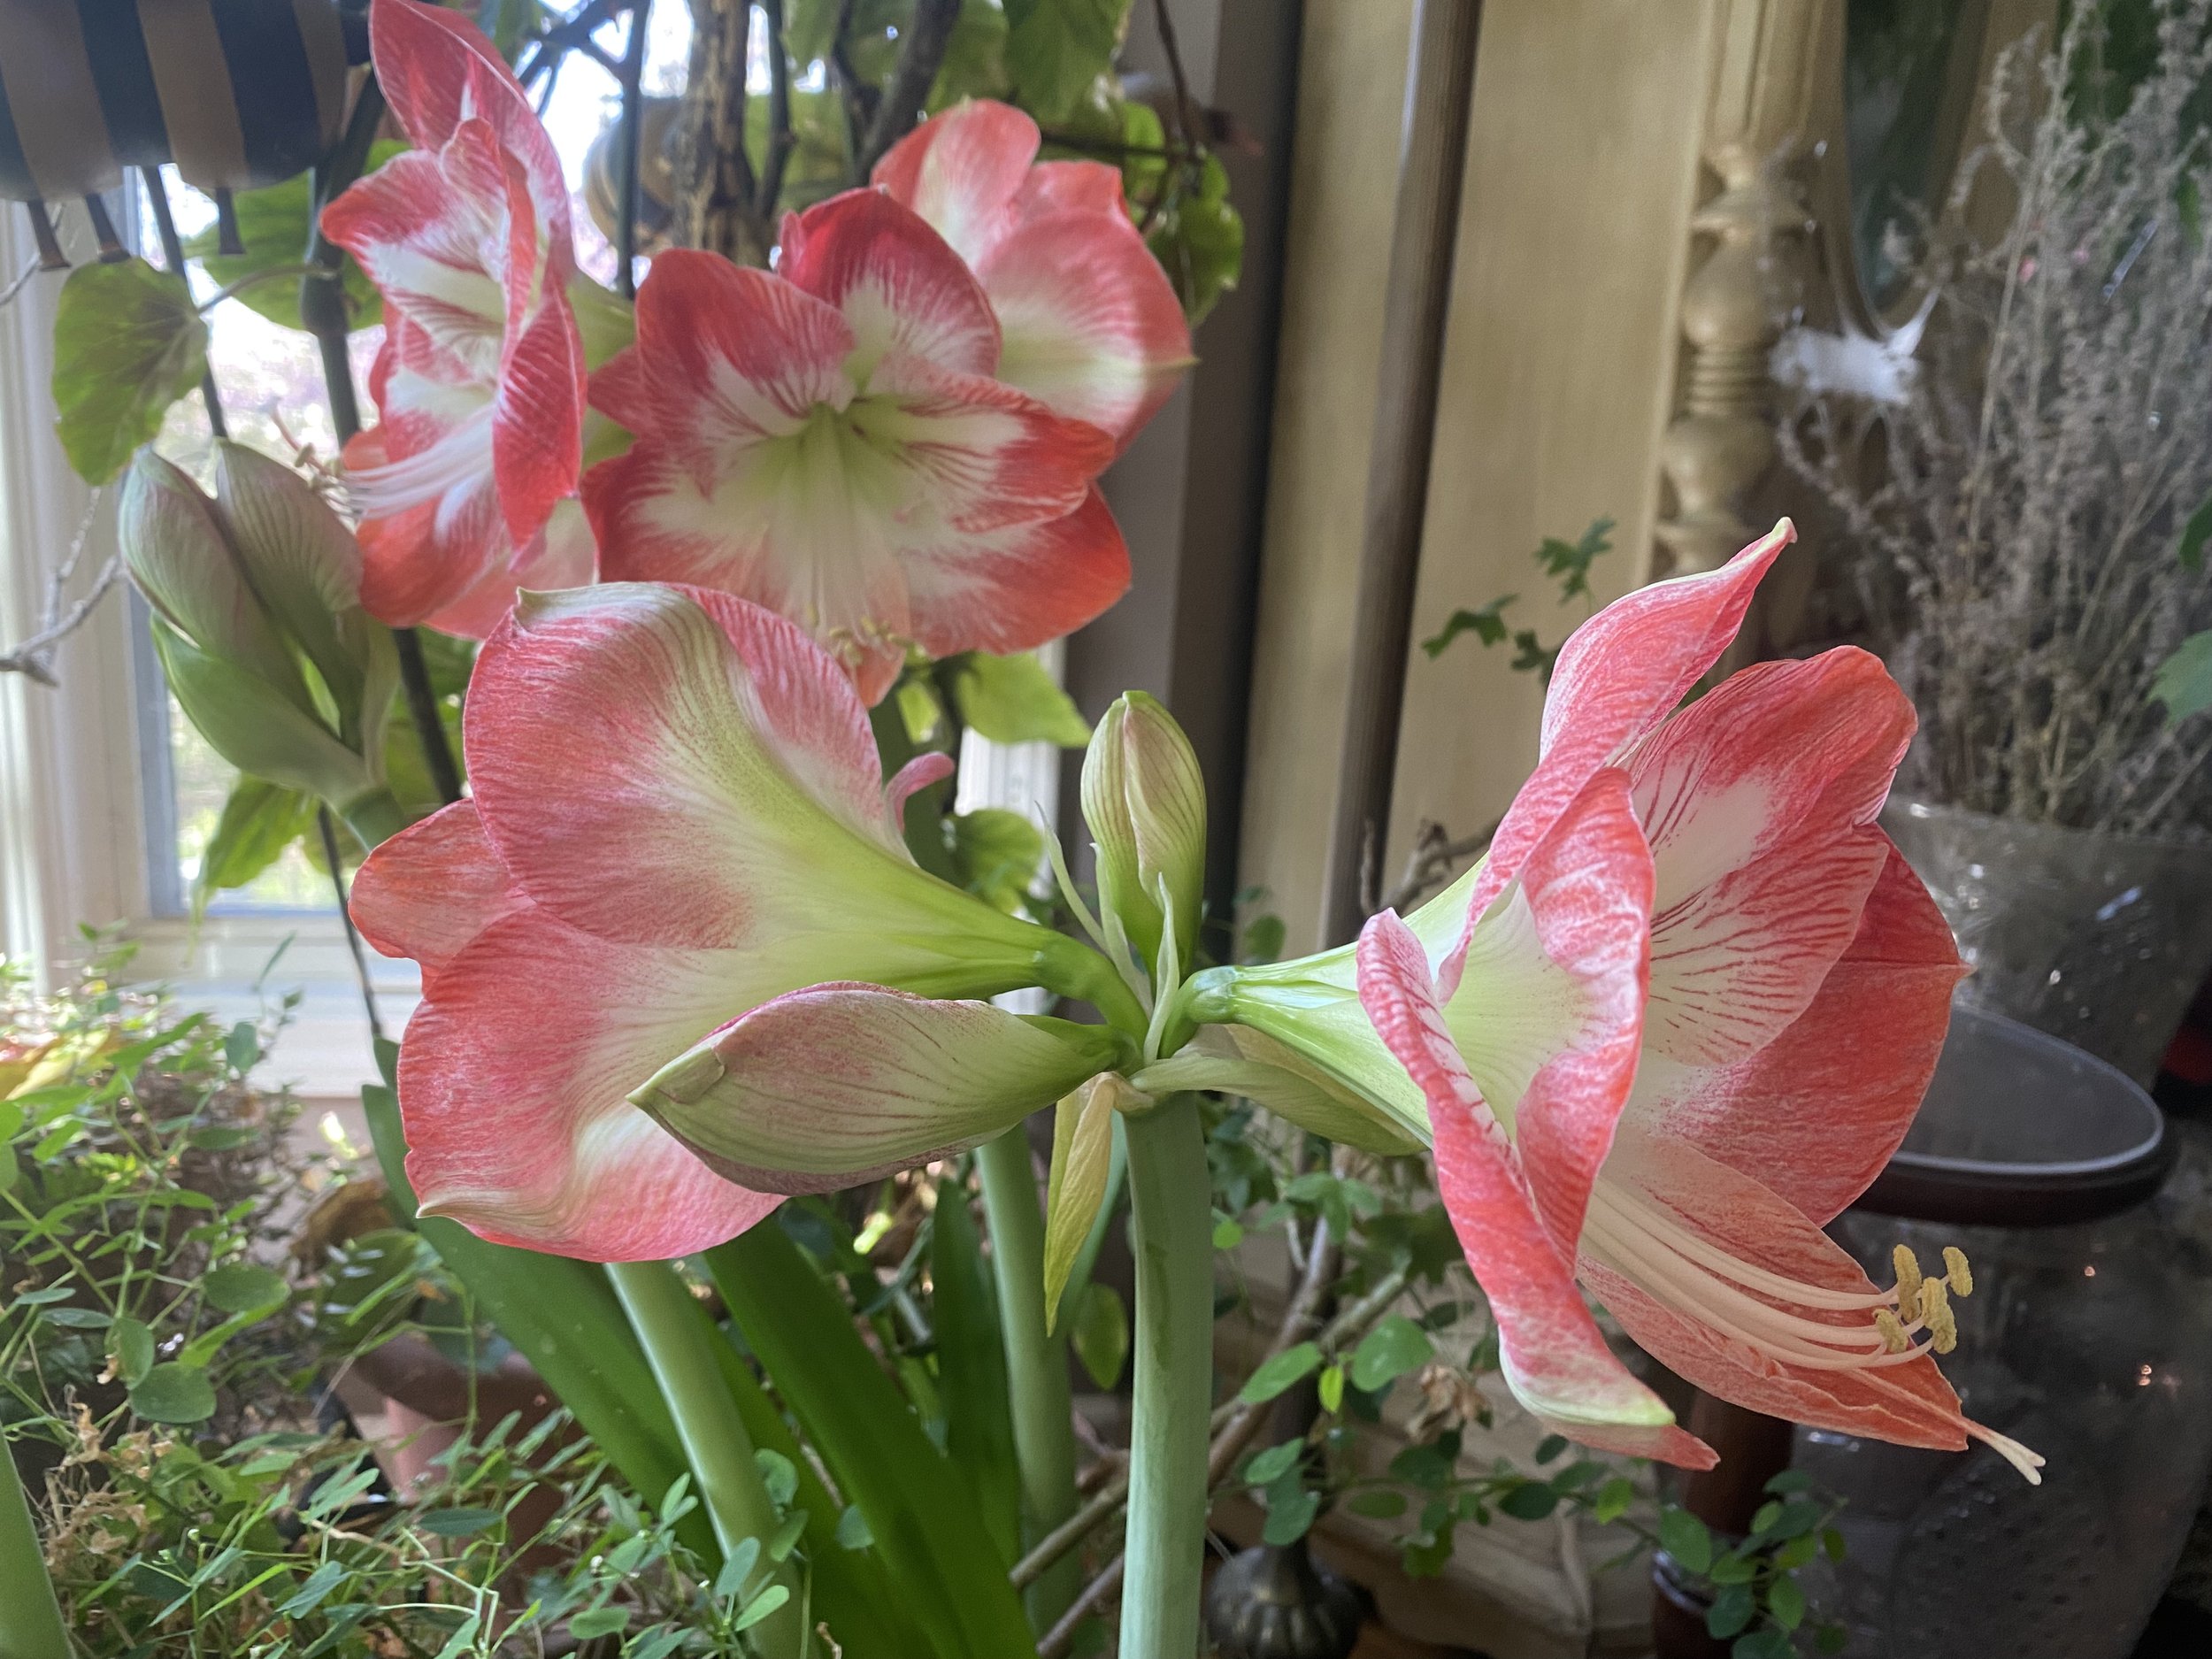
If the Amaryllis bulb has collected enough sunlight through its leaves, you will enjoy another blooming cycle.

Here’s one of my re-blooming Amaryllis, love to watch them re-grow! (Photo by Charlotte Ekker Wiggins

Amaryllis bulbs are easy to care for so you can get them to re-bloom and well worth the effort, I have some Amaryllis bulbs that are more than 10 years old.

For more gardening, beekeeping, cooking and easy home decor tips, subscribe to Garden Notes.

Charlotte

Cattle Panel Arbor

The grey cattle panel was painted black so that it visually recedes into background. (Photo by Charlotte Ekker Wiggins)

The grey cattle panel was painted black so that it visually recedes into background. (Photo by Charlotte Ekker Wiggins)

“Charlotte I love, love, love your garden arbors, how did you make those?” - Anna

Cattle Panel Arbor

Hi Anna, aren’t they fun?

They are relatively easy to make. I live in the Missouri Ozarks where these cattle and pig panels have been standard garden arbors.

I used two cattle panels laced together to make a longer corridor into my northern apiary, it’s the one in this blog post photo.

I dressed my cattle panel arbors with black paint and then cedar boughs from my trees to soften the arbor entrances. I have a lot of cedar trees on my limestone hillside so I have a ready source of cedar. I also like to remove the bottom cedar tree branches so that I can more easily walk along my paths.

To easily bend these, tie one end with a strong rope, pull the rope through the other side and gently pull the rope. That will make it easier to move the cattle panel arbor into place.

For more gardening, beekeeping, cooking and easy home decor tips, subscribe to Garden Notes.

Charlotte

Why Amaryllis Not Blooming

These minerva amaryllis re-bloom for me every winter. (charlotte ekker wiggins photo)

“Amaryllis are so pretty. What's wrong when my Amaryllis just sends up one leaf. The leaf gets tall but no flower.” — Bruce

Why Amaryllis Not Blooming

Hi Bruce, your Amaryllis bulbs haven’t saved enough energy from the sun to bloom so all they can do is grow leaves as solar collectors.

The good news is that if you let the leaves grow and gradually die off, your bulbs should be able to bloom in their next growing cycle.

bulbs with blooms have buds growing from bulb top. (charlotte ekker wiggins photo)

After letting your bulbs rest for a couple of months without watering, replant them in new soil and watch the bulb tops. If they have enough stored energy a bud will start growing. If not, you will have more leaves to help collect sun.

Be patient, they are well worth the wait!

Charlotte

When to Prune Herbs

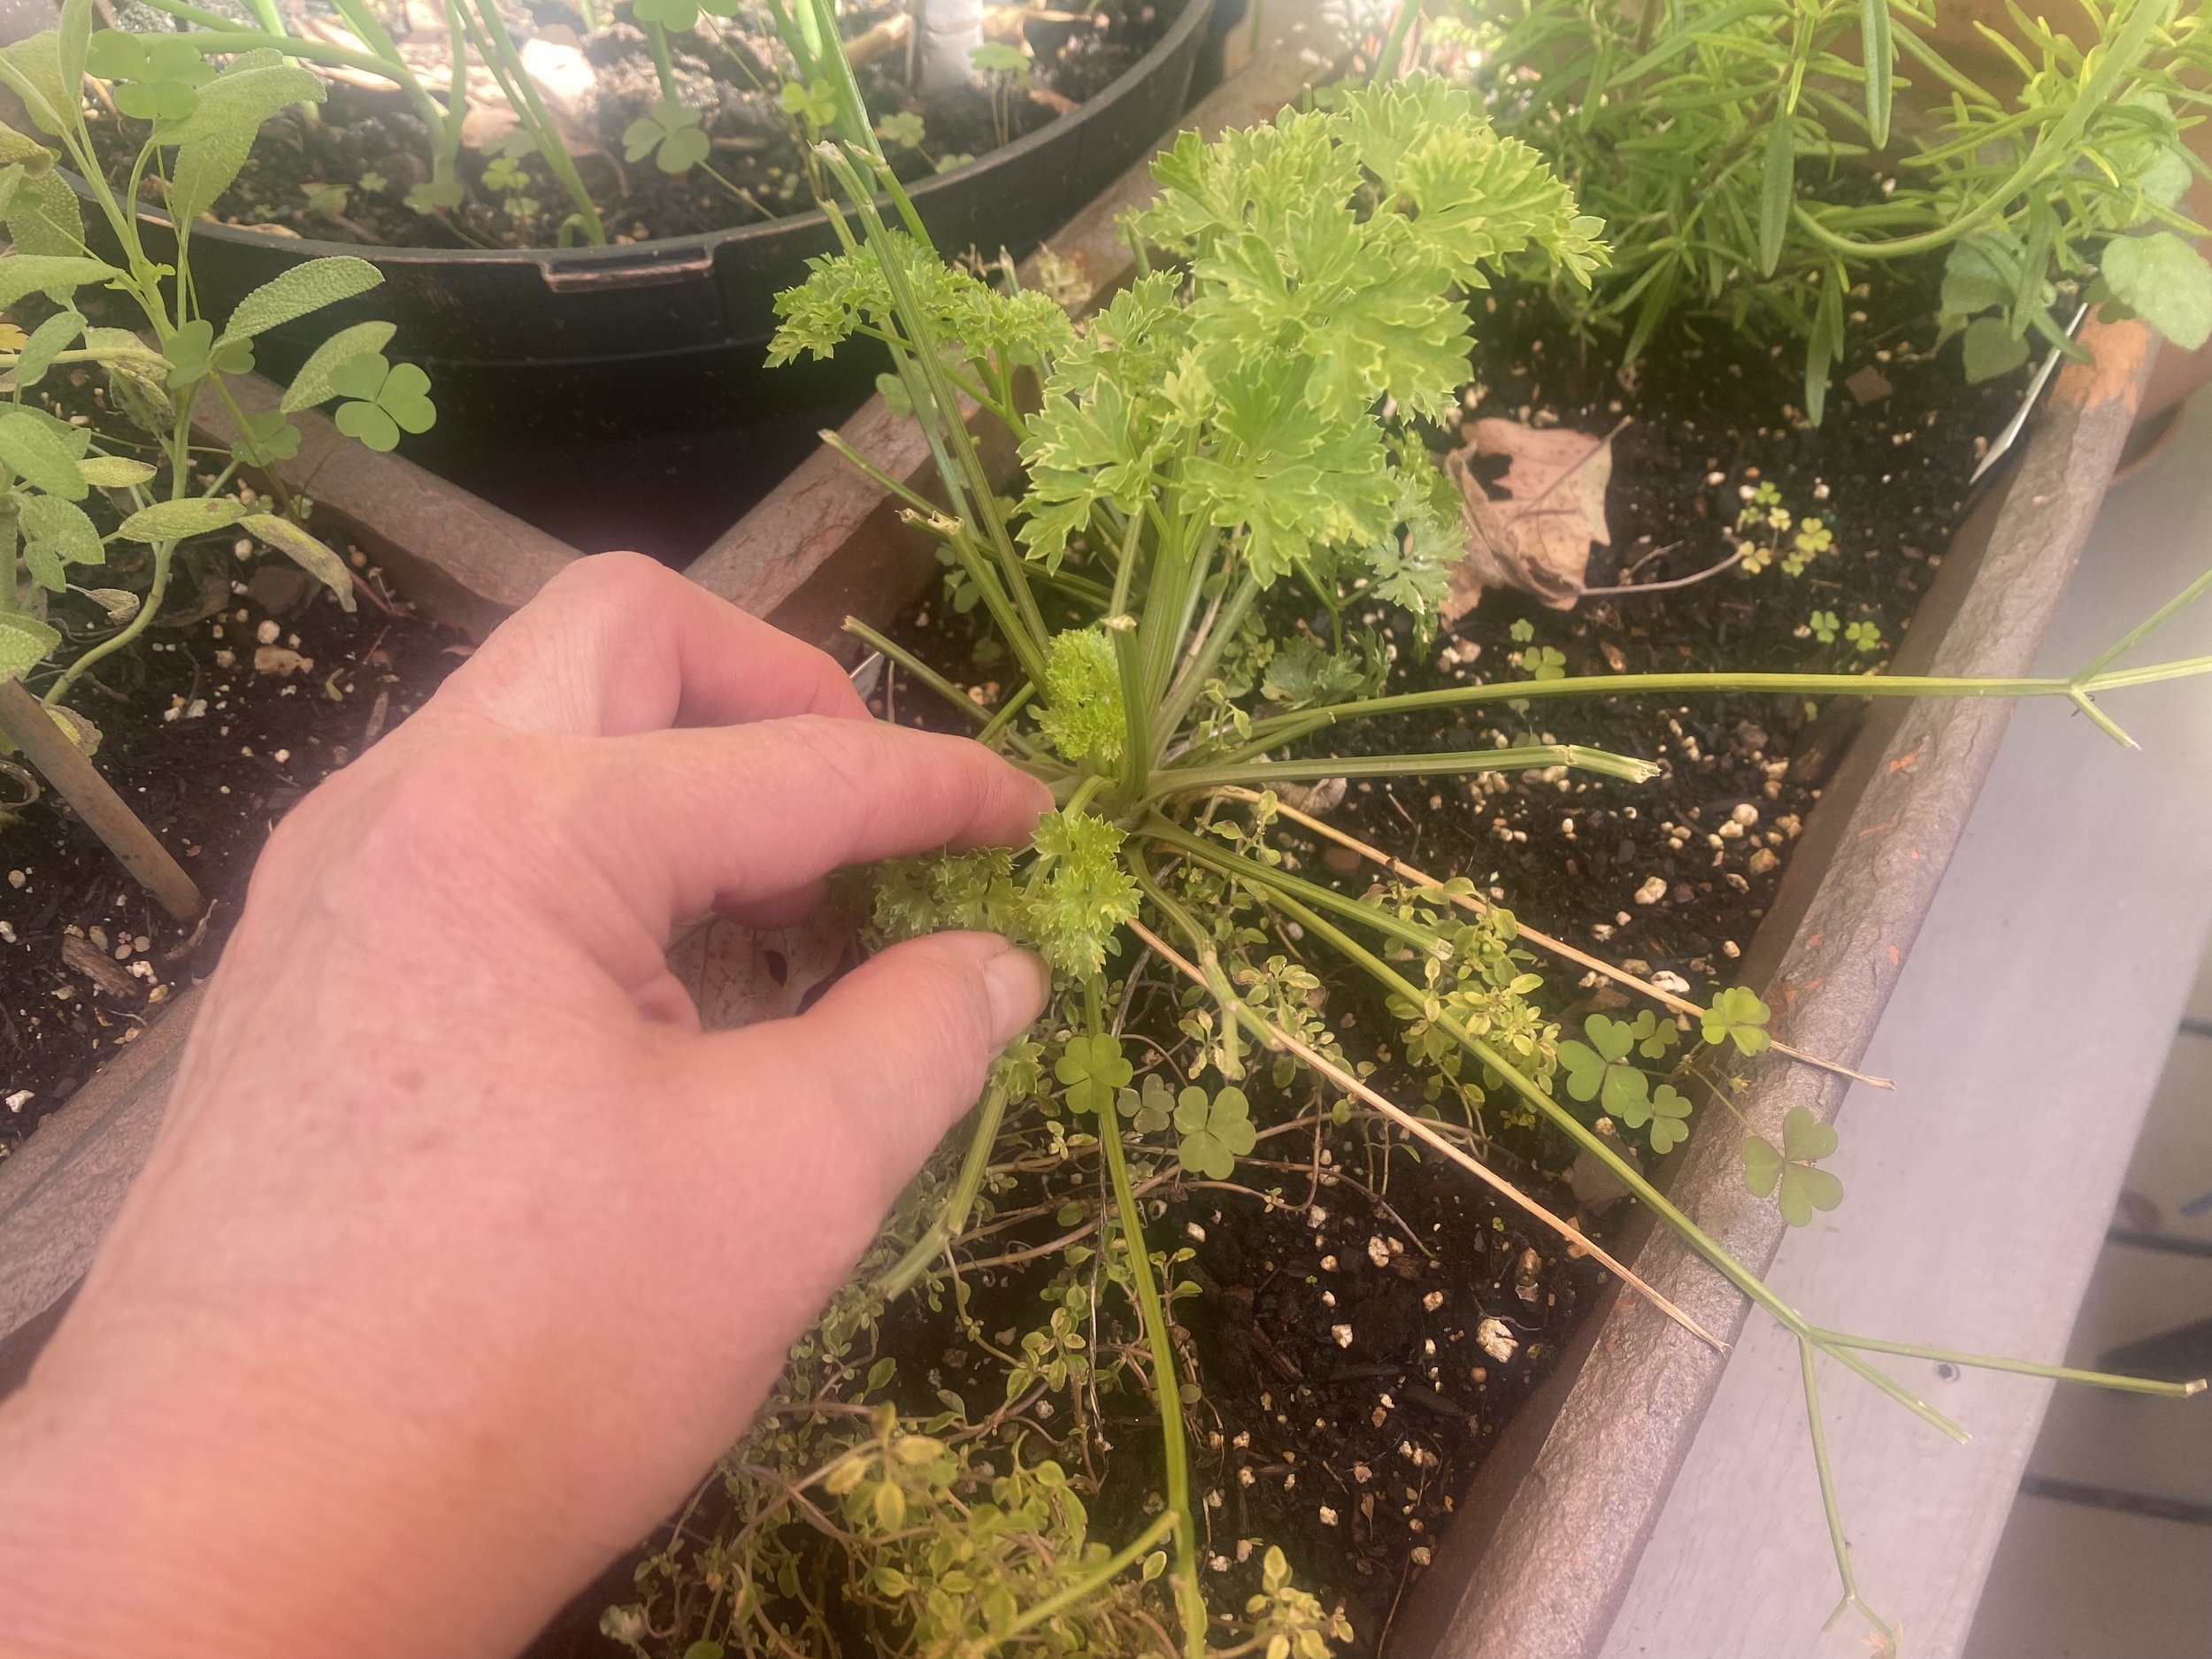
this curled parsley is growing new stems after being “pruned” by caterpillars. (charlotte ekker wiggins photo)

“…my Mom gave me a large potted herb garden. When do I prune them? The basil is getting tall and starting to fall over…” — Melissa

When to Prune Herbs

Hi Melissa,

How wonderful that your Mom gave you a potted herb garden. There’s nothing quite like adding fresh herbs to your cooking.

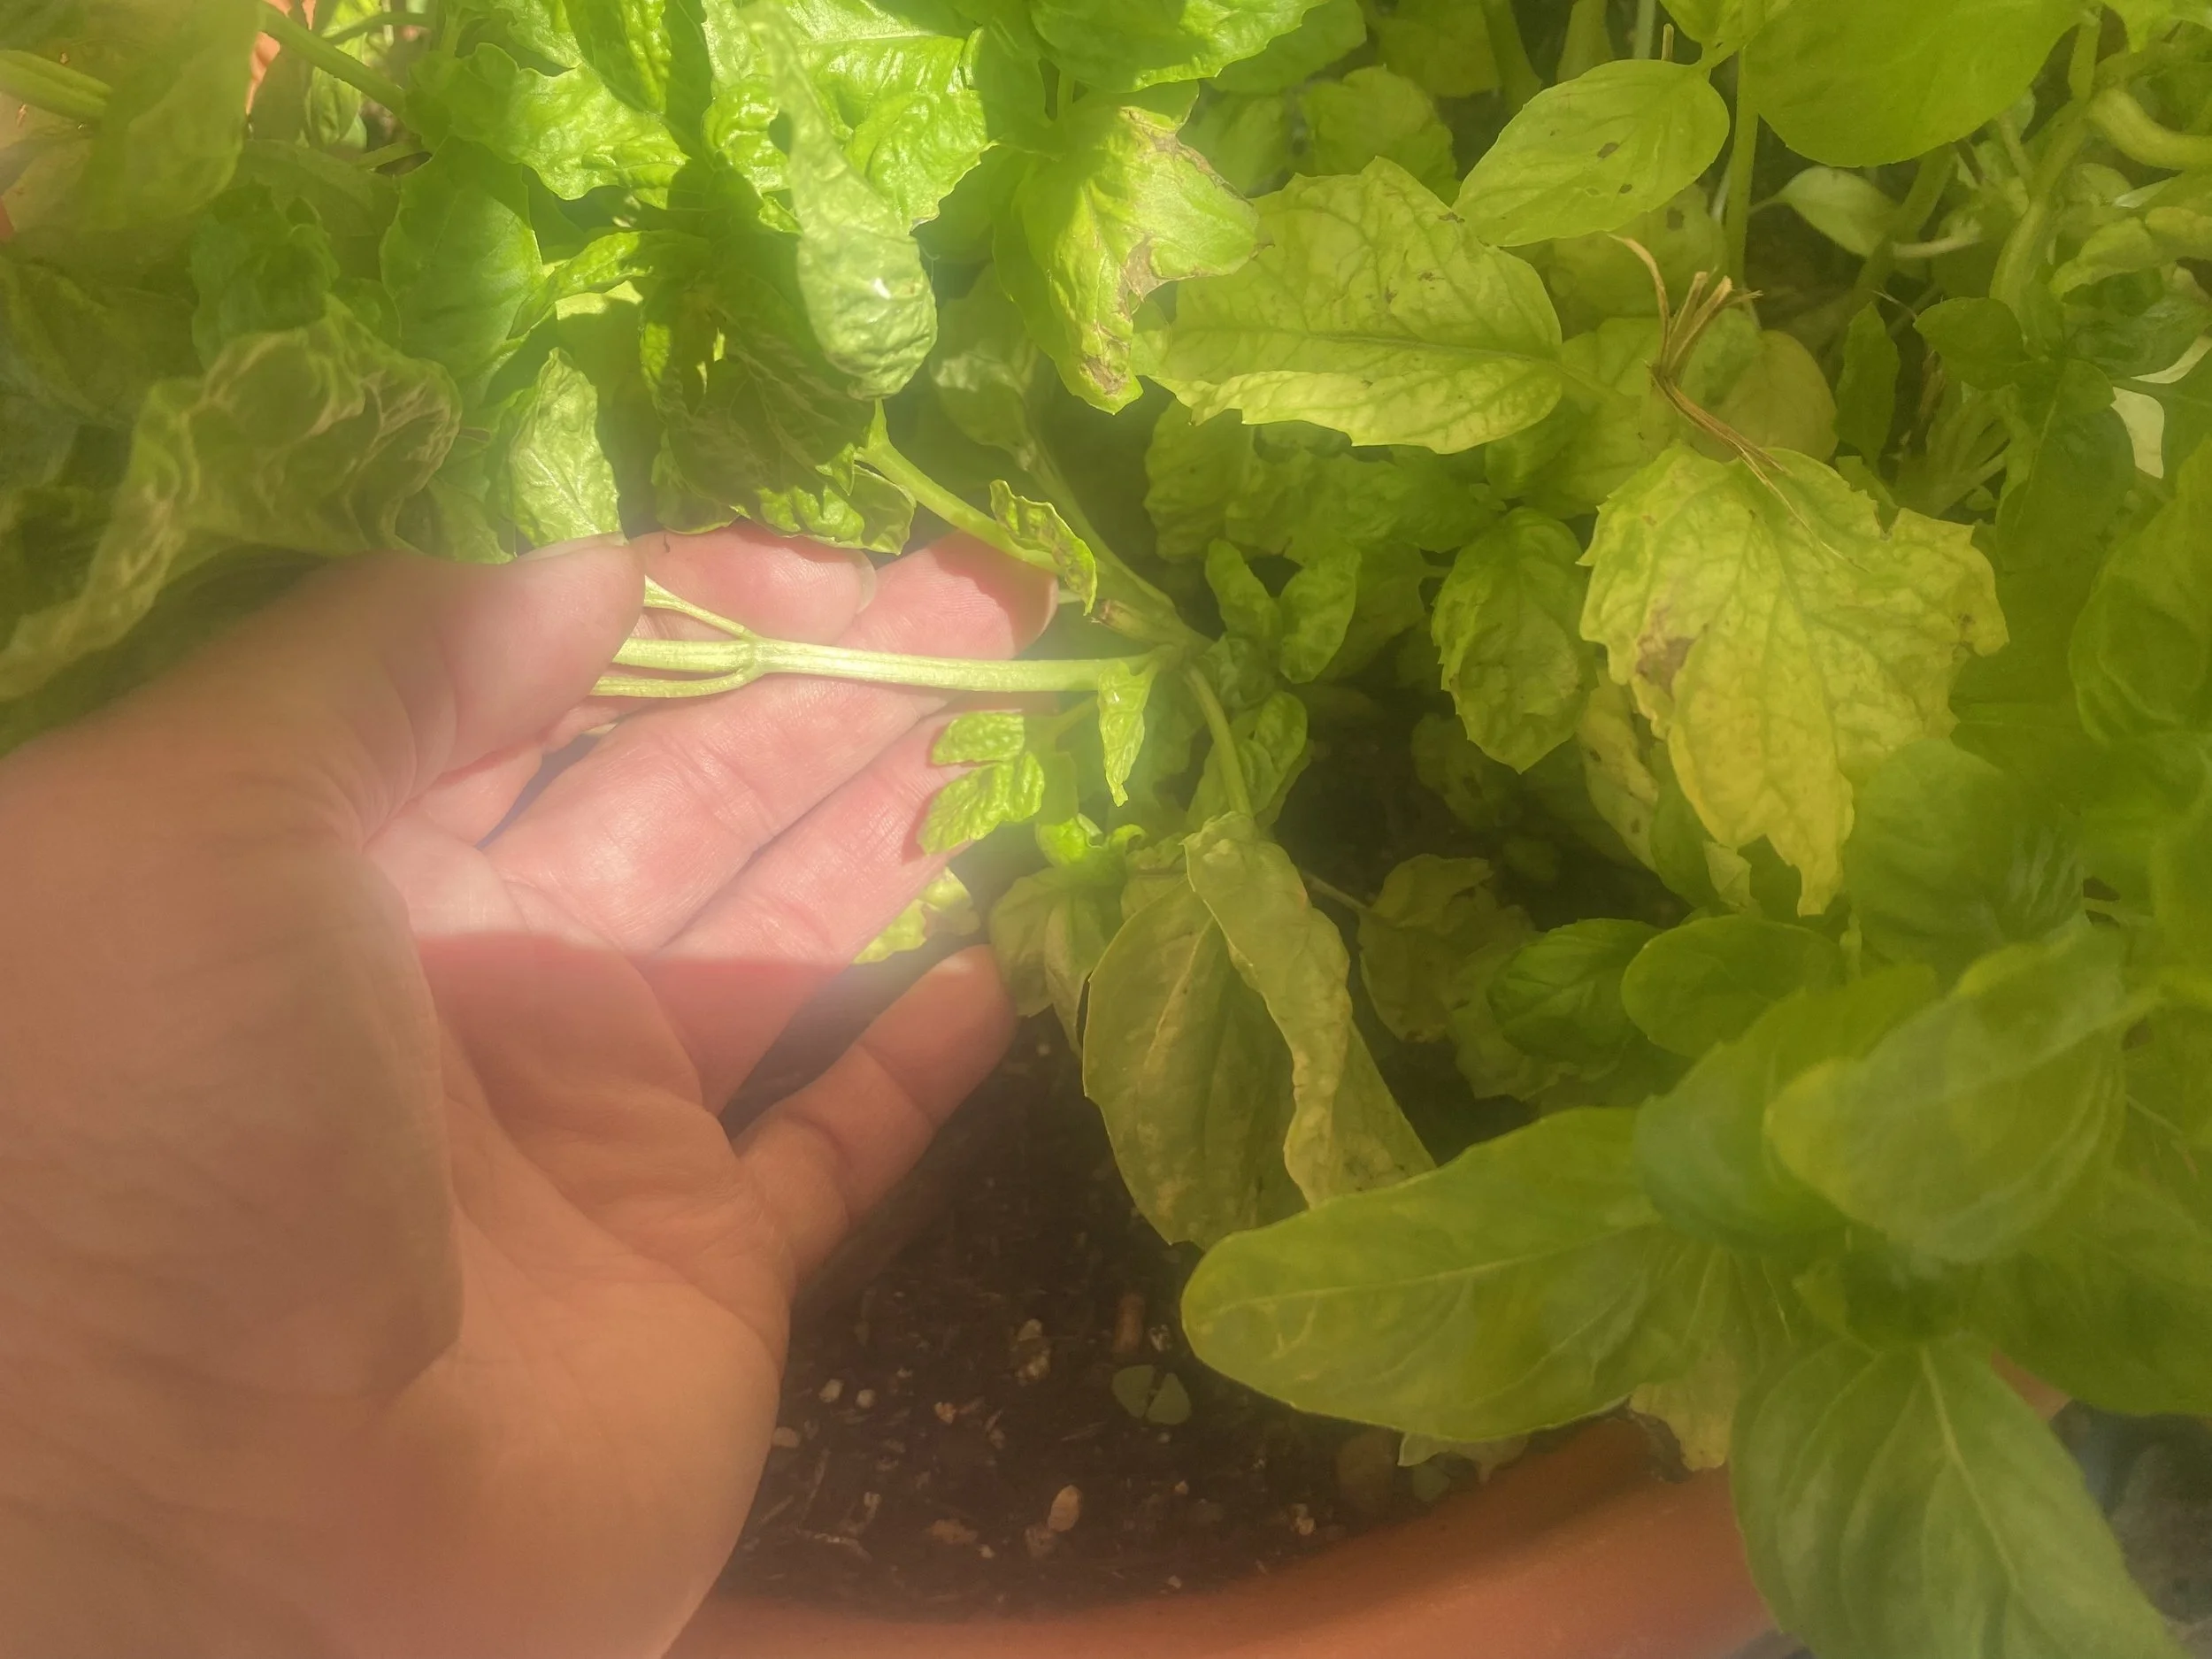
Actually you will be “pruning” your herbs as you use them. Pinch the leaves you want to use above the next set of leaves and the plant will grow new, and bushier growth.

Since some herbs are butterfly food, you may also find some leaves disappearing as butterfly caterpillar food. No need to panic, the plant will recover.

harvesting basil keeps the plants bushy and growing new leaves. (charlotte ekker wiggins photo)

Besides when you are immediately using the herbs, you will next prune herbs when you are collecting them to dry and freeze them. It’s best to do that before herbs bloom to preserve the best herb flavor.

My herbs in USDA Hardiness zone 5 don’t bloom until mid-summer. I let some bloom to feed my bees and harvest the rest prior to blooming for my winter use.

One note about rosemary. Harvest the soft stems; don’t cut into the base or the woody growth.

And one other thought. Why not ask your Mom? I bet she may appreciate having fresh herbs and may even share recipes for all those herbs you now have growing!

Charlotte

Is My Dogwood Dead?

this redbud tree died a couple of years ago. I left it in place and sure enough, new growth is starting. (charlotte ekker wiggins photo)

“Charlotte, you seem like a sympathetic and knowledgeable master gardener. I don’t dare share this with my ***master gardener group…..I’ve planted flowering dogwoods for three years straight and none of them took. I love those trees. Any tips on how to help them survive?”

(Name withheld at request of submitter)

Is My Dogwood Dead?

We see a lot of growth taking place and assume that whatever looks dead on top is dead all of the way through. We also tend to jump on immediately removing what appears dead.

Here’s the good news.

Depending on your growing conditions, your flowering dogwoods may just be taking their time to get their roots established. Plants will focus first on root development above all else and for good reason. They need a good foundation before they grow.

Keep the roots watered and mulched without touching the tree trunk and wait.

I have a dogwood I named Theodore who remained 3-feet tall for 20+ years. Then I noticed he was 4 feet tall, then six feet, and now he’s a standard-looking understory tree but he sure took his time!

Look at The Base

It’s easy to focus on the visible top of the trees but step back and look at the base. Plants in general take the first years to root, then focus on “the shoot” or the stem growth; then they “fruit” or provide flowers, fruits and seeds.

I have several tree tops that are dead. I didn’t remove them and kept them watered, watching around the tree base. If I start to see new growth, I will let the new greenery grow, tie it to the old dead trunk and prune that new growth to encourage the shooting in the direction I want.

It makes more sense to me to leave the established root structure than to pull all of that out and try to plant something new.

If you still have the dogwood trees in the ground, mark their location with a pole and monitor for any growth. If there is one thing my garden repeatedly teaches me, it is patience!

Charlotte

How to Plant Hardy Mum

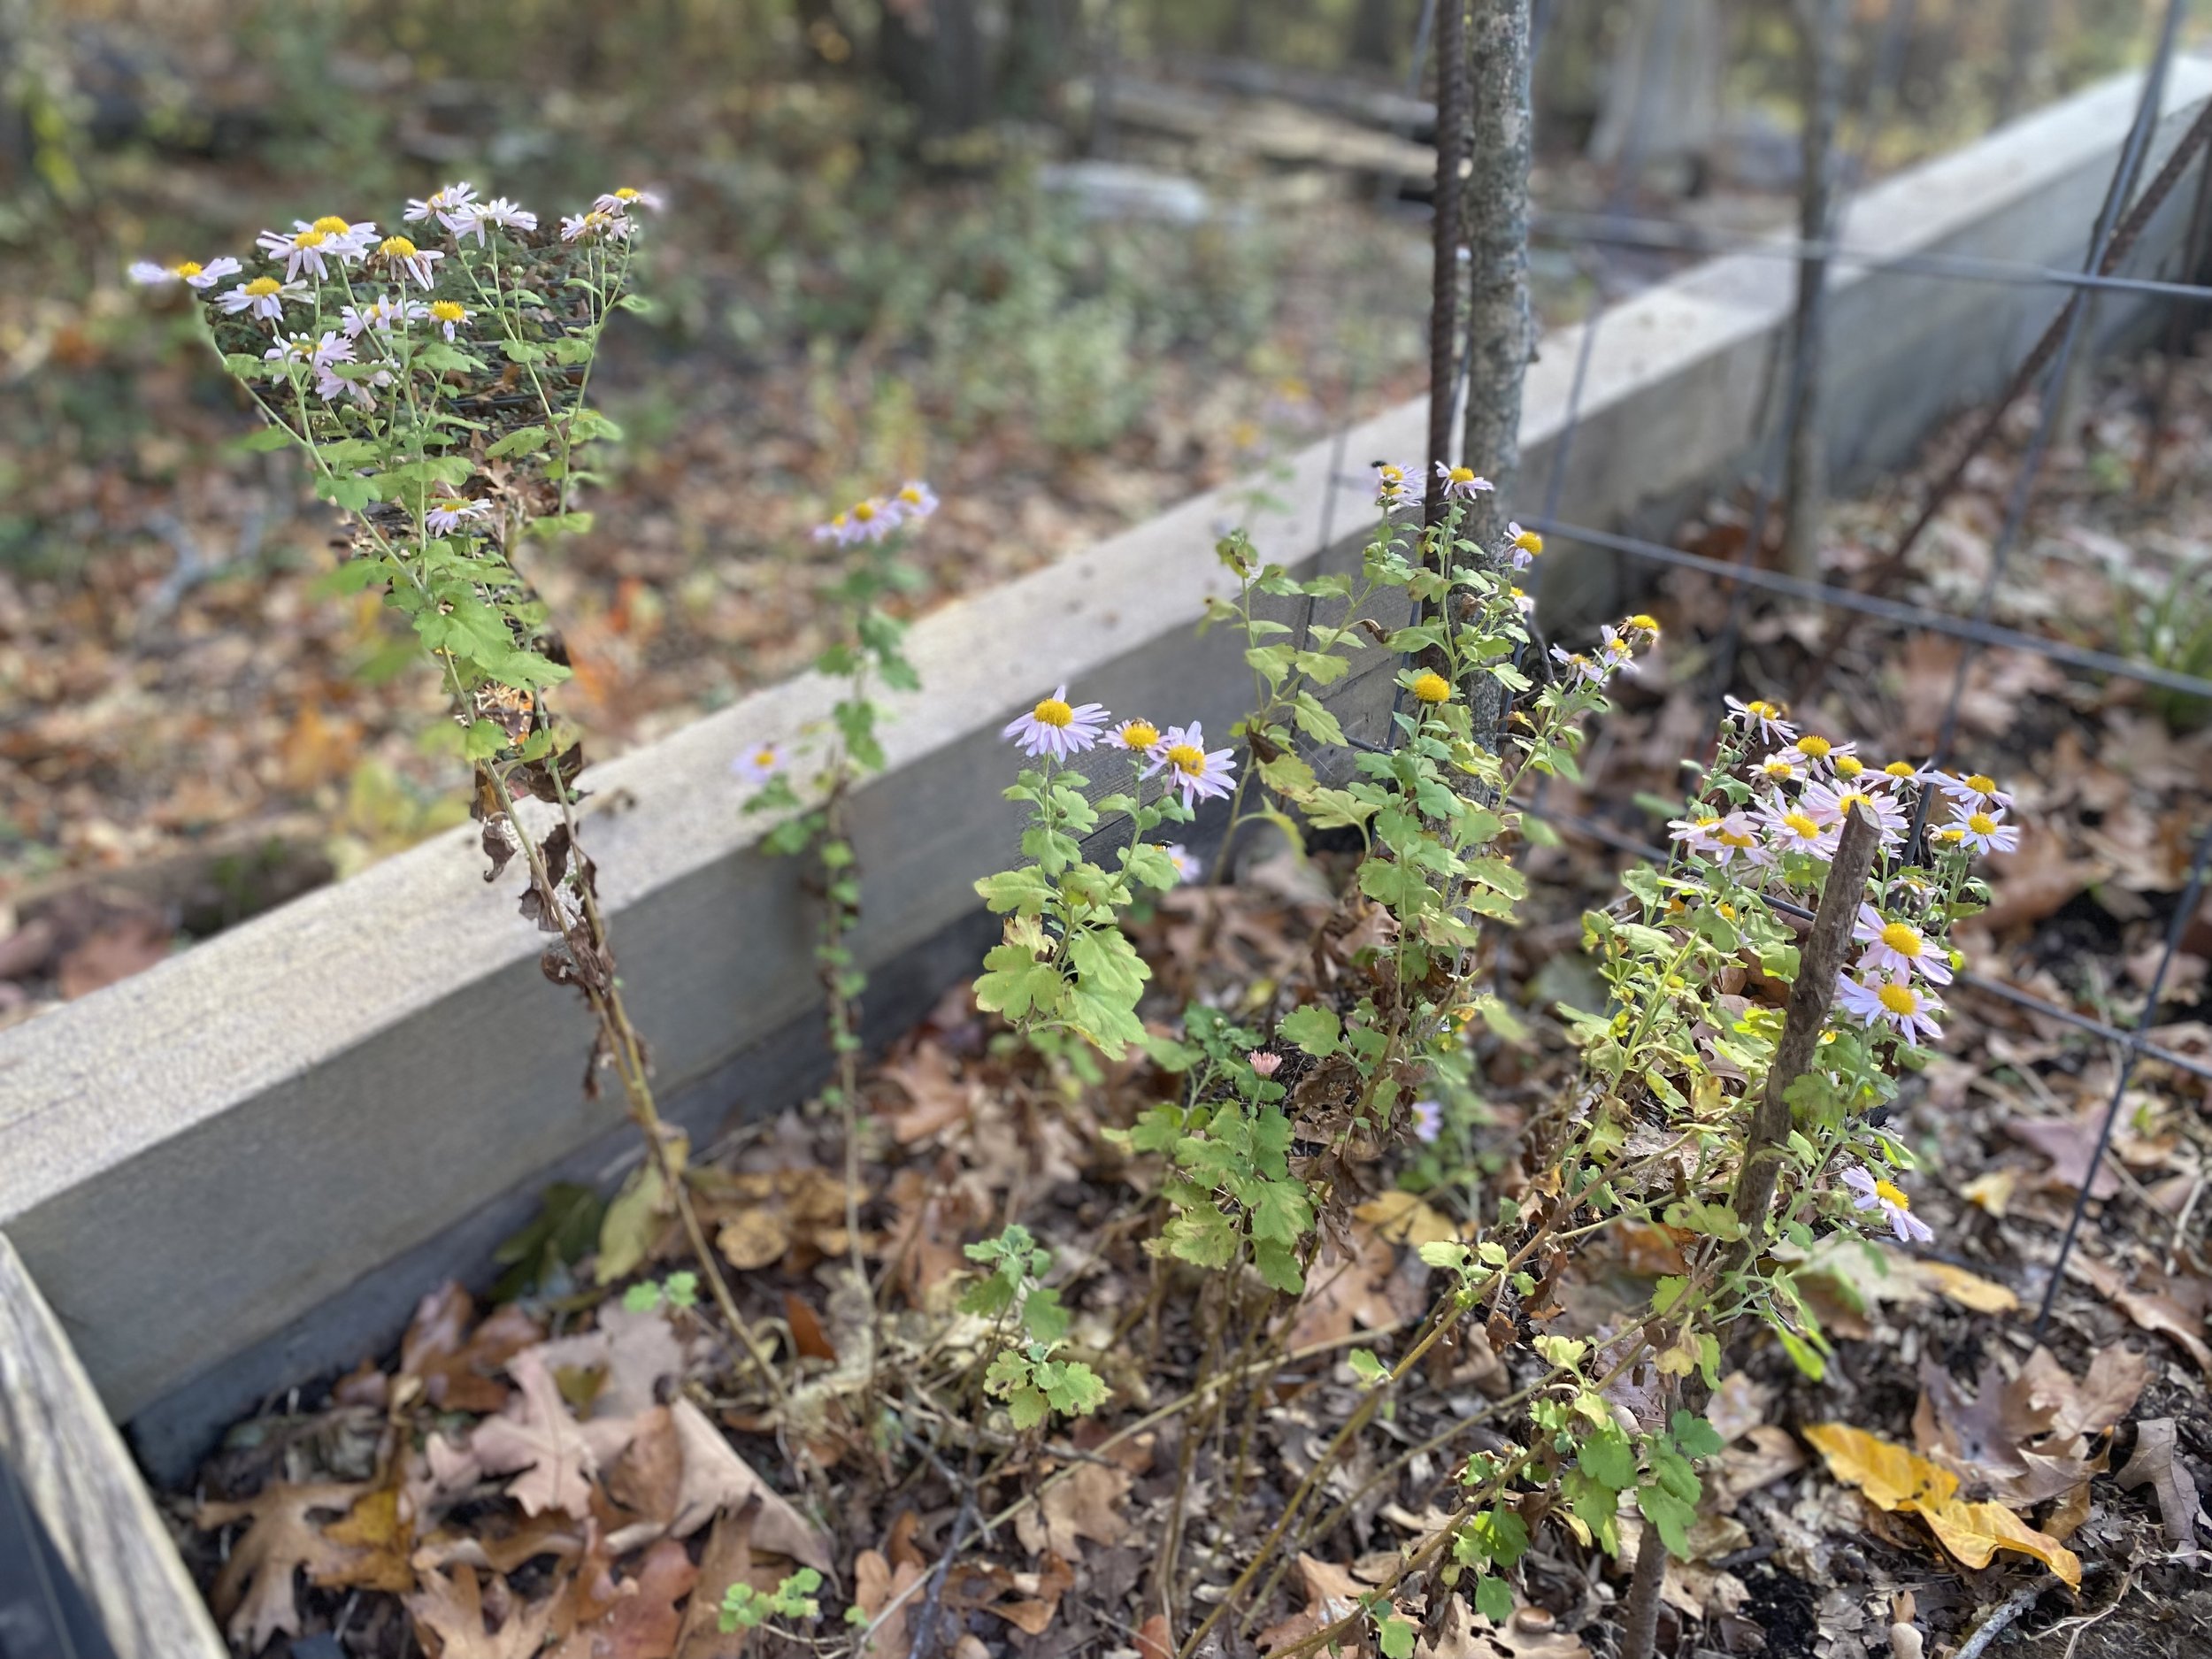
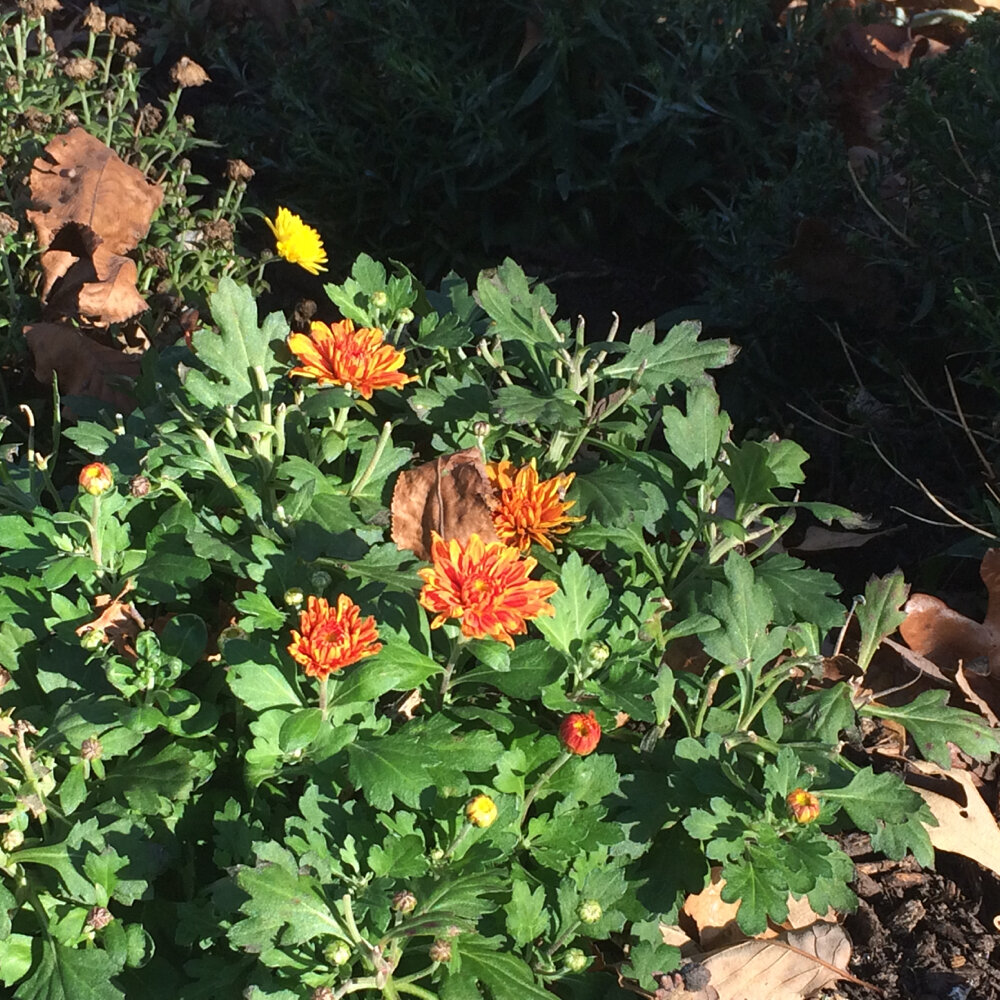
Plant mums in growing areas to repel bugs. (Charlotte Ekker Wiggins photo)

“Charlotte I bought 3 hardy mums and now what do I do, how do I plant them? — Lydia in USDA Zone 5

How to Plant Hardy Mums

Hi Lydia, you are in my USDA growing zone. You have a couple of options to get your mums through winter.

Winter Over in Garage

  1. You can winter your mums over in your garage.

    Place them off the cold ground. Water them every two weeks or so to keep their roots moist. The tops will dry.

    Leave them until spring.

    Plant after danger of frost is over, which in our area is around Mother’s Day. That gives the plants a whole growing season to get established.

    Plant Mums in Garden

  2. Plant mums in a sunny garden spot before the ground freezes, which is usually early January.

    Dig holes as deep as the plants are in the pots; water plants well; then place plants in holes and water again.

    Add mulch around the base of the plant.

    Give each plant a gallon of water a month through winter to keep roots moist.

    Don’t cut off the top; the dead branches will protect any new growth in the plant center.

    When you start seeing new growth, wait until danger of frost is over before you cut out dead tops.

    Keep watered through the growing season.

Last year’s mums survived and bloomed this year. (Charlotte Ekker Wiggins photo)

Pinching Mums

Regardless of when you plant mums, when they start growing back, decide how tall you want them to grow.

If you want the traditional mounded mum, you will need to start pinching growth when the plants reach about 4 inches. Pinch the stems every week or so until July 4 to keep the growth bushy.

If not, keep the plants mulched and watered and they will grow tall, making them excellent cut flowers. If you notice florist arrangements, they use mums are filler plants because they have a long vase life.

I add finished compost into the soil around mums early spring to help feed them through the growing season.

Charlotte

Are All Fall Bulbs Good

“Charlotte I see spring-flowering bulbs on sale this time of year, are all fall bulbs good to plant?” - Samantha

Are All Fall Bulbs Good?

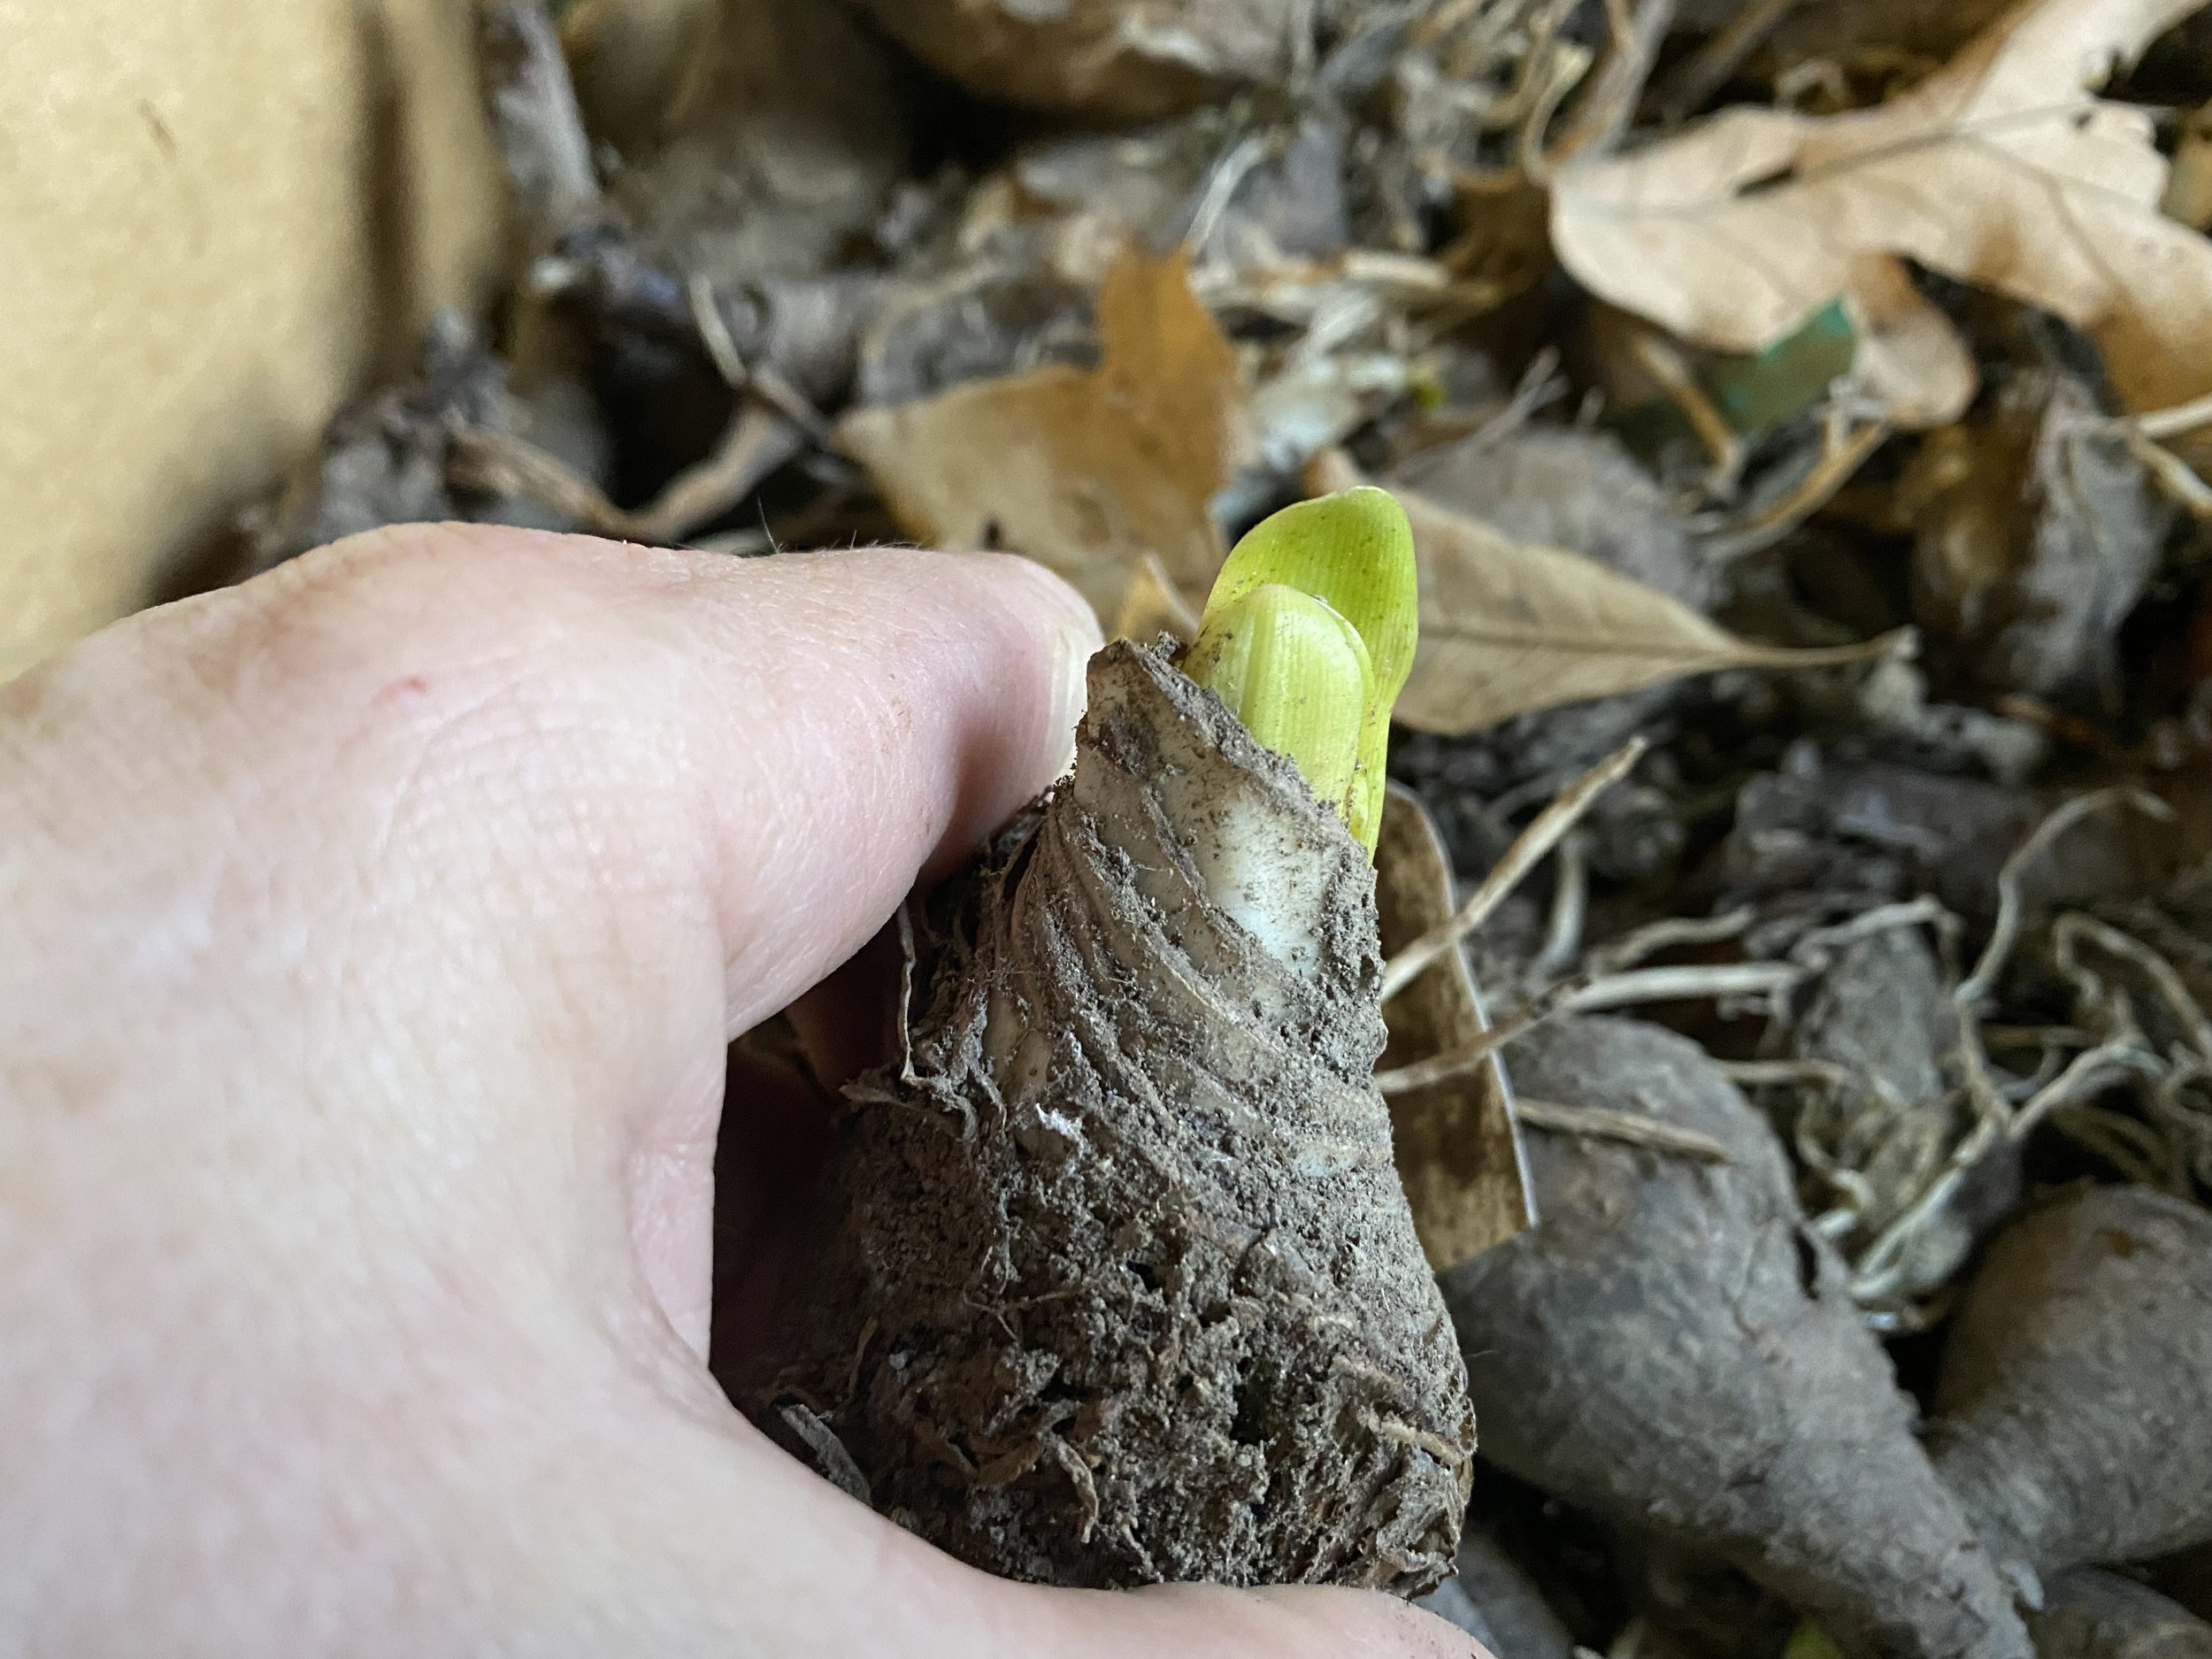
Green growth is a sure sign this surprise lily bulb is still alive. (Photo by Charlotte Ekker Wiggins)

Hi Samantha, not necessarily. Some bulbs may look dead when they are just dormant; others may have dried up and will never bloom again.

First check that the bulb feels firm. Mushy, empty bulbs are dead and won’t grow again. You can gently feel most bulbs through the packaging.

Secondly, check the tips. Bulbs that are still healthy and ready to grow may have a little green tip showing at the bulb top. You may also see tiny roots springing from the bottom of the bulb.

Finally check the season they are supposed to grow. Some bulbs are annuals and only grown one season.

If you see any of these signs of life, definitely pick them up and get them in the ground as soon as you can. many spring-blooming bulbs need exposure to cold for at least 8 weeks before they will bloom such as tulips and daffodils.

If you can’t plant them, consider potting them and storing in a refrigerator for the 8 or 12 weeks they need. Then you can pull the pots out and let the bulbs grow in the pots. Once they are done, you can move the bulbs back into your garden.

Charlotte

How To Get Mums Blooming

This recently-planted mum is still showing signs of flowers. (Photo by Charlotte Ekker Wiggins)

“Charlotte, Even planted mums never seem to bloom again for me. Do yours really do so? What’s your secret?!” - Lucy

How to Get Mums Blooming

Hi Lucy,

Left unmanaged, chrysanthemums will grow long and leggy with few blooms. To get them to have more flowers, start pinching them back 1-2 inches every week or so during the growing season until July. The pinching will encourage the plant to grow bushy and encourage blooms throughout the cut back plant.

Don’t throw out those trimmings, either. I just gently stick them in the nearby ground and make sure they are watered. They will usually grow a new plant although it may not bloom until the second year.

Charlotte

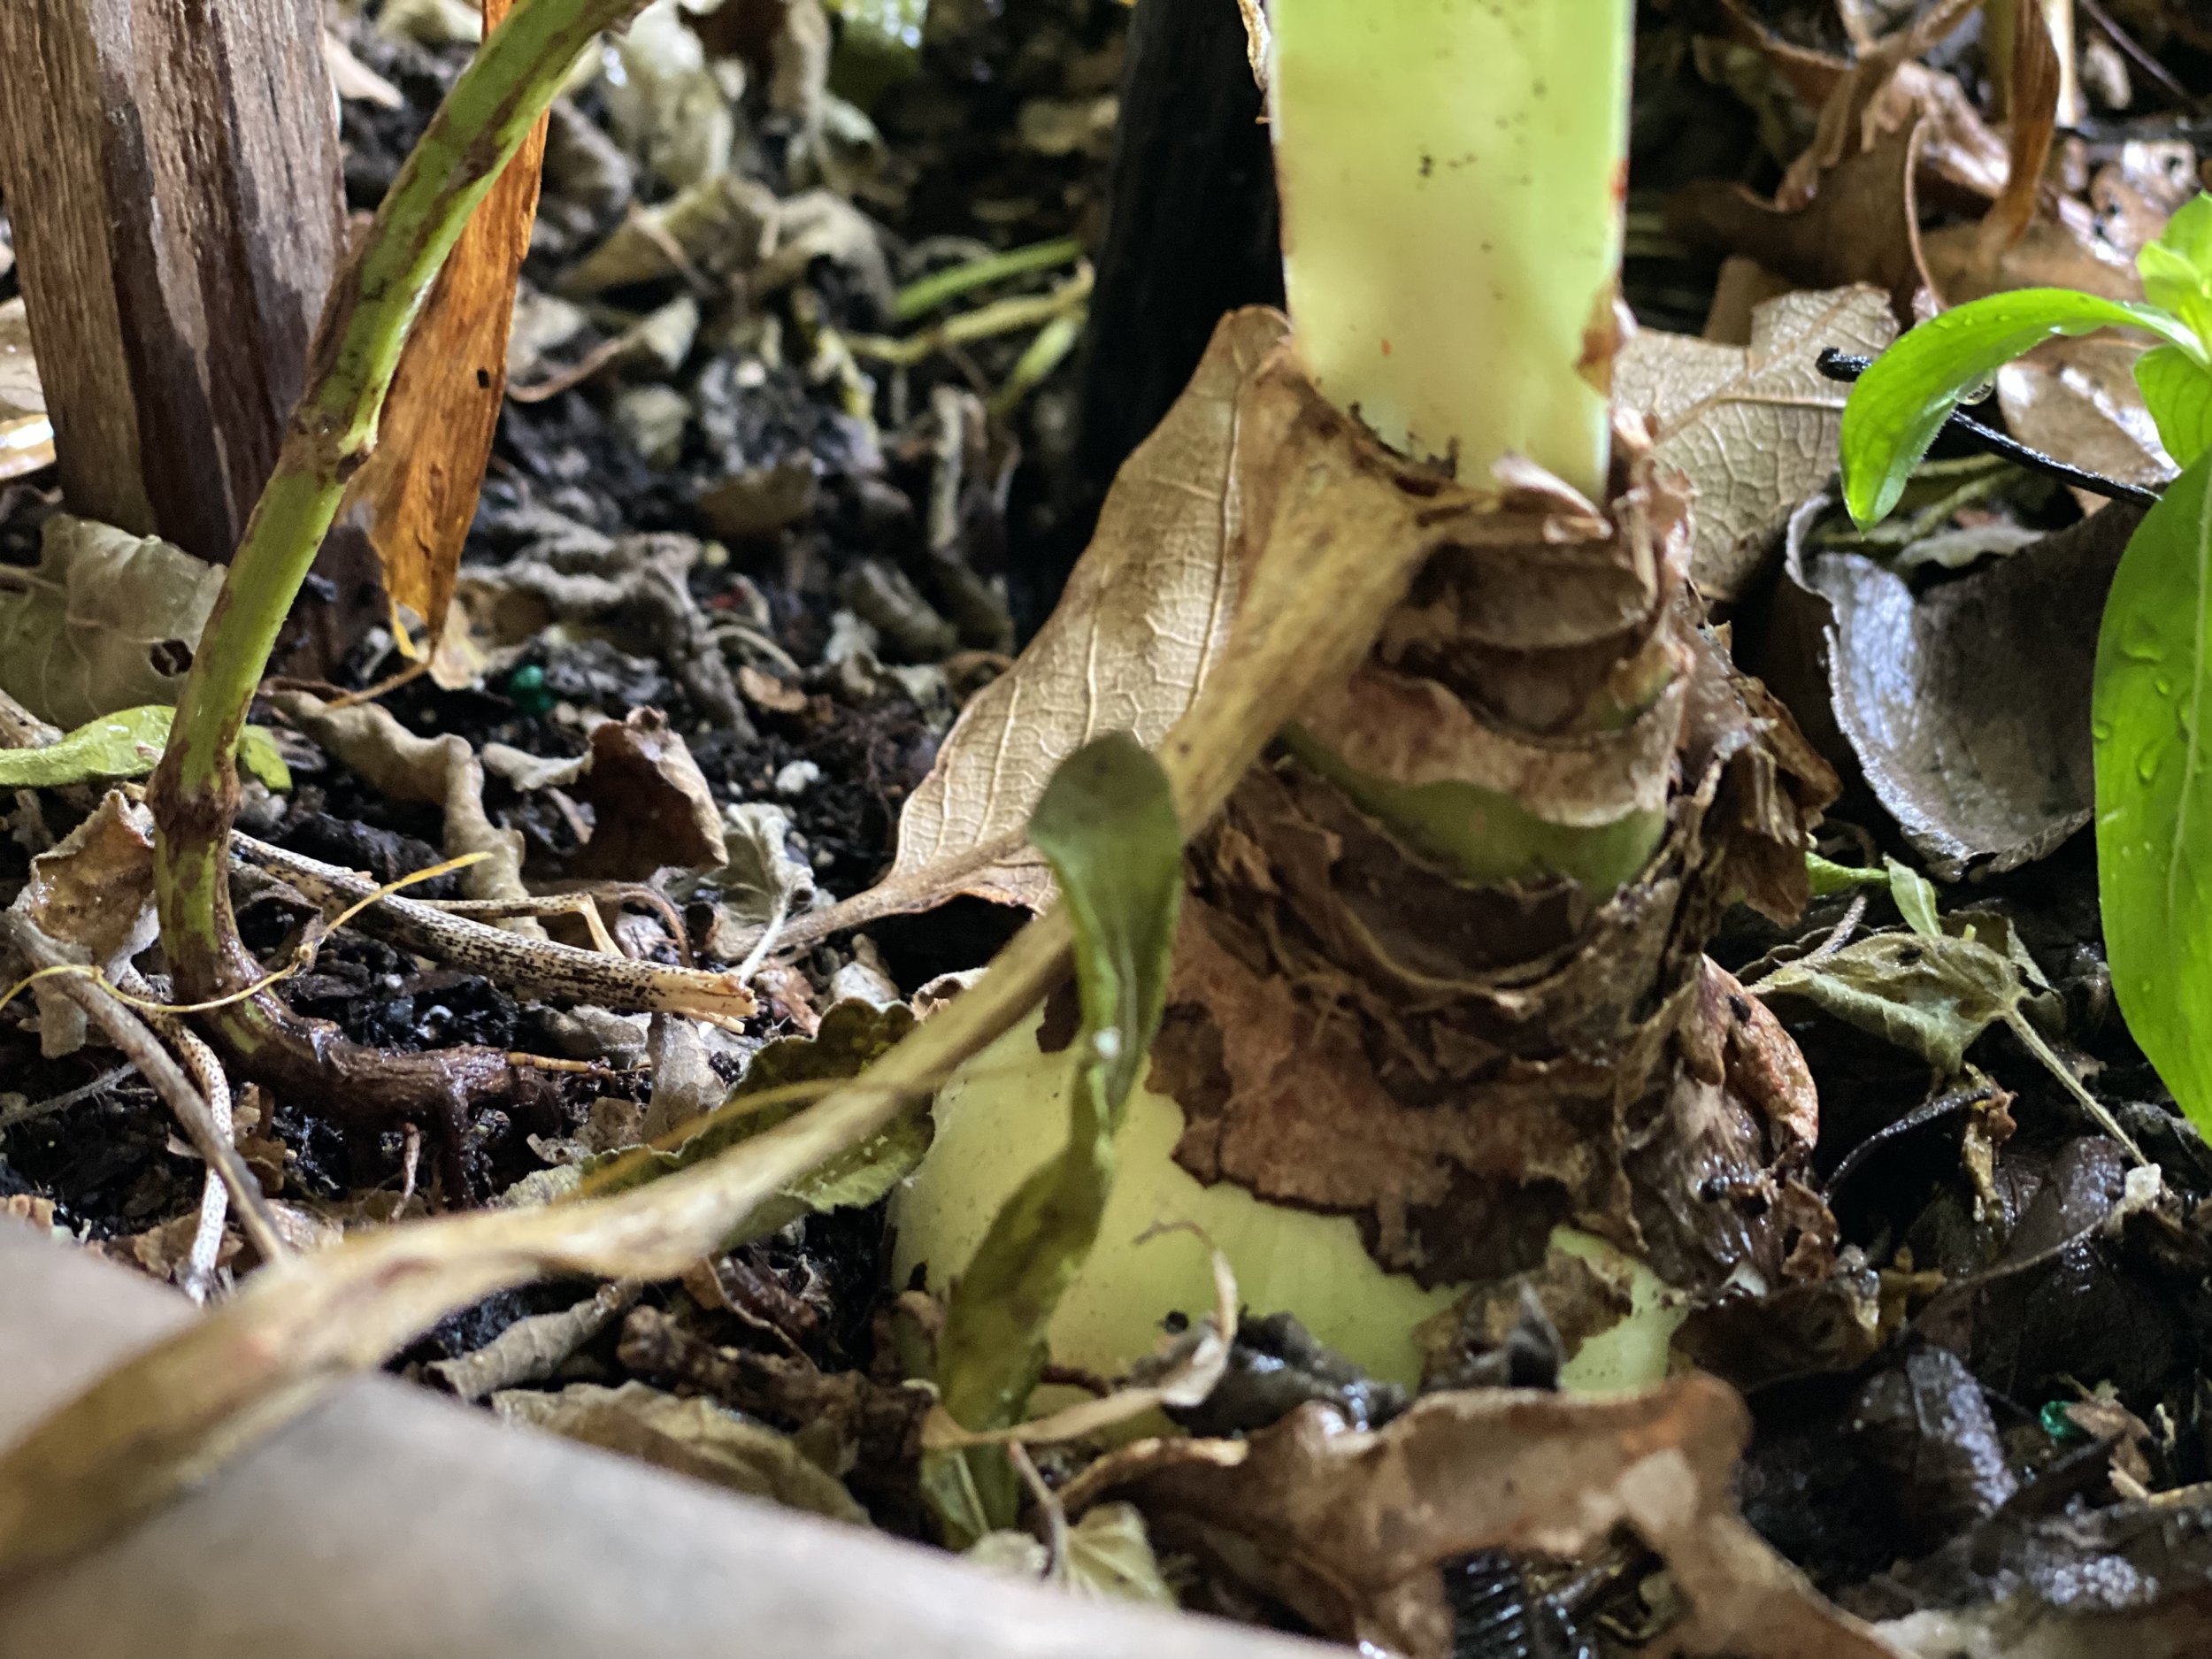
Where to Store Amaryllis

This Amaryllis is going dormant as its leaves turn yellow. (Photo by Charlotte Ekker Wiggins)

“I live in an apartment. Where can I put an amaryllis plant to go dormant. If I put it in my crisper do I have to put the bulb in a bag.” — Donna

Where to Store Amaryllis

Hi Donna, do NOT put your Amaryllis bulb in your refrigerator crisper, this is a tropical plant and the cold will kill it.

Keep the Amaryllis bulb watered in a pot in a window until all of the green leaves turn yellow and die off. If you don’t have a window, keep it as close to sunlight as you can so the leaves can collect sun and store it in the bulb. Let it go dormant on its own time.

These Amaryllis bulbs are ready for a nap for a few weeks. (Photo by Charlotte Ekker Wiggins)

You can place the Amaryllis bulb in a brown bag after all of the greenery has died back.

Leave it in a closet or in a cabinet at room temperature.

Let it rest for 6-8 weeks, then repot it. I sometimes just leave it in the original pot and start watering it when I want it to regrow.

This Amaryllis is starting to regrow, see the bud on the left? (Photo by Charlotte Ekker Wiggi

If the Amaryllis bulb has collected enough sunlight through its leaves, you will enjoy another blooming cycle.

Here’s one of my re-blooming Amaryllis, love to watch them re-grow! (Photo by Charlotte Ekker Wiggins

Amaryllis bulbs are easy to care for so you can get them to re-bloom and well worth the effort, I have some Amaryllis bulbs that are more than 10 years old.

For more gardening, beekeeping, cooking and easy home decor tips, subscribe to Garden Notes.
Charlotte

Rose of Sharon Trees

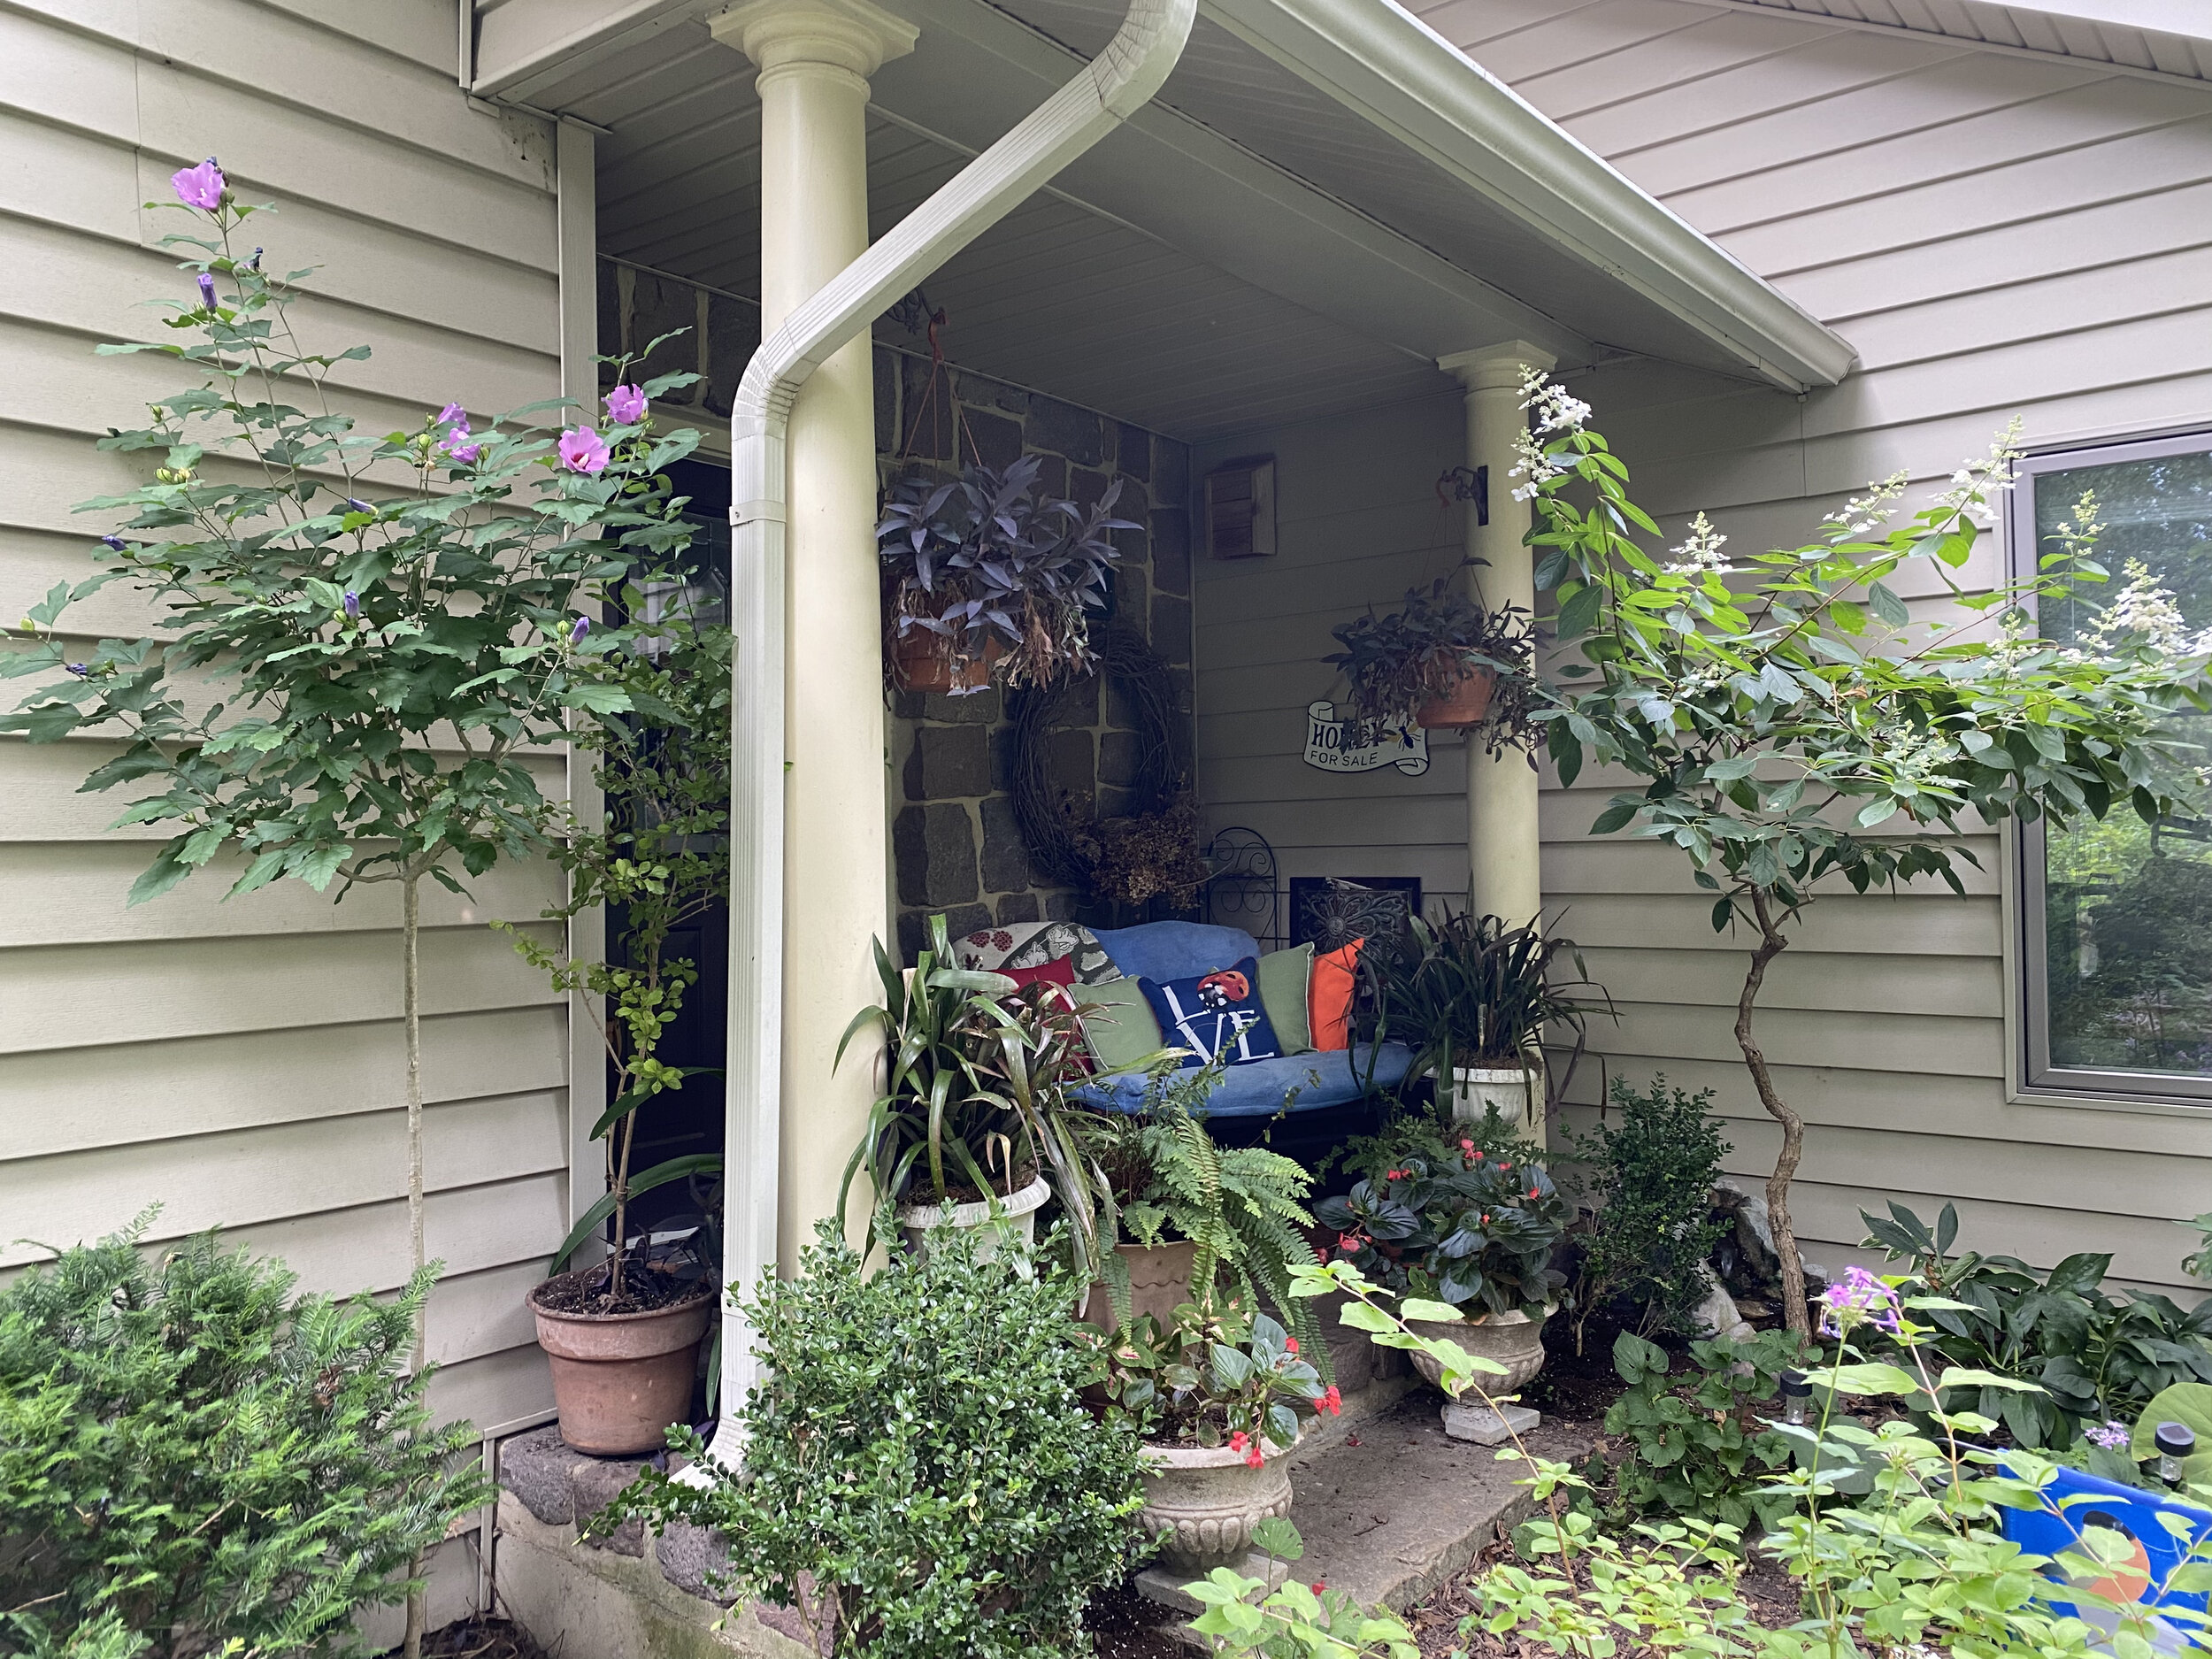
Rose of Sharon, left, and Panicle Hydrangea, right, trimmed as trees. (Photo by Charlotte Ekker Wiggins)

Rose of Sharon, left, and Panicle Hydrangea, right, trimmed as trees. (Photo by Charlotte Ekker Wiggins)

“Charlotte I love your Rose of Sharon trees, where did you get them? I would like to add some to my garden….” - Lila

Rose of Sharon Trees

Hi Lila,

If you have Rose of Sharon shrubs or access to them, that’s all you need. The Rose of Sharon trees in my garden are shrubs I pruned into a tree shape. The hardest part of doing it is/was waiting!
Rose of Sharon are a cousin to tropical hibiscus. A hardy perennial usually grown as a shrub, these hibiscus are helpful to have in the garden because they bloom mid to late in the summer season when little else is in bloom.

Keeping a Rose of Sharon shaped as a tree takes persistence and patience. (Photo by Charlotte Ekker Wiggins)

Keeping a Rose of Sharon shaped as a tree takes persistence and patience. (Photo by Charlotte Ekker Wiggins)

The Rose of Sharon trees in my garden are lavender, pink and white. Several are double lavenders and I have a blue chiffon on my wish list for a new garden area. Until then, I check my trimmed Rose of Sharon trees to make sure they are not putting energy into sprouting side shoots.

Remove any growth along the stem to encourage a straight trunk. (Photo by Charlotte Ekker Wiggins)

Remove any growth along the stem to encourage a straight trunk. (Photo by Charlotte Ekker Wiggins)

If I see those side shoots, I cut them off right then and there, no guarantee I will remember to trim later during winter or early spring.

Young Rose of Sharon trees may need support for a couple of years as their stems get thicker. I use rebar pieces in various lengths to give them support. The rebar can then be re-used for other garden projects like training Eastern Redbuds to grow straight.

Rebar makes good support and can easily be reused. I will tie this gently to the trunk.(Photo by Charlotte Ekker Wiggins)

Rebar makes good support and can easily be reused. I will tie this gently to the trunk.(Photo by Charlotte Ekker Wiggins)

The other consideration is where to place the Rose of Sharon trees in your garden so they become a focal point.

If for some reason you don’t like where you’ve settled them, they can easily be moved in their first few years. They may not bloom for a year after the move but it’s better to have them in the right spot than growing where you can’t enjoy them.

Another Rose of Sharon tree that is about 5 years old. (Photo by Charlotte Ekker Wiggins)

Another Rose of Sharon tree that is about 5 years old. (Photo by Charlotte Ekker Wiggins)

As I said, the most challenging part of growing Rose of Sharon trees is being patient. It can take 5-7 years before a Rose of Sharon tree trunk is strong enough to hold up the tree and bloom.

Staking the trunks and removing any side growth can help speed up the process but it’s not a quick process.

I happen to think it’s worth it because it provides our gardens with an interesting shape that helps us enjoy the mid-summer blooms.

And bumblebees love these flowers, too!

Charlotte

Moving Tomato Plant Inside

A cherry tree I now have growing in a sunny den window. (Photo by Charlotte Ekker Wiggins)

A cherry tree I now have growing in a sunny den window. (Photo by Charlotte Ekker Wiggins)

“Charlotte, don’t laugh. I am very attached to a tomato plant my mother gave me last spring. It’s still going strong. Can i bring it inside. Do you think it will live?” - Melissa

Moving Tomato Plant inside

Not only will it live, Melissa, but I will chuckle with you. If you have the correct light and keep it evenly watered, it may still be giving you tomatoes next year.

In their home grounds of Peru in South America, tomatoes grow as perennials. The only reason we treat them as annuals is our temperatures in USDA zone 5 (for us) and, in general, for most of north America, it gets too cold for these tropical plants.

If we bring them inside, though, they can flourish. I have pulled tomatoes through for several years - one plant was with me continually for four years.

This year I started a cherry plant very late in the season. It’s an indeterminate tomato, which means it will keep blooming as long as it has the right nutrients and growing conditions. As opposed to determinate tomatoes, which provide a limited tomato supply and then stop producing fruit.

When temperatures started to drop, this plant kept growing. It was doing so well that I moved it into my garage until I could find a south-facing window for it.

This cherry tomato is still blooming so more tomatoes are on their way. (Photo by Charlotte Ekker Wiggins)

This cherry tomato is still blooming so more tomatoes are on their way. (Photo by Charlotte Ekker Wiggins)

Tomatoes are pollinated by bumble bees. You can also artificially pollinate by using a small paint brush and moving pollen from one flower to the next. I’ve done that when the inside tomato plant was blooming in January and no bumblebees were around.

From the look of this cherry tomato plant, there should be many more tomatoes before I need to do that.

Once you have it inside, monitor the soil. Tomatoes like soil moisture level to stay even. Winter conditions in our homes can be dry so I daily check to make sure the soil is not drying out.

Now this cherry tree is a new one for me. Yes, it’s a cherry plant. I have been tying it up as it grew and it now this cherry plant is a good 7 feet tall. Don’t you think this qualifies now as a tree?

The 7-foot cherry tomato now wintering over in my den. (Photo by Charlotte Ekker Wiggins)

The 7-foot cherry tomato now wintering over in my den. (Photo by Charlotte Ekker Wiggins)

Tying up the tomato plant makes it easier to keep sucker branches removed. It also makes it easier to find ripe tomatoes.

I am also seriously considering adding Christmas lights. Wouldn’t this make a nice Christmas tree?

Charlotte

Elevated Pot Gardens

This is an example of a pot garden that has been elevated. (Photo by Charlotte Ekker Wiggins)

This is an example of a pot garden that has been elevated. (Photo by Charlotte Ekker Wiggins)

….I loved the idea of a pot garden but want something ai can easily reach. I’ve seen raised beds but not ones with pots, is that even possible?” — Amanda

Elevated Pot Gardens

Hi Amanda, it’s easy to raise your pot garden like one would a raised bed. Measure the right height for you and then take a look at the size of the pots you plan to plant in.

You can either build, or have built, basically wood trays on legs that will hold your pots to the height you need. Or you can buy pre-made raised beds and just use pots in the beds instead of adding soil.

I personally like to have elevated working surfaces when I garden or putter. I have a gardening table my handyman helped me to make where i can stand and fill pots or do whatever I need to get done.

The important measurement here is what height will work for you. Some pre-made raised beds can be too high so before loading them up with pots, measure the raised beds and have the legs adjusted accordingly.

The elevated pot garden in the photo was at one of our local apartment buildings easily visible from a public road. I personally don’t have a pot garden elevated in raised beds but I would if that’s the only way I could grow some of my favorite foods.

The advantage of growing in pots is that you can change out the pots when the crop is done, refresh the soil and replace those pots with new ones for a fall crop. You also should not have issues with garden visitors such as rabbits. Raccoons and birds may still get into your bounty but you can secure your pots by covering them with netting.

When you get your elevated pot garden set up, would you share some photos? Would love to see how you get yours set up!

Charlotte

Grass in Iris Beds

I use vinca ground cover to hold in soil and keep iris rhizomes hydrated. (Photo by Charlotte Ekker Wiggins)

I use vinca ground cover to hold in soil and keep iris rhizomes hydrated. (Photo by Charlotte Ekker Wiggins)

“My iris beds have become covered in grass. How can I get that removed? Do I need to use landscape fabric?” — Cynthia

Grass in Iris Beds

Hi Cynthia,

I would grab a cup of coffee, or tea, put on my gardening gloves and head out after a good rain. The best way to keep your iris beds clean of grass is to remove the grass by hand. Make sure you get the roots, not just the green tops.

Once cleared, add a shallow layer of mulch. You don’t want to cover the iris rhizomes but you want to maintain a level of moisture around the roots. The mulch will help keep the moisture in and level out the temperature so the plants are less stressed.

In terms of landscaping fabric, I am not a fan. Soil is a living, breathing ecosystem so you want to keep soil hydrated and healthy. That’s way your plants stay healthy.

I was once given a roll of landscape fabric and placed it on a couple of paths covered in mulch. I have since pulled it all up and tossed it. I would rather keep something growing on the paths cut short with my weed eater than smother what may try to grow and destroy the soil.

After removing the grass, consider planting a ground cover to keep your iris hydrated. Lamb’s Ears and Vinca are both excellent ground covers that can keep soil hydrated.

Charlotte

Leave or Cut Iris Flowers

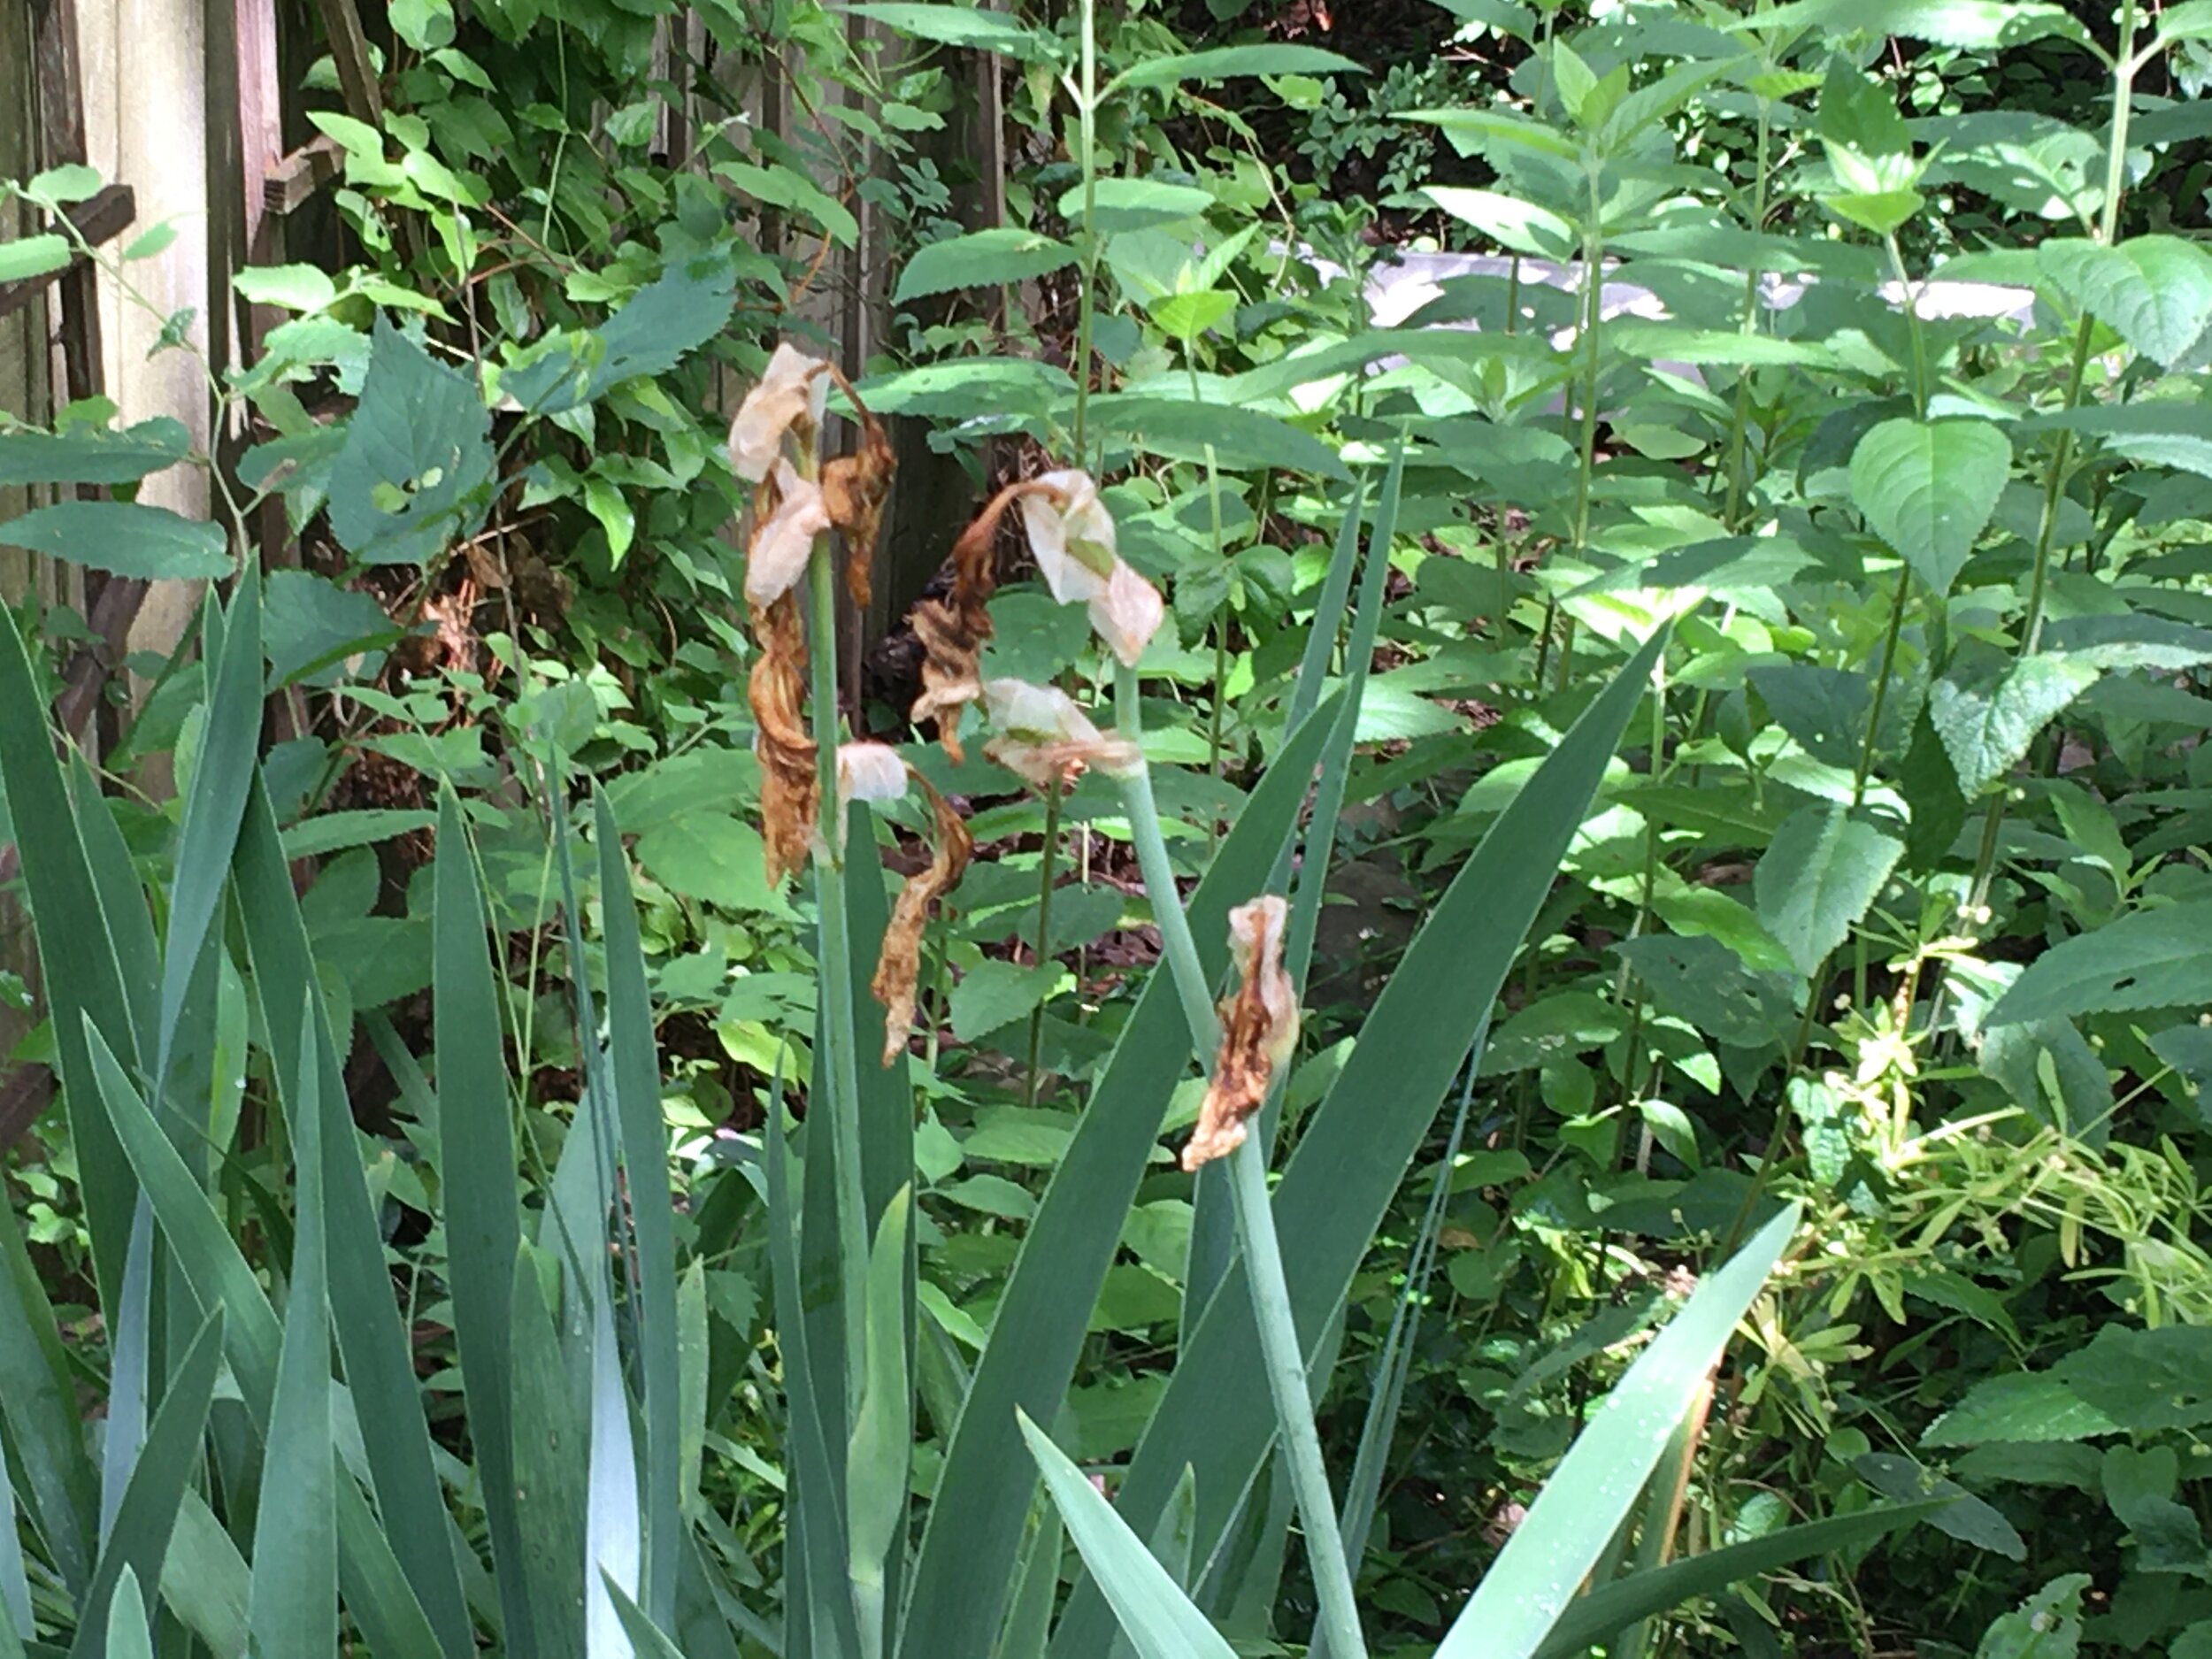
After blooming, iris flowers form seed pods unless the dead heads are cut off. (Photo by Charlotte Ekker Wiggins)

After blooming, iris flowers form seed pods unless the dead heads are cut off. (Photo by Charlotte Ekker Wiggins)

“..my irises have died back and are now making seed pods. Should I leave them or cut off the flowers?” — Gary

Leave or Cut Iris Flowers

Hi Gary,

If you want more irises, leave the seed pods. You can cut them off after they dry and store them to plant next year.

If you don’t want more of the pod-generating iris, I would cut them off right after they bloom, that way the plant is not spending energy making the seeds.

I have a number of different gift irises from friends and family throughout my garden. This is one of the newest additions:

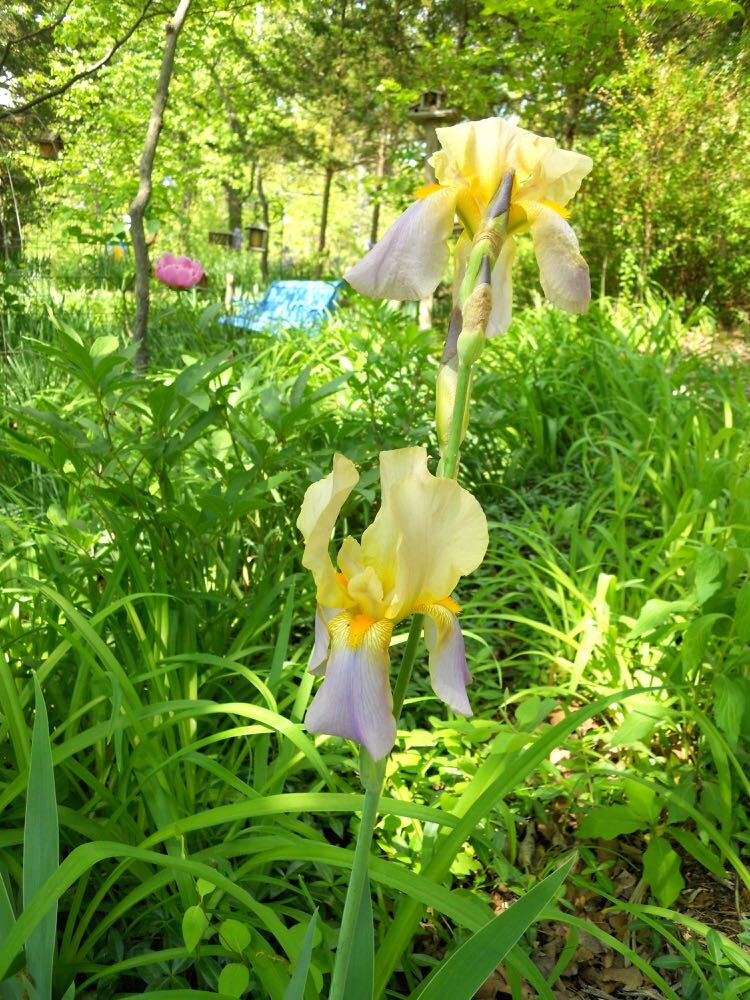
One of the new iris to bloom this year in my Missouri limestone hillside garden. (Photo by Charlotte Ekker Wiggins)

One of the new iris to bloom this year in my Missouri limestone hillside garden. (Photo by Charlotte Ekker Wiggins)

If you want to move your iris, I like to do so right after they bloomed through about early fall. That way the plant roots still have time to settle in before winter. They also will bloom again next year as opposed to waiting a growing cycle or two.

Also remember to mark the fading iris so you remember what color they are. It’s helpful to minimize moves and get them established in their final flower bed so you can enjoy them for years to come.

Charlotte

Moldy Seed Starting

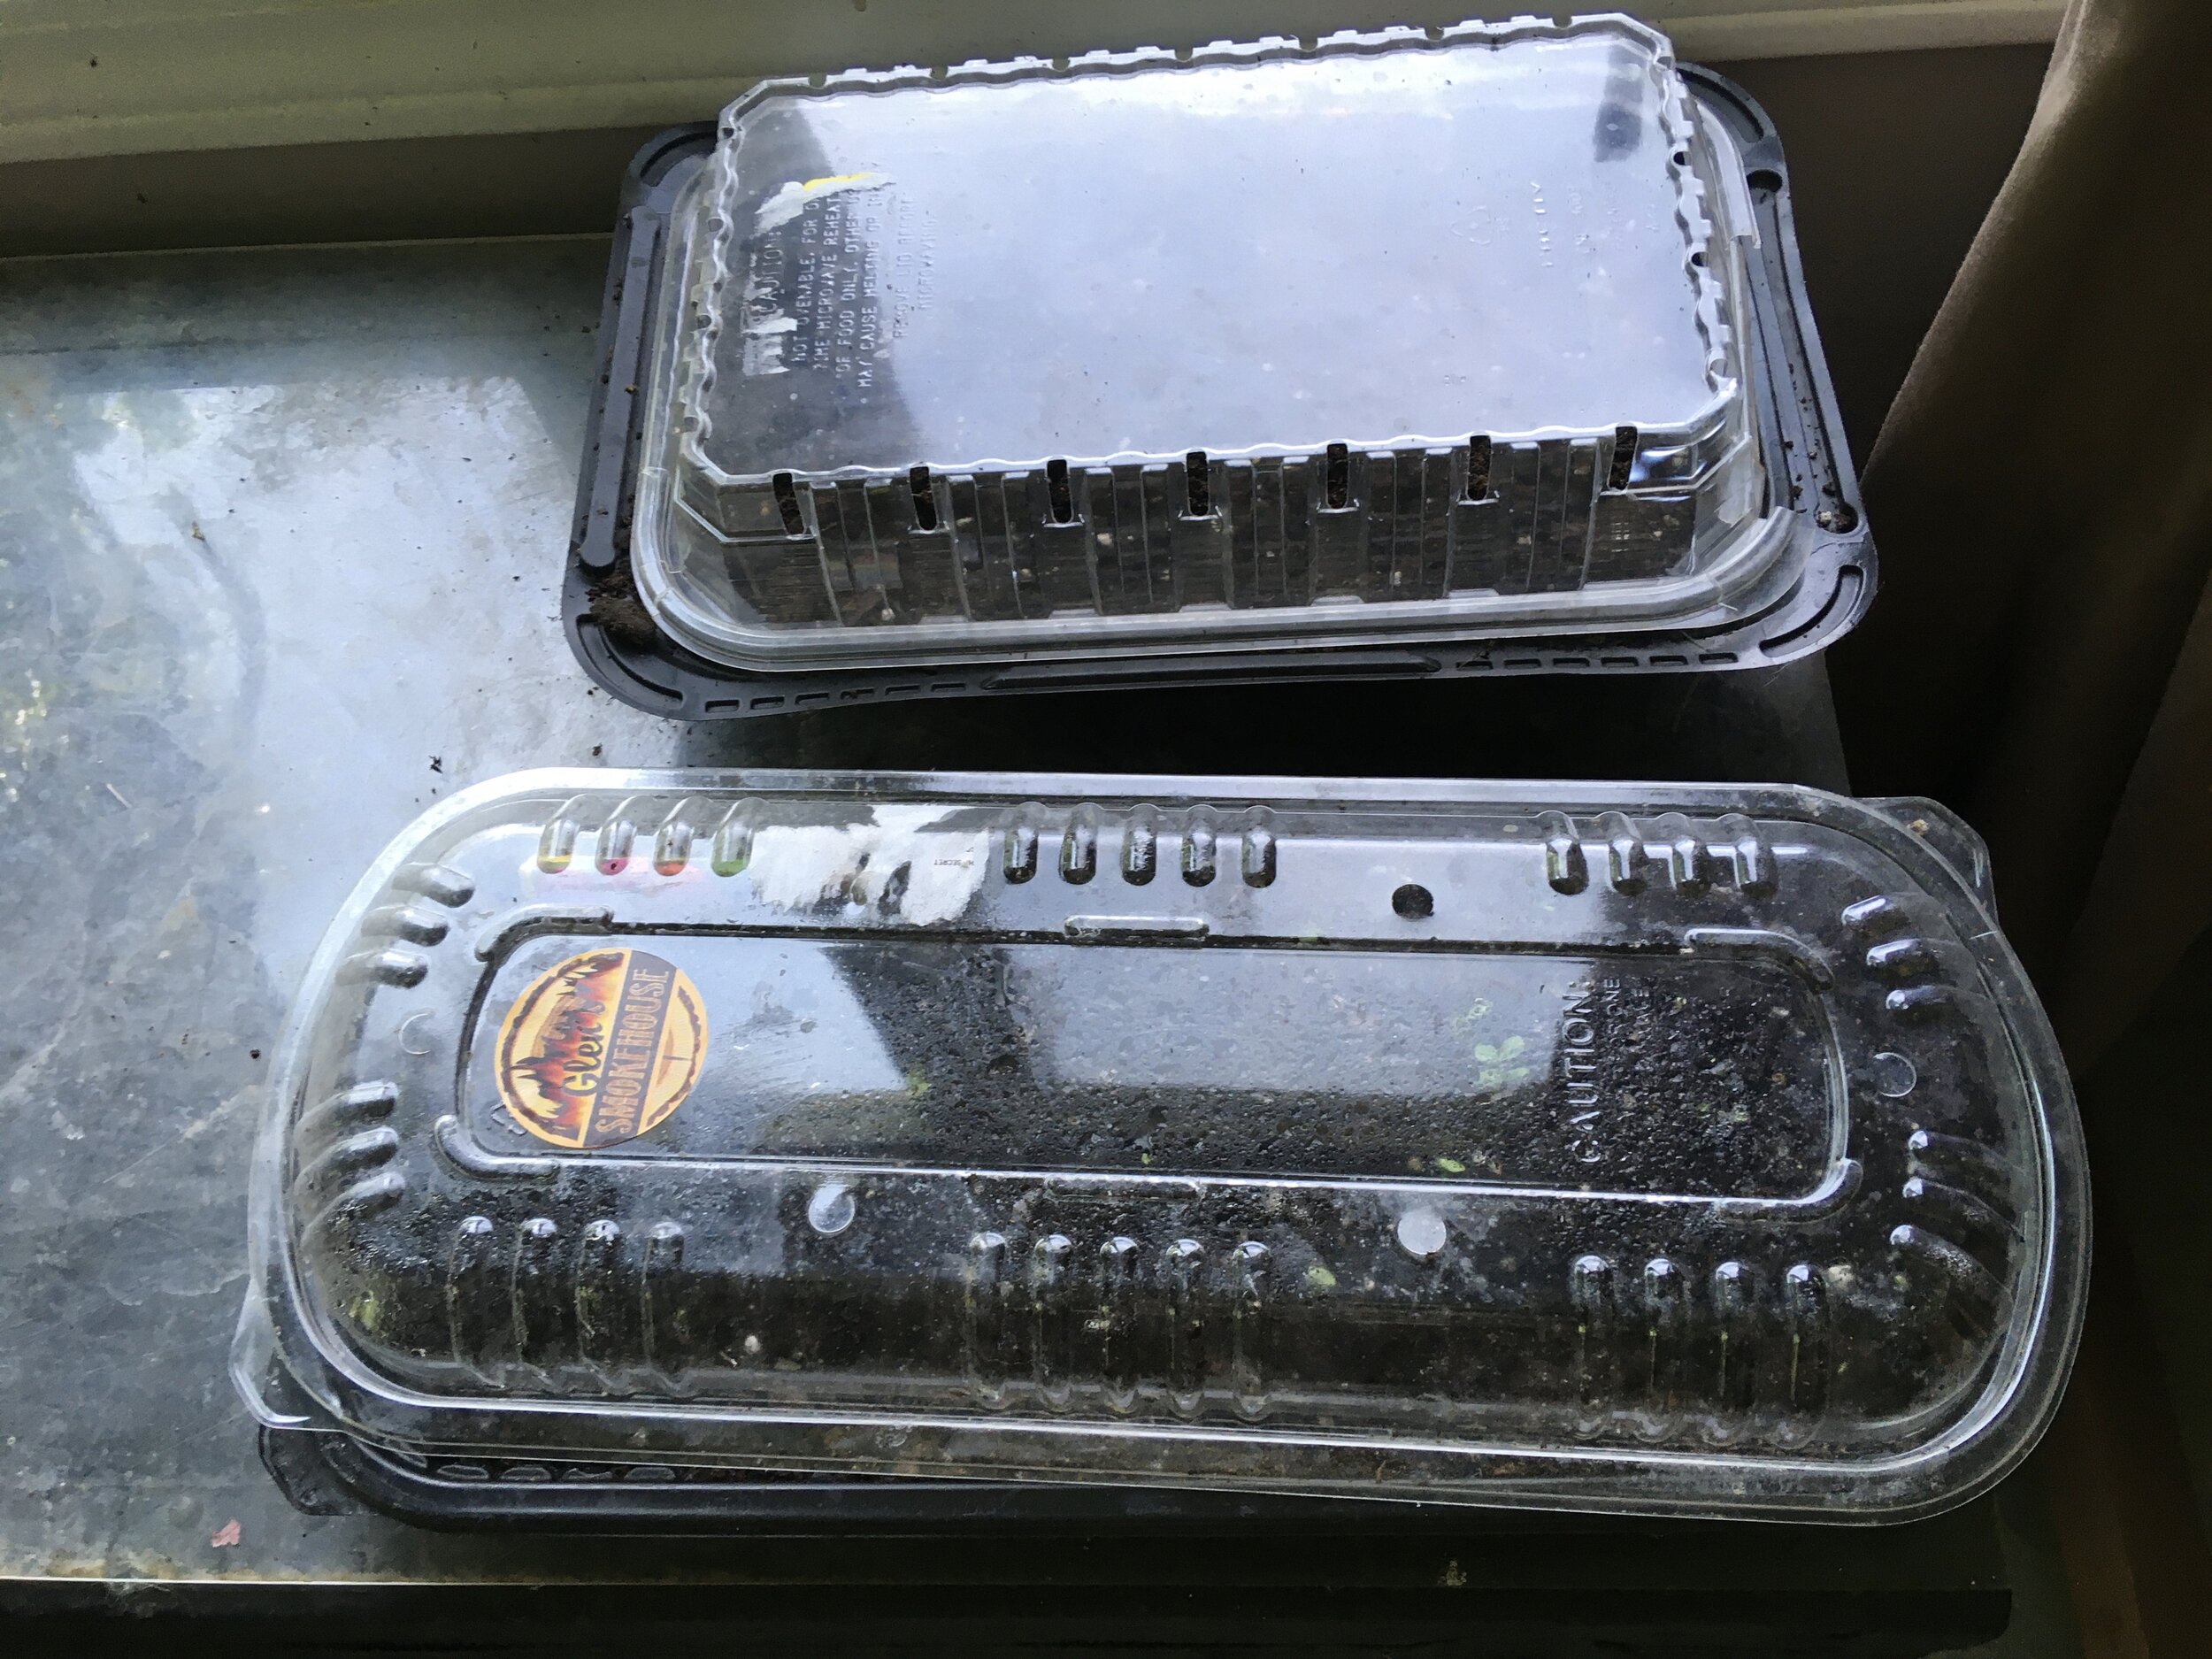
Zinnia seeds getting a good start in a chicken rotisserie container. (Photo by Charlotte Ekker Wiggins)

Zinnia seeds getting a good start in a chicken rotisserie container. (Photo by Charlotte Ekker Wiggins)

“….I have a question. I’m starting seeds in a barbecue container and it’s now growing mold. Will the seeds be ok?” — Sally

Moldy Seed Starting

Hi Sally,

I love repurposing those chicken - and other - containers to grow seeds. Your question inspired me to start my miniature zinnia seeds. We had so much moisture this spring it may be late in the season before I can get zinnia seeds planted outside. Zinnias are a favorite of butterflies and other pollinators.

I’m using these two repurposed containers to grow zinnia seeds. (Photo by Charlotte Ekker Wiggins)

I’m using these two repurposed containers to grow zinnia seeds. (Photo by Charlotte Ekker Wiggins)

First, did you already have, or did you add, holes in the bottom of the container? That will help keep the water drained so the soil doesn’t become saturated and encourage fungal growth.

Secondly, when you see condensation on the lid, do you remove it? The clear lid should stay on just long enough to get the seeds started. Then you want to take the lid off so the seeds can start getting acclimated to your growing conditions.

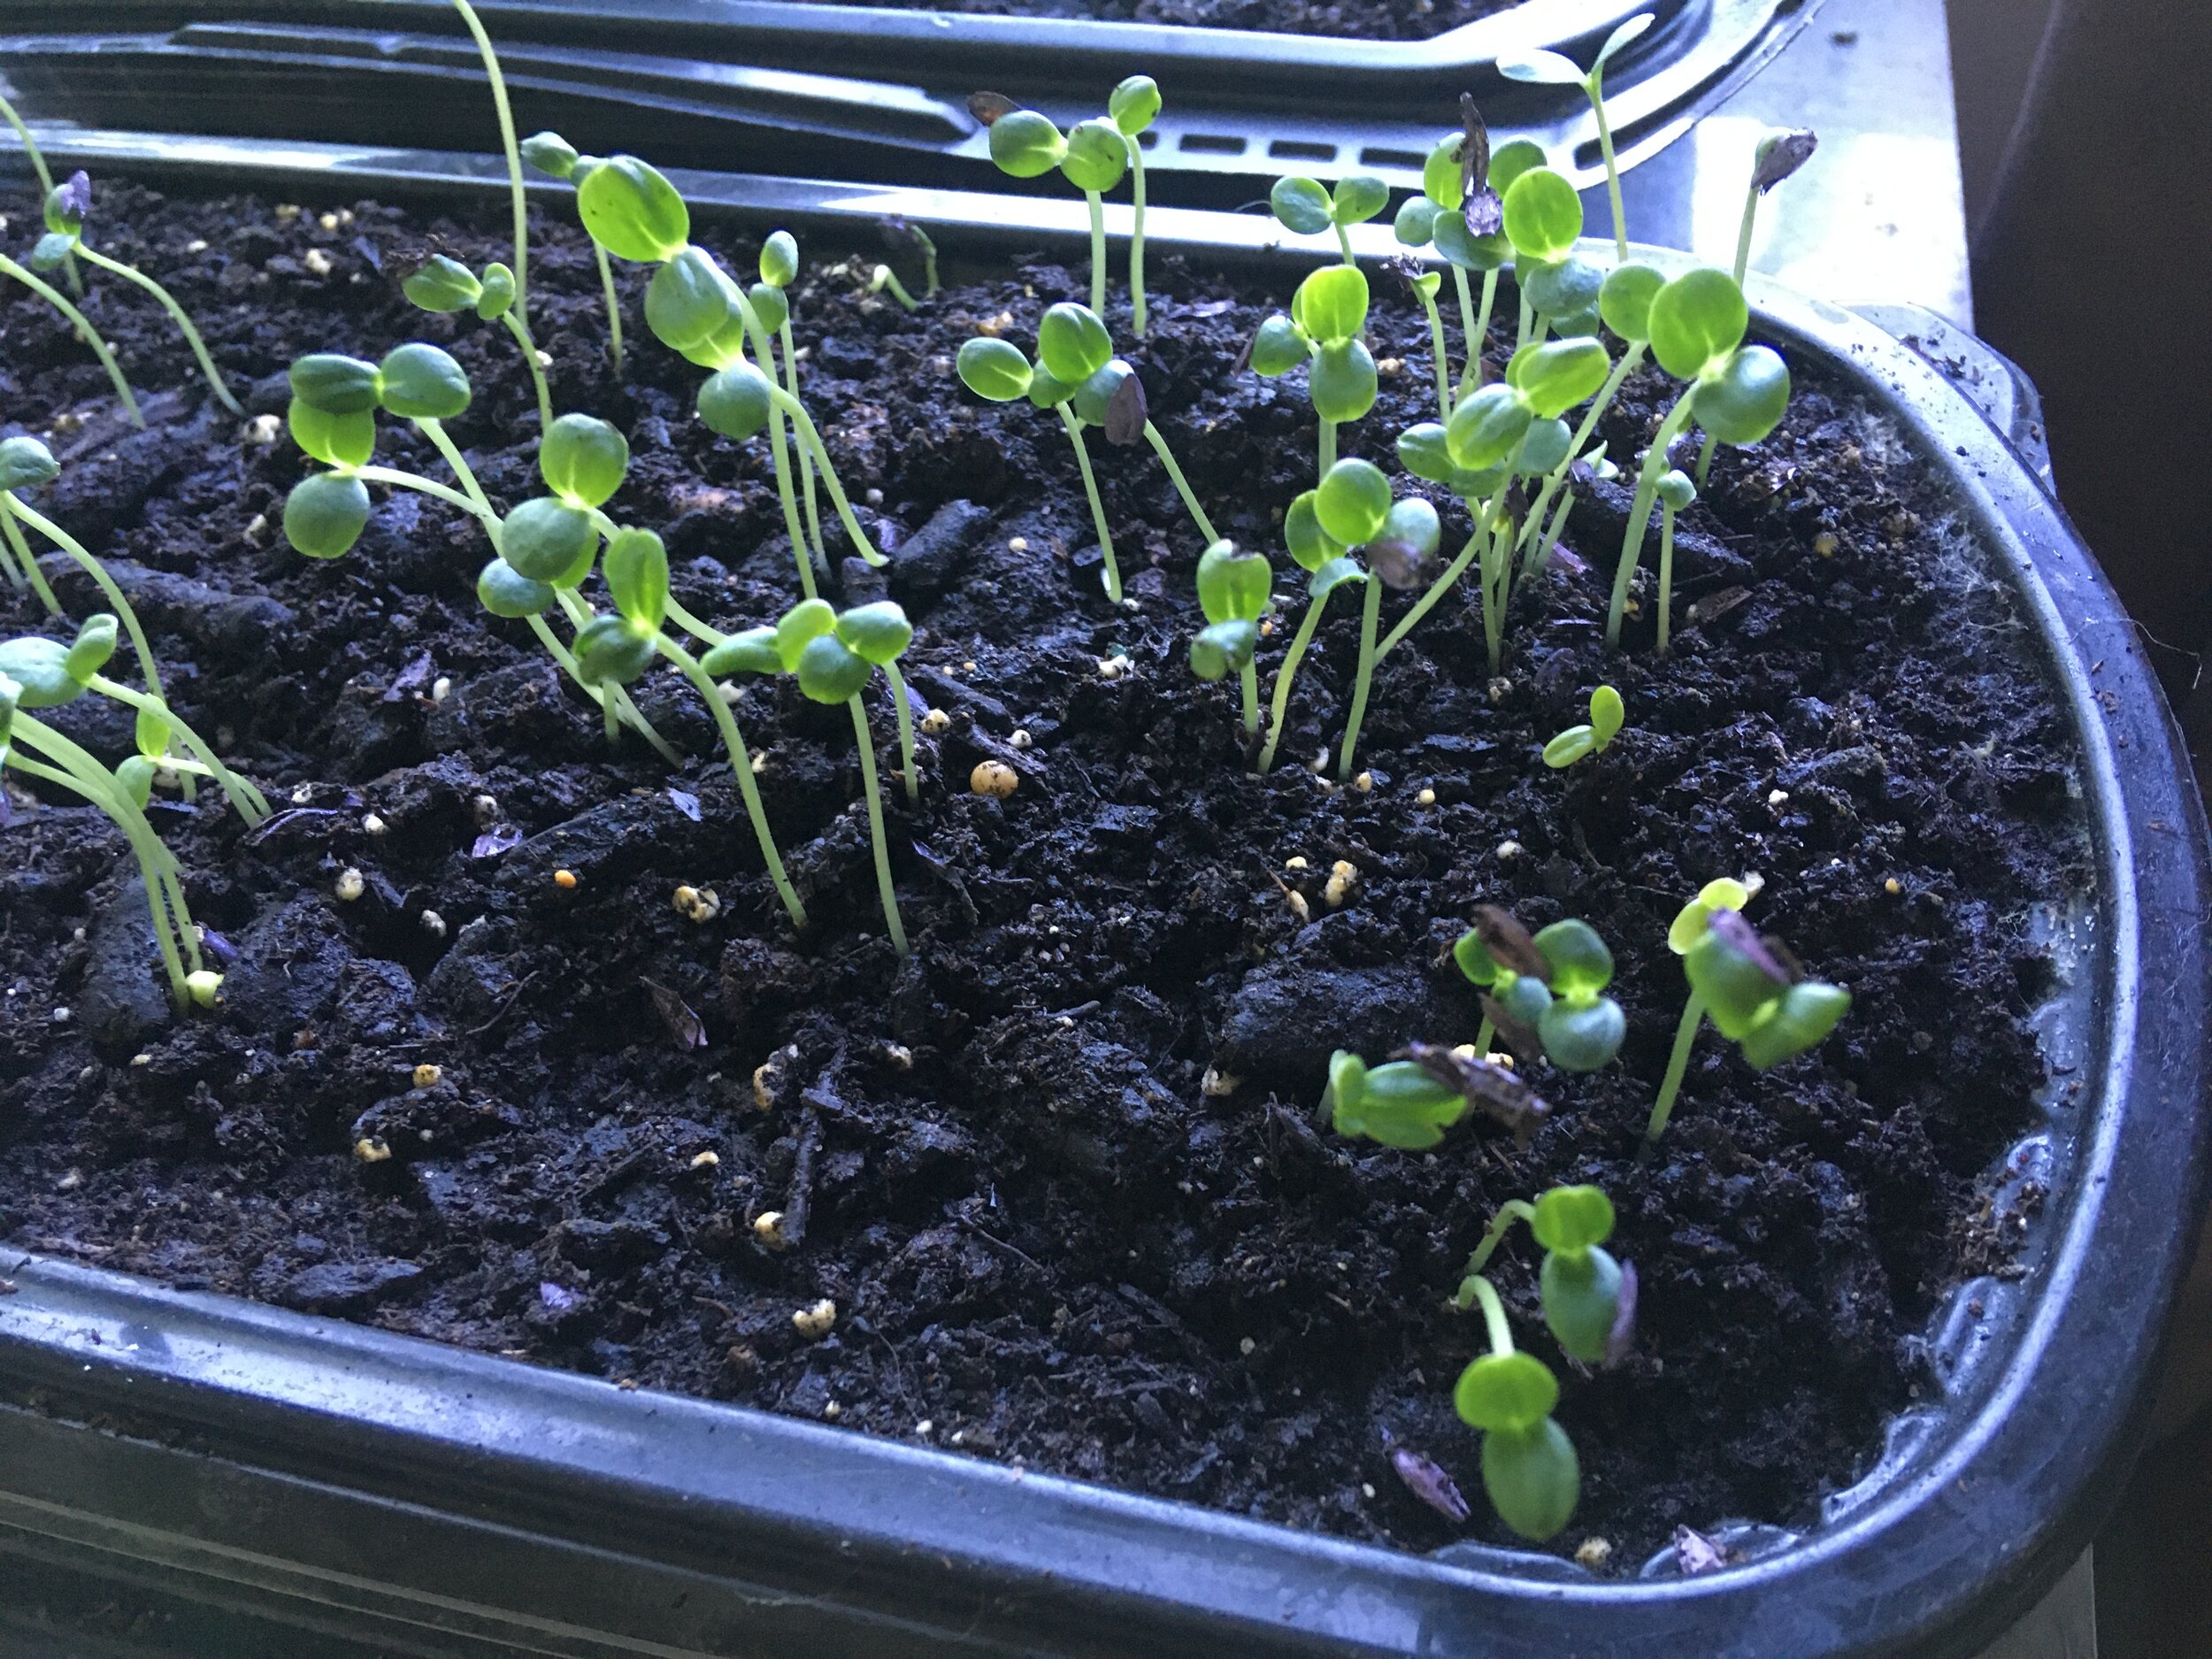
Miniature zinnia seeds started 5 days after getting planted. (Photo by Charlotte Ekker Wiggins)

Miniature zinnia seeds started 5 days after getting planted. (Photo by Charlotte Ekker Wiggins)

When you are first planting, also use a spray bottle to moisten the soil, you don’t want to get it too wet.

Whenever planting seeds, use a spray bottle to control moisture. (Photo by Charlotte Ekker Wiggins)

Whenever planting seeds, use a spray bottle to control moisture. (Photo by Charlotte Ekker Wiggins)

I keep the spray bottle nearby and spritz the seeds daily as they are growing.

I also have them in indirect sun until their first true leaves grow. Then I will move them into direct sunlight for a couple of hours every day. Once they are growing, they will get thinned out, then moved outside for a few hours every day until it’s time to plant them in the garden.

Take the clear lid off when you see condensation on it. (Photo by Charlotte Ekker Wiggins)

Take the clear lid off when you see condensation on it. (Photo by Charlotte Ekker Wiggins)

I would remove your lid and let the soil dry out. A quick spray of water daily should rehydrate the soil and keep the seedlings happy but discourage any further fungus from growing.

Let me know how this works for you!

Charlotte

Bending Daffodils

These old-fashioned double daffodils often fall over after a rain. (Photo by Charlotte Ekker Wiggins)

These old-fashioned double daffodils often fall over after a rain. (Photo by Charlotte Ekker Wiggins)

“Help, my daffodils won’t stand up, they are all falling over. How do I get them to stand up?” — Sally

Bending Daffodils

Hi Sally, I have some daffodils that get too lanky to stand up as well.

Most daffodils need to be planted a good 6-8 inches. On my Missouri limestone hillside, I don’t have that depth of top soil so I often have daffodils that don’t stand up, especially after a rain.

As I walk through my garden, I will often select the falling over daffodils for cut flowers.

If you have good soil and want to help your daffodils stand up, wait until after they stop blooming. Dig up the bulbs and replant them at a deeper depth.

Another option is to add top soil and mulch, thereby making the top soil level deeper. Just be careful with what is growing around the daffodils or you can kill off other plants.

When I thin out my daffodils, I do try to replant them in garden spots with more and better top soil.

Charlotte

When to Mulch

Shredded leaves cover one of my flower beds this winter. (Photo by Charlotte Ekker Wiggins)

Shredded leaves cover one of my flower beds this winter. (Photo by Charlotte Ekker Wiggins)

“…I get confused, when am I supposed to mulch? I love how the garden looks after I get it covered in mulch….” — Lilie

When to Mulch

Hi Lilie, I love the way my garden looks after I have mulched it as well, a friend in the landscaping business calls mulch his secret weapon.

Mulch, however, is more than aesthetics to a garden or, more specifically, the plants growing in the garden. Mulch helps to protect plant roots from the heaving and thawing caused by fluctuating temperatures, which is why the traditional recommendation is to mulch after the first hard frost.

By that hard frost, the ground is solid and mulching will help maintain that temperature so plants can enjoy a period of dormancy.

With our rapidly changing climate, though, our temperatures in mid-Missouri can shift from record cold to record hot in just a matter of days.

I still wait to put my garden to bed after the first hard frost, that way I know the roots are getting put to bed for the season. With these recent record warm temperatures, I have been mulching with shredded leaves from our local recycling center. I then cover the shredded leaves with the wood mulch.

You can also mulch in spring, when you want the soil to remain cool before hot temperatures move in.

Frankly if you keep your plants mulched throughout the growing season, you will be doing the roots a favor and help soil retain moisture as well.

Charlotte

Growing Peruvian Lilies

These red Peruvian lilies just started to bloom in my inside winter garden. (Photo by Charlotte Ekker Wiggins)

These red Peruvian lilies just started to bloom in my inside winter garden. (Photo by Charlotte Ekker Wiggins)

“Seriously. Did you grow those red Peruvian Lilies ….inside??’ — Evelyn

Growing Peruvian Lilies

Hi Evelyn, absolutely! Once I found out Peruvian lilies are one of the longer, if not longest-lasting cut flowers, I plotted to add some to my inside winter garden. That’s basically my living and dining rooms turned over to tropical plants that can’t make it outside through mid-Missouri’s cold winters.

For many years I have wintered over inside tropical hibiscus, geraniums, salvia and herbs. With a little care not to forget to water them, and to provide moisture when they need it, these plants have successfully moved in and out of my house through many seasons. There is something quite nice about having a tropical jungle inside when it is cold and snowy outside.

It’s also handy to have stalwart bloomers. The red begonias in particular take a little breather when they first come inside and then pick up where they left off at the end of summer, giving me a nice flush of flowers all through winter.

Peruvian lilies (Alstroemeria spp) are used as bouquet fillers, sometimes sold as a bouquet all by themselves. I gave some to an office colleague several years ago and, after 6 weeks, she asked when the flowers were planning to die. That put them on my “I must grow some myself list” thinking of long, cold, snowy winters warmed up by a bouquet of long-lasting cut flowers.

There’s science, you know. Not that I had any doubt but there are studies that show having cut flowers lift spirits and contribute to a happier environment, which may explain why we send flower bouquets to people in hospitals and who need cheering up.

So this spring, when I spotted several Peruvian lilies growing in pots at one of our local garden centers, the stalking began. One pot of Peruvian lilies retailed for $25 so I decided to wait until the price came down. My gardening buddy Tom was also asked to patrol the sales; he would intermittently report when he saw a price reduction.

Finally late summer all of the red ones were marked down to $3 each and I took two plants home.

Potted Peruvian lilies spending winter in a sunny window. (Photo by Charlotte Ekker Wiggins)

Potted Peruvian lilies spending winter in a sunny window. (Photo by Charlotte Ekker Wiggins)

They were repotted into larger pots with compost at the bottom and are now in a sunny window. I will monitor the temperature to make sure it stays over 60F in their window spot and provide watered down fertilizer once a month.

I just cut a little sprig of blooms off and added them to some yellow mums and the last of my miniature yellow roses. It was snowing outside as I snipped the mums, the last ones to be blooming in my garden this year.

Now the race is on to see which ones will last the longest, mums are also long-lasting cut flowers. What do you think, which ones will last the longest in a vase?

Charlotte


Can I Still Plant Spring Bulbs

Uh-oh, ran out of warm weather before I planted my spring bulbs this year. (Photo by Charlotte Ekker Wiggins)

Uh-oh, ran out of warm weather before I planted my spring bulbs this year. (Photo by Charlotte Ekker Wiggins)

“Yikes, it’s snowing and I don’t have all of my spring bulbs in the ground. When is it too late to plant them?” — Ralph

Can I Still Plant Spring Bulbs

Hi Ralph, welcome to the club. I also ran out of time to get some of my spring bulbs in the ground before snow and cold weather moved into mid-Missouri. The good news is that there still is time to get them in the ground.

Tulips, daffodils and most other spring bulbs need a good 12 weeks planted in the ground to trigger growth. Considering that most of our soil starts to thaw out early March, that gives us all until the end of November and beginning of December to get these vintage flower bulbs in the ground.

The key is when does your soil freeze for winter. I’m in USDA Hardiness zone 5b/6a so our soil tends to stay workable until December. Even if you wait that late, you can still get spring bulbs in the ground so that they bloom next spring but the earlier you get them in, the better for the bulbs.

And yes, I have been seen out in my garden in full winter garb with my handy pick ax in blowing snow getting a few last spring bulbs in the ground. Especially when I find them on sale at the end of the fall season. A few bulbs may have dried up by the time they are discounted but most packages still have viable bulbs.

Remember to add a little bone meal at the bottom of the holes, the bone meal will help feed the bulbs when they are ready to grow.

And ah, bundle up!

Charlotte

Mums Dead or Alive

Mums are favorite fall flowers often tossed after they bloom. With a little care, they can get established. (Photo by Charlotte Ekker Wiggins)

Mums are favorite fall flowers often tossed after they bloom. With a little care, they can get established. (Photo by Charlotte Ekker Wiggins)

“…you said something at the last lecture about Mums being natural bug deterrents. I planted several but now I can’t tell if they are dead or alive. What’s the secret?” — Lisa

Mums Dead or Alive

Hi Lisa, if you couldn’t tell, Mums are one of my favorite all time flowers. In addition to being long-lasting as cut flowers, they are a great bug deterrent and so easy to grow.

it helps to understand a little about how Mums grow. Mums, or chrysanthemums for short, are pinched during spring growth to make them bush out into the round shape we are used to seeing, and buying, in fall. I have several in my garden I miss pinching so I know how long and leggy they can grow. I don’t mind, though, because those are easier to add to a vase to bring inside and enjoy by themselves or with other cut flowers.

The round, bushy shape makes it hard to see new growth, which takes place at the base of the plant. Growth can also occur when you sneak a branch into soil and roots develop at the growing nodes, which are the bumps you feel along the plant stem.

So take a look at this Mum and tell me if you think it’s dead or alive:

Red mum covered in snow in my Missouri hillside garden. (Photo by Charlotte Ekker Wiggins)

Red mum covered in snow in my Missouri hillside garden. (Photo by Charlotte Ekker Wiggins)

It looks dead, doesn’t it. And yes, it was cold and windy when I took this picture to show you looking at the plant is not how you determine if it’s surviving. Gently push the dead stems apart and look at the base. If the Mum is still alive, you should see tiny green growth:

New growth at the base of the dead-looking Mum. (Photo by Charlotte Ekker Wiggins)

New growth at the base of the dead-looking Mum. (Photo by Charlotte Ekker Wiggins)

Be careful when you move the dead branches, it’s easy to break them. If it’s too cold to move them, peer through the top and see if you spot any green at the bottom.


I’ve been known to sneak peeks at the base of my new Mums through winter as I water them. There is something magical about seeing the dead top and then spy new growth underneath at the root. Leaving the dead branches also provides the new shoots protection from winter elements.

Why bother? Besides being pretty and easy to grow, Mums are bug deterrents. Many of the “organic” and “safe” insect sprays these days are made with pyrethrins, basically essence of Mums. By adding a few Mums throughout your garden you can help deter insects and still enjoy pretty fall flowers.

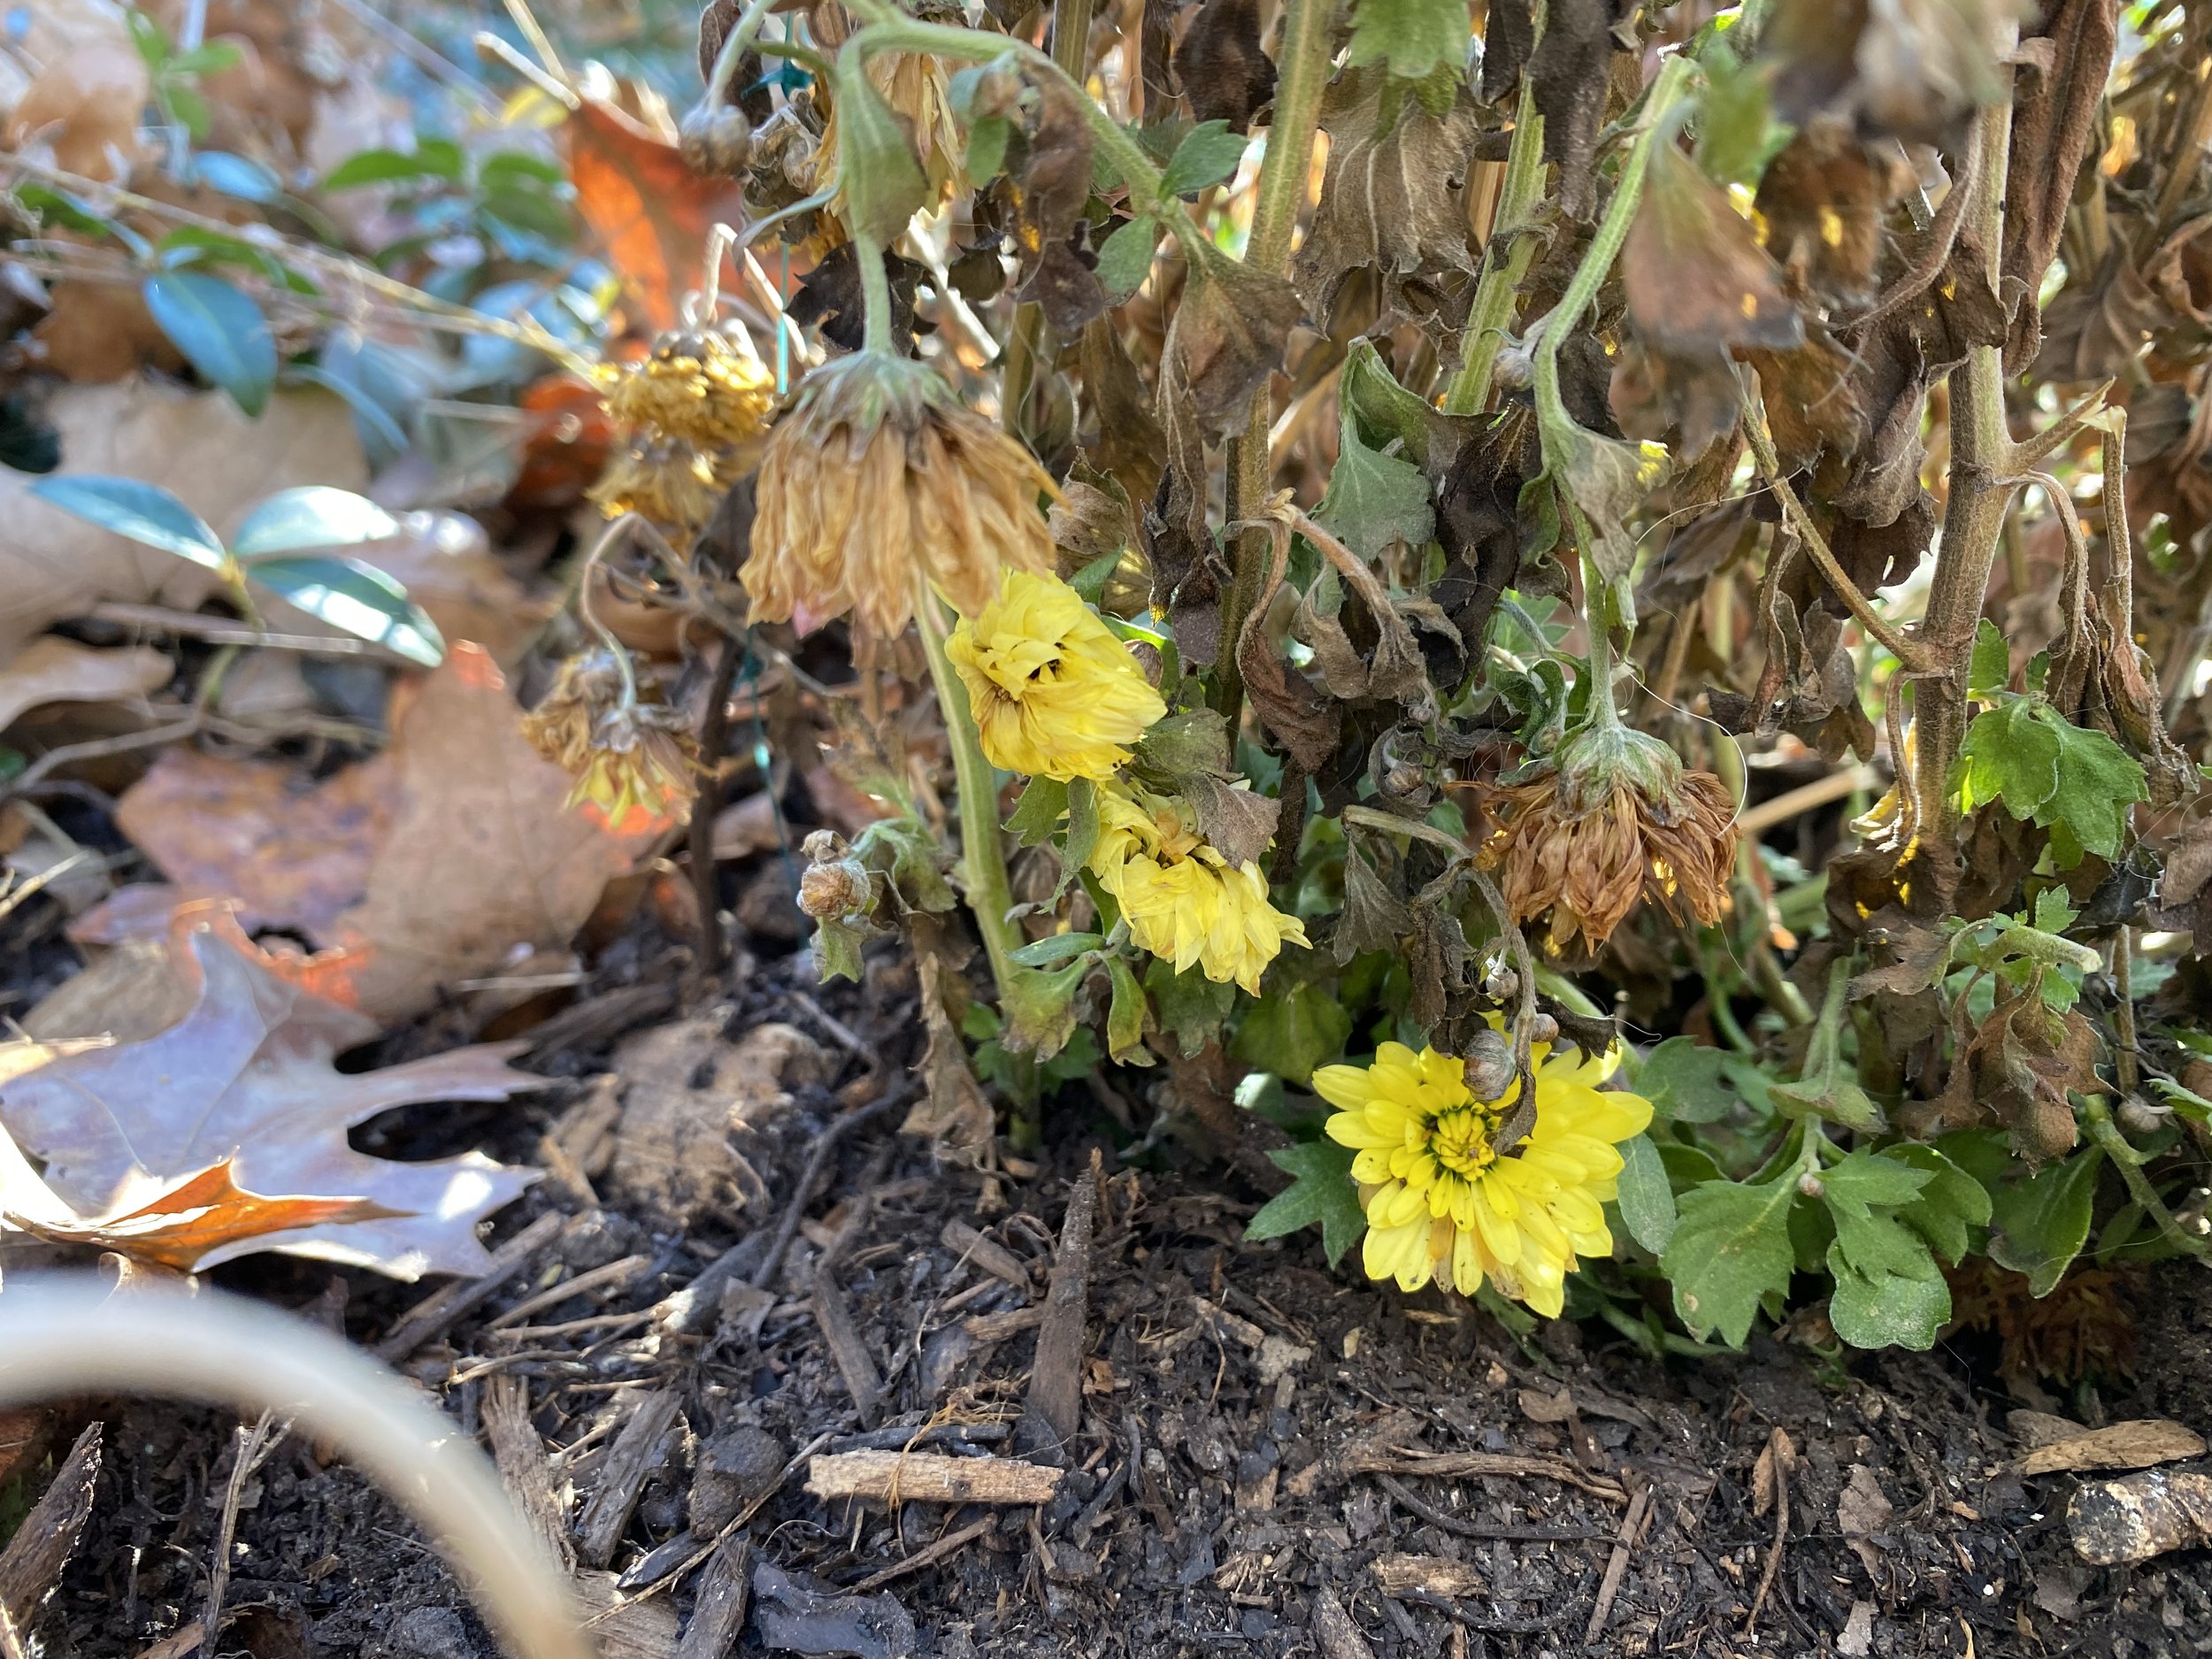
Yellow fall Mums join a sprig of red Peruvian lilies, both long-lasting cut flowers. (Photo by Charlotte Ekker Wiggins)

Yellow fall Mums join a sprig of red Peruvian lilies, both long-lasting cut flowers. (Photo by Charlotte Ekker Wiggins)

Just remember to water them a couple of times a month through winter to help the roots get established.

if you want that fall round shape, pinch them through spring growing season once very 4 inches. When I pinch mine, I just stick the cut off portion back in the soil to grow new roots. Or move that bunch of pinched branches to another spot and push them into the ground for a new mum. It may take a couple of years in my rough hillside soil but they do grow quite nicely.

We are having our first snow of the season today. Time to start dreaming about next year’s garden!

Charlotte