Inside Plants Healthy

Reading a book under this fig tree reminds me of being outside. (Photo by Charlotte Ekker Wiggins)

Reading a book under this fig tree reminds me of being outside. (Photo by Charlotte Ekker Wiggins)

Inside Plants Healthy

There is a new scientific study supporting what I have known for decades; having plants inside over winter make us happy. And healthier.

It’s easy to determine why. The plants are a bit of green in an otherwise cold and dreary winter tableau. For me, having the signs of life are frankly up lifting. Caring for the greenery is also therapeutic, keeping me busy until I can get outside again.

As we head into winter, there are other good reasons to have plants inside.

Better Air

During photosynthesis, plants absorb carbon dioxide and release oxygen. We as people inhale oxygen and exhale carbon dioxide, making us mutually dependent. At night, photosynthesis ceases, and plants typically respire like humans, absorbing oxygen and releasing carbon dioxide.

More Humid Air

As part of the photosynthetic and respiratory processes, plants release moisture vapor, which increases humidity of the air around them. Plants release roughly 97% of the water they take in.

Place several plants together, and you can increase the humidity of a room, which helps keeps respiratory distresses at bay. Studies at the Agricultural University of Norway document that using plants in interior spaces decreases the incidence of dry skin, colds, sore throats and dry coughs.

Purified Air

Plants remove toxins from air –up to 87% of volatile organic compounds (VOCs) every 24 hours, according to NASA research. VOCs include substances like formaldehyde (present in rugs, vinyl, cigarette smoke and grocery bags), benzene and trichloroethylene (both found in man-made fibers, inks, solvents and paint). Benzene is commonly found in high concentrations in study settings, where books and printed papers abound.

The NASA research discovered that plants purify that trapped air by pulling contaminants into soil, where root zone microorganisms convert VOCs into food for the plant.

Potted sage in one of my living room windows. (Photo by Charlotte Ekker Wiggins)

Potted sage in one of my living room windows. (Photo by Charlotte Ekker Wiggins)

Edible Plants

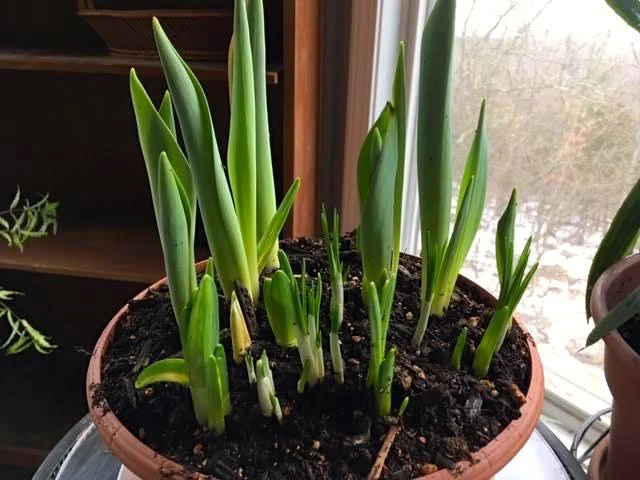
I can’t imagine making my winter soups without access to fresh herbs growing inside. I have a rosemary plant that is now on its 5th year wintering over inside while giving me fresh flavor in cooking. Another small pot of sage is handy for cooking with fish.

Improving Health

Adding plants to hospital rooms speeds recovery rates of surgical patients, according to researchers at Kansas State University. Compared to patients in rooms without plants, patients in rooms with plants request less pain medication, have lower heart rates and blood pressure, experience less fatigue and anxiety, and are released from the hospital sooner.

The Dutch Product Board for Horticulture commissioned a workplace study that discovered that adding plants to office settings decreases fatigue, colds, headaches, coughs, sore throats and flu-like symptoms. In another study by the AgriculturalUniversity of Norway, sickness rates fell by more than 60 percent in offices with plants.

Sharpening Focus

A study at The Royal College of Agriculture in England found that students demonstrate 70% greater attentiveness when they're taught in rooms containing plants. In the same study, attendance was also higher for lectures given in classrooms with plants.

Potted rosemary keeping me company in another window. (Photo by Charlotte Ekker Wiggins)

Potted rosemary keeping me company in another window. (Photo by Charlotte Ekker Wiggins)

How Many Plants?

The recommendations vary based on your goals:


To improve health and reduce fatigue and stress, place one large plant (8-inch diameter pot or larger) every 129 square feet.

In office or classroom settings, position plants so each person has greenery in view.

To purify air, use 15-18 plants in 6-8-inch diameter pots for an 1,800-square-foot house. That's roughly one larger plant every 100 square feet. Achieve similar results with two smaller plants (4-5-inch pots).

Based on these recommendations, my house should be a haven of happiness. And it is!

Charlotte

Follow the Foot Prints!

My snow-covered garden ready to “tell” on its visitors. (Photo by Charlotte Ekker Wiggins)

My snow-covered garden ready to “tell” on its visitors. (Photo by Charlotte Ekker Wiggins)

Follow the Foot Prints!

There are many reasons to look forward to cold, snow-covered days. They are great excuses to “rest” after a busy gardening and beekeeping season; it’s a good time to catch up with reading and I enjoy a cup of tea curled up in front of a fireplace with a purring cat in my lap.

There’s one other reason and one that is part solving a mystery with a dash of fresh discovery. That is walking through my snow-covered garden and spotting the different foot prints in the snow, which confirms my regular visitors.

These look like squirrel prints along with some birds on the right. (Photo by Charlotte Ekker Wiggins)

These look like squirrel prints along with some birds on the right. (Photo by Charlotte Ekker Wiggins)

Although I can’t tell the difference between the different winter birds, those foot prints are the easiest and most fun to follow.

In the following photo, can you find the deer print?

The bird prints are easy to spot, even on rocky ledges. (Photo by Charlotte Ekker Wiggins)

The bird prints are easy to spot, even on rocky ledges. (Photo by Charlotte Ekker Wiggins)

As much as the individual foot prints are fun to follow, I like to find the intersection of prints and try to imagine what happened at that point.

When I watch my garden from inside my house, I sometimes spot birds running into each other and squirrels chasing each other through the garden, even in snow. Their combined foot prints, however, don’t mean they were in the one spot at the same time.

Let’s see, I see squirrels, birds, rabbits and maybe raccoon prints in this spot.

Now this looks like a traffic intersection, how many different prints do you see? (Photo by Charlotte Ekker Wiggins)

Now this looks like a traffic intersection, how many different prints do you see? (Photo by Charlotte Ekker Wiggins)

If they were all in the same spot at the same time, however, I imagine it would look something like this:

One more conflagration of foot prints, so easy to see in the snow. (Photo by Charlotte Ekker Wiggins)

One more conflagration of foot prints, so easy to see in the snow. (Photo by Charlotte Ekker Wiggins)

By checking the foot prints, I have also found some interesting trails. I didn’t know some of my birds like to winter over some of my hydrangea bushes, or how much many of these creatures circle my small front pond. Seeing those foot prints inspired me to make more of an effort to give them water in nearby bird baths.

Being outside after a snowfall is also quite quiet and beautiful, completely changing the look of my garden covered in a blanket of snow.

And one more set of prints that mar the white landscape. (Photo by Charlotte Ekker Wiggins)

And one more set of prints that mar the white landscape. (Photo by Charlotte Ekker Wiggins)

If you haven’t had a chance to walk through your garden after a snow storm, do it safely if you can but give it a try. You may be surprised at what evidence you see of what is visiting your garden!

Charlotte

March Gardening Chores

Spring is all about daffodils in my hillside garden. (Photo by Charlotte Ekker Wiggins)

Spring is all about daffodils in my hillside garden. (Photo by Charlotte Ekker Wiggins)

March Gardening Chores

March is the beginning of daffodil days in my garden, a wonderful almost daily parade of new flowers that can distract me from getting things done but doesn’t stop me from garden dreaming. The weather can also be a little challenging in USDA Hardiness zone 5b so March is a hit and miss month in terms of getting a lot done but I still have” must do” chores.

Under the category of garden maintenance:

1.     Prune and fertilize roses. On the first warm day, I remove all dead branches so the new growth will have room and add coffee grounds, banana peels, Epsom salts and crushed egg shells mixed into the soil around the base of the plants. Gently, you don’t want to tear up the roots. Also a good time to mulch.

2.     Plant onion sets around roses to keep bugs at bay. Three for miniature roses, 5-6 for the larger roses.

3.     Prune fruit trees. Nothing elaborate, I make sure the branches don’t cross and are open in the center. Also mulch. Make a tire around the base leaving the space up at the tree trunk open.

My yellow Lenten Roses herald the arrival of yellow in my garden. (Photo by Charlotte Ekker Wiggins)

My yellow Lenten Roses herald the arrival of yellow in my garden. (Photo by Charlotte Ekker Wiggins)

4.     My hellebores and ‘Autumn Joy’ Sedum get the old greenery cut off so any new growth gets to shine. The Sedum starts look like tiny green roses.

5.     If I haven’t already painted and repaired birdhouses and native bee houses, those get finished and installed this month. If I put this off much longer, possible renters, especially birds tend to pop into the garage to check out the real estate before it’s moved out into the garden.

6.     Mulch. My over-wintering mulch pile is ready to spread over new areas that need cover for the season and areas that lost cover over winter. Good time to load up the wheelbarrow and keep a supply at hand.

In the category of planting:

7.     If you didn’t get your lettuce and spinach out in February, get them planted this month. I started a crop in my pot garden mid-February.

8.     March and St. Patrick’s Day is also the time to plant potatoes, radishes and carrots.

9.     The last frost day for this zone is Mother’s Day in May so it’s a little too early to get much else planted and much too early to move tropical plants outside, even if you are ready to toss them out on their aggravating dropping leaves by now. Give them a little rainwater and that will help tide them over another month or so.

10.  Also check inside plants for bugs. Look under leaves and if you see white bugs, clean off with a damp cloth wet with water and dishwashing liquid. Also spray soil with a few drops of dishwashing liquid in water in a spray bottle to get rid of eggs in soil. Start watering with ¼ strength fertilizer since days are getting longer. They are as anxious to get outside as you want them to be outside, I am sure, mine seem to blossom within a week of hitting my deck.

 Charlotte


Blooming Bulb Garden

One of my bulb gardens in bloom at a friend’s office. (Photo by Charlotte Ekker Wiggins)

One of my bulb gardens in bloom at a friend’s office. (Photo by Charlotte Ekker Wiggins)

Blooming Bulb Garden

Most years in fall, when spring bulbs are on sale, I pick up a few bags and make bulb gardens to share with friends mid-winter. Usually by early to mid-February those of us who live in Missouri are more than ready for spring and a little bulb garden offers the promise of more flowers to come.

This past year, I used crocus, small daffodils and tulips in my bulb garden, the bulbs layered so their roots could get nourishment as they grew. After watering and covering the bulbs with new potted soil, I wrapped them in a metallic wrap and placed them in a refrigerator to chill for 3 months.

Once the tips started to show, I started to pull them out and share as gifts for Valentine’s Day.

Usually the crocus bloom first, followed by the daffodils and tulips.

Here is how they look as they are getting started:

Bulbs after 12 weeks of cold getting ready to grow. (Photo by Charlotte Ekker Wiggins)

Bulbs after 12 weeks of cold getting ready to grow. (Photo by Charlotte Ekker Wiggins)

Once warmed up, it doens’t take the bulbs long to get growing. I place them in an area where they can get sun but not directly, and away from heat sources so that the heat doesn’t dry out their soil.

My bulb garden growing but not yet in bloom. (Photo by Charlotte Ekker Wiggins)

My bulb garden growing but not yet in bloom. (Photo by Charlotte Ekker Wiggins)

My crocus have bloomed in my pot, now waiting for the daffodils and tulips.

Daffodils bloom in my kitchen pot garden between potted begonias. (Photo by Charlotte Ekker Wiggins)

Daffodils bloom in my kitchen pot garden between potted begonias. (Photo by Charlotte Ekker Wiggins)


Another way to bring on an early spring is to add a floral quilt on your bed, like Pink Applique Tulips. These tulips last as long as you have the handmade quilt on your bed and no watering required!

Charlotte


Nap Time!

One of the squirrels in my garden enjoying winter sunshine. (Photo by Charlotte Ekker Wiggins)

One of the squirrels in my garden enjoying winter sunshine. (Photo by Charlotte Ekker Wiggins)

Nap Time!

Sometimes I feel like I’m living in an animal house, or at least in the middle of a zoo. Being a National Wildlife Federation certified wildlife garden, I do encourage wildlife to feel comfortable in my one acre limestone hillside garden.

There are small ponds for water. Bird feeders with a variety of treats and oak trees comfortable enough for homes.

One such tree is located outside my den. I can see it from the house and often start my morning looking at it out of my den windows. Over the years, hand-raised Robins have serenaded me from those tree branches. I have had an owl perched on one of the top branches and, most recently, watched a squirrel nesting.

The squirrel nest is nicely tucked between tree trunks. (Photo by Charlotte Ekker Wiggins)

The squirrel nest is nicely tucked between tree trunks. (Photo by Charlotte Ekker Wiggins)

Squirrel nests in Missouri are easy to see, especially in winter. With leaves off trees, the pile of nests are easy to spot. Most tend to be built towards the top of trees, at least in my garden.

My best guess is this is the largest of the 4 native Missouri squirrels. The fox squirrel, also known as the eastern fox squirrel or Bryant's fox squirrel, is the largest species of tree squirrel native to North America.

It has very sharp claws, a muscular body, and a long, fluffy tail. The most common fur color for a fox squirrel is reddish-brown, but color can vary greatly from overall pale gray to black with white feet. The fur on its belly is always lighter in color than the rest its body. Often a fox squirrel will have reddish hairs tipped with brown.

These animals are most often found in forests with open understory, or in urban neighborhoods with trees. They prefer to live among oak, hickory, walnut and pine trees, storing nuts for winter. They shelter in leaf nests or tree dens, but will sometimes make an attic their home if they find a way inside.

This particular morning we were enjoying a sunny day with temperatures a little warmer than usual.

As I peeked out of my den window, there was a squirrel, also enjoying the warm sunshine.

Shsssssss. (Photo by Charlotte Ekker Wiggins)

Shsssssss. (Photo by Charlotte Ekker Wiggins)

Grey squirrels are frequent visitors to my garden. This one has apparently decided my garden is a good place to nest. And rest!

Charlotte

New Online Tool Will Help MO Prioritize Plant Management

This is bush honeysuckle in winter, one of Missouri’s top 10 invasives. It kills everything that grows under it. (Photo by Charlotte Ekker Wiggins)

This is bush honeysuckle in winter, one of Missouri’s top 10 invasives. It kills everything that grows under it. (Photo by Charlotte Ekker Wiggins)

New Online Tool Will Help Missouri Prioritize Plant Management

Jefferson City, MO (February 8, 2019)—Yesterday, at the Missouri Natural Resources Conference in Osage Beach, MO, Dr. Quinn Long, a member of the Missouri Invasive Plant Task Force (MoIP), presented a statewide comprehensive invasive plant assessment during the workshop organized by MoIP, Invasive Species Collaboration: Informing the Masses, Building the Armies, Stemming the Flow, and Turning the Tide

"One of the biggest threats to Missouri's—and the nation's—native plants and animals, and to many facets of our economy, are invasive plants," said Carol Davit, MoIP Chair and Executive Director of the Missouri Prairie Foundation. "Invasive plants and animals—including that small percentage of non-native plants that, intentionally or accidentally, have been introduced here and have spread rapidly—are second only to outright habitat destruction in the loss of native biodiversity, can have negative impacts on our cattle, timber, and outdoor recreation industries, cause headaches for private landowners, and nationally, cost billions of dollars in control efforts annually." 


Dr. Quinn Long, botanist, Director of Shaw Nature Reserve, and MoIP member, worked since 2015 to lead the MoIP working group that assembled and analyzed invasive plant data for the assessment.

“This assessment—complete with maps for each of the 142 species assessed—will provide a valuable tool for landowners, land managers, and natural resource planners to focus their efforts on invasive plant management,” said Long.

The assessment maps depict abundance, impact, and rate of spread of these plants in the state. 

MoIP is a dedicated group of representatives from land-holding agencies and natural resource management professionals from across the state.

"We are pleased to present this important new tool, which is critical to assertive, prioritized invasive plant management efforts. Many individuals have worked very hard to make this assessment possible, including more than 25 reviewers; Phillip Hanberry, contractor with the Missouri Department of Conservation who generated the assessment maps; and Tina Casagrand, MoIP contractor who loaded and linked all maps to the MoIP website, where they are available for all to consult and use."

MoIP is housed and administered by Grow Native!, a native plant education and marketing program of the Missouri Prairie Foundation. The purpose of MoIP—working as a united, supportive front—is to review, discuss, and recommend actions related to managing known and potential non-­native invasive plant species that pose threats in Missouri and elsewhere in the lower Midwest.

For more information about MoIP, definitions of invasive plants, and many other resources, visit www.moinvasives.org.

So take the pledge and don’t plant, even better yet, remove the following:

These are Missouri’s top ten invasive plants that need to be removed. (Photo by Charlotte Ekker Wiggins)

These are Missouri’s top ten invasive plants that need to be removed. (Photo by Charlotte Ekker Wiggins)

I have been waging war against bush honeysuckle on my one acre hillside garden for years. Most of it has been removed; now I periodically check to make sure the plants on my neighbor’s property is now encroaching again.

Charlotte


February Gardening Chores

February is a good month to find seeds you want to plant later this year. (Photo by Charlotte Ekker Wiggins)

February is a good month to find seeds you want to plant later this year. (Photo by Charlotte Ekker Wiggins)

February Gardening Chores

We’re in the throes of another cold spell, wind chill below zero and everything around me frozen solid. Our big box stores, however, are offering onion sets, asparagus starts and Iho Peonies so spring is just around the corner.

I live in USDA Hardiness Zone 5b-6A so I tend to plant for plants that are hardier to the colder range. The following are my February gardening chores:

  • Pressure is on so if you haven’t made a dent in your reading pile, get a start, spring is only two months away. With our rapidly changing and more erratic climate patterns, the forecast is for an earlier spring. So also says the groundhog.

  •  If you haven’t ordered your favorite gardening catalogs, get them ordered. Look for catalogs with detailed plant descriptions and good photographs so you can use them for reference.  Missouri Wildflowers Catalog has lovely pictures, even old catalogs are still good references. www.mowildflowers.net. For heirloom seeds, try Baker Creek Heirloom Seeds at www.rareseeds.com, both are Missouri nurseries.

  • Now for a great Native Plant Guide, you can download the Prairie Moon Catalog online. This guide out of Winona, Minnesota offers North American Native seeds and plants along with a guide on how to get wildflower seeds to grow, how to plant bare root plants, seed combinations and a plant/insect interaction guide so you know what plants attract what pollinators. https://www.prairiemoon.com/catalog-request.html

  • Review last year’s garden diary entries. If you’ve missed a few entries, add them now. Underline items you wanted to get done this year. I make a list, then decide which projects I want to tackle. I also carry over the ones I didn’t get to last year, or drop them off the master list. This is a good time to dream.

  • Focus on adding native plants. Once established, they will be low care and tend to require less water than other plants and they will feed the native pollinators. They are connected.

  • Read. Whether it’s Missouri Gardener Magazine, which provides good local gardening information and gardening books, catch up on what you couldn’t get to last year. I keep a pile of gardening books from our local library’s semi-annual book sale just for snowy, cold winter days.

  • On warm days, remember to water mums planted this past year. New mums need a gallon a month to keep their roots moist their first year. Once established, mums will become perennials and deter bugs from around where they are planted.

  • Remove any broken limbs in pathways to keep walkways clear and safe.

  • Pile mulch and leaves on garden beds if they’ve been blown off by winter winds.

  • Check inside plants for any hitchhiking bugs and remove. Make sure they are getting their sunlight needs met. If not, move them. Water with diluted fertilizer. Prune as necessary.

  • Drop your garden pruners and other garden tools off to get sharpened, this is a slow time of year and this will give you a head start on the season.

  • When feeding birds, add a little sand in the bird feeder mix. Birds need sand to help them digest seeds. Also ensure they have an available water source. Feed suet on cold days.

  • If you have fish in an outside pond, make sure it has a hole in the ice so fish will get oxygen.

Charlotte

Pick the Right Pot

A typical bulb garden in a tapered pot. Is that the right pot to choose?

A typical bulb garden in a tapered pot. Is that the right pot to choose?

Pick the Right Pot

Bulb gardens are popular as gifts mid-winter. For years I have made bulb gardens from fall sale bulbs and tucked them into the back of my refrigerator 10-12 weeks for the bulbs to get the chiling they need before they start to grow.

Depending on when I made them, I start pulling them out mid-winter. Just as another winter storm is in the forecast, the green tips of little bulbs promise spring is not too far away.

Buds are starting to pop up in this homemade bulb garden. (Photo by Charlotte Ekker Wiggins)

Buds are starting to pop up in this homemade bulb garden. (Photo by Charlotte Ekker Wiggins)

When planning to plant anything, and here I am using the bulb gardens as an example, the size of the pot is important. You want at least 2 inches of new soil around the roots so the roots can take up nutrients and feed the plants. Especially when planting tulips, you also need a longer pot so the tulip greenery doesn’t fall over.

t’s easy to pack too many bulbs into the wrong-sized pot, which I did with one of the bulb gardens this year. See the white roots peeking out of the bottom?

Too many bulbs, not enough room in the pot. Time to move! (Photo by Charlotte Ekker Wiggins)

Too many bulbs, not enough room in the pot. Time to move! (Photo by Charlotte Ekker Wiggins)

I could tell from seeing those roots I was rusty in making my bulb gardens but luckily it was relatively simple to fix.

I selected another, larger pot I could use to transplant the original bulb garden. To make sure the bulbs were not impacted, I cut the original plastic pot off the roots after ensuring the bulb garden would nicely fit in the larger pot.

The bulb garden is moving to a bigger pot so roots have room. (Photo by Charlotte Ekker Wiggins)

The bulb garden is moving to a bigger pot so roots have room. (Photo by Charlotte Ekker Wiggins)

The same concept applies for whatever you want to plant this next growing season. Often when we buy plants in pots they’re jammed full of plants that can’t survive in such cramped quarters because there is not enough nutrients available through the soil.

If you want to buy a hanging plant full of flowers, check to see how many plants are in the pot and make sure there are at least two of each. Then buy a second empty pot with soil and make yourself a second hanging pot, giving your plants more room to grow.

It may take a little time for the plant roots to establish themselves in the second pot but you will have longer-lasting plants and more blooms if their roots have enough nutrients.

And yes, you can fertilize but that’s only going to last so long. Artificial fertilizers forces the plant to grow too fast. As soon as any hot weather impacts the little soil already in the pots, the plants will die for lack of both water and food.

And what about the pot for the bulb garden at the top of this story?

It’s pretty and appropriate for the bulbs in the pot, crocus surrounding the outside and tete-a-tete daffodils in the middle. The daffodil roots will grow longer so they need more soil under them. The crocus are shallow so don’t need as much soil.

If I had my druthers, though, I would give all those bulbs more root space so they can stay healthy during their growth and I can pop them outside in my garden for repeated growth later.

Charlotte

Hardy Monkey Grass

These three plants survived the polar vortex and are now in a pot in my kitchen. (Photo by Charlotte Ekker Wiggins)

These three plants survived the polar vortex and are now in a pot in my kitchen. (Photo by Charlotte Ekker Wiggins)

Hardy Monkey Grass

I have a new contender for hardiest as well as most useful border garden plant, liriope muscari, also known as monkey grass.

Over the years, I have used this flowering perennial to line garden paths. Not only does it easily adjust to most soil conditions but it blooms August-September when little else in the garden is blooming. The light lavender flowers remind me of tiny grape hyacinth flowers, which explains the “muscari” in the plant name.

I found this latest bunch of monkey grass abandoned by the side of a road close to where I live. I recognized the tufts of thin leaves on top of the root clumps and happily brought them home to line my new garden paths.

A few weeks later, I started to find little plant groups pulled out of the ground and sitting in my paths. After a closer look, I found most of the plants trimmed to the ground by, I suspect, my resident deer. The ones pulled straight out of the ground had not established their roots yet so they could not fight off the hungry marauding visitors.

When the record-breaking cold polar vortex with snow hit mid-Missouri, it crossed my mind I should go out and check for any errant monkey grass pulled out of the garden. I waited until temperatures were in the 30s before making the rounds and found 3 groups of plants sitting in paths, their roots frozen but still pliable.

Frozen roots are thawing out and hopefully will recover. (Photo by Charlotte Ekker Wiggins)

Frozen roots are thawing out and hopefully will recover. (Photo by Charlotte Ekker Wiggins)

Once inside, I gently poured room temperature water on the roots and placed them in a pot to thaw out.

According to the Missouri Botanical Garden, monkey grass is easily grown in average, medium moisture, well-drained soil in full sun to part shade. Tolerates a wide range of light conditions and soils. Will grow in close to full shade, but will produce more elongated foliage and spread more slowly. Also has good tolerance for heat, humidity and drought.

As you can see from the plants I brought inside, the leaves hold their color for a good part of fall and winter, finally dying back until new growth appears in spring. Some people cut it down. I have my own mowing team that trims the foliage back to root level so I don’t do much with the plants over winter.

Liriope muscari is also commonly called lilyturf or blue lily turf. It is a tufted, tuberous-rooted, grass-like perennial which typically grows 12-18" tall and features clumps of strap-like, arching, glossy, dark green leaves (to 1" wide). Clumps slowly expand by short stolons, but do not spread very fast. Lavender flowers give way to blackish berries which often persist into winter.
The genus name honors a Greek woodland nymph, Liriope, the mother of Narcissus.
Other common names are border grass and monkey grass.

Here is one of my garden paths bordered with monkey grass. The plants soften the paths and provide a nice green line during most of the growing season. When it blooms early fall, it also provides a source of pollen for my bees.

Monkey grass lines many of my garden paths. (Photo by Charlotte Ekker Wiggins)

Monkey grass lines many of my garden paths. (Photo by Charlotte Ekker Wiggins)

As far as the three plants I brought inside, they get planted into a pot tomorrow to winter over in my living room until I can safely move them back outside.

As you plan your garden for later this year, add this plant to your list of border plants. They will be a nice addition to your garden and not require a lot of work, unless you find them out of the soil frozen mid-winter. Considering their history, I think pulling them through the rest of winter is the least I can do!

Charlotte

Blooming Apple Blossom Amaryllis

Blooming amaryllis close.jpg

Blooming Apple Blossom Amaryllis

Do you ever wonder whether some blog posts actually turn out the way the person posting says they will?

I do as well. I thought about that as I was doing dishes earlier tonight and enjoying what I call my birthday Amaryllis bulbs, all starting to bloom in a pot in my kitchen. It may be cold and drizzling outside but these lovely flowers are brightening, and warming up, my home.

Quick recap. These Amaryllis bulbs were on deep discount after Christmas so I picked up three to add to my other Apple Blossom Amaryllis bulbs. I have a couple of pots full of bulbs that summer outside, then come inside in fall to bloom - well, not quite sure when they will bloom, which is why I splurged on these three as a birthday gift.

Amaryllis are native of South America and usually easily found mid-fall through Christmas. They come in a variety of colors and shapes. Two of the more popular ones include the pinkish Apple Blossom and the red ones usually featured during Christmas.

As I said in my earlier blog post, you want to pick Amaryllis bulbs already showing a little bud at the tip of the bulb. This is what all three of my Apple Blossom Amaryllis bulbs had when I selected them. The bud is thicker than the leaves that will develop after the flowers.

This Amaryllis bulb bud guarantees a bloom once it grows. (Photo by Charlotte Ekker Wiggins)

This Amaryllis bulb bud guarantees a bloom once it grows. (Photo by Charlotte Ekker Wiggins)

Although most Amaryllis bulbs planted and watered at the same time will grow together, two of the three Apple Blossom Amaryllis bulbs took off once they were in the pot. I tied them up once they were 6 inches tall to make sure the weight of the flowers didn’t make them tip over.

Two of the three Apple Blossom Amaryllis bulbs in bloom. (Photo by Charlotte Ekker Wiggins)

Two of the three Apple Blossom Amaryllis bulbs in bloom. (Photo by Charlotte Ekker Wiggins)

At the other end, the Apple Blossom Amaryllis buds had several flowers inside each of the flower buds. These will bloom for a couple of weeks and get replaced by new flowers.

I tied up these Apple Blossom Amaryllis stalks so the flowers didn’t pull them over. (Photo by Charlotte Ekker Wiggins)

I tied up these Apple Blossom Amaryllis stalks so the flowers didn’t pull them over. (Photo by Charlotte Ekker Wiggins)

The Apple Blossom Amaryllis flowers are keeping my Christmas poinsettia company. I think they nicely brighten up my kitchen sitting next to the poinsettias.

Apple Blossom Amaryllis sitting next to my Christmas poinsettia. (Photo by Charlotte Ekker Wiggins)

Apple Blossom Amaryllis sitting next to my Christmas poinsettia. (Photo by Charlotte Ekker Wiggins)

Frankly with these flowers as company, I enjoy washing my dishes!

Charlotte

Choosing Amaryllis Bulbs

Apple Blossom Amaryllis in bloom last year in one of my bay windows. (Photo by Charlotte Ekker Wiggins)

Apple Blossom Amaryllis in bloom last year in one of my bay windows. (Photo by Charlotte Ekker Wiggins)

Choosing Amaryllis Bulbs

Summer in the Midwest can be a lovely riot of color. By mid-winter, however, I miss the Missouri wildflowers and perennials that usually keep me company on my hillside. To brighten up my winter and for my early January birthday, I splurged on three Apple Blossom Amaryllis bulbs to add to my already existing collection. Yes, I have picked up a few of these fun bulbs in the past, most certainly to celebrate other birthdays.

The Amaryllis bulbs where on deep discount after the holidays, which is a great time to buy them. As I was picking my Amaryllis bulbs, a lady stopped by and asked for help picking one out as a gift for a friend.

Usually by this time of year Amaryllis bulbs have bloomed in their box or not quite started. Those that bloomed were exposed to some moisture, which triggered the blooming. They will need to be potted, allowed to grow leaves and then encouraged to rest a couple of months before they bloom again.

If you want an Amaryllis bulb that is going to bloom now, chase the buds. You want a bulb that has a thick flower bud popping out of the tip of the bud. Here they are as the bulb is growing:

This year’s crop of Apple Blossom Amaryllis bulbs starting to grow. (Photo by Charlotte Ekker Wiggins)

This year’s crop of Apple Blossom Amaryllis bulbs starting to grow. (Photo by Charlotte Ekker Wiggins)

Look closer at the bottom of the photo where growth is coming out of the Amaryllis bulb. In front, the little growth on the right are leaves. The next photo shows the difference between leaves growing and the Amaryllis bud flower starting:

See the thick tip coming out of the back flower bulb? That’s a flower in the making. (Photo by Charlotte Ekker Wiggins)

See the thick tip coming out of the back flower bulb? That’s a flower in the making. (Photo by Charlotte Ekker Wiggins)

This is how you usually see Amaryllis bulbs right out of the package. If you don’t see any Amaryllis flower buds or leaves, pick the largest Amaryllis bulb you can get. The larger the Amaryllis bulb, the more energy is stored and the higher the chance that the Amaryllis bulb will produce a flower.

This is how an amaryllis bulb usually comes out of a box. (Photo by Charlotte Ekker Wiggins)

This is how an amaryllis bulb usually comes out of a box. (Photo by Charlotte Ekker Wiggins)

Here is another Apple Blossom Amaryllis bulb in bloom with the start of another flower stalk coming out of the bulb. This Amaryllis bulb was already trying to bloom when I bought it on sale.

Another view of the kind of flower bud you want to see on an Amaryllis bulb. (Photo by Charlotte Ekker Wiggis)

Another view of the kind of flower bud you want to see on an Amaryllis bulb. (Photo by Charlotte Ekker Wiggis)

The Amaryllis flower bud quickly makes its way on top of a green stalk, growing to almost 2 feet before it blooms.

I usually have to stake mine along the way to prevent the weight of the flowers from knocking the plant over.

This Amaryllis bud has now grown about 2 feet and is getting ready to bloom. (Photo by Charlotte Ekker Wiggins)

This Amaryllis bud has now grown about 2 feet and is getting ready to bloom. (Photo by Charlotte Ekker Wiggins)

Amaryllis bulbs are native to South America. They can spend summer outside to build up energy in their buds before being moved inside for midwest winters.

One of the delightful surprises is to find Amaryllis bulbs blooming mid-winter. I don’t always see the buds as they are growing but it’s impossible to miss the lovely flowers!

Charlotte

1961 Complete Guide to Garden Flowers

I bet I can describe this jacket cover in my sleep! (Photo by Charlotte Ekker Wiggins)

I bet I can describe this jacket cover in my sleep! (Photo by Charlotte Ekker Wiggins)

1961 Complete Guide to Garden Flowers

If there was one book my grandmother sent me for Christmas that had the most influence over the years, this is it. The 1961 Complete Guide to Garden Flowers used to sit next to my bed for years, the favorite book to peruse as I was getting ready to sleep.

That turned out to not be such a good idea since once I started, I could spend hours browsing through the 1,000 illustrations and flower planting guides. I didn’t choose to live on a hillside but the photos of spring bulbs on a rise sure looks familiar during springs now in my garden.

The photos were a definite draw. What was even better were the detailed descriptions of flowers and their growing requirements. Six horticulturists contributed their expertise as book editors, which explains why this vintage gardening book still holds its value.

Photographs of daylilies, left, and delphiniums, right. (Photo by Charlotte Ekker Wiggins)

Photographs of daylilies, left, and delphiniums, right. (Photo by Charlotte Ekker Wiggins)

I know it’s easy to think that everything one needs to know is available on the internet but that’s not true. These older, vintage gardening books reflect a different time but still offer valuable information on how to successfully grow plant varieties.

As our climate continues to rapidly change, we will continue to lose species and these old books will also document varieties that we may no longer have.

If you’re looking for a gift for gardener who will enjoy this book, we have one edition in excellent condition for sale.

No, it’s not my original one, I have that one happily in my library in a place of honor next to my Grandmother’s photo. I have a feeling she knew what she was doing when she sent me that book!

Charlotte

Defining Garden Paths

The garden path from my front door covered in ice. (Photo by Charlotte Ekker Wiggins)

The garden path from my front door covered in ice. (Photo by Charlotte Ekker Wiggins)

Defining Garden Paths

Winter seems to be a quiet time for gardeners but there are several things one can do. One of the more challenging things to design in a garden is a network of paths. If you’re working with a brand new piece of property with nothing growing, that’s one thing. However, most of us have at least a house and some form of growth be it trees or shrubs, or both. If you have any kind of incline like I do, it’s almost impossible to keep the paths once you build them so adding structural support is a must.

You can buy software programs where you can plug in your land dimensions and even photos. Those programs, however, don’t easily adjust for garden terrain.

One easy way to determine where you should put your paths is an ice storm. Freezing rain, sleet and ice will settle on the ground and help define the low spots. It’s how I have developed and confirmed my garden path network.

The flat garden areas are easy, such as around the front of my house (photo above) and small pond.

This icy path is by a small goldfish pond. (Photo by Charlotte Ekker Wiggins)

This icy path is by a small goldfish pond. (Photo by Charlotte Ekker Wiggins)

As I move to the hillside, the ice helps to show me the garden path network and how accurately I developed them earlier in the season.

This corner is on the south side of my property leading to my southern bee garden. Some of these paths have been around for a couple of decades. The path on the left was build new last year.

The icy paths towards the southern apiary, or bee garden. (Photo by Charlotte Ekker Wiggins)

The icy paths towards the southern apiary, or bee garden. (Photo by Charlotte Ekker Wiggins)

The oldest garden path is in a center island as one enters my property. It’s off center compared to the rest of the garden paths but it was the easiest place to build one at the time.

Every year I consider whether I want to move the path and so far, have left it.

One of the older garden paths, this one in a center island. (Photo by Charlotte Ekker Wiggins)

One of the older garden paths, this one in a center island. (Photo by Charlotte Ekker Wiggins)

The northern apiary has a better developed network of paths. Most of these paths were built this past season and with one exception where I need a small tweak, this side of the garden is now easy to access with flat garden paths.

After lining the path with downed trees, I add cardboard then mulch until the path is level. Or as level as I can get it.

Icy paths around the northern apiary. (Photo by Charlotte Ekker Wiggins)

Icy paths around the northern apiary. (Photo by Charlotte Ekker Wiggins)

Don’t tackle the ice to get photos but if you can take some safely it’s a good time to document your garden path system before snow covers it all up.

Icy paths get a layer of snow. (Photo by Charlotte Ekker Wiggins)

Icy paths get a layer of snow. (Photo by Charlotte Ekker Wiggins)

When we’re close to the ground it’s hard to guestimate where a new path should go. The ice and these photos will give me a blueprint for next year.

Now to start dreaming about what I am going to plant!

Charlotte

Cedar Rose Trellis

Two rose trellises now mark the entrance to one of my garden paths. (Photo by Charlotte Ekker Wiggins)

Two rose trellises now mark the entrance to one of my garden paths. (Photo by Charlotte Ekker Wiggins)

Cedar Limb Rose Trellis

It’s true, I’m a bit picky about my gardening trellises. I want them to be interesting but not so interesting to take away from the flowers growing over them. I also prefer something less than hard edged industrial, which tends to be the main options.

This year, I am trying something new - repurposing native Missouri cedar branches into fruit fences, flower bed arbors and now rose trellises.

I was inspired by having this black metal rose trellis on one side of a garden path. To balance out the area, I needed another trellis on the left side.

This is a metal rose trellis that inspired the cedar limb one. (Photo by Charlotte Ekker Wiggins)

This is a metal rose trellis that inspired the cedar limb one. (Photo by Charlotte Ekker Wiggins)

A cut down ash tree stump inspired me to encircle it with cedar tree limbs tied at the top about the same height as the metal rose trellis.

At first I thought I would finish the trellis by getting a metal fence post for the top but leftover cedar pieces cut smaller give me the same pyramidal top.

The cedar limb rose trellis with a top cap out of cedar. (Photo by Charlotte Ekker Wiggins)

The cedar limb rose trellis with a top cap out of cedar. (Photo by Charlotte Ekker Wiggins)

Remember this structure will be entwined in rose vines next spring so very little of it will be visible once the vines start growing.

I thought I was on the right path when I had to move the existing rose vines out of the way to install the cedar limb trellis. Once growth starts, the vines should get the support they need and nicely cover the cedar limbs.

Cedar limbs are not only native but they are long-lasting and I can easily add more if I need them.

I still have some cedar limbs left so next I am making a larger arbor to cover the bench in my berry patch. That one is going to have to wait until after the snow storm passes and melts.

Rose trellises now covered in a January 2019 snow. (Photo by Charlotte Ekker Wiggins)

Rose trellises now covered in a January 2019 snow. (Photo by Charlotte Ekker Wiggins)

Looking at the cedar rose trellis in the snow beside the metal one, I think this will work quite nicely, don’t you?

Charlotte

Salvaged Begonias

This is my one begonia, more like an Angel Wing Begonia tree, now in bloom. (Photo by Charlotte Ekker Wiggins)

This is my one begonia, more like an Angel Wing Begonia tree, now in bloom. (Photo by Charlotte Ekker Wiggins)

Salvaged Begonias

It may come as a surprise to those who know me that even though I spend my winters in a house full of plants I only had one begonia going into winter this past year.

It’s an Angel Wing begonia that is now branching out and almost as tall as my living room ceiling. It was a gift from a gardening friend a good 20 years ago or more, a tiny speckled-leaf plant that I often forgot to water because of where I placed it, in a corner where I had to crawl over a chair.

As it grew, it increasingly got my attention, especially when it flowered mid-winter. Who can resist a plant that offers beauty in the middle of a stark Missouri winter landscape?

My Angel Wing Begonia, now almost as tall as my ceiling, Photo by Charlotte Ekker Wiggins)

My Angel Wing Begonia, now almost as tall as my ceiling, Photo by Charlotte Ekker Wiggins)

I need to re-pot it this spring and do some trimming. I will wait until then so the cuttings will more easily root.

Begonias are native South American plants and so easy to grow its easy to overlook them. The Angel Wing begonia has taught me that the amount of flowering and leaf color depends on not only how well it is watered but the amount of light it gets. Pretty basic growing requirements for most plants, even indoor ones. Now that the plant is closer to a sunny window, I am getting more frequent flowering, which reminds me to water it.

The leaves themselves are interesting. If you find a variety of begonia plants this spring, take a loot at their leaf shapes and colors, they’re almost as interesting as the flowers.

This how to tell what kind of begonia it is, this is an Angel Wing Begonia leaf, red on the bottom. (Photo by Charlotte Ekker Wiggins)

This how to tell what kind of begonia it is, this is an Angel Wing Begonia leaf, red on the bottom. (Photo by Charlotte Ekker Wiggins)

Which brings me to the second begonias I now have living with me. These are their leaves. Look familiar?

This is the leaf from the salvaged begonias. (Photo by Charlotte Ekker Wiggins)

This is the leaf from the salvaged begonias. (Photo by Charlotte Ekker Wiggins)

Frankly I didn’t know what they were when I found them discarded. There were no leaves on the stems. The stems themselves looked bedraggled after spending a few nights outside in below freezing temperatures. By all accounts, these plants should not be living.

I wrapped the roots in repurposed bird seed bags and brought them home to sit in my den for a couple of days to warm up. The challenge I had was that I really didn’t have room for more plants inside but I was curious about what these were.

Once potted with new soil, trimmed and watered and tucked into a southern-facing window, the salvaged begonias have started to bloom.

Three pots of salvaged begonias growing nicely in a south window. (Photo by Charlotte Ekker Wiggins)

Three pots of salvaged begonias growing nicely in a south window. (Photo by Charlotte Ekker Wiggins)

Usually I see begonias in the spring that are either red or white flowers so this was a delightful surprise. The corral color contrasts nicely against the dark green leaves and the plants now seem none the worse for being tossed.

I haven’t introduced the salvaged begonias to the Angel Wing begonias on the other side of the room yet but I think their flower colors are complimentary, both in that peachy corral range.

Don’t you love the corral color of these begonia flowers? (Photo by Charlotte Ekker Wiggins)

Don’t you love the corral color of these begonia flowers? (Photo by Charlotte Ekker Wiggins)

And yes, I have a new appreciation for begonias. Even though I will still delight in having yellow roses like this vintage rose quilt brightening up my winters, begonias will have a special spot in my fall planning this year.

These bedraggled plants should not have recovered. Their resiliency and beauty have now moved them up on my list of favorite winter plants!

Charlotte

Cedar Branch Fruit Fences

This wild black raspberry knew what to do with the cedar branch fruit fence. (Photo by Charlotte Ekker Wiggins)

This wild black raspberry knew what to do with the cedar branch fruit fence. (Photo by Charlotte Ekker Wiggins)

Cedar Branch Fruit Fences

I was getting excited about a winter snow storm forecast when I remembered one of my garden projects was only half done: my cedar branch fruit fences. The problem was that the cut down cedar branches were now piled in front of my garage door, keeping a couple of visiting rabbits warm and my car from getting safely stored away before the storm moved in.

Luckily this was not a difficult project to finish so I bundled up, plugged in my nail gun compressor and got started making the actual fences for some of my raspberry and blackberry patches.

Cedar tree branches ready to become garden fencing. (Photo by Charlotte Ekker Wiggins)

Cedar tree branches ready to become garden fencing. (Photo by Charlotte Ekker Wiggins)

If you do a search for these berry fences, you will find some very serious-looking set ups with wire and industrial end supports.

My idea is more user friendly. I want to be able to walk through my garden paths and easily pick the berries off the nearby vines. I also didn’t want them to look like prison walls like some do so I chose to make smaller fruit fences out of cedar branches. Cedar is long-lasting, the newly-cut branches are easy to shape and with a little creativity, I can make fencing that will also be attractive to both fruiting vines and garden visitors.

Knowing that raspberry vines like to move, my first cedar branch fence was for a newly-established raspberry area so I can try to corral the raspberries. I know, a lost cause but it at least marks where they are and guides me away from the thorns. The plants can spread towards the back and any that make it into the patch can be easily moved.

One of the strips of finished cedar branch fending for raspberries. (Photo by Charlotte Ekker Wiggins)

One of the strips of finished cedar branch fending for raspberries. (Photo by Charlotte Ekker Wiggins)

The fence lengths, about 5-foot long each, also have cedar branches that form arches so the fruit vines can easily wrap around the bending cedar branches.

The bottom, more straight rungs will also contain vines and still make them easily accessible. I’m thinking for me but I’m sure the deer and birds will more easily find them, too.

Fencing arch will help keep vines off the ground. (Photo by Charlotte Ekker Wiggins)

Fencing arch will help keep vines off the ground. (Photo by Charlotte Ekker Wiggins)

Once these branches start to grow, I can then trim the plants at the bottom of the cedar branch fence without getting entangled in the thorns. Well, at least that’s the theory.

Raspberry vines now weave around the cedar branch fence arches. (Photo by Charlotte Ekker Wiggins)

Raspberry vines now weave around the cedar branch fence arches. (Photo by Charlotte Ekker Wiggins)

Another fruit fence was made for a thornless blackberry growing beneath one of my hives. Last year, the plant seemed to be trying to grow into the hive so I am hoping the cedar branch fruit fence can keep the vine better behaved and still give my bees access to the nearby nectar and pollen.

Another cedar branch fence for a blackberry patch between hives. (Photo by Charlotte Ekker Wiggins)

Another cedar branch fence for a blackberry patch between hives. (Photo by Charlotte Ekker Wiggins)

There are a number of pre-made fencing available on the market but they all look way too industrial for my garden. They also assume one is installing them on a flat surface, not a limestone hillside where to get any depth one would need to dynamite.

These cedar branch fruit fences will fade as the growing vines cover them and I can use cut down cedar trees from my garden to make them. That’s a win-win in my garden book and now I can get my car into my garage.

Ok, snow, bring it on!

Charlotte

January Gardening Chores

Winter is a good time to find gardening items on sale. (Photo by Charlotte Ekker Wiggins)

Winter is a good time to find gardening items on sale. (Photo by Charlotte Ekker Wiggins)

January Gardening Chores

January is the one month when a gardener can sit back and do some of the most important work: planning. Our rapidly-changing climate is challenging the traditional gardening chores so this year I will be including more recommendations on how to prepare for our changing growing conditions in USDA Hardiness Zone 6A, formerly USDA Hardiness Zone 5B.

According to US Department of Agriculture, the Hardiness Zones are based on the average annual minimum winter temperature divided into 10-degree F zones, which give a range of temperatures for a certain plant or tree. The hardiness zones for the Midwest fluctuate more than other zones but average Zones 4,5 and 6.

 The zones for Missouri can be found here: https://planthardiness.ars.usda.gov/PHZMWeb/

1.         Review your garden diary from last year. Underline items you want to get done this year. I also carry over the ones I didn’t get to last year, or drop them off the master list. This is a good time to dream.

2.         Identify what plants you want to add this year and note what soil and sun requirements they will need. Focus on adding native plants. Once established, native plants will be low care and excel in local soil and weather conditions.

3.         Plan on expanding flowerbeds to start removing grass from your property. Expanding flowerbeds will give you areas to plant vegetables as well as flowers and provide more food for pollinators. One way to start expanding flowerbeds is to place cardboard along the existing flowerbed edge and then move the flower bed border early spring. Mulch on the cardboard will keep the garden looking nice and help restore healthy soil conditions.

 4.        Order catalogs you have used in the past and share catalogs you don’t need or use. One of my favorites is the Missouri Wildflowers Nursery Native Plants catalog, it has lovely pictures with a quick guide on what growing conditions native plants require and they offer great plant starts. www.mowildflowers.net

5.         Order locally-adapted seed catalogs. Baker Creek Heirloom Seeds is a favorite seed catalog from Mansfield, Missouri. www.rareseeds.com.

Remember to keep newly-planted mums watered through their first winter. (Photo by Charlotte Ekker Wiggins)

Remember to keep newly-planted mums watered through their first winter. (Photo by Charlotte Ekker Wiggins)

6.         Read. Whether it’s Missouri Gardener Magazine, which provides good local gardening information and new gardening books, catch up on what you couldn’t get to last year.

7.         Remove any broken limbs in pathways to keep walkways clear and safe.

8.         Don’t walk on frozen lawns.

9.         On warm days, pile mulch and leaves on garden beds if they’ve been blown off by winter winds.

10.       Check inside plants for any hitchhiking bugs and remove. Make sure they are getting their sunlight needs met. If not, move them. Water with diluted fertilizer. Prune as necessary.

11.       Drop your garden pruners and other garden tools off to get sharpened.

12.  Start scouting where you can install rain barrels and totes to collect rain water off your gutter system.

13. Push heaved plants gently back into soil. Make sure to add mulch around these plants.

14. Water newly-planted chrysanthemums so they can get their roots established.

Charlotte

Water New Mum Plants

These yellow mums will need to be watered through winter. (Photo by Charlotte Ekker Wiggins)

These yellow mums will need to be watered through winter. (Photo by Charlotte Ekker Wiggins)

Water New Mum Plants

I know, it sounds odd to be saying to go out in the Missouri winter cold to water a plant but if you want newly-planted mums to survive, their roots need moisture until they can get established.

Mums have for years been a traditional fall plant to add to a garden for color. Unfortunately planting them that late does not give the plant roots enough time to establish themselves before cold weather arrives. Established roots can go dormant and reappear the following year, which is what happens once mum roots are established.

To pull mums through their first winter, plan on making sure their roots stay hydrated through the cold season, which means watering them a couple of times a month. If you get rain or snow that soon melts, nature is watering them for you.

Here are a couple of examples. This first mum is how most mums look about this time of year: Dry, brown and dead:

This yellow mum was planted this fall and looks dead. (Photo by Charlotte Ekker Wiggins)

This yellow mum was planted this fall and looks dead. (Photo by Charlotte Ekker Wiggins)

If this mum has been kept hydrated since I planted it, it should have some new growth peeking up through the dead branches. Leave dead branches on the plant, they provide young plant starts protection from the elements.

Looking through the dead branches to soil level, especially towards the center of the plant, you will see plant starts.

Bottom of the mum shows new plants starting to grow. (Photo by Charlotte Ekker Wiggins)

Bottom of the mum shows new plants starting to grow. (Photo by Charlotte Ekker Wiggins)

Another fall-planted mum plant has even less dead material over where the new shoots are growing:

Another mum plant that appears to be dead. (Photo by Charlotte Ekker Wiggins)

Another mum plant that appears to be dead. (Photo by Charlotte Ekker Wiggins)

Can you see the new growth underneath? I have been watering these mums every week or so since the mums were planted last fall.

New growth is already appearing underneath the dead cover. (Photo by Charlotte Ekker Wiggins)

New growth is already appearing underneath the dead cover. (Photo by Charlotte Ekker Wiggins)

Once the mums start growing in spring, I will cut away the dead cover and gently break up sol around the base with my claw gardening gloves so they can more easily grow.

It’s amazing how these little starts will quickly grow into spring plants given half the chance. Once they make it through this winter, these mums will return on their own for several years without having to be watered through winter.

Charlotte

Gardening by Holidays

Set up a garden spot where you can sit down and enjoy the fruits of your labor. (Photo by Charlotte Ekker Wiggins)

Set up a garden spot where you can sit down and enjoy the fruits of your labor. (Photo by Charlotte Ekker Wiggins)

Gardening by 2019 National Holidays

It’s hard enough to keep track of gardening chores for USDA Hardiness zone 6A - we used to be 5B- let alone when it is best to do them. I use national holidays to try to keep me on track so here is my basic gardening calendar for 2019 chores:

New Years Jan. 1:  Check inside plants for hitchhiking bugs. Spray with Neem oil mixed with water. Catch up on reading. Day dream with gardening catalogs.

Martin Luther King Day Jan 17: Make sure inside plants are all getting sunlight needs met. If not, move them around. Review last year’s garden diary; make notes for what to do this year. Water newly-planted mums monthly to keep roots hydrated.

Valentine's Day February 14: Check birdhouses for repairs; clean garden implements; wash flower pots.

President's Day February 20: Prune fruit trees. Plant onion sets, lettuce, spinach, radishes. 

St. Patrick's Day March 17: Plant potatoes, peas, Brussels sprouts and broccoli; start tomato and pepper seedlings inside. Check mums for new growth at the base of plants.

First Day of Spring March 20: Work compost into raised garden beds. Plant more lettuce, spinach, radishes, onions. Prune roses. Enjoy the first sight of blooming flowers like the ones on these Vintage Days of the Week Kitchen Towels.

Easter April 21: Plant tree seedlings and native wildflowers. Update garden diary for bulbs I need to divide and move this fall; mark locations so I can find them later. Pinch an inch off mums weekly to keep them bushy.

Earth Day April 22: Plant last of my spinach, peas and lettuce. Cover the garden with tulle to keep deer out. Plant trees.

Mother's Day May 12: Last frost day so everything can get moved outside. I'll leave seedlings in their containers outside for a few days before planting them. 

Memorial Day May 27: Last day to plant anything from seed which means pumpkins, cucumbers and zucchini go in. Compact fruit trees, bushes and perennials also get planted so they can benefit from June showers. Good time to move Iris, daylilies and peonies after they have stopped blooming.

Mark trees that need to be cut. These are ash trees with emerald ash borer larvae, which will kill the trees in 3-4 years. (Photo by Charlotte Ekker Wiggins)

Mark trees that need to be cut. These are ash trees with emerald ash borer larvae, which will kill the trees in 3-4 years. (Photo by Charlotte Ekker Wiggins)

Father's Day June 16: Last weekend to plant perennials. Check garden centers for end of season plant sales.

Independence Day July 4: Last day for planting beans, last weekend for pinching back Mums so they bloom bushy this fall. 

Labor Day Sept. 2: Harvest fall crops; check for bugs; add compost, and start getting raised garden beds ready for winter. Place poinsettias in room without evening light.

Columbus Day Oct. 14: Trim deck plants; move them inside house for winter. Trade plants with friends for holiday gifts.

Halloween Oct. 31; First fall hard frost. All plants that are going to

winter over should be settled inside. Halloween weekend is also a good time to add compost.

Veterans Day Nov. 11: Clean and store pots, garden implements; toss out torn gardening gloves; mark envelopes with saved seeds; update garden diary on what worked well this year and what I want to do differently or try next year. If there's been a hard frost, good time to mulch plant beds so soil temperature doesn't fluctuate.

Thanksgiving Nov. 28: Buy spring bulbs on discount. 

Winter, Dec. 21: Look for first gardening catalogs in the mail!

What gardening chores would you add to this basic list?

Charlotte

Reuse Cut Down Trees

Reuse Cut Down Trees

I don’t mind leaving dead trees in my wildlife garden for woodpeckers and other creatures but when the trees might fall into my house I have to give that a second thought. Fall of 2018, when 5 more ash trees were identified as having emerald ash borer larvae in their bark, I decided not to wait the 3-4 years before the trees were dead and had them professionally cut down.

Dennis King of King Out On a Limb Tree Trimming Service cutting down one of my five dying ash trees. (Photo by Charlotte Ekker Wiggins)

Dennis King of King Out On a Limb Tree Trimming Service cutting down one of my five dying ash trees. (Photo by Charlotte Ekker Wiggins)

Usually tree trimmers will haul off the trees but I kept them on site to reuse. The cut trunks are now being used as retaining walls to terrace my new hillside garden beds. The cut down trees help to hold leaves, mulch and soil from getting washed down hill.

Cut down ash trees now form new hillside terracing. (Photo by Charlotte Ekker Wiggins)

Cut down ash trees now form new hillside terracing. (Photo by Charlotte Ekker Wiggins)

The tree stumps themselves were not cut to the ground, they were specifically left so that I can use them later. I asked that they leave the tree trunks so that I can then cut them lower as necessary.

The recently-cut down ash trees are in the back. The one with the birdhouse had to be cut down several years ago and is now a birdhouse base.

This church birdhouse sits on top of a cut down ash tree trunk stub. (Photo by Charlotte Ekker Wiggins)

This church birdhouse sits on top of a cut down ash tree trunk stub. (Photo by Charlotte Ekker Wiggins)

The smaller ash tree limbs are now refreshing wildlife refuge piles I have along my property line and the nearby woods. As a certified wildlife garden, providing safety through cover is important to some wildlife species especially in winter.

Smaller ash tree branches refresh a wildlife pile. (Photo by Charlotte Ekker Wiggins)

Smaller ash tree branches refresh a wildlife pile. (Photo by Charlotte Ekker Wiggins)

The emerald ash borer-damaged trees were marked in summer with pink plastic so that I knew what trees needed to be removed. Actually it was more for the tree service although they didn’t have any trouble locating the trees on their first visit. Woodpeckers had removed pieces of tree bark as they went after the emerald ash borer larvae under the tree bark.

Pink plastic marked the ash trees to be cut down. (Photo by Charlotte Ekker Wiggins)

Pink plastic marked the ash trees to be cut down. (Photo by Charlotte Ekker Wiggins)


Although most people will wait until spring and summer to get them cut, I did it late fall on a warm day since the tree cutting company was available. Usually tree-trimmers are very busy during spring and summer and may need several weeks and months advance notice.

Here’s another tree stump from a few years ago that now serves as a stand.

This metal bee sculpture now sits on top of a cut down ash tree. (Photo by Charlotte Ekker Wiggins)

This metal bee sculpture now sits on top of a cut down ash tree. (Photo by Charlotte Ekker Wiggins)

Although I was not happy to lose the ash trees, I was glad to recycle them on my hillside garden instead of having them hauled off to the recycling center, where I go to pick up my mulch. This way the trees continue to retain water to help keep flower bed soil moist as well!

Charlotte