How to Plant Tulips

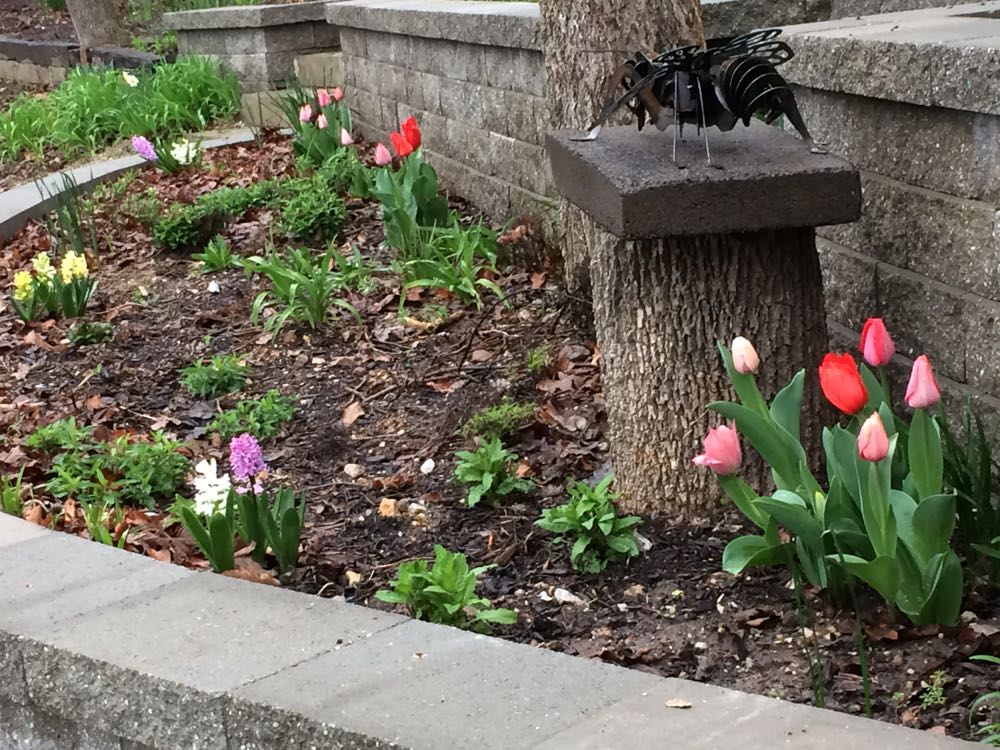
Darwin Hybrid mixed tulips in bloom spring 2017 in my new driveway retaining wall.

Darwin Hybrid mixed tulips in bloom spring 2017 in my new driveway retaining wall.

How to Plant Tulips

Tulips are planted in fall but most people think about planting them when they see them in spring in bloom. And yes, you can move tulips in spring, I will get to that in a minute.

Purchase tulip bulbs that are large, firm and heavy. Store the bulbs in a cool, dark place until planting time. You can usually find them for sale early fall at most garden centers, or through a variety of online suppliers.

Plant tulips in mid to late fall, when you are raking leaves and doing other fall clean up chores. Soil temperature should be 55°F or cooler.

Choose a planting location with full to part day sun, where the soil is well drained and easy to dig, never soggy. Loosen the soil to a depth of 10”. Also think about what wildlife may be in the area. Tulips are a favorite snack for deer and rabbits. Mice will eat the bulbs when there are mole runs.

If you have a lot of moles, plant tulip bulbs in soil in pots and bury the pots in the ground covered with chicken wire to protect them from being a winter snack.

How to Best Group Tulips

Tulips look best when they are planted in informal groups of 5 or more bulbs. Groupings of odd-numbered bulbs seem to look better than even numbers but I have planted, and like both groupings.

Space the tulip bulbs approximately 3 to 4” on center and plant them 6 to 7” deep. Use a garden trowel to plant individual bulbs or remove the soil from the planting area, place the bulbs and then refill the hole.

I invest in bone meal and add a sprinkling in the bottom of each hole before adding the bulbs. Bone meal provides a boost to the bulb roots as they start growing and makes sure they are strong and healthy when they are ready to bloom.

Moving Tulip Bulbs

Because people fall in love with tulips in spring when they are in bloom, there is a tendency to want to move them in springtime, too.

Although I don't recommend moving spring flowers in spring, it can be done. Dig the soil around the tulip roots and move tulip bulbs and soil to the new growing location. Do not dislodge the soil around the tulip roots or you will deny the plant the ability to gather nutrients and you will also disrupt the growing cycle.

Once moved, water well and, if necessary, stake the flowers so they will stand. I have found that once moved, it will take the flowers about a week to settle into their new home and stand up on their own.

The bulbs may not bloom the next year but if they are a re-blooming variety, add compost through the fall to re-invigorate the bulbs and they should bloom the following season.

Language of Flowers for Tulips

It’s been said that various colors of tulips have significant meaning when gifted: Red means love, white means I’m sorry and purple represents loyalty. Some of these "messages" are similar to the meaning of similar colors in other flowers, such as roses.

Regardless of the tulip variety, they are lovely flowers and deserve a safe spot in a spring garden.

Charlotte

Burgundy Hellebores

These burgundy hybrid hellebores popped up and started blooming almost overnight.

These burgundy hybrid hellebores popped up and started blooming almost overnight.

Burgundy Hellebores

How appropriate to be featuring this lovely perennial on this last day of winter. Burgundy hybrid hellebores, also referred to as Lenten roses because they tend to bloom around Lent, are one of the last winter-blooming flowers. These literally just popped up in my garden this past week.

The actual flower is inside the burgundy-colored sepals surrounding the center.

The actual flower is inside the burgundy-colored sepals surrounding the center.

The flowers of hybrid hellebores are actually the long, slender yellow filament-looking segments inside the burgundy-colored sepals. As the sepals mature, they loose some of their color but not their shape. This year I am going to try to save the sepals at the end of the season and see if I can dry them for my wreaths.

The one challenge in enjoying these lovely plants is that the flowers on the plants actually droop. To be able to see, and photograph, the flowers, I have to lean over and try to catch the flowers from a less than comfortable angle.

This is how the hybrid hellebores appear in the flower bed, with the sepals hanging down.

This is how the hybrid hellebores appear in the flower bed, with the sepals hanging down.

Even without being able to see the droopy flowers I can spot the plant in the flower bed when it is in bloom. Sometimes it's the only green showing up in the whole area!

Sometimes its easy to overlook hybrid hellebores in a garden bed.

Sometimes its easy to overlook hybrid hellebores in a garden bed.

Farewell winter, it was a long, snowy one!

Charlotte

Yellow Lenten Roses

Isn't this stunning? If it just wasn't so hard to take a picture of it!

Isn't this stunning? If it just wasn't so hard to take a picture of it!

Yellow Hellebores or Lenten Roses

They're finally blooming, my little collection of hybrid hellebores purchased at the end of spring the last few years. Some were without tags but I recognized the plant by their large, speckled leaves.

I found some hellebores last week at our local garden center for $20 and was in a bit of shock, forgetting for a moment that I picked up mine on sale. The garden center manager reminded me they have always been on the pricier side and come in a wide range of colors and shapes.

Hybrid hellebores get their common name from the rose-like flowers that appear in early spring around the Christian Lent observance. The "Lenten Rose" blooms are similar to poinsettias in that the colored sepals protect the true flowers inside. The wonderful advantage of adding these perennials to any garden is that the "blooms" last for several months and the foliage stays green for most of the year.

My hybrid hellebores are in partial shade in rich, moist and well-drained soil. The biggest challenge enjoying the flowers is trying to see, and photograph, the downward-facing blooms so I have them planting along the gentle curve of my hillside. It does make it a little easier for photography but I can't say it helps very much in terms of seeing the flowers, I still have to get down to eye level without exposing myself to my neighbors.

I add mulch every year to their flower beds and noticed that their crowns are now buried. I may have to lift them later, or move the mulch out from around them so the crown is back to soil level.

In year's past, these have started to bloom late January to February, this is the latest that they have started. I tried out my thread snips to cut back the old greenery during a warm January day when I was looking for some sign of life. I will be adding compost to this area this year to make sure the plants have enough nourishment while they are blooming.

Here are my yellow hybrid hellebores all blooming in a bunch on my hillside.

Here are my yellow hybrid hellebores all blooming in a bunch on my hillside.

If you have a chance to pick up any hellebores on sale, jump on the chance. Regardless of the variety and color they may be, hellebores are a wonderful addition to a late winter, early spring garden.

Charlotte

The Dirt on Soil

Leaves are a good soil additive, helping to keep soil from packing too densely, especially Missouri clay.

Leaves are a good soil additive, helping to keep soil from packing too densely, especially Missouri clay.

The Dirt on Soil

Did you know there are more microorganisms in a tablespoon of soil than there are people on earth? Some people think of soil as dirt, or as a farm, or as something one buys at a home and garden center in a plastic bag but soil is an amazing recycling operation, a constant re-combining of minerals and decaying plants and animals.

An average soil sample is 45 percent minerals, 25 percent water, 25 percent air, and five percent organic matter. Different-sized mineral particles, such as sand, silt, and clay, give soil its texture.

How fast water interacts, or doesn’t interact with those mineral particles, determines how well different plant varieties can pull the nutrition they need. Then there are the good soil organisms and the bad ones that, once out of balance, can turn soil communities into infertile landscapes.

To find out what kind of soil you have, you can do a quick soil test at home:

1. Fill a quart jar one-third full with topsoil and add water until the jar is almost full. Screw on the lid and shake the mixture until all the clumps of soil have dissolved.

2. Set the jar on a windowsill and watch as the larger particles begin to sink to the bottom. In a minute or two, the sand portion of the soil will have settled to the jar bottom. Mark the level of sand on the jar side. A colored magic marker will work, you can wash it off later.

3. Leave the jar undisturbed for several hours. The finer silt particles will gradually settle.

4. Leave the jar overnight. The next layer above the silt will be clay. Mark the thickness of that layer. On top of the clay should be a thin layer of organic matter. Some of this organic matter may still be floating in the water. In fact, the jar should be murky and full of floating organic sediments. If not, you probably need to add organic matter to improve the soil's fertility and structure.

One of the easiest soil amendments for flower beds is to add weathered wood chips. The wood chips break down into added organic matter and, once in decomposed form, are a wonderful planting medium for many plants. 

One of the easiest soil amendments for flower beds is to add weathered wood chips. The wood chips break down into added organic matter and, once in decomposed form, are a wonderful planting medium for many plants. 

Not sure what you are seeing? I can understand, sometimes it all looks like a big muddy blob. Take a good look until your eyes can distinguish between colors. Give up? Ok, but don’t toss it down the sink, pour it on a flower bed, there is another way.

Collect about 6 scoops or 1.5 cups of soil from 6-8 points from a good 4-6 inches below ground from around your garden in a plastic bag and take it down to your local University of Missouri Extension Office. For $15, they will send the samples off to a lab. In a couple of weeks, you will get a very detailed analysis back with a detailed report of your soil including ph levels and recommendations of what you need to do, if any, to improve your soil.

The report will also help guide you in what you can plant in your soil conditions and how to amend your soil for optimum growing conditions. Take your time with whatever you do, most soil amendments take time.

Charlotte

Peach Miniature Rose Now Two Months Later

Another bud is getting ready to bloom on this peach miniature rose!

Another bud is getting ready to bloom on this peach miniature rose!

Peach Miniature Rose Now Two Months Later

So it's been two months since I brought this marked down miniature rose home. It was the last one at the grocery store, marked down to $2.49, covered in  dried up rose buds and only one I could leave on the shrub to remind me of the peach color.

I have posted several sets of photos to show you how this little shrub rose can be not only salvaged but easily grown through winter and encouraged to re-bloom.

Once the danger of frost is over, I will be moving this and a few other miniature roses to their permanent home outside. In the meantime, I love seeing how many buds are popping up.

On this morning there were a total of four rose buds starting on this plant.

On this morning there were a total of four rose buds starting on this plant.

Without the restrictions of other plants in the pot, this little rose shrub has a more normal green color.

The flowers are also returning to a more normal size as opposed to the smaller size that comes from placing four rose plants in one pot. Epigenetics, my brother said when I was describing the transformation, the plant is responding to its new surroundings.

So nice to see this little plant so healthy and doing so well, there's even a faint scent.

So nice to see this little plant so healthy and doing so well, there's even a faint scent.

Now do you believe that you, too can grow miniature roses?

Charlotte

First Signs of Spring

Snowdrops galanthus have popped up around one of my tiny front ponds.

Snowdrops galanthus have popped up around one of my tiny front ponds.

First Signs of Spring

For the past 15 years or so, what blooms first in spring is now a surprise, with no two years the same and no two plants or flowers appearing in any semblance of order. As winter wanes in Missouri, it seems appropriate this year to have snowdrops galanthus popping up around one of my small ponds, a last winter hurrah before spring officially arrives on March 30.

Not so fast, though. In the hardiness zone where I live, we can still have a blackberry winter as late as early May. Snow has been known to grace Easter and many daffodils have popped up only to be covered in white snowy blankets.

This year, the snowdrops have company, my early yellow daffodils. They are not big, or splashy. These came from an abandoned home site that was 30 years old when I moved them a good 30 years ago. Once the regular daffodils start blooming, the small early daffodils fade in stature and presence but, to me, they hold a special place for being the first ones to bloom.

You can pick the unopened buds and place them in water in a flower vase to enjoy the new blooms inside. Don't mix them with other flowers because daffodils have a toxin that make them inedible, and therefore safe, from wildlife. The toxin, however, will quickly wilt any other flowers you try to mix with daffodils unless you let the daffodils drain for a good day in a separate vase first.

The first early daffodils have started to bloom, a sure sign spring is just around the corner.

The first early daffodils have started to bloom, a sure sign spring is just around the corner.

I have this first vase of spring daffodils sitting where I can easily see them. As I was admiring the bright yellow color, I spotted my painted gourd bee also appearing to look at the flowers.

Daffodils are not a major nectar and pollen source for native or honeybees although I periodically will see bees flying into, or out of, the flowers. The large flower "noses" do invite a visit.

This little painted bee is keeping an eye on the blooming buds, just as my outside bees are doing!

This little painted bee is keeping an eye on the blooming buds, just as my outside bees are doing!

It won't be long before my real honeybees outside will join the bumblebees and other pollinators flitting through the rest of the flowers blooming in my one-acre limestone hillside garden. Then I will know it really IS spring!

Charlotte

Winter-Flowering Peach Hibiscus

Double peach hibiscus blooming mid winter in my bay window.

Double peach hibiscus blooming mid winter in my bay window.

Winter-Flowering Peach Hibiscus

If there is one plant that brightens up a cold, snowy winter day, it's a blooming tropical hibiscus. I have several tropical hibiscus plants wintering over inside my house, and I love to be greeted by the bright flowers especially on a drizzly winter day.

This one is a double peach hibiscus, rescued from a sale pile at a local garden center a couple of years ago. 

Frankly I didn't know what color the flowers were. The plant was healthy enough so I took a chance and brought it home to join my other tropical hibiscus or should that be hibiscii.

This blooming cycle included a second nearby bloom as well.

This blooming cycle included a second nearby bloom as well.

The trick to wintering tropical hibiscus plants is to give them as much direct sun as possible.

I also check the soil daily to make sure the plant pot doesn't dry out.

Tropical hibiscus winter over inside well as long as they get sunlight.

Tropical hibiscus winter over inside well as long as they get sunlight.

Combined with the other neighboring plants, the blooming peach tropical hibiscus does bring a lovely color to that corner of my room!

Charlotte

New Use for Letter Opener

Old-fashioned letter openers have a new purpose for opening seed packets.

Old-fashioned letter openers have a new purpose for opening seed packets.

New Use for Letter Opener

If you've ever grabbed a handful of seed envelopes and headed out to the garden, you know what I'm going to reference here. Sometimes it is best to turn around, head back inside, take a deep breath and start again, and by that I mean set those seed packets on the counter and get them carefully open before heading back out into the garden.

I don't know how many times I have headed out and then tried to open the seed envelopes in the garden, only to loose half the seeds in the process. Doesn't matter how, it's a combination of spilling, spreading and scattering, at times all in the same spot.

So when I discovered the repurposing of this old favorite letter opening tool, I was quite pleased. It's an old gift, one end rather flat so the tip easily fits under the flaps of envelopes so one can open envelopes without getting paper cuts. Not only will old letter openers work very well to quickly unseal seed packets, but they will leave the opening cleanly open so I'm not tearing off half of the envelope and seeds will easily spill out as I walk out to the garden spot.

Letter opener makes opening seed packets easy and prevents spilling seeds.

Letter opener makes opening seed packets easy and prevents spilling seeds.

Another benefit is that I can then store the half-filled seed packets in a relatively orderly fashion so I can find them again as I spread more seeds, as opposed to scrambling around for the leftover envelopes and loosing more seeds in the process.

Yes, pretty happy with this little discovery if I say so myself.

I suspect my garden will be as well, now more seeds may end up where they're supposed to be!

Charlotte
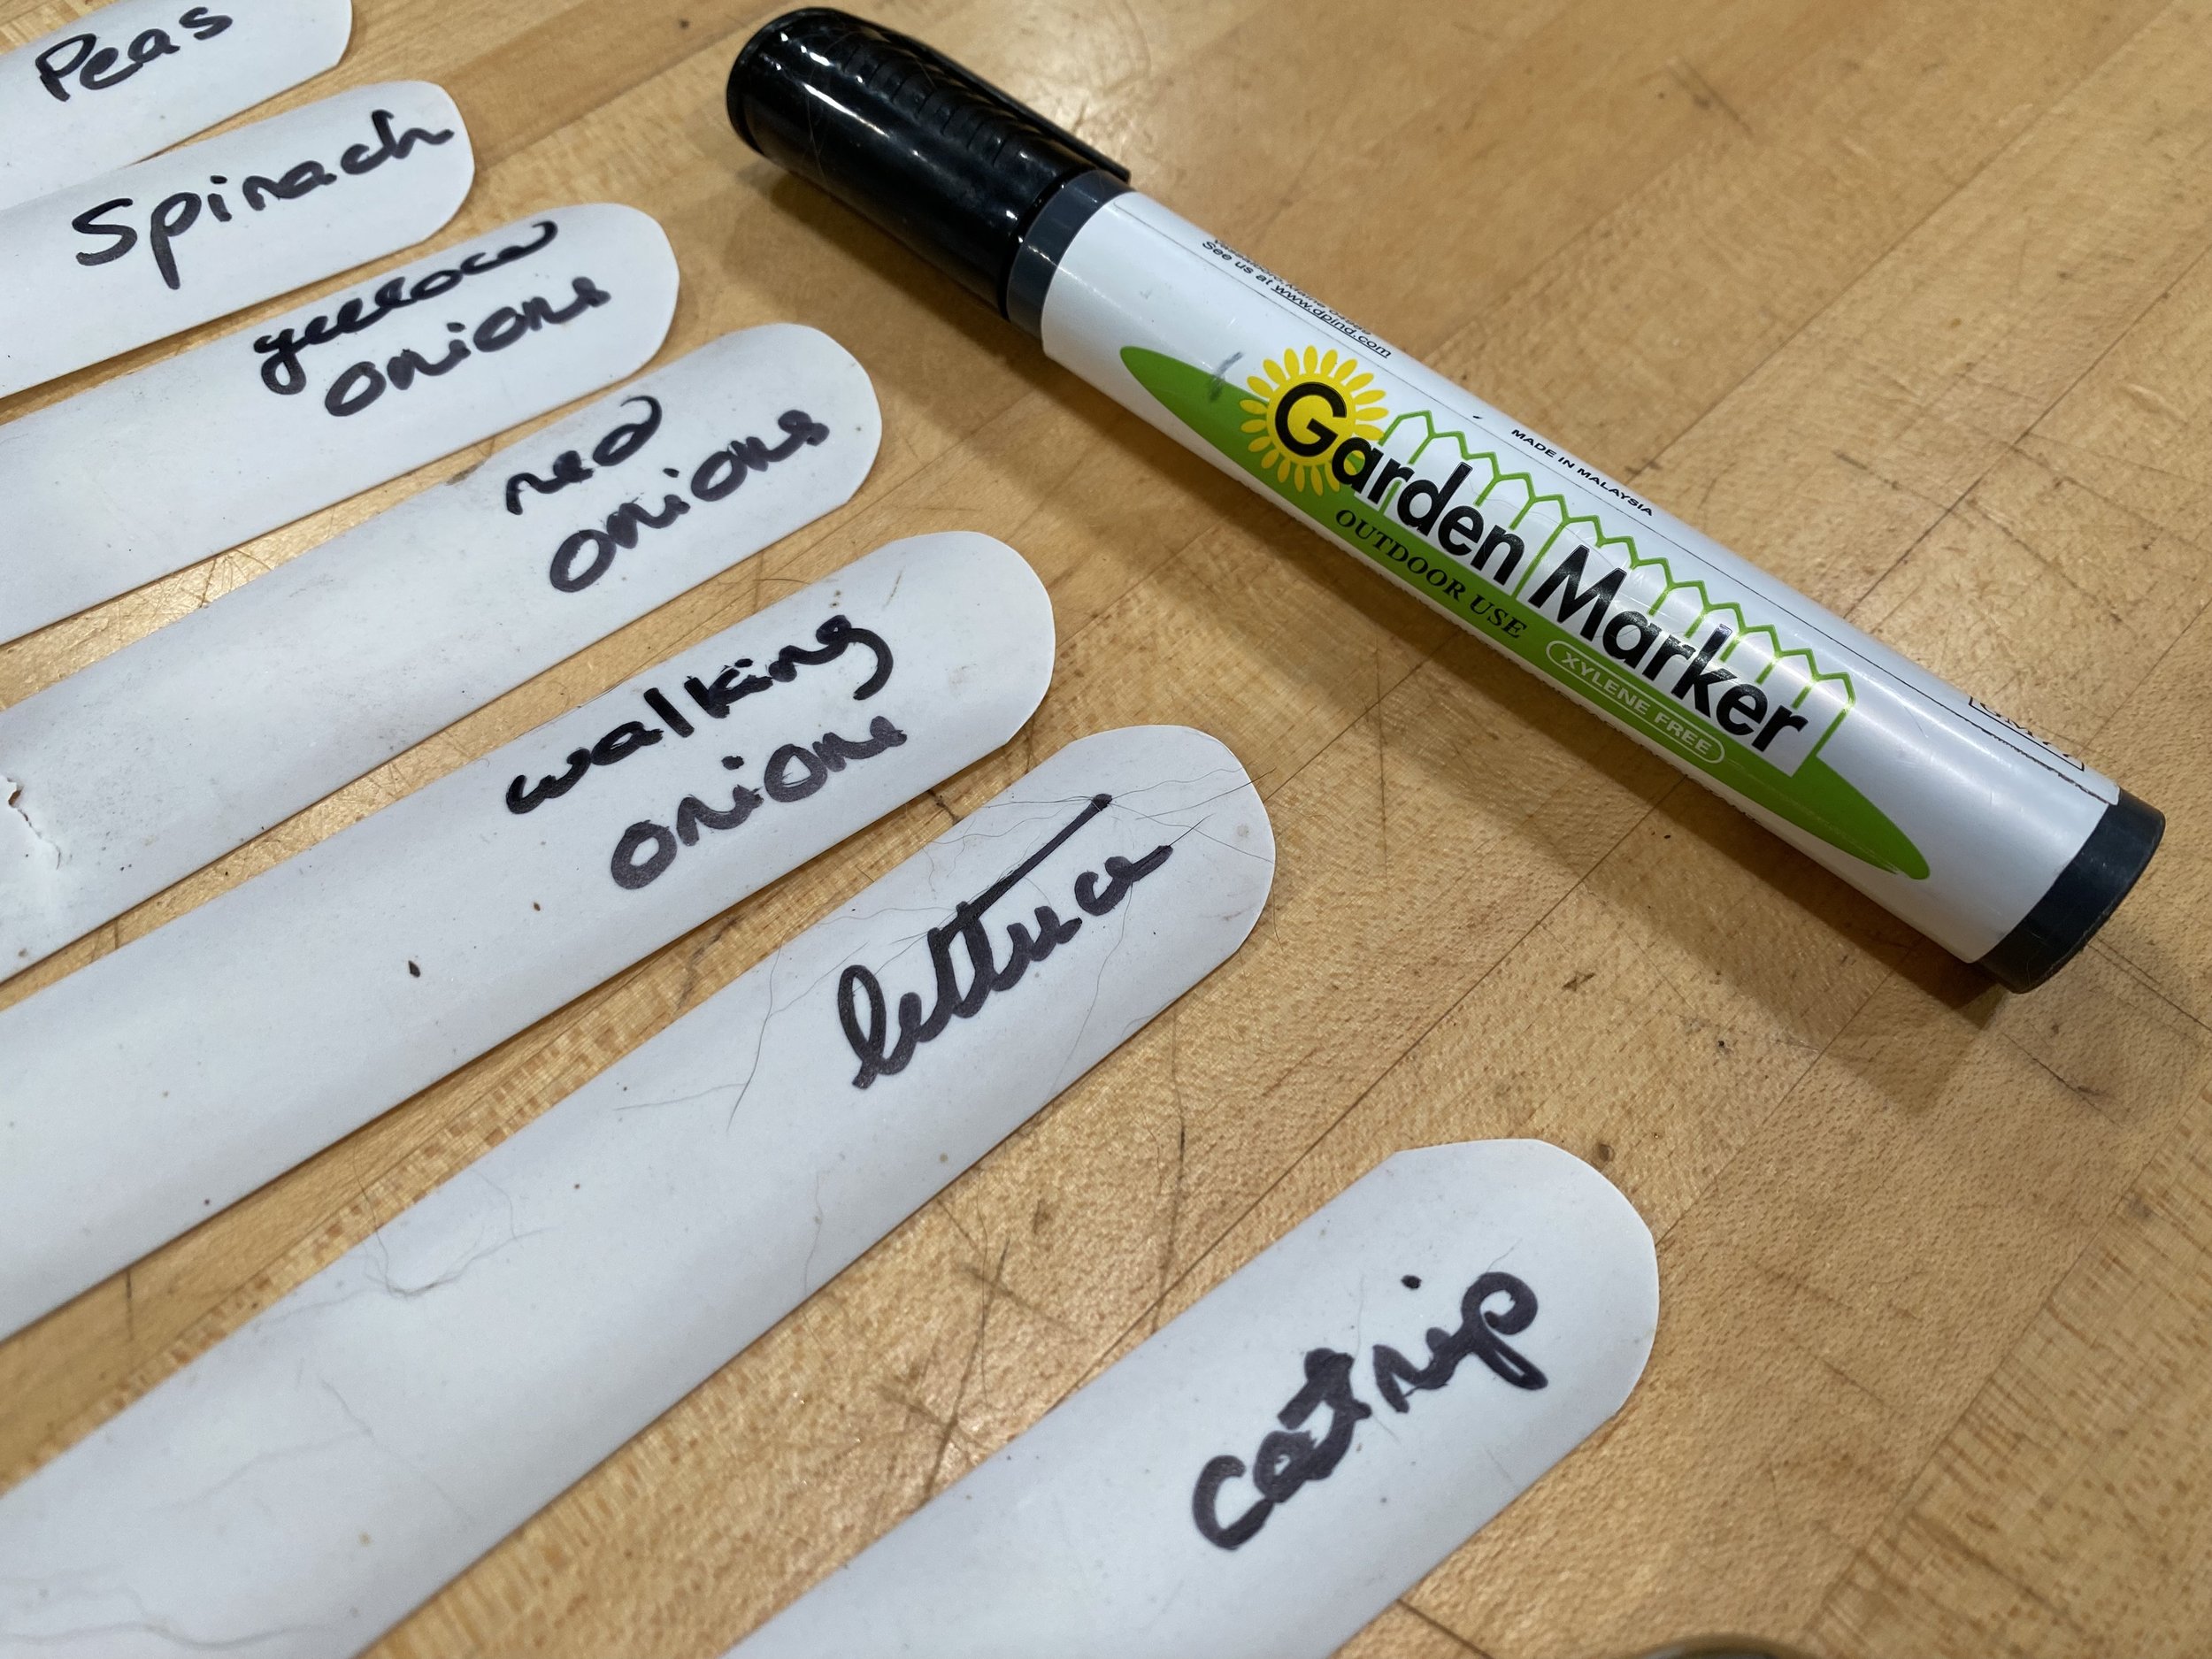
Best Gardener Gift Idea

This is one of our custom gardener gift sets, ready to ship for Valentine's Day.

This is one of our custom gardener gift sets, ready to ship for Valentine's Day.

Best Gardener Gift Ideas

Periodically friends will ask what is a good gardener gift idea and I have several to recommend.

Most gardeners don't have enough good gloves. If they do, they are worn by now, or held on to in spite of the frayed edges, because they have some sentimental value. The best gardening gloves have reinforced fingers but still breath through cotton. I also like the longer cuffs to cover my arms when I'm wrestling shrubs and especially rose bushes.

I've packaged a pair of my favorite gardening gloves in this custom gardener gift set to make gift giving easier. 

Sneak peek at what's inside this custom gardener gift kit, the book has a charming book mark.

Sneak peek at what's inside this custom gardener gift kit, the book has a charming book mark.

Isn't this adorable? Cute bookmark is attached to the book so you don't misplace it.

Isn't this adorable? Cute bookmark is attached to the book so you don't misplace it.

In addition to the wonderful leather gloves, this custom gardener gift set includes a beautiful book with fun recipes; four fabric coasters; thread snips that can be used in the garden to dead head flowers; some wildflower seeds and our long-lasting, handmade gardener soap.

There are also three Bluebird Gardens honey samplers but I was going to leave that as a surprise.

Sorry, it's no longer avaiable, I sent it to a colleague as a thank you gift.

Charlotte

Miniature Rose Starts Blooming!

I just added a new buddy to Hazel's pot, an onion start to keep bugs away.

I just added a new buddy to Hazel's pot, an onion start to keep bugs away.

Miniature Rose Starts Blooming

Isn't that little rose just peachy? Such a welcome sight after watching a heavy blanket of snow covering my mid-Missouri garden earlier. It was sunny and 81F two days ago, now back to winter, yet another reason why I surround myself with indoor greenery, I have at least one place where I can rely on seeing green every day through winter.

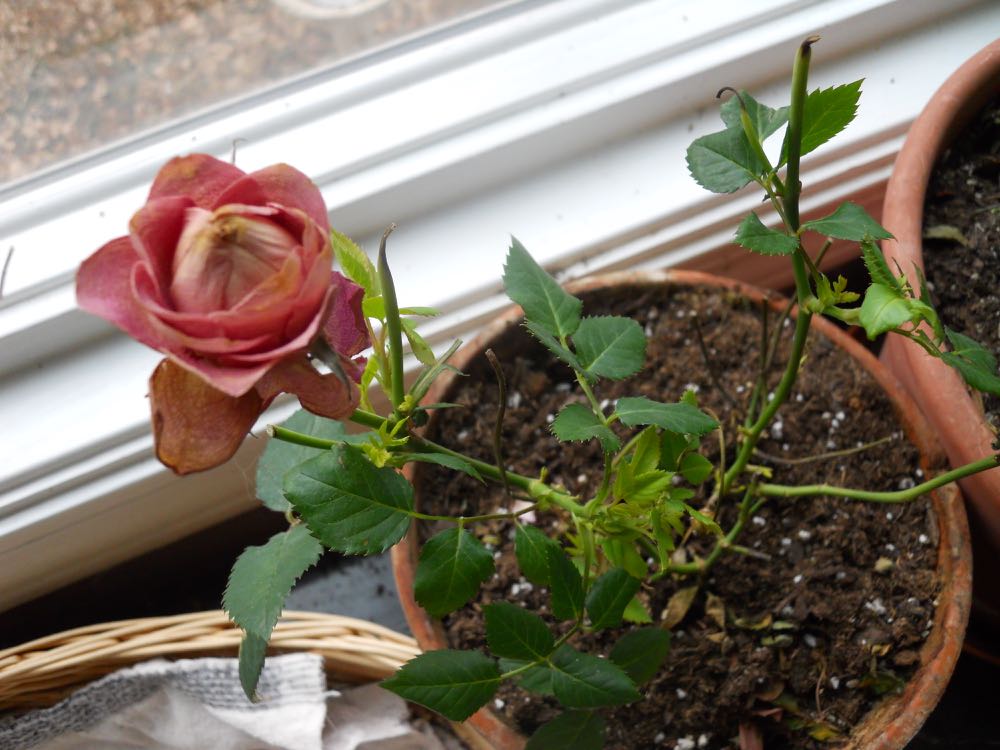
So for those of you eyeing those marked down after a holiday miniature roses, go back and take another look. Hazel, this now blooming miniature rose was the last one at a local grocery store marked down to $2.49 after Christmas. She was wrapped up in that shiny gift paper in a small 4" pot, the flower buds dried up or about to die, with only one bud possibly still growing, here are the little plants once I watered them and settled them in the window while I looked for a larger pot:

This is Hazel on December 29, 2017 right after I brought her home from a local grocery store sale.

This is Hazel on December 29, 2017 right after I brought her home from a local grocery store sale.

Friends tell me they have little luck growing roses but I find them to be easy to grow, especially miniature roses. The miniature varieties are actually shrub roses, which means they are hardier stock, bloom longer and can more easily adapt to a variety of soils. 

I don't recommend growing miniature roses inside unless you have room for large soil containers because they need to pull a lot of soil nutrients but you can certainly pick up a few on sale now and grow them inside until the danger of frost is over in May, then condition them to grow permanently outside.

Once I had Hazel watered, I found a pot larger than the one she was in, added some broken flower pot shards in the bottom, new potting soil and my concoction of dried coffee grounds, banana peels, epsom salts and crushed eggs shells, then more potting soil and the roses. More potting soil, tapped gently, then sprayed water with a spray bottle until wet so I don't over water.

Back to the window to be turned towards the sun and checked daily. The plant is in a window facing southwest next to Miriam, the cherry tomato also growing and producing delicious cherry tomatoes midwinter inside.

I watch the color of the leaves to make sure they don't start turning light green, that means the plant needs more nitrogen. Getting new potting soil with added composting materials should prevent that from happening but I still monitor, just in case.

Success is seeing the first signs of flower buds and here they were, a little less than 2 months after I brought the plant home.

This was the first bud that became the rose you saw on top, and there is a second one forming.

This was the first bud that became the rose you saw on top, and there is a second one forming.

So growing roses is not hard, or expensive, you just have to pick the right variety and time when you buy them.

Charlotte

Miriam Tomato Fruit

My inside tomato plant is not only growing fruit but the fruit is ripening enough to pick.

My inside tomato plant is not only growing fruit but the fruit is ripening enough to pick.

Miriam the mysterious tomato plant has two ripe cherry-size tomatoes ready to pick.

Miriam the mysterious tomato plant has two ripe cherry-size tomatoes ready to pick.

Miriam Tomato Fruit

Miriam my tomato plant continues to grow, spending this Missouri winter in one of my sunny bay windows with Hazel the miniature rose I picked up on sale right after Christmas getting ready to bloom.

I have been wintering over one tomato plant for years, a wonderful way to have fresh tomatoes without having to resort to buying tasteless ones or having to invest in huge greenhouses, hoop houses or other large gardening contraptions that quickly get abandoned because they can't be maintained.

This was a mysterious tomato start from a friend's garden I found growing outside last fall in one of my flower beds. I usually plan to have a tomato plant to bring in for winter but I was running behind last year until I saw a little 3-inch seedling among hyssop starts. So far I have determined this is a cherry tomato plant of some sort, and that I guessed well on what growing conditions it needed so far. I've had to stake the plant twice so far and by the looks of it, may have to stake it yet again, the plant is now a good 4-feet tall.

Three days ago, I added some worm castings to the tomato plant soil to enrich the soil and add nitrogen. Tomato plants are heavy feeders meaning they can quickly deplete the soil of nutrients. With a plant growing in a small container, that is especially true so it's important to keep the soil enriched with compost and other natural amendments. 

Why did I add the worm castings? The tomato plant leaves were starting to look a little more  yellow green for my taste so I didn't think it would hurt to give the soil a little healthy boost.

Besides making sure the plant is watered every day , there has been little additional care required. Well, except for now, I need to pick those two lovely cherry red tomatoes and give them a taste.

Here's a closer look of the two ripe cherry-size tomatoes that have ripened in my window.

Here's a closer look of the two ripe cherry-size tomatoes that have ripened in my window.

They didn't even make it to the kitchen, ate them right there in the window.

What do you think, winter grown tomatoes don't have any taste?

Wrong, they were absolutely delicious, warm right off the vine and perfectly ripe. Can't wait for the next ones!

Charlotte

February Gardening Chores

February is a good time to check your seed stash for viable seeds you can still use this year.

February is a good time to check your seed stash for viable seeds you can still use this year.

February Gardening Chores

Pressure is on so if you haven’t made a dent in your reading pile, get a start, spring is only two months away. Most of mid-Missouri is in USDA Hardiness Zone 5b which, with climate changing, means spring will start earlier than in the past and along with fall, last longer.

1.         If you haven’t ordered your favorite gardening catalogs, get them ordered. Look for catalogs with detailed plant descriptions and good photographs so you can use them for reference.  Missouri Wildflowers Catalog has lovely pictures, even old catalogs are still good references. www.mowildflowers.net. For heirloom seeds, try Baker Creek Heirloom Seeds at www.rareseeds.com, both are Missouri nurseries.

2.         Now for a great Native Plant Guide, you can download the Prairie Moon Catalog online. This guide out of Winona, Minnesota offers North American Native seeds and plants along with a guide on how to get wildflower seeds to grow, how to plant bare root plants, seed combinations and a plant/insect interaction guide so you know what plants attract what pollinators.

3.         Review last year’s garden diary entries. If you’ve missed a few entries, add them now. Underline items you wanted to get done this year. I make a list, then decide which projects I want to tackle. I also carry over the ones I didn’t get to last year, or drop them off the master list. This is a good time to dream.

4.         Focus on adding native plants. Once established, they will be low care and tend to require less water than other plants and they will feed the native pollinators. They are connected.

5.         Read. Whether it’s Missouri Gardener Magazine, which provides good local gardening information and gardening books, catch up on what you couldn’t get to last year. I keep a pile of gardening books from our local library’s semi-annual book sale just for snowy, cold winter days.

Prairie Moon Nursery's Native Plant Guide has a nice how to for planting wildflowers.

Prairie Moon Nursery's Native Plant Guide has a nice how to for planting wildflowers.

6.         On warm days, remember to water mums planted this past year. New mums need a gallon a month to keep their roots moist their first year. Once established, mums will become perennials and deter bugs from around where they are planted.

7.         Remove any broken limbs in pathways to keep walkways clear and safe.

8.         Pile mulch and leaves on garden beds if they’ve been blown off by winter winds.

9.         Check inside plants for any hitchhiking bugs and remove. Make sure they are getting their sunlight needs met. If not, move them. Water with diluted fertilizer. Prune as necessary.

10.       Drop your garden pruners and other garden tools off to get sharpened, this is a slow time of year and this will give you a head start on the season.

11.       When feeding birds, add a little sand in the birdfeeder mix. Birds need sand to help them digest seeds. Also ensure they have an available water source. Feed suet on cold days.

12.       If you have fish in an outside pond, make sure it has a hole in the ice so fish will get oxygen.

What else would you add to this list?

Charlotte


Miriam Tomato Plant Update

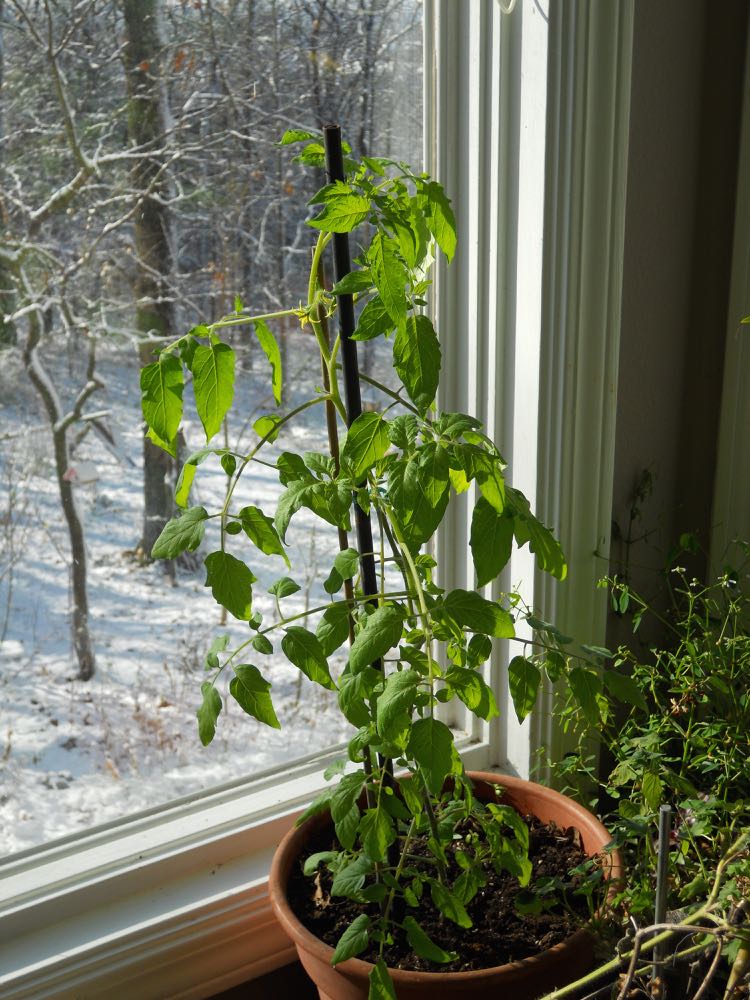
This is Miriam, the mysterious tomato plant when I started to feature her in my gardening column.
This is Miriam, the mysterious tomato plant when I started to feature her in my gardening column.

Miriam Tomato Plant Update

Let's see, it's been three months since Miriam the tomato seedling was potted and brought inside. I call her the mystery tomato because I don't know what kind of tomato she is, and her original owner Tom can't remember, either. Now you know and we will all be surprised once the tomatoes ripen.

Most people have told me they assume they can't grow tomatoes inside in a pot, tomatoes can only grow on a farm. Or outside in a garden plot.

Contrary to popular belief, tomatoes can be grown in a pot indoors. And yes, Miriam has baby tomatoes and appears to be growing even more. Since I mentioned growing, Miriam is also now almost 3-feet tall so I had to stake her with longer rods to keep her stems from falling over.

Miriam Tomato spends her winter days keeping Razel Rose company in one of my bay windows.

Miriam Tomato spends her winter days keeping Razel Rose company in one of my bay windows.

When I first spotted fruit, there were three. Now there are more than five, in part due to my hand pollinating the delicate yellow flowers with a Q-tip.

Miriam Tomato has officially set fruit and should be having ripened tomatoes in a few weeks.

Miriam Tomato has officially set fruit and should be having ripened tomatoes in a few weeks.

Outside in a garden, tomato plants would be pollinated by bees moving pollen from one flower to the next. Since I don't have bees inside over winter, Miriam needed a little help to set fruit.

As long as we have sun every once in awhile this winter, the fruit will turn color. If not, I can either pick them and use them green, or place them inside a brown paper bag and add an apple to accelerate the ripening process.

Miriam Tomato also has new flowers branching off the stems, more tomatoes in the works!

Miriam Tomato also has new flowers branching off the stems, more tomatoes in the works!

Assuming nothing untoward happens to Miriam, such as a cat knocking her over, she will go outside after the danger of the last frost of the season, around May. I may re-pot her then into a larger pot with compost to keep her happy but so far, she seems to be doing quite well.

Have you tried to grow a tomato inside over winter?

Charlotte

Miniature Rose Plant Update

This is Hazel, my miniature peach rose right after I brought her home, the last rose at the store.

This is Hazel, my miniature peach rose right after I brought her home, the last rose at the store.

Miniature Rose Plant Update

Right after Christmas, I picked up this peach-colored miniature rose for $2.49 at a local grocery store floral section. It was the last one remaining from a group of miniature roses that had included red and white "peppermint" ones; solid red ones, a few white ones and a couple of the peach-colored ones.

Miniature roses like this are actually tiny repeat-blooming shrub roses, hardier than hybrid tea roses and the easiest roses for me to grow. I have a number of them scattered throughout my USDA Hardiness zone 5b one-acre hillside garden planted among other perennials. Last year, I also started a miniature rose border with several different-colored tiny shrubs. Purchased on sale, of course, part of the fun is the plant treasure hunting!

When I saw this lone plant on sale, I couldn't pass it up. We were heading into record cold weather and having something in bloom, even something tiny, cheers me up any time of the year but in winter. Well, it's a must. You should see my living and dining room, it's a veritable jungle.

Even though I have heard some people say they can't grow miniature roses inside over winter, I have had very good luck pulling miniature roses through the cold months. The trick is to give the plant cut up banana peels and crushed egg shells in the bottom of the new, larger pot in new potting soil, and to not overwater.

So here's Hazel about a month after I brought her home. I finally cut off the peach rose bud before I took this picture so she can focus her energy in growing new leaves.

This is Hazel about a month later, sprouting new growth next to her friend, Miriam, a tomato plant.

This is Hazel about a month later, sprouting new growth next to her friend, Miriam, a tomato plant.

I check her every morning for bugs, just in case something has found her tender leaves to munch on. Although I try to not have plant bugs - the white mealy bugs are the worst, second only to scale - I keep a close eye to jump on anything that may be getting a start.

If she were growing outside, I would add onion sets around her to keep bugs away and add a basil or two for good measure. Inside my house, she's going to have to depend on my good eyesight and soapy water if she gets unwanted visitors.

Charlotte

Harriet's Orchid

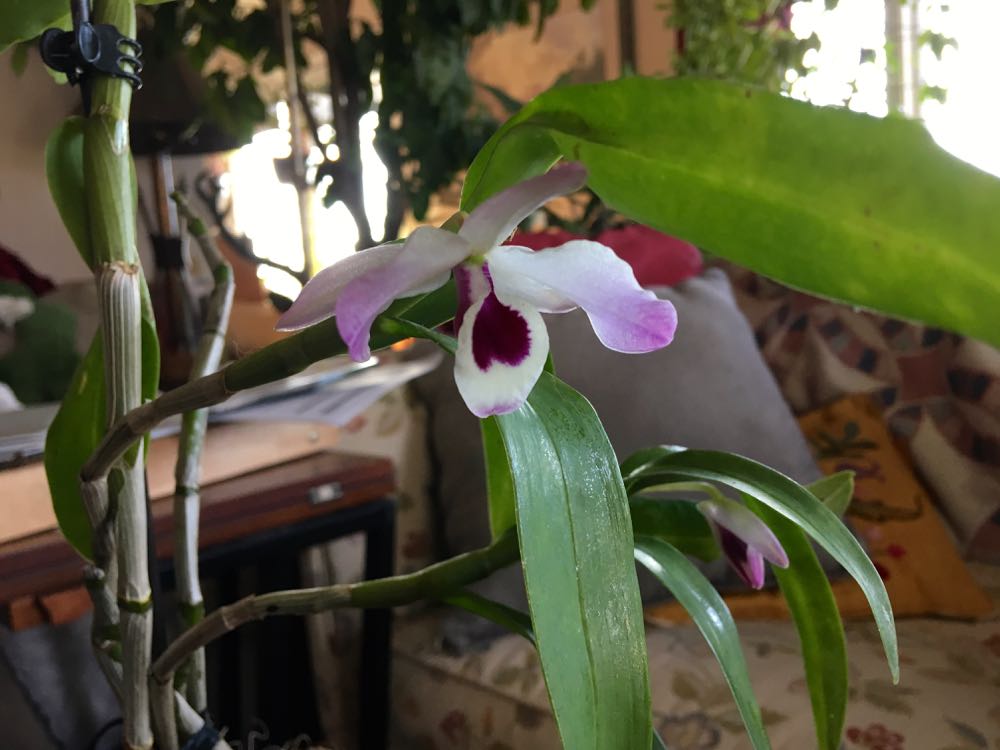
This orchid from Burma is from my master gardener friend Harriet Bain, love the delicate flower!

This orchid from Burma is from my master gardener friend Harriet Bain, love the delicate flower!

Harriet's Orchid

In the middle of life's challenges, fresh flowers have always boosted my spirits. When those flowers are still on the plant, even better!

Last fall, a master gardener friend offered some of her orchids for sale as a fundraiser for our local chapter. Sight unseen, I put in my bid. Harriet is a wonderful gardener and if she had orchids, I knew it would be fun to have a start.

We waited until the last possible day for the hand-off, the day before our first winter storm was moving in. Besides two Australian orchids in large pots, she handed me one orchid in a small 4-inch clay pot. It's a dendrobium, she said, from Burma, her home country.

Once home, I tucked the orchids in my basement away from direct light. They were in the same southwest window as other re-blooming orchids so I left them there as I tried to identify if Burma had a signature orchid. When I looked up the orchids from Burma, I was delighted with the variety and possibilities, there really is something amazing about flowers that feel like a soft plastic but look so delicate.

No point in trying to guess what kind of flowers would be blooming so I settled for being pleasantly surprised. No, I wasn't going to ask Harriet, that would spoil the surprise!

Orchid Flowers from Burma

As I was watering my orchids this morning, Harriet's orchid caught my attention. Actually a flower had appeared, and then I saw a second bud. Dendrobium nobile Is "one of the most beautiful epiphyte or lithophytes dendrobium species found from the Chinese Himalayas, Assam, eastern Himalayas, Nepal, Bhutan, Myanmar, Thailand, Laos and Vietnam that is found in tropical evergreen forest and primary mountain forest at an elevations of 200 to 2000 meters," according to Bhaskar Bora. Bora notes in his biography that he is an Indian businessman who likes to collect orchids as a hobby. 

I do as well. I have a little collection of phalaenopsis or moth orchids I have adopted over the years. One of the easiest orchids to grow, moth orchids are also a popular gift flower. I buy them after they have finished blooming and give them some "tender loving care" until they're ready to bloom again. It can take almost a year to get them blooming again so it is a labor of love. There is a wonderful feeling of accomplishment when I see the new growth and know I helped coax it into flowering again.

I was so excited about seeing Harriet's orchid bloom, I bought it a little special container to set it in and moved it to my den coffee table so I could enjoy it when I was sitting nearby.

Harriet's Orchid has two flowers, one in bloom and one in bud. I celebrated by buying a container.

Harriet's Orchid has two flowers, one in bloom and one in bud. I celebrated by buying a container.

Tip for Growing Orchids

Clay pots are fine. Actually clay pots are preferred for orchids because they wick away extra moisture that can easily rot roots. When we grew up in Brazil, I remember cattleya orchids that covered our backyard trees. My father watered them with a hose to get them hydrated but not too wet. The water easily fell off the large orchids clinging to tree bark.

Taking those memories, and experience, as a clue, I carefully checked the orchid roots every week and made sure I wasn't over-watering. When temperatures hit record lows a few weeks back, I moved the orchids up to my dining room. That was helpful when I lost heat for a couple of days, not sure they would have survived sitting on cold basement concrete.

Most orchids like indirect light, much as African violets and Chocolate Soldiers do. Besides periodically checking for bugs, that's all that you need to do with orchids. I do add a pinch of fertilizer to rain water once a month, and keep them away from heat and drafts. Short of that, there is little more than one needs to do.

Considering what we had just been through without heat, and it still flowered, I decided to get the orchid a decorative container. This little metal florist vase caught my eye for a simple whimsical reason, it has feet. 

Love the feet on this recycled container from a local thrift shop for $2 for Harriet's Orchid.

Love the feet on this recycled container from a local thrift shop for $2 for Harriet's Orchid.

I picked the previously-owned container for $2 at our local thrift shop called The Community Partnership Resale Shop. The sale of donated items funds a non-profit that helps families with special need children so I shop there first when I'm looking for unusual pieces. My rule is I have to take a box to donate before I can bring a new box home but I waived that rule for this special occasion.

It didn't take me long to find this flower container, it was sitting on a corner of the store shelves as if it was waiting for me. I think Harriet would approve, don't you?

Charlotte

Online Master Gardener Classes

Master gardener training provides basic concepts for gardening inside and outside.

Master gardener training provides basic concepts for gardening inside and outside.

Online Master Gardener training class begins

COLUMBIA, Mo. – A new session of online core training to become a certified Master Gardener begins January 22, 2018.

“The motto of the Master Gardener program is ‘Helping others learn to grow,’” said David Trinklein, state horticulture specialist for University of Missouri Extension.

The popularity of the online classes has grown steadily since University of Missouri (MU) Extension began offering them in 2013. In the past, some people had to travel many miles to attend Master Gardener classes.

“These classes represent a viable option for people who can’t take the weekly classes in person,” Trinklein said.

Trinklein and MU Extension regional horticulture specialist Sarah Denkler teach the 14 online sessions. Classes are delivered as a series of scripted and narrated PowerPoint presentations. To pass the course, participants need a composite score of 70 percent on chapter quizzes.

Subjects include basic botany, soils and plant nutrition, vegetable gardening, fruit production, insects and diseases, landscaping and landscape plants, turf management, and pesticide safety.

Core training is the first step toward Master Gardener certification. Trainees must also complete a minimum of 30 hours of volunteer service, Trinklein said. Local Master Gardener chapters help online trainees find volunteer opportunities to meet the service hour requirements.

“There are Master Gardener programs in every state of the union and in most provinces of Canada,” Trinklein said.

The registration deadline for the online spring session is Jan. 15, 2018. Classes begin Jan. 22, 2018.

For more information, including registration instructions, go to extension2.missouri.edu/missouri-master-gardener-core-training.

The course also may be taken for personal enrichment only (no volunteer requirement) for a higher registration fee. For details, visit extension2.missouri.edu/courses/horticulture-for-the-homeowner.

"For more than 100 years, University of Missouri Extension has extended university-based knowledge beyond the campus into all counties of the state. In doing so, extension has strengthened families, businesses and communities."

Charlotte

Miriam Tomato Plant Has Fruit!

Miriam tomato plant tomato.jpg

Miriam Tomato Plant Has Fruit!

So excited, I almost feel like I should send out baby announcements!

For those of you just joining this saga, every year I winter over one tomato plant in my sunny, inside bay window. Tomatoes are originally from tropical Peru, where they grow as perennials, or plants that live for many consecutive years.

I don't grow a traditional garden or farm a large plot, I have more in common with urban area residents who want fresh herbs and a few favorite vegetables handy during the growing season. I call it my pot garden since I grow those on my deck but that's a whole different story.

I have been growing a tomato in a pot inside over winter for a good 20 years. About a decade ago, I had a tomato plant that survived for 4 years living on my deck during summer and wintering over in my living room. One of my cats knocked it over and broke the main stem or I think it would have happily lived a few more years as long as I brought it inside over winter.

Last year when I posted the tomato plant I heard from some of my newspaper gardening article readers that it was impossible or I was "cheating" so here we go again, proof that yes, you can grow a tomato plant successfully indoors over winter.

Miriam tomato plant flowers.jpg

This year, I was behind getting a tomato plant ready to move inside and initially thought I would skip it. As I was mulching flowers beds, however, I found a tiny, 2-inch high unidentified tomato seedling valiantly growing so I pulled it out and named it "Miriam." I do know the seedling came from my gardening friend Tom's place but he doesn't remember what species was in the hyssop plant starts he gave me.

After adding crushed egg shells to the bottom of the pot and adding new potting soil, Miriam settled into her new digs in one of my bay windows.

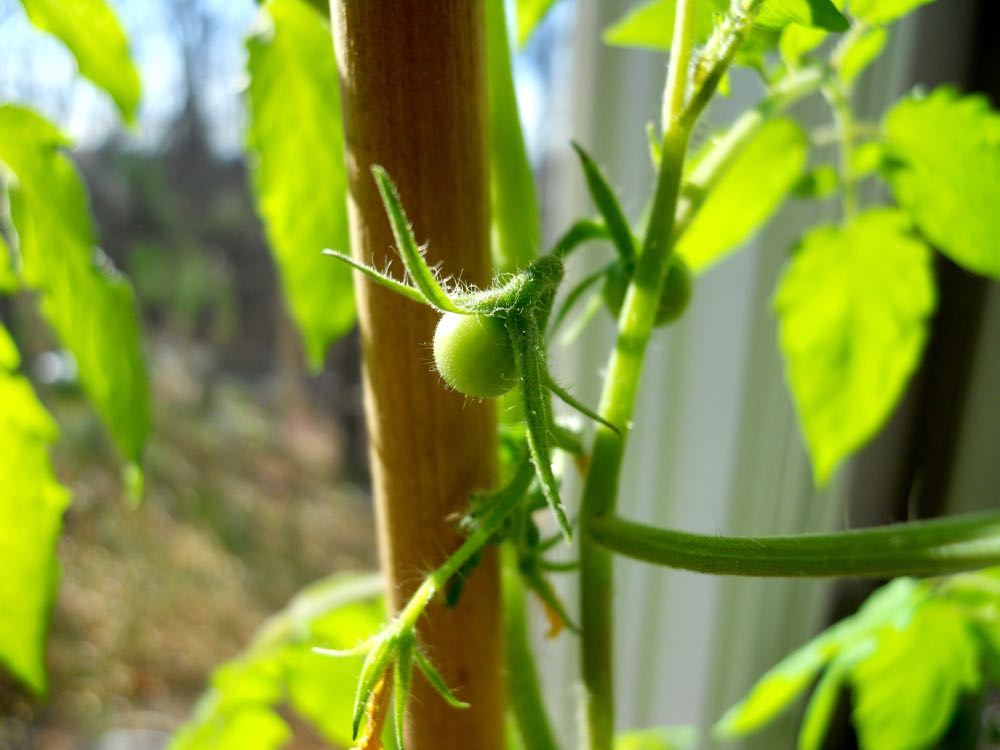
Miriam the seedling is now almost 3 feet tall with flowers. Not just flowers but flowers I pollinated with a Q-tip, and now there is fruit, I never tire of finding the first tomato forming.

At first I thought it was just one tomato. As I was taking photos,  I noticed a second one, and then a tiny third one so my pollinating technique is working again.

Outside, tomatoes depend on native bees to move pollen from one flower to another one. Since Miriam has spent her entire flowering life inside without bees, it was hard to guess whether my fumbling pollination technique would take. 

Miriam tomato plant in bay window.jpg

In another few weeks, we should have confirmation of what kind of tomato plant she is. As far as I'm concerned, she's a winner!

Charlotte

January Gardening Chores

One of my favorite native plant catalogs to order from Missouri Wildflowers Nursery.

One of my favorite native plant catalogs to order from Missouri Wildflowers Nursery.

January Gardening Chores

You bet there are gardening chores in January, it’s the one month when a gardener can sit back and do some of the most important work: dreaming and planning. Most of mid-Missouri is in USDA Hardiness Zone 5b which means the last frost is in May and the first frost around Halloween, although climate change is making spring and fall seasons longer and shortening our summers and winters.

1.     If you haven’t ordered your favorite gardening catalogs, get them ordered. Look for catalogs with detailed plant descriptions and good photographs so you can use them for reference.  One of my favorites is the Missouri Wildflowers Nursery catalog, it has lovely pictures with a quick guide on what growing conditions the plants require.

2.     Order favorite seed catalogs. Some companies will send free catalogs if you ordered from them before; others will charge for a catalog if you are a new customers. Plant seeds locally-adapted. Baker Creek Heirloom Seeds Company is a favorite seed catalog from Mansfield, Missouri.

3.     Review your garden diary from last year. If you’ve missed a few entries, add them now. Underline items you wanted to get done this year. I make a list, then decide which projects I want to tackle,  I also carry over the ones I didn’t get to last year, or drop them off the master list. This is a good time to dream.

4.     Identify what plants you want to add this year so you have a shopping list. Focus on adding native plants, once established they will be low care and tend to require less water than other plants.

5.     Read. Whether it’s Missouri Gardener Magazine, which provides good local gardening information and gardening books, catch up on what you couldn’t get to last year. I keep a pile of gardening books from our local library’s semi-annual book sale just for snowy, cold and blustery winter days.

Remember to water new chrysanthemums so they can get strong roots established.

Remember to water new chrysanthemums so they can get strong roots established.

6.     On warm days, remember to water mums planted this past year. New mums need a gallon a month to keep their roots moist their first year. Once established, mums will become perennials and deter bugs from around where they are planted.

7.     Remove any broken limbs in pathways to keep walkways clear and safe.

8.     Pile mulch and leaves on garden beds if they’ve been blown off by winter winds.

9.     Check inside plants for any hitchhiking bugs and remove. Make sure the plants, not the bugs, are getting their sunlight needs met. If not, move the plants. Water with diluted fertilizer. Prune as necessary.

10. Drop your garden pruners and other garden tools off to get sharpened, this is a slow time of year and this will give you a head start on the season.

11. When feeding birds, add a little sand in the bird feeder mix. Birds need sand to help them digest seeds. Also ensure they have an available water source. Feed suet on cold days.

12. If you have fish in an outside pond, make sure it has a hole in the ice so fish will get oxygen.

Anything else you do for your January gardening chores?

Charlotte

13 Tips to Grow Miniature Roses Inside

This little miniature rose was on clearance for $2.49 mid-December and now has new growth.

This little miniature rose was on clearance for $2.49 mid-December and now has new growth.

13 Tips to Grow Miniature Roses Inside

Have you seen miniature roses on sale during winter and passed them by because someone told you they can't be grown inside? Not only can they be grown inside over winter like herbs but they will grow and be ready for blooming outside as soon as the danger of frost is over.

Of all roses, miniature roses are the easiest, and most versatile, to grow. They will do well in pots as well as the garden; are disease and pest resistant shrubs, are long-lasting blooms and are edible so I can add a little flower to garnish a plate and dessert.

There are a few things to remember when growing miniature roses inside:

13 Tips to Grow Miniature Roses Inside

1. Growers place several plants together in the smallest pots possible when selling miniature roses wholesale. When you get or buy one, find a pot that is the next size, preferably at least longer than the pot the miniature rose came in. Miniature rose roots need room to grow.

2. If you want to get several plants, you can separate the ones grouped in the original pot.

3. Before planting, add broken pots or about an inch of broken shards at the bottom to help with drainage.

4. After adding about an inch of new potting soil, I also add a banana peel and crushed dry egg shells, then fill the pot up half full. Spray the soil with water.

5. Add the miniature rose, then fill around it with more potting soil. Press soil gently to pack it around the roots. Spray lightly again. 

6. Cut off all flowers and buds so the plant's energy goes into settling into their new pot. I kept one flower on my peach miniature rose for the photos. If you want to keep one to enjoy that's ok, it will be our little secret.

7. Add a saucer under the pot and place it in a sunny southern or western window. Expect some leaves and buds to fall off before the plant settles into its new growing pot.

8. Keep the miniature rose on the drier side, winter over-watering is the leading cause of killing off the plant. I keep it moist with a spray bottle every other day. Before spraying, I slip a pointing finger into the soil to test the soil moisture so that I am not getting the soil too wet.

9. This is 3 weeks after I first brought the miniature rose on sale home. New leaves are growing nicely and the soil has remained on the dry side.

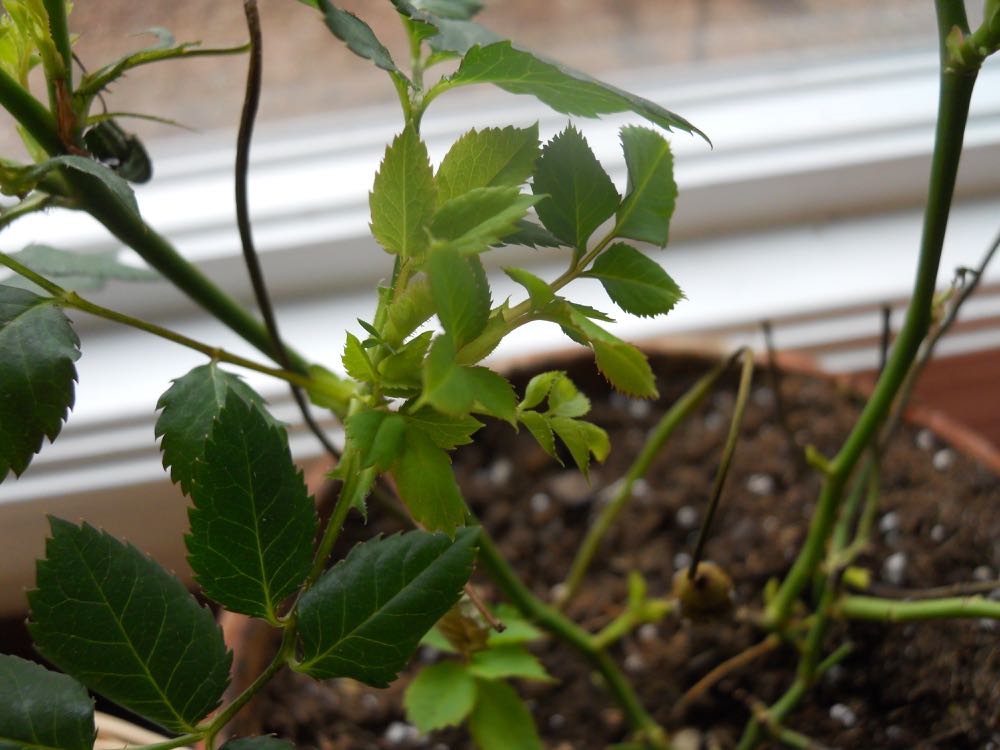
New growth is starting to show on this miniature peach-colored rose, a good sign!

New growth is starting to show on this miniature peach-colored rose, a good sign!

Miniature roses have a long flowering habit and, in the garden, are one of the easiest roses to grow so it's worth pulling them through winter until you can set them outside.

I enjoy cut miniature roses in desk top flower vases all by themselves; they're also sweet mixed with other garden flowers.

One of the many reasons I like miniature roses, they are a wonderful addition to desk vases.

One of the many reasons I like miniature roses, they are a wonderful addition to desk vases.

Living in USDA Hardiness zone 5b, our last frost date is Mother's Day, which is May 13, 2018. That means these miniature roses need to be kept alive and happy for about 4 months before they get to be planted outside.

10. Last year, I pulled a brown bag full of marked down for 49 cents Valentine's Day red miniature roses through spring and moved them later out into the garden. Although some had roses and buds, I cut those off to prevent the plant from being stressed trying to bud and settle into a new pot. I wanted them to focus first on root growth.

These red miniature roses were on sale after Valentine's day for 49 cents, a great buy any time!

These red miniature roses were on sale after Valentine's day for 49 cents, a great buy any time!

11. Start with new potting soil and add compost or worm castings if you have access to any. Roses are "heavy feeders," which means they require a lot of soil nutrients to successfully grow.

12. Use one fourth of the recommended soluble fertilizer when you water with the spray bottle. Foliar feeding will help get nutrients into the plant but make sure to dry if the leaves remain wet after about 10 minutes. Wet leaves can encourage pests and diseases.

My new peach miniature rose is keeping Miriam, my tomato plant company in a bay window.

My new peach miniature rose is keeping Miriam, my tomato plant company in a bay window.

So here's my little peach miniature rose in the bay window keeping my winter tomato plant, Miriam, company. I've been told I can't grow tomato plants inside in winter, either, but I have for years and had tomatoes, too.

13. Check the miniature roses regularly to make sure they are doing ok. I check mine daily; look under the leaves for any bugs; check the moisture in the soil; enjoy that one little rose you left on. I do!

Charlotte

Recycle Cut Christmas Trees

Some of the cut Christmas trees left at Rolla Recycling Center to become mulch.

Some of the cut Christmas trees left at Rolla Recycling Center to become mulch.

Recycle Cut Christmas Trees

Some friends are finally taking down their fresh cut Christmas trees and tossing them into garbage piles. That's a shame because these trees can easily be recycled and keep contributing in a variety of ways through the rest of winter.

The following are seven ways cut Christmas trees can be used now that all ornaments, lights, tinsel and cats have been removed:

1. Cut branches off and pile them into a small teepee shape at the corner of your property for wildlife refugees. I keep several piles around my one-acre hillside and keep them "refreshed" with twigs and other cover through the seasons so wildlife have a protected hiding space. In spring, it's fun to see what comes out of those refuges. Last spring, I saw a number of rabbits making the wildlife piles home.

2. Cut Christmas trees also make good bird cover under bird feeders. If you don't like having a whole tree at a bird feeder, cut off branches and use the branches to provide a green safe space at the foot of a bird feeder. 

3. Better yet, use the cut Christmas tree as a bird feeder. Place the tree up against a post or tie it to another tree and add orange slices, strung popcorn, old cranberries and even a bird feeder to give birds a safe place to eat. One of the most beautiful garden sights in snow is to see red cardinal birds in the evergreen branches of a cut Christmas tree!

4. Striped Christmas tree trunks can be set aside to weather and then used as fence posts and bird feeder poles.

Chipped trees and donated branches become a gardener's dream, a pile of potential mulch!

Chipped trees and donated branches become a gardener's dream, a pile of potential mulch!

5. Donate your cut Christmas tree to your local recycling center. The Rolla Recycling Center collects trees and chips them up into huge mulch piles that sit through the rest of winter waiting for spring. When weather warms up, residents can stop by on Wednesdays to have the loader fill their pick-ups and trailers with the chipped wood for garden mulch.

The mulch is also available the rest of the week but you have to shovel your own so Wednesdays become a popular day to visit the recycling center.

6. Tie a weight on the cut Christmas tree and sink it in your ponds for fish cover. Evergreen trees make good cover for baby fish as well as providing safe hiding spaces for larger fish trying to get away from predators.

7. Two years ago, a local garden center was giving away their cut Christmas trees so I picked several up and used them for a wind break around my honeybee hives.

Cut Christmas trees also make good wind breaks around honeybee hives facing the south.

Cut Christmas trees also make good wind breaks around honeybee hives facing the south.

In the photo I have the trees pulled away from hive entrances so the honeybees can easily take their winter cleansing flights. As soon as the temperatures dropped to make them cluster back inside the hives, I moved the cut Christmas trees back in front of the hives for a wind break.

Here's a closer look of one of my hives with bees taking cleansing flights.

Here's a closer look of one of my hives with bees taking cleansing flights.

It takes a while for evergreen trees to dry out, even if they aren't placed in water so you have about half a year of good use before the branches become brittle.

Charlotte