Recycle Cut Christmas Trees

Some of the cut Christmas trees left at Rolla Recycling Center to become mulch.

Some of the cut Christmas trees left at Rolla Recycling Center to become mulch.

Recycle Cut Christmas Trees

Some friends are finally taking down their fresh cut Christmas trees and tossing them into garbage piles. That's a shame because these trees can easily be recycled and keep contributing in a variety of ways through the rest of winter.

The following are seven ways cut Christmas trees can be used now that all ornaments, lights, tinsel and cats have been removed:

1. Cut branches off and pile them into a small teepee shape at the corner of your property for wildlife refugees. I keep several piles around my one-acre hillside and keep them "refreshed" with twigs and other cover through the seasons so wildlife have a protected hiding space. In spring, it's fun to see what comes out of those refuges. Last spring, I saw a number of rabbits making the wildlife piles home.

2. Cut Christmas trees also make good bird cover under bird feeders. If you don't like having a whole tree at a bird feeder, cut off branches and use the branches to provide a green safe space at the foot of a bird feeder. 

3. Better yet, use the cut Christmas tree as a bird feeder. Place the tree up against a post or tie it to another tree and add orange slices, strung popcorn, old cranberries and even a bird feeder to give birds a safe place to eat. One of the most beautiful garden sights in snow is to see red cardinal birds in the evergreen branches of a cut Christmas tree!

4. Striped Christmas tree trunks can be set aside to weather and then used as fence posts and bird feeder poles.

Chipped trees and donated branches become a gardener's dream, a pile of potential mulch!

Chipped trees and donated branches become a gardener's dream, a pile of potential mulch!

5. Donate your cut Christmas tree to your local recycling center. The Rolla Recycling Center collects trees and chips them up into huge mulch piles that sit through the rest of winter waiting for spring. When weather warms up, residents can stop by on Wednesdays to have the loader fill their pick-ups and trailers with the chipped wood for garden mulch.

The mulch is also available the rest of the week but you have to shovel your own so Wednesdays become a popular day to visit the recycling center.

6. Tie a weight on the cut Christmas tree and sink it in your ponds for fish cover. Evergreen trees make good cover for baby fish as well as providing safe hiding spaces for larger fish trying to get away from predators.

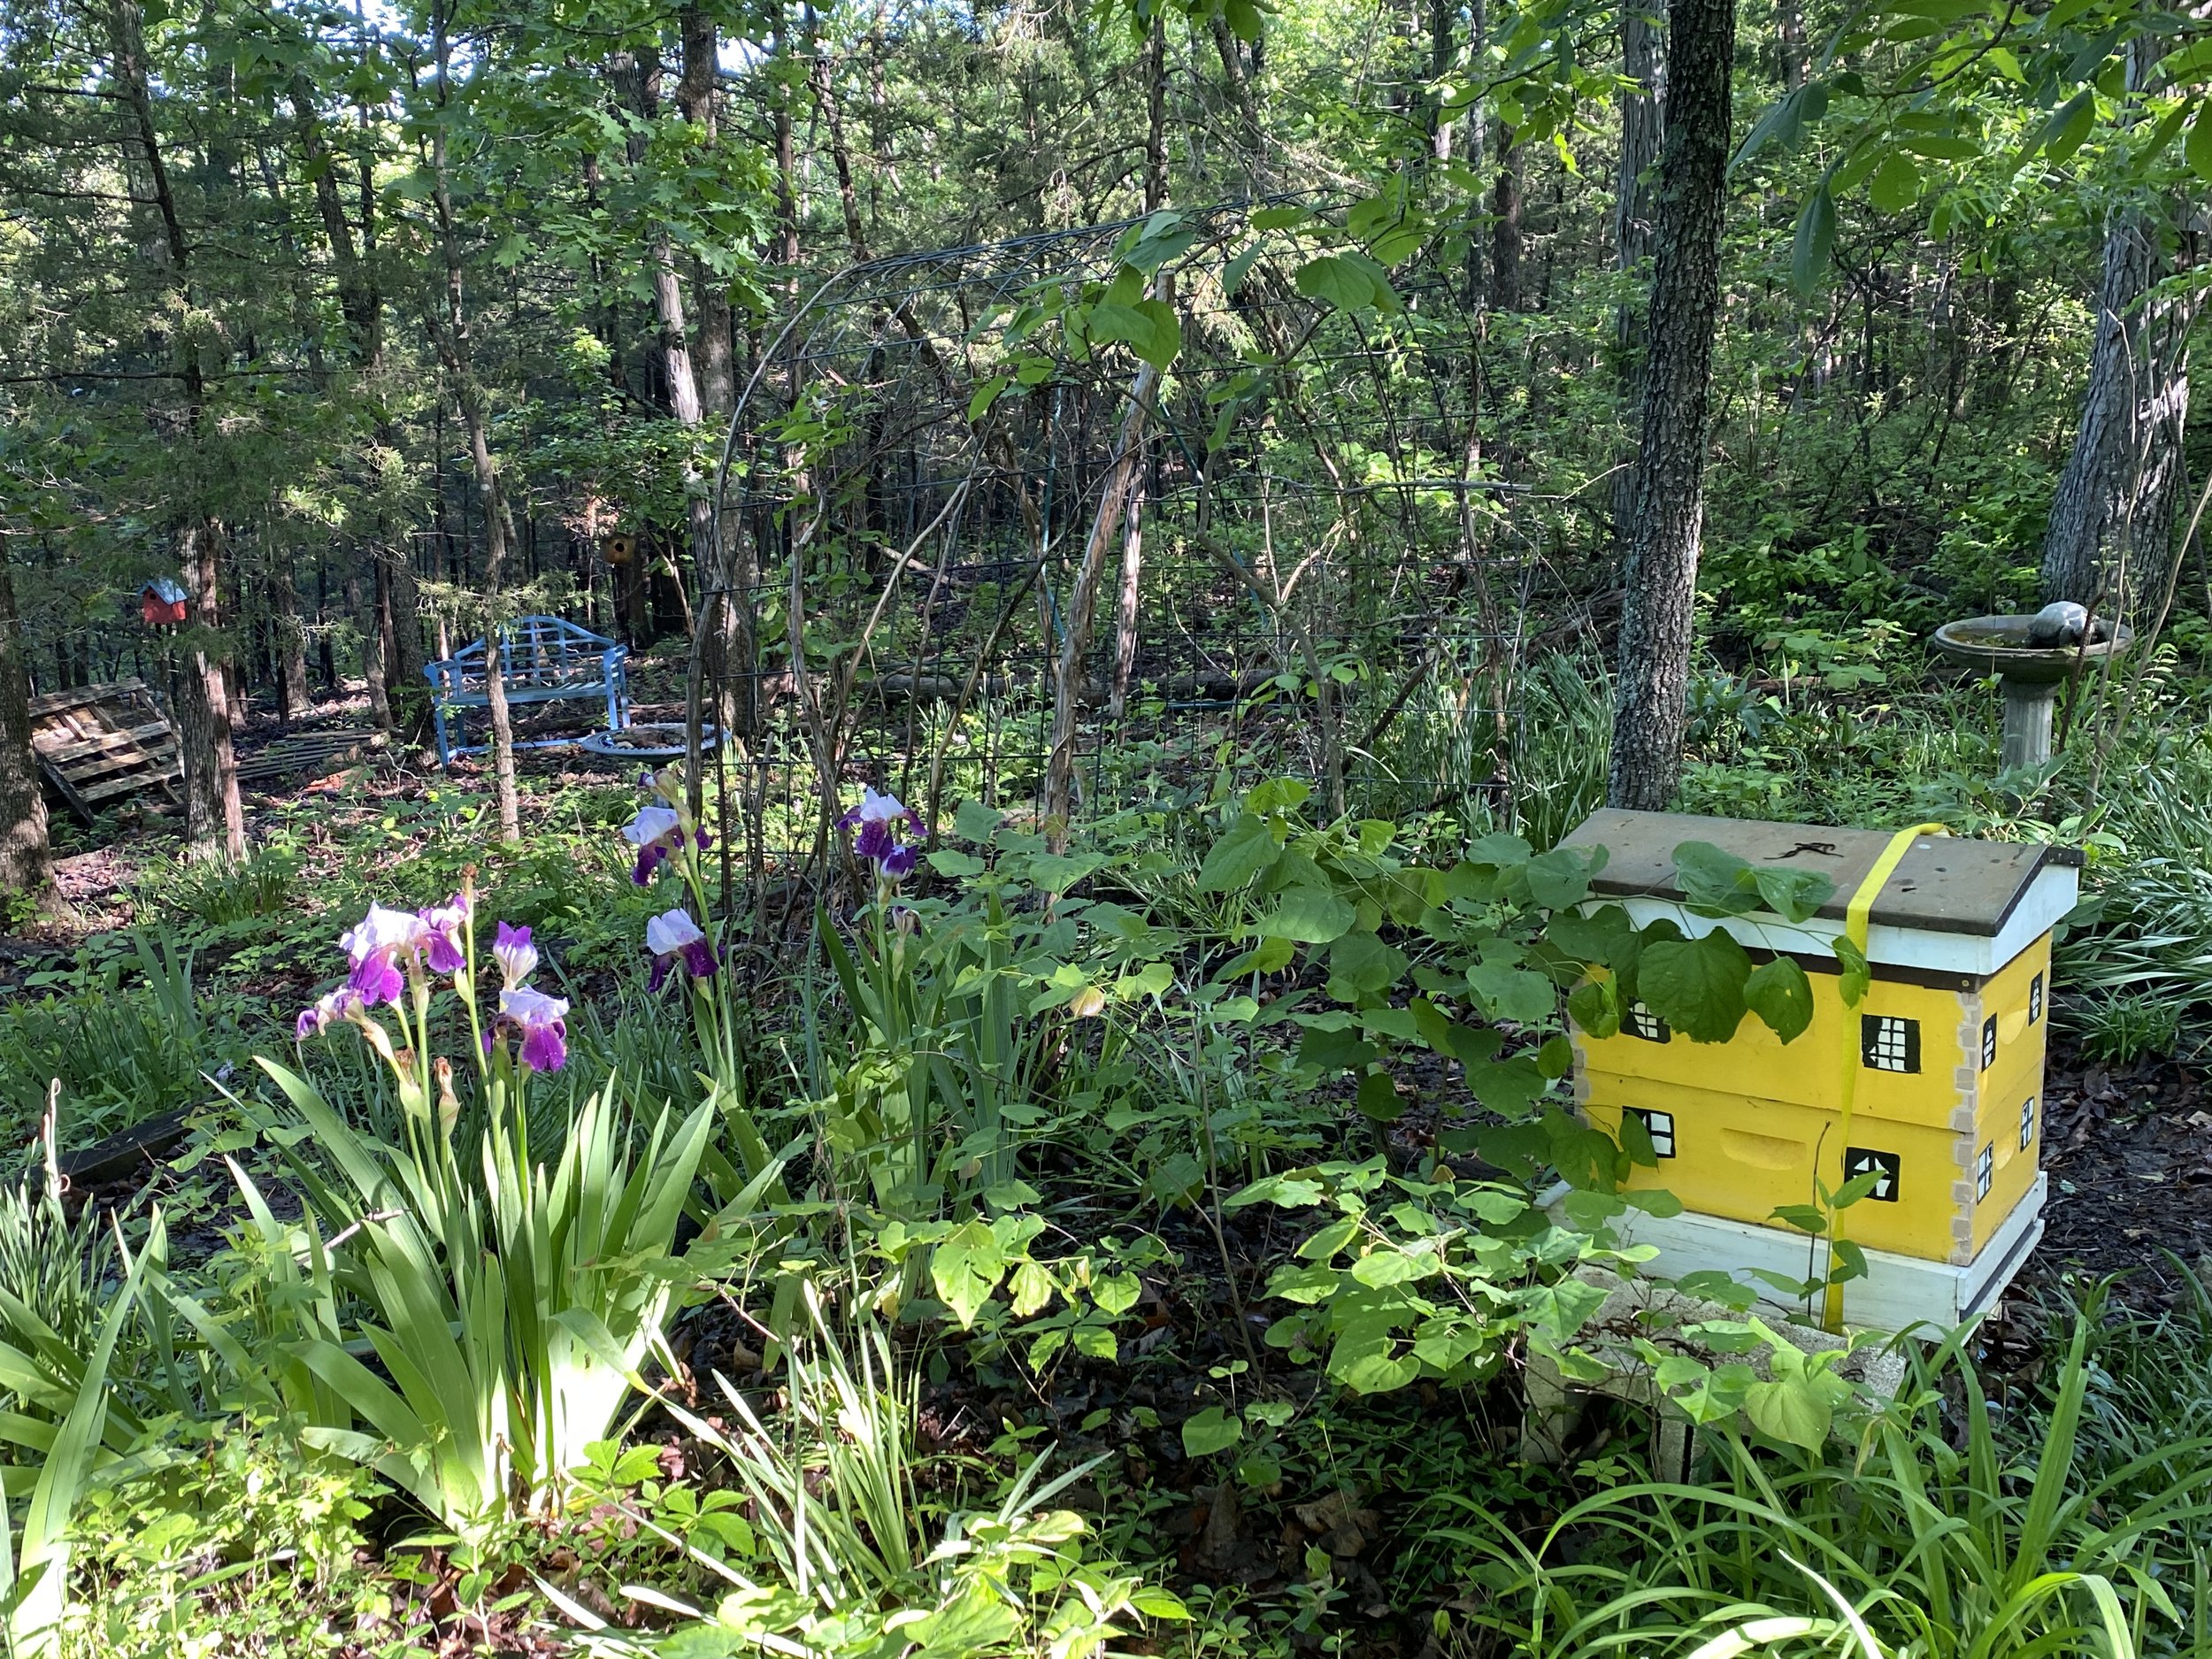
7. Two years ago, a local garden center was giving away their cut Christmas trees so I picked several up and used them for a wind break around my honeybee hives.

Cut Christmas trees also make good wind breaks around honeybee hives facing the south.

Cut Christmas trees also make good wind breaks around honeybee hives facing the south.

In the photo I have the trees pulled away from hive entrances so the honeybees can easily take their winter cleansing flights. As soon as the temperatures dropped to make them cluster back inside the hives, I moved the cut Christmas trees back in front of the hives for a wind break.

Here's a closer look of one of my hives with bees taking cleansing flights.

Here's a closer look of one of my hives with bees taking cleansing flights.

It takes a while for evergreen trees to dry out, even if they aren't placed in water so you have about half a year of good use before the branches become brittle.

Charlotte

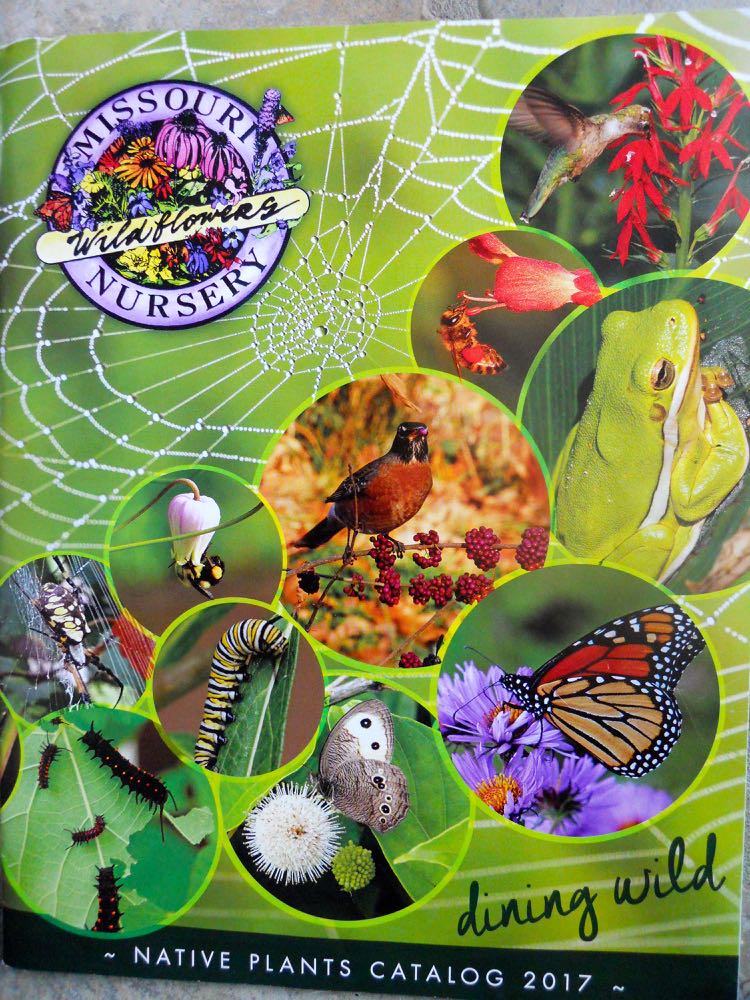
Favorite Wildflowers Catalog

Aren't these lovely Missouri wildflowers photo? And they include growing suggestions, too!

Aren't these lovely Missouri wildflowers photo? And they include growing suggestions, too!

Favorite Wildflowers Catalog

It's that time of year when I go through my old gardening catalogs and decide which ones I want to re-order. My garden is still snow-covered and we're actually hearing the term "bomb cyclone" in the forecast, it's enough to make me want to hide in the colorful gardening catalog pages.

One of my favorites - there is absolutely no doubt about this catalog, I have it hole punched and part of my gardening diary - my favorite gardening catalog and one of the best references for Missouri native plants and wildflowers is this particular catalog.

Just look at those wonderful pictures, don't they make you want to walk through that garden and plant everything on those pages?

I have most of the native plants already in my garden, some from starts from this nursery although I am waiting to finish preparing the appropriate planting beds for the ones I still don't have. I want to add rose verbena this year to several existing flower beds, just love the way those plants grow. And who doesn't love that lovely lavender color? 

The wildflowers have a little rating system with the stars that denotes good for formal locations.

The wildflowers have a little rating system with the stars that denotes good for formal locations.

This marvelous catalog is from Missouri Wildflowers Nursery in Jefferson City. The star rating system is handy for people who want native plants for more "formal" landscaping. That means they will behave in a flower bed as opposed to native plants that are downright unruly, in this rating system the one-star plants:

"One star plants are often desired for their wildlife or plant community value, but not for the front yard. They are usually tall. It takes serious creativity to find a place for them in a formal situation."

Our local chamber of commerce used to have a native wildflower garden at the entrance of the visitor center but ended up removing it after "unruly" plants started to grow. Visitors loved the native plant beds but the staff thought it looked messy.

Don't worry, I moved my share of native plants from there to my gardens.

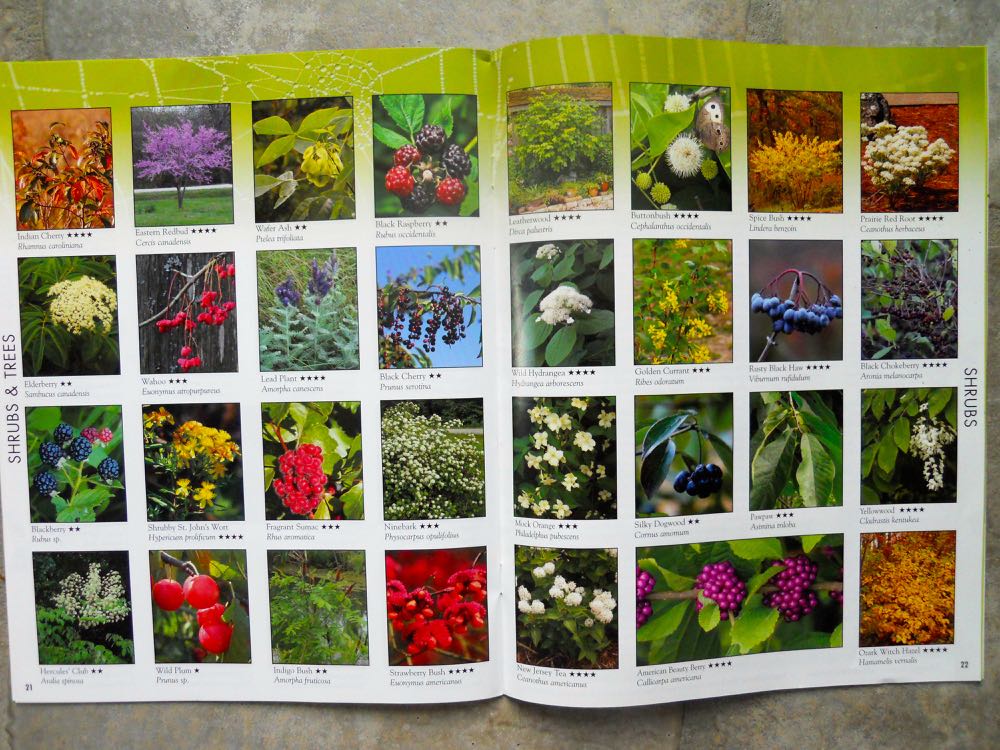
The shrub section is even more colorful, look at all of the wonderful shrub varieties!

The shrub section is even more colorful, look at all of the wonderful shrub varieties!

And speaking of finding the right place, I have a generous list of shrubs I want to add to my landscape if I can just find the best place to put them. At the head of my list, buttonbush, which is a wonderful bee pollen and nectar shrub.

Over the years I have been adding elderberries and they are doing well on my limestone hillside garden. 

So here's the next one I want to try to plant, buttonbush, a great plant for bee pollen and nectar.

So here's the next one I want to try to plant, buttonbush, a great plant for bee pollen and nectar.

And their handy price list and selection guide has a nice summary of best planting conditions along with the star rating system, all conveniently in one place so one can place the order and refer to the critical information.

My favorite is the little column at the right side of the left page which tells me what pollinators are attracted to each plant variety.

The detailed planting guide is a great reference, too, I check that before I plant any wildflowers.

The detailed planting guide is a great reference, too, I check that before I plant any wildflowers.

In case you don't know where to start, this catalog also has suggested plant groupings for hummingbirds, bees, birds, butterflies, rain gardens, forest wildflowers, prairie plants and glade plantings. Each grouping of 10 plants covers about 25 square feet and can be ordered as seedlings.

The Missouri Wildflowers Nursery 2018 catalog will be available February 2018.

The Missouri Wildflowers Nursery 2018 catalog will be available February 2018.

For those of you who visit the nursery, you can recycle your plastic pots there:

Missouri Wildflowers Nursery, 9814 Pleasant Hill Road, Jefferson City, Mo. You can reach them at mowildflrs@socket.net and by calling (573) 496-3492.

Tell Pamela I sent you!

Charlotte

2018 Gardening Calendar

If you don’t keep a garden diary, this is a good time to start. You can keep track of what worked well, and what didn’t, as well as other major garden changes, through a diary. I started mine in 1985 and included wildlife observations. (Photo by Cha…

If you don’t keep a garden diary, this is a good time to start. You can keep track of what worked well, and what didn’t, as well as other major garden changes, through a diary. I started mine in 1985 and included wildlife observations. (Photo by Charlotte Ekker Wiggins)

2018 Gardening Calendar

To keep my major gardening chores organized, years ago I developed a gardening calendar associated with federal holidays to help me remember important milestones. This came in handy when I worked away from home full-time because it helped me get supplies and plan ahead for what I wanted to get done on those long weekends.

I live in USDA Hardiness Zone 5b, which is the US "belt." Here's my calendar for 2018:

Jan. 1 New Years:  Spray inside plants for hitchhiking bugs; remove dead branches. Mark garden catalogs for possible projects.

Jan. 15 Martin Luther King Day: Check plants wintering inside are getting enough sunlight; move them around and give watered down fertilizer. Mark gardening calendars for items to order. Check deck pots outside for moisture and add compost.

Feb. 14 Valentine's Day: Prune fruit trees. Clean and repair garden implements; wash flower pots; repair bird houses. Start looking for blooming crocus.

Feb. 19 President's Day: Plant onion sets, lettuce, spinach, radishes either in garden or in deck containers.

March 17 St. Patrick's Day: Plant potatoes, snow peas, Brussels sprouts and broccoli; start tomato and pepper seedlings.

March 20 Spring Equinox: Prune and compost roses. Add compost to raised garden beds. Plant more lettuce, spinach, radishes, onions.

April 1 Easter: Plant tree seedlings and native wildflowers. Update garden diary for bulbs I need to divide and move this fall; mark locations so can find them when it’s time to dig them up.

April 23 Earth Day: Plant last of my spinach, peas and lettuce. Cover garden with tulle to keep deer out. Start pinching mums back once a week.

May 13 Mother's Day: Last day of frost so everything can get moved outside. Leave delicate plants outside for a few hours for the first few days to get them used to outside conditions. Leave seedlings in containers outside for a few days before moving them permanently into the garden.

May 28 Memorial Day: Last day to plant anything from seed in garden including basil, pumpkins, cucumbers and zucchini. Compact fruit trees, bushes and perennials also get planted so they can benefit from June showers.

June 17 Father's Day: Last weekend to plant perennials.

July 4 Independence Day: Last day for planting beans. Last weekend for pinching back Mums so they bloom bushy this fall.

Sept. 3 Labor Day: Harvest fall crops; check for bugs; add compost, and start getting raised garden beds ready for winter.

Oct. 8 Columbus Day: Trim deck plants. Start moving them inside house for winter.

Oct. 31 Halloween: First fall hard frost. Add compost to raised bed gardens.

Keep track of the changes in your garden by taking photos from the same spots, especially if you have made major changes. Gardens change all on their own, too. (Photos by Charlotte Ekker Wiggins)

Keep track of the changes in your garden by taking photos from the same spots, especially if you have made major changes. Gardens change all on their own, too. (Photos by Charlotte Ekker Wiggins)

Nov. 11 Veterans Day: Clean and store pots, garden tools; toss out torn gardening gloves; mark envelopes with saved seeds; update garden diary. If there's been a hard frost, good time to mulch plant beds so soil temperature doesn't fluctuate. Check for spring bulbs on sale.

Nov. 22 Thanksgiving: If ground is frozen, mulch garden beds.

Dec. 21 Winter Solstice: Water first year mums and pansies once a month through winter. Make sure winter birds have defrosted water to drink.

Dec. 25 Christmas: Make a note on who admires your Christmas cactus to give starts to next year.

Happy New Year!

Charlotte


Winter Tomato Plant

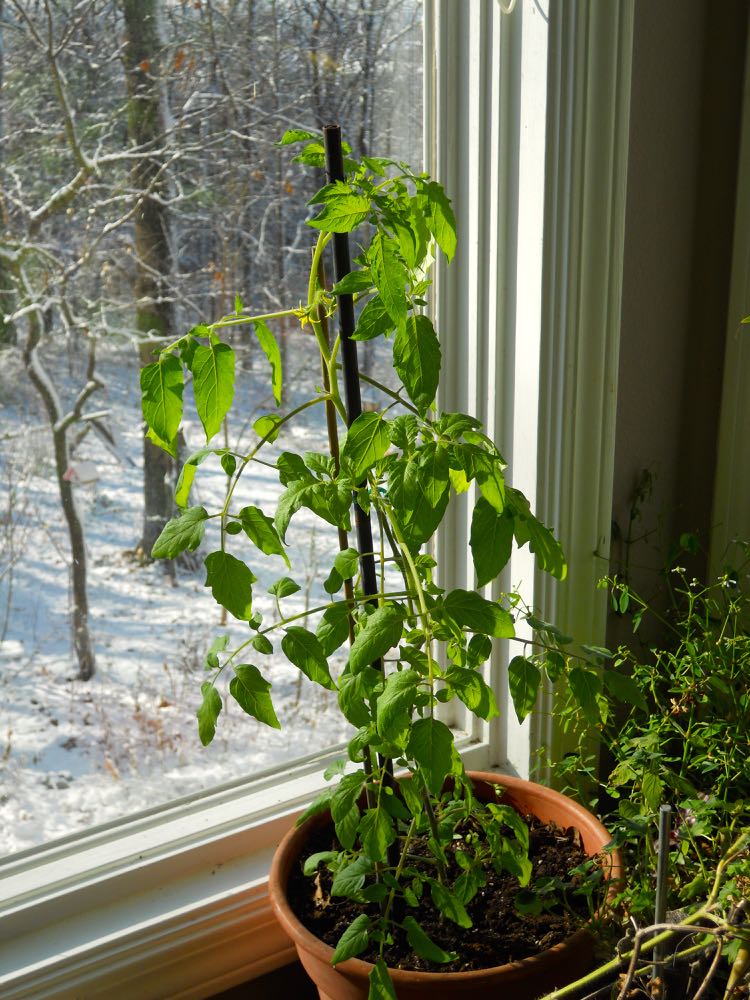
Miriam, my 2017-2018 winter tomato plant, is starting to flower in one of my bay windows.

Miriam, my 2017-2018 winter tomato plant, is starting to flower in one of my bay windows.

Winter Tomato Plant

Most people have tropical plants and some herbs growing inside over winter. I do as well but I also add one tomato plant to my indoor winter garden.

This year's winter tomato plant was literally a last minute planting. I found the little seedling growing in a flower bed where I had planted hyssop starts from a friend's garden so this wasn't even a tomato start from my garden.

Over the years, I have added a tomato plant to my inside garden to winter over with my other tropical plants. Some years this one tomato plant makes it through spring to spend a second year outside providing me delicious fruits. In their native habitat of Peru, tomatoes grow as perennials, living for many years to produce fruit without the plant dying off and having to be re-grown every year.

I was so busy with other things this year I forgot to set aside a tomato plant to winter over inside. Usually it's a plant that was sacrificed to feed tomato hornworms early summer so that by moving inside time in October, the tomato plant is starting to recover. I didn't have many hornworms this year so I didn't have to segregate a tomato plant from the rest.

When I recognized the seedling growing in a flower bed, I pulled the seedling out of the ground, brought it inside, plopped it into a six-inch pot with fresh potting soil and stuck it in a southwest inside window.

At Christmas, I noticed the first flowers on the now 2-foot high plant so it must be happy where I plopped it. Time to do a little pollinating!

How to Pollinate Inside Tomato Plant

The absence of pollinating insects can be a problem when growing indoor tomatoes so hand pollinating is helpful. In nature, bees and other pollinators move the pollen from one flower to the next, matchmakers in the plant's scheme to survive by producing fruit with seeds. Since I don't have tiny pollinators available, I will be doing the honors.

One way to help a winter tomato plant pollinate is to tap the stems lightly when flowers are in bloom to spread pollen. That's easy enough to do but not a reliable way to hand pollinate.

I have also used a cotton swab tapped into each flower to move the pollen around. That's a better way and ensures the pollen ends up where it needs to be.

Besides giving the plant watered down fertilizer every couple of weeks, I turn the plant daily so each side gets adequate sun and flower and fruit production is even.

Miriam is now staked to keep the plant upright.

The full Miriam, now about 3-foot tall and needing a taller stake to keep leaning into as she grows.

The full Miriam, now about 3-foot tall and needing a taller stake to keep leaning into as she grows.

Miriam the tomato plant is keeping other tropicals company this winter season. A banana plant, right, and several tropical hibiscus plants give one of my reading nooks a nice garden flavor.

And yes, I have my chairs facing the windows instead of the inside of the room. That way I can sit and enjoy the view without having to turn the chairs. When friends visit, I turn them back into the room or we've been known to sit as the chairs are and enjoy the view together.

Miriam the tomato plant spends her days in this window with southeastern exposure. (Photo by Charlotte Ekker Wiggins)

Miriam the tomato plant spends her days in this window with southeastern exposure. (Photo by Charlotte Ekker Wiggins)

Will this tomato plant have tomatoes?

With a little care, winter growing tomatoes will produce in about the same time as their outdoor counterparts so yes, I should have some tomatoes by March.

Charlotte
Christmas Cacti or Cactuses

One of my Christmas cactus currently in bloom, see the smooth edges of the leaves?

One of my Christmas cactus currently in bloom, see the smooth edges of the leaves?

Christmas Cacti or Cactuses

Or should I say Christmas "cacti?" I have a tendency to call them "cactuses," too. Whatever you call them, these living plants from where I grew up in Brazil, north of Rio de Janeiro, are a favorite of a number of friends of mine. They like to compare photos, and tips, for keeping these South American plants happy and in bloom so here are a few photos of mine currently in bloom.

Christmas versus Thanksgiving Cactus

First, there are two kinds of Christmas cactus that often get confused. The original Christmas cactus (Schlumbergera bridgesii) is no longer available on the commercial market so if someone has a start from grandmother, most likely it is a true Christmas cactus. The leaves of the old-fashioned Christmas cactus are rounded.

By comparison, the Thanksgiving cactus (Schlumbergera truncata) has pointed ends on the green fronds. They also tend to bloom earlier than the old-fashioned Christmas cactus, like this white version that was in bloom a month ago.

This is a Thanksgiving cactus, note the spikes on the green leaves.

This is a Thanksgiving cactus, note the spikes on the green leaves.

There is a third popular cactus available commercially and that one blooms in spring so it's sold as an Easter cactus.

Cactus Care

These tropical plants prefer indirect southern exposure. They will tolerate low light, but perform best in bright, indirect light in the home. Brighter light is beneficial during the winter, but full summer sun can result in pale plants. If you have them outside in the summer, keep plants in a semi-shady location.

Christmas cacti prefer temperatures of 70 to 80 F for their April to September growing season.

According to Dr. David Trinklein, University of Missouri Extension, Christmas cacti do not grow well in a wet root environment. Christmas cacti tolerate under watering better than overwatering. Water only when the growing medium is dry to the touch. If you put a saucer under the pot to collect drainage water, empty it to keep excess water from wicking back into the pot. Failure to do so results in a soggy root environment, which is an open invitation to root rot.

Reduce watering from fall through spring. Only fertilize plants during their growth period of early spring through late summer. Use a regular fertilizer at one-quarter strength or a houseplant fertilizer according to label directions.

Keep Christmas cacti slightly pot-bound to induce prolific flowering. Repotting may be necessary every three years. Use a porous, well-drained potting mix. Commercial mixes made for epiphytes are good choices. Make regular peat-lite mixes into epiphytic mixes by adding perlite or sterile sharp sand to increase porosity.

How to Get Christmas Cacti to Rebloom

Reblooming Christmas cacti can be challenging, Trinklein said. The cacti are short-day plants. However, temperature affects their response to day length. In fact, Trinklein says, flowering will occur regardless of day length under cool night conditions (50-55 F).

Prolific flowering occurs when plants are exposed to cool nights with at least 13 hours of darkness. Reduce water to slightly stress the plant at this time to improve flowering. Expose holiday cacti to short days, cool nights and dry conditions in mid-October for full bloom during the holiday season.

Wish I could tell you I follow these rules but I don't. I leave the plants in the same window all year and sometimes forget to check on them to water. They are kept in the cool basement during summer with a southern exposure, which triggers their blooming by mid-November.

When the pots are in bloom, I bring them upstairs so I can enjoy them but keep them with the same southern exposure. Sudden changes in temperature, light or other factors, such as excessive drying of the growing medium, can cause Christmas cacti to drop unopened flower buds.

Poor flowering also happens when stray light interrupts the required long periods of darkness during short-day treatment. Interior home lights, streetlights and even car lights can disrupt the required dark period and cause disappointing flowering.

Christmas cacti are prone to root rot, another reason to water sparingly. Avoid overwatering and maintain strict sanitation. Remove common insect pests, which include mealybug and scale.

Another Thanksgiving cactus in bloom, this one looks red and white in bright light.

Another Thanksgiving cactus in bloom, this one looks red and white in bright light.

I started several Thanksgiving and Christmas cacti in hanging baskets. When a piece falls off because I over watered, I plant the piece back in the hanging basket and most of them easily root to start a new plant with very little care. This red Thanksgiving cactus in the hanging basket has some of the dead cactus pieces in the front, turned brown. 

If you have friends who admire your Christmas cactus, consider taking snips to make starts and get them rooted for next year gifts. Remember to label them so you know what color they are. It can take 3-4 years before a plant is mature enough to start blooming.

Newest Christmas Cactus Addition

One of my master gardener colleagues earlier this summer mentioned she had a Christmas cactus that needed a new home. Without knowing what color or size it was, I volunteered to adopt it. To my delight, the plant was huge. Another friend told me these can live for decades so I found a plant stand to better display the beauty of the plant and now I'm looking for a pot to cover the plastic one.

This is a very old Christmas cactus, I feel so lucky to now be the caretaker of this lovely plant.

This is a very old Christmas cactus, I feel so lucky to now be the caretaker of this lovely plant.

I placed the plant in my southern exposure basement window, not expecting any blooms for this holiday. To my surprise, buds started within weeks of the plant settling in and now it's covered in blooms, just in time for Christmas.

Charlotte
Rose Pruning

Inspiration to learn how to prune roses, it is relatively simple once you follow a few steps.

Inspiration to learn how to prune roses, it is relatively simple once you follow a few steps.

Rose Pruning

Ok, it’s that time! If you are one of those people who have wondered through the year when you should be pruning your roses, the time is now. I look for green stems by St. Patrick’s Day, a good way to remember what time of year roses should be pruned.

To prune roses, start with sharp trimmers cleaned with alcohol so you are not spreading last year’s diseases. I use old socks soaked in rubbing alcohol to wipe down my trimmers. I also make sure the trimmers have been sharpened so the cuts are clean; using dull trimmers will cause stem tissue damage to the plant and invite diseases as well as slow down growth.

Now pruning anything can be nerve-racking. The good thing to remember is that most plants, including roses, are forgiving so take a deep breath.

The second tip is to take your time.  When I first started pruning, I tied pieces of yarn and old bread ties where I was thinking of cutting. I would adjust the cutting plan before actually making the cut. If I made a cut and didn't like it, I would remind myself of tip number one.

After trying several different approaches, here is how I start. I first remove any and all dead stems, that usually gives a better view of what's left behind and what you should trim next. Go slowly; some branches that are dead may only be dormant. If in doubt, first scrape the branch gently with your fingernail to expose what's underneath. If it's green, that branch is still alive.

Some branches may be yellow green; that means it may be dying but it could rally with a little help so don’t give up on it just yet. Definitely mark that rose for a little extra soil conditioning and give each plant ¼ cup dried coffee grounds, half to one banana peel and 2 tablespoons Epsom salt mixed together. I also add crushed egg shells and dried orange peels when I have them. Feed once a month through the growing season.

You want to keep a shape that leaves air circulating through the center so remove branches that crisscross or are in-growing.

Now that the dead branches are gone, and then the criss-crossing ones have been removed, what is left is almost done.

Look for the pink nodes facing outwards, that's where you want to cut to encourage growth.

Look for the pink nodes facing outwards, that's where you want to cut to encourage growth.

Look carefully at what is growing where. Find the pink nodes facing outwards, that’s where the plant will grow. Cut the branch 1/4 inch above the swollen bud at a 45 degree angle, that will encourage the branch to grow outward.

In general, also follow the following guidelines:

If you want your rose bush to be about the same size as it was last year, cut it down by half.

If you want a smaller shrub, prune to one third of its original size.

If you want something larger, prune to two thirds of its original size.

If this is your first year growing roses, prune much lighter at first; I usually wait until at least the second year before doing any pruning.

Charlotte
March Gardening Chores

Birdhouses undergoing repairs are drying in the sun before I put them back out in the garden. Repairing birdhouses are one of the many traditional March gardening chores I look forward to getting ready for spring.

Birdhouses undergoing repairs are drying in the sun before I put them back out in the garden. Repairing birdhouses are one of the many traditional March gardening chores I look forward to getting ready for spring.

March Gardening Chores

This is the month when I am ready to push my potted plants wintering inside out but in my heart I know it’s too early, our last frost day is supposed to be in May. 

This year, though, everything seems to be at least one month ahead of schedule. According to the USA National Phenology Network, spring IS a good 3 weeks ahead of schedule for mid-Missouri, a trend forecasted as our rapidly changing climate alters traditional weather patterns and seasons. Phenology is nature’s calendar – when dogwood’s bloom, when a robin builds a nest, when leaves turn color in the fall. These trends gardeners, beekeepers, farmers and others have followed for centuries are now followed by a network. The phenology network combines professionals and citizens collecting a variety of data to monitor signs in nature to better identify trends.

With this shift in what to expect, I have also adjusted a few of my traditional March gardening chores but not enough to take a chance on putting my inside plants outside for the season.

1. Check inside potted plants, trimming and shaping so they are ready to go outside. Prune limbs back at least a third, and remove any criss-crossing branches. I also start feeding them diluted fertilizer, a pinch per gallon of water so they can start growing again.

2. Prune outside roses. Remove dead branches first, then remove any dead canes down to the green.

3. Plant onion sets, lettuce, spinach, radishes; I start those in my pots so I can easily cover them if there’s an evening cold spell.

4. You can also plant broccoli and cauliflower, and I like having snow peas to harvest and individually freeze for later use. Snap peas also prefer cooler spring weather. At the rate we are going with record warm spring temperatures, we may have skipped a long cool spring period this year.

My compact pear tree off my deck is getting ready to bud almost a month earlier than in past years. Watching when trees bud is part of what scientists and citizens in the phenology network to do track nature’s seasonal trends. This year, they confir…

My compact pear tree off my deck is getting ready to bud almost a month earlier than in past years. Watching when trees bud is part of what scientists and citizens in the phenology network to do track nature’s seasonal trends. This year, they confirm spring is 3 weeks ahead of schedule in our part of the country. 

5. Plant potatoes on St. Patrick’s Day.  The trick to planting potato seeds is to cut seed potatoes and let them sit out for 2-3 days to first develop a callous before planting. If you immediately plant, the potato seed piece disintegrates before the potato start can develop roots. 

6. Start herbs, tomatoes, peppers and other seeds in starter pots you want to harden off later before planting outside.

7. There’s no more putting this one off, if you leave your garage door open, even for just a few minutes, birds will let you know they are shopping for real estate and they will not be waiting any longer. I usually make repairs – gluing is usually involved – then let that sit for a few days to dry before painting. I also let the paint dry for another few days before taking the birdhouses back out into the garden. 

8. Don’t trim your mums yet, leave the dry tops for late frost protection.

9. Mark where bulbs are popping up so you don’t do what I do and try to plant something there later. Oh, never mind, it’s like finding treasure.

10. Enjoy spring, it's the season of growth and renewal!

Charlotte


Recycle Christmas Greenery

Recycle Christmas trees as wildlife cover, a fish nursery or take to a recycling center for mulch.

Recycle Christmas trees as wildlife cover, a fish nursery or take to a recycling center for mulch.

Recycle Christmas Greenery

Bless my brother, he didn't even ask why almost as soon as I got back into town, I was texting him from the recycling center. I was curious how many people would be recycling Christmas greenery. Did you know that 75% of what is hauled off to landfills could be recycled? A good percentage of recyclables are easily compostable materials such as Christmas trees, leaves and kitchen scraps.

My brother has started composting. He told me he was amazed at how quickly he has less in his garbage. He started by saving kitchen scraps in a plastic bag stored in the top freezer drawer for easy access. When the bag is full, he takes it outside to a handy composter sitting next to his garage. I suggested he could also bury it in holes in his garden but he lives in northern Minnesota; his garden is frozen seven months out of the year. On the other hand, he's proud to report they have one of the lowest crime rates in the country so there's something to be said about living in tundra conditions.

Besides kitchen scraps, live Christmas trees and other greenery can also easily be recycled, even if it is cold. After removing all decorations, including tinsel:

  • Pull off or cut off tree branches and boughs to cover roses and other tender plants, if you haven't already. The best time to mulch is after the first hard frost. Mulch is basically a blanket to maintain soil temperature around plants. With our ever-fluctuating temperatures, it's even more important now to make sure plants have consistent soil temperature so they can maintain their winter dormancy.  Trees that are particularly affected by fluctuating temperatures, and should also be mulched, include cherries and Japanese maples.
  • If you have a pond, tie a rock to the denuded tree and sink it in your pond. It will provide a nursery area and good cover for baby fish and tadpoles.
  • Place the tree in a corner where birds can use it for protection. One year, we "planted" one of our live cedar trees back in the yard with pinecones with peanut butter and strings of popcorn. It was highly entertaining to watch all of the wildlife that made use of that tree for the rest of winter, especially song birds and wild turkeys. Once wild turkeys discovered the popcorn strings, they spent several days working them out of the tree. I can still remember them walking off, dragging popcorn strings behind them.

If you are more interested in wood chips, most recycling centers allow local residents to haul off wood chips for free. Wood chips make great cover for walking paths and, once dry, are great for mulching flower beds and trees. 

Smaller trees like cut cedars work well as outside brooms to clear off paths.

Charlotte
Milk Jug Greenhouse

This milk jug is protecting a little rose start at the corner of one of my flower beds.

This milk jug is protecting a little rose start at the corner of one of my flower beds.

Milk Jug Greenhouse

It's easy to assume that when someone says "greenhouse," we all imagine a large, house-like structure with glass walls and maybe a tray of plants sitting in a corner.

One of my favorite tiny "greenhouses" are plastic, one gallon milk jugs. I also use clear plastic water bottles the rest of the year but for winter, the opaque gallon milk jugs work quite well.

After cutting the bottom out of the milk jug, I store them stacked on top of one another until I need them, usually close to the first fall frost. Most of the time, I get delicate plants and seedlings insider to winter over but not always. This past year, I had rose starts I was worried about so I deployed my carefully collected milk jug greenhouses.

After making a little trench around the rose starts, I placed a milk jug into the trench and covered it back up with soil so the milk jug would not fly off. 

When the soil around it was dry to the touch, I watered the rose start through the milk jug center.

As temperatures hit single digits, I peeked inside to make sure all was well. So far, so good. 

Will be interesting to see if once spring arrives, the little rose start has survived winter in its little individual greenhouse.

Have you tried to use milk jugs as plant covers?

Charlotte


Tree Pruning Time

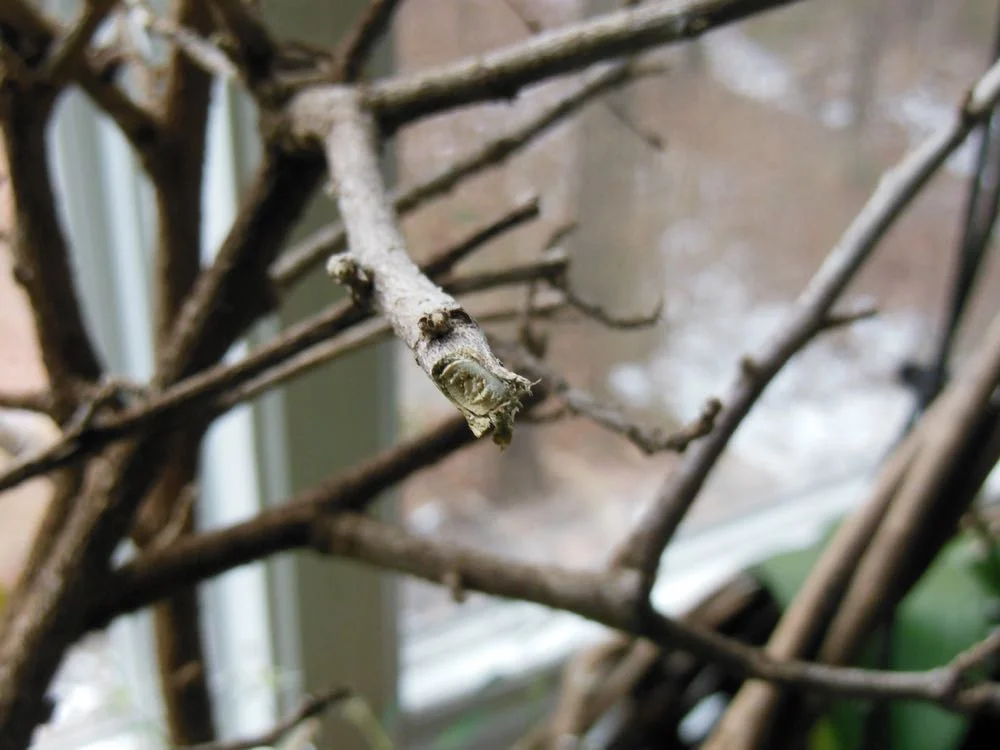
Prune trees above the growing node but make sure your pruners are sharp; i set these pruners aside so I don't tear more of the tropical hibiscus while pruning.

Prune trees above the growing node but make sure your pruners are sharp; i set these pruners aside so I don't tear more of the tropical hibiscus while pruning.

It’s time to prune trees if you haven’t already. Although I appreciate well-shaped trees and bushes, I have to work myself into a certain state to prune. There is something counter-intuitive about cutting off branches to make something grow a better, fuller shape.

I start pruning in January when my tropical hibiscus have dropped most of their leaves in my living room. The leafless tree shape is easier to see and I can do the trimming in phases so I don’t traumatize it. Basically you don’t want to trim more than a quarter of the total tree branches at once so mark them before cutting so you don’t cut too much.

Start with some simple branches to cut off:

1.     Mark and remove dead branches.

2.     Mark and remove branches that are unsafe. This can be branches that are unsafe for people who may be around them as well as branches that are unsafe for the tree itself. Branches that cross are not good for fruit trees, for example. Branches with a low clearance are not safe for people who may mow lawns nearby.

3.     When choosing branches to remove, mark branches so new buds are facing outwards. It took me awhile to get this concept under my belt but basically don’t cut above growing nodes that will force a new branch inward. The nodes should be pointing in the direction you want the new branch to grow.

4.     Don’t cut right at the growth node, trim at a 45 degree angle about 1/8th of an inch above the growth node.

Coming up next, tips for pruning fruit trees.

Charlotte


Pulling Mums Through Winter

Did you plant chrysanthemums last fall? Autumn is the most popular time of year of the four seasons to plant them but not necessarily the best time for the plants.

Chrysanthemums are one of the most hardy cut flowers. It's why most florists use them to fill up flower arrangements and bouquets. They do need a little special care and are well worth it.

To help your mums pull through winter, make sure the plants are kept moist. Water the plants 1-2 times a month by pouring a good gallon of water around roots.

Keep mum roots mulched to minimize changes in temperature causing the roots to literally heave out of the ground.

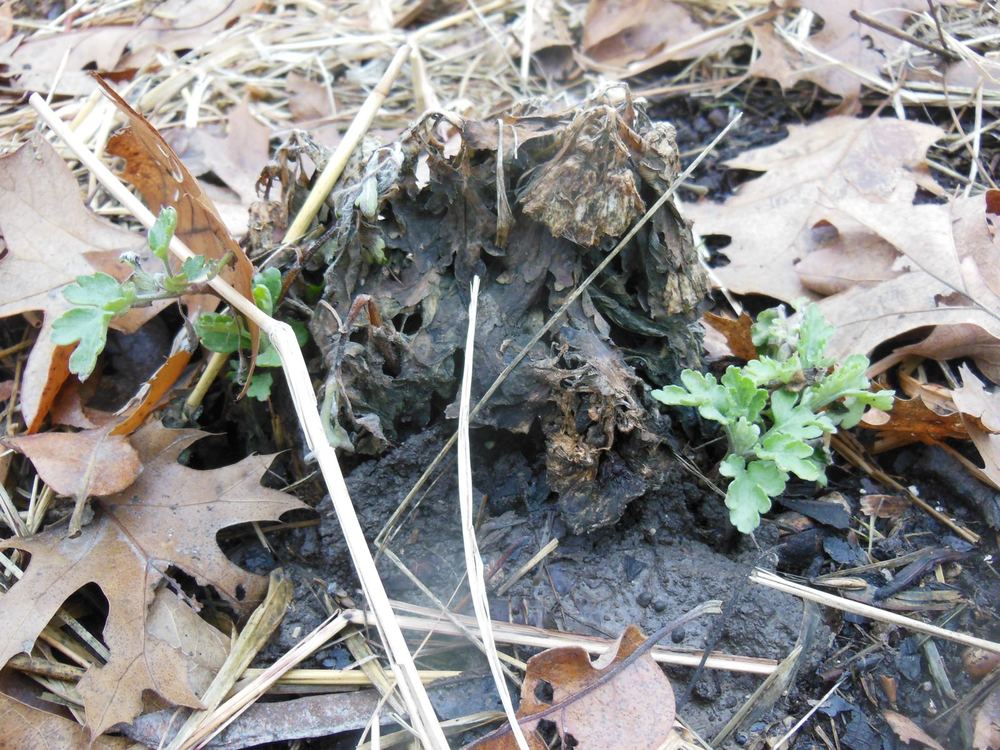
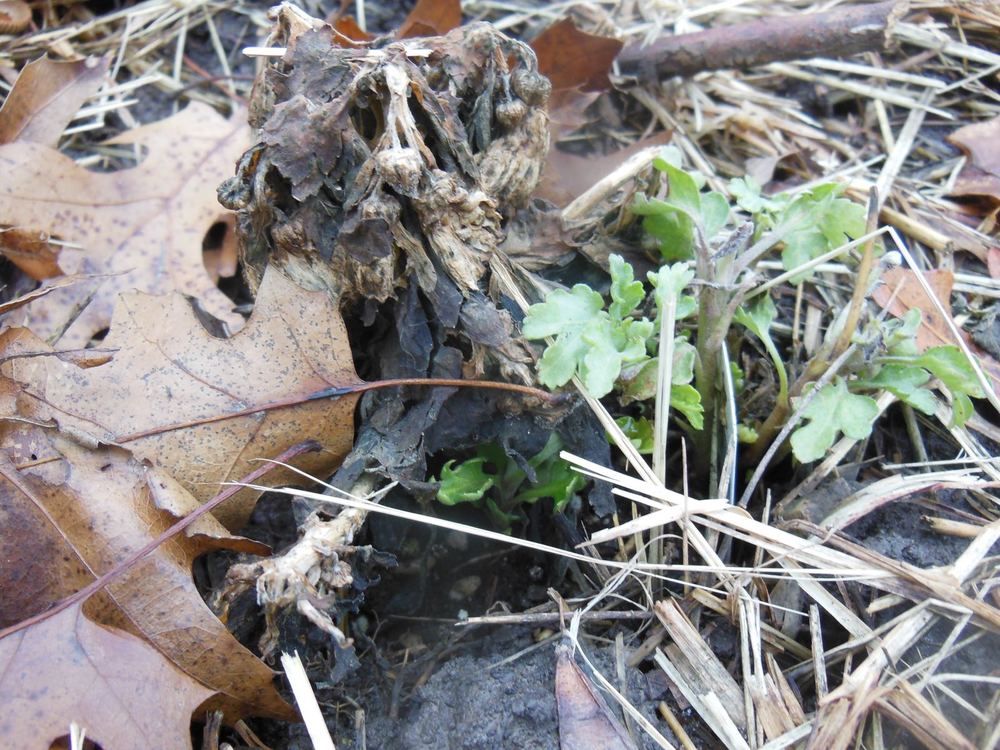
Here are a couple of mums I bought for 25-cents last fall that are making it so far through our Missouri winter by getting water and being mulched.

From the top it looks like the plant is dead. Plant starts, however, are peeking out from the sides.

By keeping roots moist, plants will be ready to grow as soon as temperatures warm up. The full season of growth will make them stronger for fall blooms and you should now have repeating blooming chrysanthemums.

Charlotte
Homemade Vertical Herb Garden

Want to have herbs handy but no room to plant them, and get a little extra privacy at the same time?

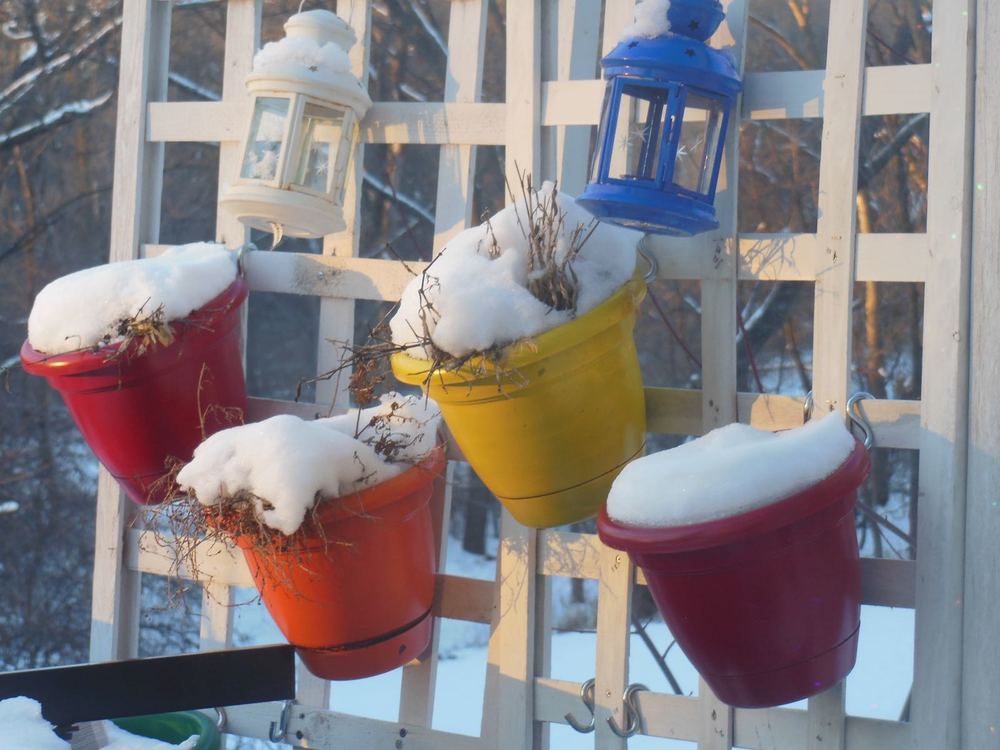
Try what my sister-in-law in Minnesota set up on her deck. A vertical herb garden using standard wooden trellises and plastic pots. The wooden trellises give her a little privacy from looking down on her next door neighbor and provide a handy space to hang pots for favorite plants and herbs.
No herbs growing in the middle of winter in Minnesota but you can better see how the pots have been hung on the pre-assembled and painted wooden trellis.

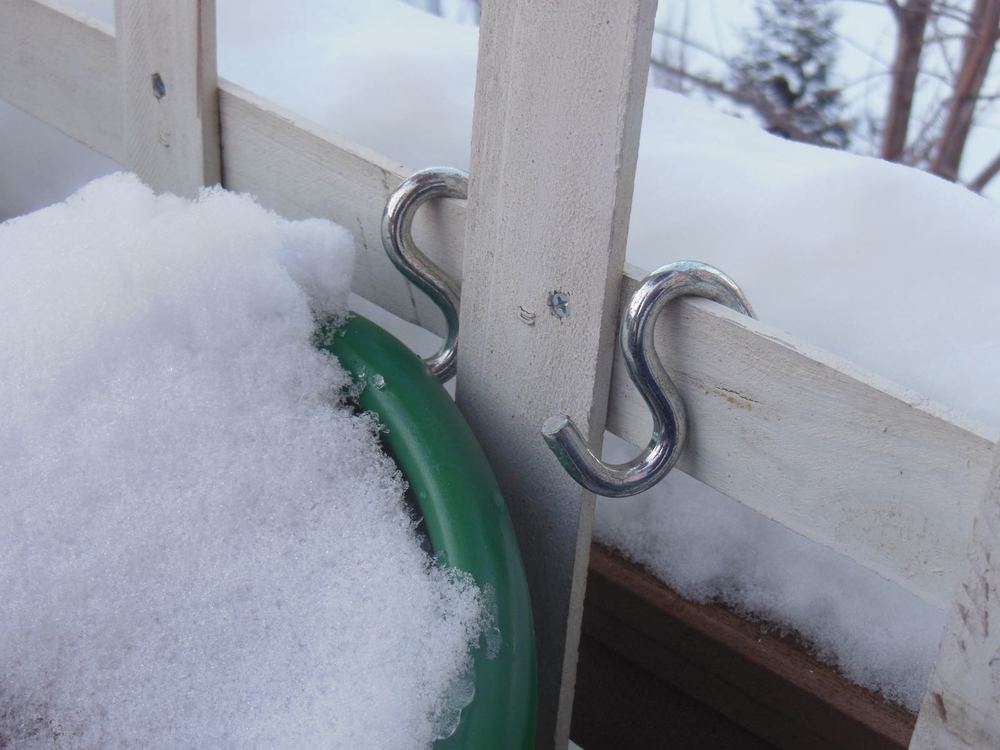
The plastic pots were originally black. My sister-in-law ordered them online because these had the longer lips on the side to hook onto the "S" hooks. 

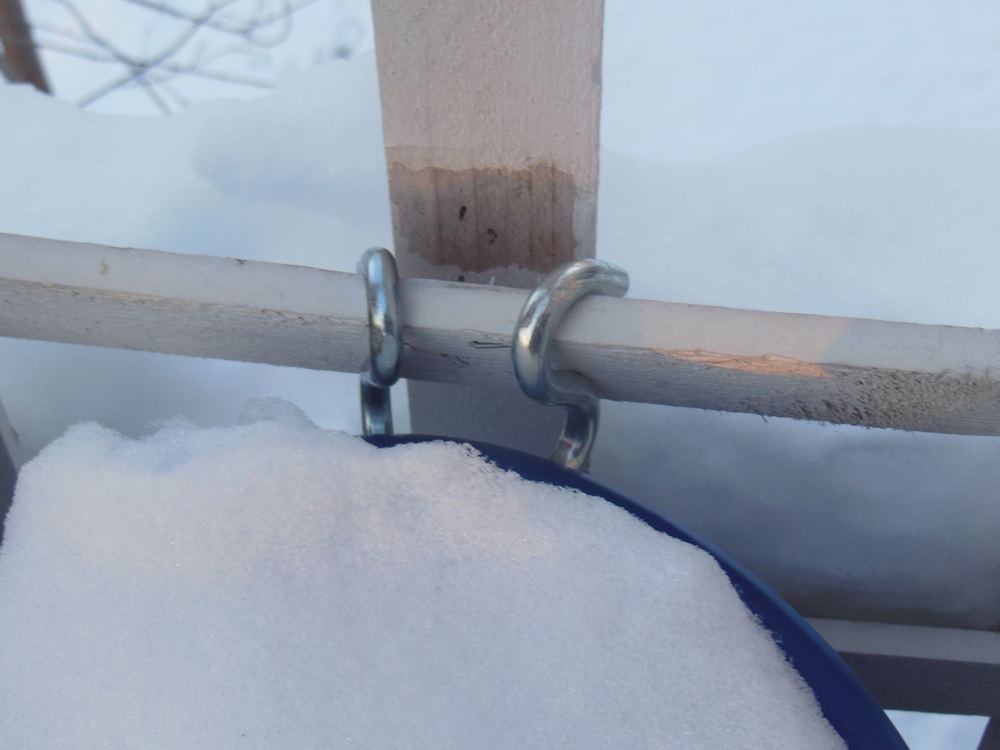
The pots are the same size and shape, spray painted different colors. To easily hang them, place two large "S" hooks about 2 inches apart.

Once in place, the "S" hooks securely hold the pots on the trellis next to the outdoors table for easy reach during meals.

I volunteered to come back next summer to thoroughly research how well this system works, especially when my brother is cooking. My sister-in-law said that was a wonderful idea!

Charlotte