Growing Tomatoes

Blossom end rot can be fixed with regular and even watering. (Photo by Charlotte Ekker Wiggins)

Blossom end rot can be fixed with regular and even watering. (Photo by Charlotte Ekker Wiggins)

Growing Tomatoes

Of all of the vegetables home gardeners can grow, tomatoes to me are the taste of summer. This year, record hot and humid conditions have made tomato growing challenging so here are some typical issues, and tips, on how to fix growing tomato problems.

Proper Fertilizer

Tomato plants taller than their growers usually means tomato plants may be getting too much nitrogen fertilizer. Nitrogen encourages the green growth that spurs plants to unnatural heights.A balanced plant meal requires nitrogen for growth, phosphorous for moving energy through the plant, and potassium for stress tolerance.  Our Ozark soil can provide nitrogen but the other two fertilizer elements usually need a boost. 

Soil testing through a local University of Missouri Extension office will help determine what is missing. A test costs $15 and includes not only what is in your soil but what you need to do to amend it.

Even Watering

The other delicate part of raising tomatoes is watering. Blossom end rot, where the bottom of the tomato starts to decompose, is usually caused by calcium deficiency, Calcium is usually present in soil but without water, tomato plants can’t take it up from the soil.

The best way to prevent blossom end rot is to regularly and evenly water tomatoes,. This means watering them every day at the same time with the same amount of water.

Tomato roots in open ground can grow to 5 feet deep. Tomatoes even grown in containers prefer to be evenly moist so with temperatures, and humidity, either at record levels or varying widely, requires careful monitoring.

I have sunken plastic bottles with holes in pots keeping my tomatoes company so that I can better keep the roots moist.

I also use a paint stick propped into the side and moved over an inch to check how wet the soil is before I water.

Temperatures Over 86F

Another challenge to raising tomatoes is temperatures over 86F. Tomatoes go into survival mode at 86F and higher so the tomatoes will not ripen on the plant. If temperatures remain that hot, pick the tomatoes while still green and allow them ripen in your kitchen.

Remove suckers of the growth in between branches to keep tomatoes focused on growing fruit. (Photo by Charlotte Ekker Wiggins)

Remove suckers of the growth in between branches to keep tomatoes focused on growing fruit. (Photo by Charlotte Ekker Wiggins)

Remove Suckers

One last tip: remove the growth in between tomato branches to keep the plant focused on producing the fruit we all enjoy.

Charlotte

July Gardening Chores

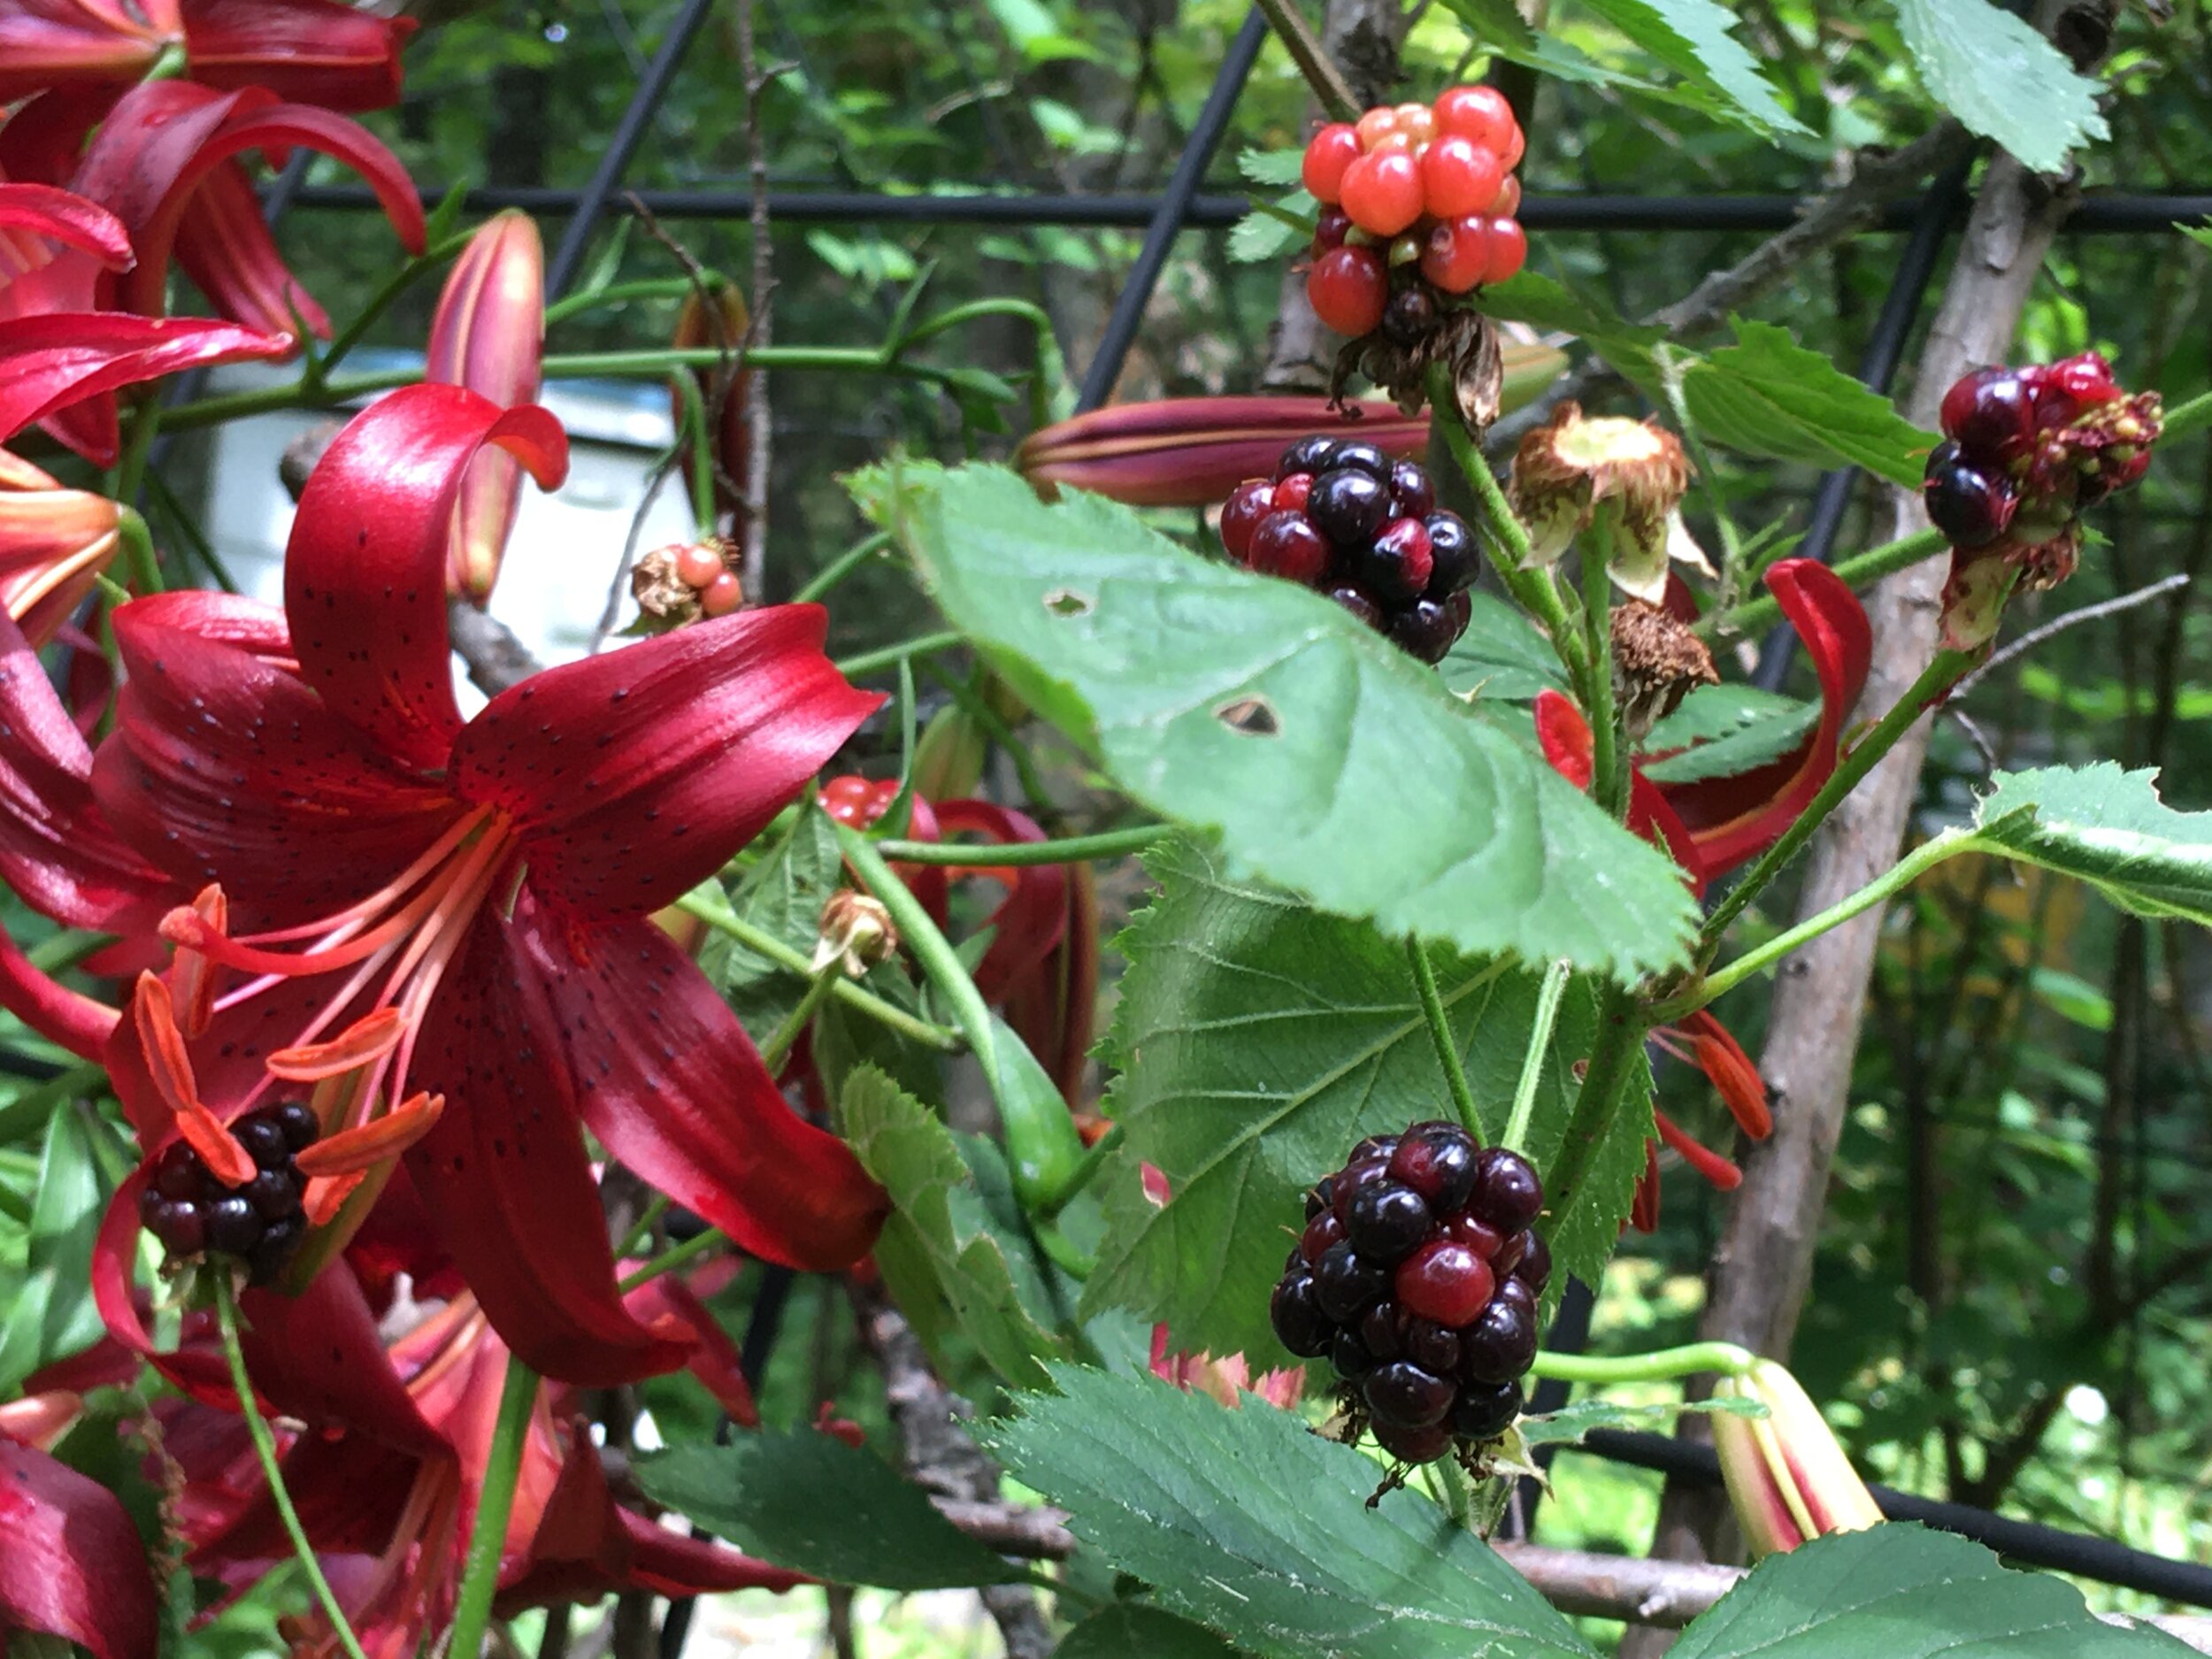
A sure sign of July, Oriental lilies and picking blackberries. (Photo by Charlotte Ekker Wiggins)

A sure sign of July, Oriental lilies and picking blackberries. (Photo by Charlotte Ekker Wiggins)

July Gardening Chores

Hot heat. Staying cool. Or at least trying. It’s what drives every gardener this month, whether it’s making sure the garden gets an inch of moisture a week or mulch to remain cool. I live in USDA zone 5b so among the other chores for July, besides enjoying picking blackberries:

1.     Deadhead flowering plants. Removing spent blooms will help keep plants healthy and may even give you a second and third wave of flowers.

2.     Remove weeds/unwanted plants. Unwanted plants take up nutrients, moisture and space away from desired plants. In this context, competition is not a good thing.

3.     Know your weeds. If you weren’t sure what it was before, whatever was growing should be showing its true identity by now. Many plants casually labeled weeds are forgotten herbs; others, like goldenrod, are blamed for what a true weed, ragweed does, which is aggravate allergies. And ragweed is a good plant, it only grows in very poor soil and adds nutrients to improve it before it dies off. Did I say know your weeds already??

4.     Give your garden one inch of water a week. When you water, use a watering wand or place the hose into the ground, no sprinkling. In hot summer weather, using sprinklers is a waste, the water just evaporates before it even hits the ground.

5.     Touch up mulch. Mulch will help keep garden beds cool. Make sure it’s aged mulch. If the mulch is steaming, it’s too young to use on flower beds.

6.     Keep your early morning dates with Japanese beetles. Catch them in soap-filled buckets to help reduce the population. Don’t try to catch them later in the day, they will just fly off.

7.     No more compost for woody plants, time for them to start hardening off and getting ready for winter.

8.     Water trees deeply, especially newly-planted trees and the oldest ones.

9.     Rambler roses done blooming? Prune.

10. How are your vines? My blackberries and clematis need a little help so I gauge their possible growth for the rest of this season and add support. Oh, I’m often wrong, the idea is just to give them extra support or it’s a mess trying to untangle them later. I usually wait until next year then and start with fresh growth.

11. I am starting to make new flower beds so I am hauling cardboard boxes home to get a good start. Once I line the beds with cardboard, I add mulch to start making the foundation of the bed. After the next rain, soil will be added, then another layer of mulch.

12. Start thinking about what needs to be done early next spring. I keep a list, check it twice.

13. The nearby composter will also get cleaned out. Not entirely, leave a good bucket-full as compost starter for the next batch.

14. Mowing grass? Don’t bag or rake clippings, they return Nitrogen to the soil.

15. Plant buckwheat in open areas. It’s not only a fast-growing, Nitrogen-introducing cover crop for garden spots, it also gives bees a source of food during August, when little else is in bloom.

16. Keep an eye out for garden visitors such as rabbits and deer. You may not stop them from munching but make sure the plants haven’t been pulled out of the ground to their roots. If so, replant. Squirrels have cleaned out my peach and pear trees so I am planting more trees.

Charlotte

Milk Carton Fence

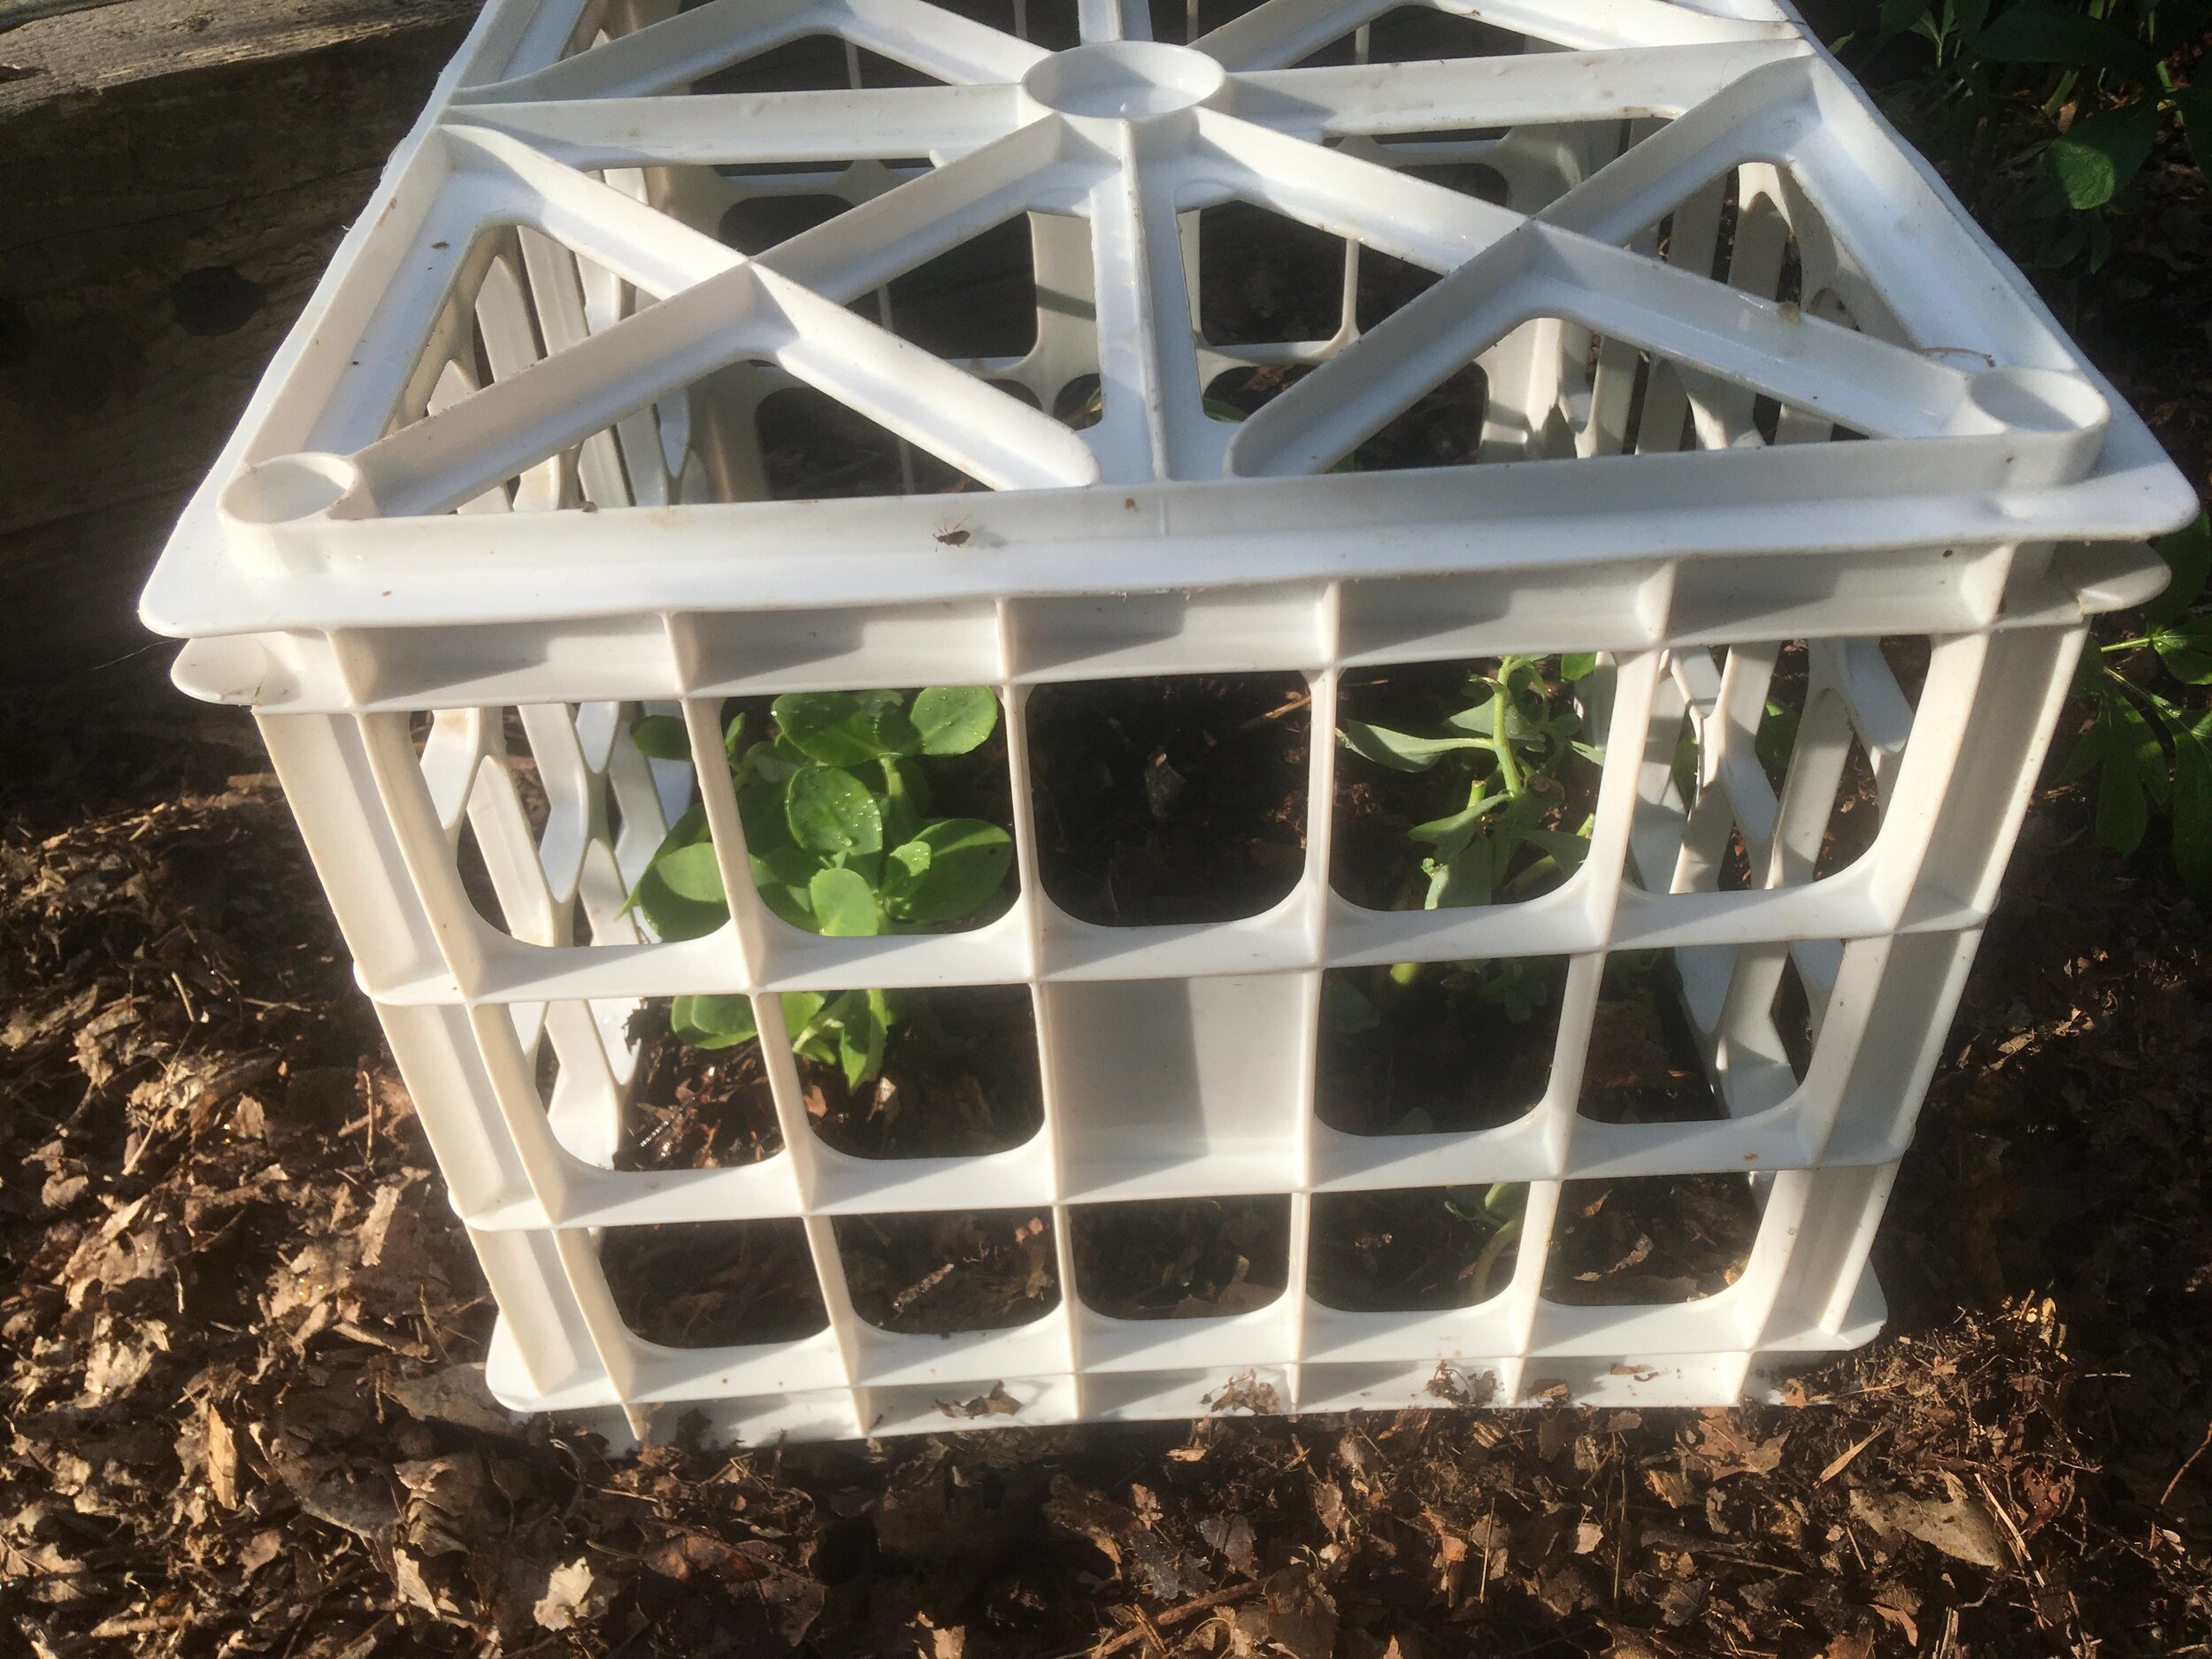
This upside down milk carton is protecting sedum from munching deer. (Photo by Charlotte Ekker Wiggins)

This upside down milk carton is protecting sedum from munching deer. (Photo by Charlotte Ekker Wiggins)

Milk Carton Fence

This time of year carefully tended gardens become fodder for wildlife looking for food. The newest marauders are black bears now making a comeback in Missouri. Short of bears, the usual culprits mowing garden areas to the ground are deer.

Most deer deterrent suggestions talk about building a very tall fence to keep the large garden visitors at bay. Several products on the market are also focused on chasing deer off. There is one more thing gardeners can do to protect their greenery, and that is to use plastic milk cartons to protect plants.

You can find plastic milk cartons for sale at thrift shops and online sales outlets. i found several a couple of years ago to use as storage containers in my garage.

When deer started to nibble on a newly-planted Autumn Sedum Joy, pulling them out of the ground every night, I decided to use the plastic milk carton to protect the plant.

Now a good two weeks later, the plants seem to be finally settling into their new growing spot without daily deer interruptions.

The cartons would also work well to protect other newly-planted additions.

If you can’t find milk cartons, you can make something similar out of folded chicken wire.

You are basically buying your plants enough time to get themselves in the ground.

Charlotte

Homemade Wood Arbor

This wood arbor combines smooth wood with garden remnants. (Photo by Charlotte Ekker Wiggins)

This wood arbor combines smooth wood with garden remnants. (Photo by Charlotte Ekker Wiggins)

Homemade Wood Arbor

February is a good month to start planning what to want to get done in this year’s garden once spring arrives. I once again have garden arbors on my list.

For inspiration, here is a homemade wood garden arbor made with a basic trellis along with other garden branches.

Pre-made lattice top finishes this easy to make garden arbor. (Photo by Charlotte Ekker Wiggins)
Pre-made lattice top finishes this easy to make garden arbor. (Photo by Charlotte Ekker Wiggins)

As our temperatures continue to get warmer, garden arbors will be an important addition to give growing vegetables and plants a break from the heat.

This arbor is at the doorway into a vegetable patch, a nice opportunity to grow flowers that will attract pollinators to the flowering plants.

To secure the branches to the side, use long nails or an air gun with long staples.

Once plants are growing up the sides, you won’t see the design. The additional tree branches are to give the growing plants a good hand hold.

Charlotte

Saving Zinnia Seeds

A seed head from a zinnia will produce hundreds of plants. (Photo by Charlotte Ekker Wiggins)

A seed head from a zinnia will produce hundreds of plants. (Photo by Charlotte Ekker Wiggins)

Saving Zinnia Seeds

I didn’t get my zinnias planted this year so I plan to make up for that next year. Zinnias, my all-time favorite annual flowers. Why?

They are very easy to grow.

Colorful.

Excellent for pollinators.

Wonderful as cut flowers.

And you can save their seeds for planting the following year.

I can’t remember the last time I bought zinnia seeds because friends have passed on theirs. These lovely colorful flowers have large seed heads, making it easy to dry them for planting over the next 2-3 years. I know, we all tend to think seeds last only a year. If stored in the correct dry conditions, most seeds will last for several years after collected and dried.

One question a friend asked was did she have to separate flower petals from the seeds. I say no as long as you get both nicely dry.

Dry the whole flower head; the flower petals will dry and mix in with seeds. (Photo by Charlotte Ekker Wiggins)

Dry the whole flower head; the flower petals will dry and mix in with seeds. (Photo by Charlotte Ekker Wiggins)

To dry the seeds, the key is to allow air to circulate through them so they can thoroughly dry.

This year, I am using a cardboard box that’s lined with brown paper. The brown paper helps to absorb and wick away any moisture. I toss the pile every time I walk by, ensuring that air gets through the pile.

I may even set up a second drying rack and distribute this stash of zinnias to ensure they are drying evenly.

A lined cardboard box I periodically toss is an excellent place to dry zinnias. (Photo by Charlotte Ekker Wiggins)

A lined cardboard box I periodically toss is an excellent place to dry zinnias. (Photo by Charlotte Ekker Wiggins)

And I already have the flower beds selected for planting these zinnia seeds next year.

This is a zinnia bouquet from last year, such a great combination of colors! (Photo by Charlotte Ekker Wiggins)

This is a zinnia bouquet from last year, such a great combination of colors! (Photo by Charlotte Ekker Wiggins)

You probably have seen zinnias growing in a variety of places, they are a garden favorite and usually covered in bees and butterflies. If I had my druthers on naming these flowers, I would have called them flutterbies.

I missed planting them this year because our midwest spring was too wet. Even if the same thing happens next year, these will be the first seeds that go out once the danger of frost is over, around Mother’s Day in May.

Looking forward to having zinnias back in my garden, and my house!

Charlotte

Water Dogwoods

One of the dogwood trees in my center island is starting to show red fruit. (Photo by Charlotte Ekker Wiggins)

One of the dogwood trees in my center island is starting to show red fruit. (Photo by Charlotte Ekker Wiggins)

Water Dogwoods

Record hot summer temperatures are back in mid-Missouri, even though it’s the beginning of September. We sometimes have hot weather in USDA Hardiness zone 5b/6a this time of year. In the past, though, it was a continuation of August hot temperatures. Now temperatures fluctuate from week to week, sometimes as much as 20 degrees from one week to the next.

As temperatures climb into the high 90s, it’s important to make sure one of my favorite tree roots are protected and hydrated. Flowering dogwoods are understory trees, which means they like shade and cooler growing conditions under the taller, towering trees such as oaks and hickory.

Although they are Missouri’s state tree, they are not easy to plant and grow. Even George O. White Nursery, which sells flowering dogwood seedlings, warns buyers that 40% may not make it.

Gardening on my limestone hillside is a test of patience. It can take trees many years to get their roots established, then a few more years before they find enough nutrition to power their growth.

This dogwood tree, which sits in my center driveway island, had been 2-feet high for more than a decade. I staked it to make sure I wasn’t stepping on it and even moved my garden path to protect it. In the last three years, it has had a nice growth spurt and is now is taller than I am.

Here is how this flowering dogwood looked this past spring:

Here is the same dogwood earlier this spring. (Photo by Charlotte Ekker Wiggins)

Here is the same dogwood earlier this spring. (Photo by Charlotte Ekker Wiggins)

To make sure the flowering dogwood trees can survive the fluctuating record hot temperatures, I am adding a bed of twigs over the base covered in dry leaves. Once watered so the twigs and leaves hold in the moisture, I cover the twigs and leaves with mulch from our local gardening center that has wintered over in my garden.

By waiting a year to use it, the mulch is safe to spread on the garden.

Adding leaves, twigs and mulch are critical to keep dogwoods happy. (Photo by Charlotte Ekker Wiggins)

Adding leaves, twigs and mulch are critical to keep dogwoods happy. (Photo by Charlotte Ekker Wiggins)

The mulch topping will then keep the moisture in and help keep the dogwood roots from feeling the fluctuating temperatures.

Leaves will also help keep the soil on the acid side, which dogwoods prefer.

Here’s the same dogwood tree nicely mulched in spring. (Photo by Charlotte Ekker Wiggins)

Here’s the same dogwood tree nicely mulched in spring. (Photo by Charlotte Ekker Wiggins)

Years ago, our rural community had a lovely residential neighborhood well known for its spring flowering dogwoods. The flowering dogwood trees were so thick, it almost looked like the trees were snow-covered.

I don’t visit the area much but someone who lives there recently told me most of the dogwoods have died. In their zeal to keep their lawns perfectly manicured, the residents removed the much-needed leaf and tree debris cover that kept the dogwoods hydrated.

They would have been better off leaving the twigs and leaves on the ground around the dogwoods. They would have kept the roots hydrated; it would have been less trouble to the homeowners and ensured that the flowering dogwoods would have survived.

Charlotte

Thwarting Squirrels

Think this will work to protect one of my last Bartlett pears? (Photo by Charlotte Ekker Wiggins)

Think this will work to protect one of my last Bartlett pears? (Photo by Charlotte Ekker Wiggins)

Thwarting Squirrels

It’s now mid-September and I can declare, with certainty, the squirrels have won.

Most people complaint about rabbits in their gardens but for me it’s these furry acrobats. I love to watch them in my garden but. At least four squirrels at a time have managed to denude my semi-dwarf Bartlett pear tree from hundreds of green pears over summer. I watched them right before dusk every day, running up the tree, pulling a pear off and sitting on my deconstructed deck to enjoy it.

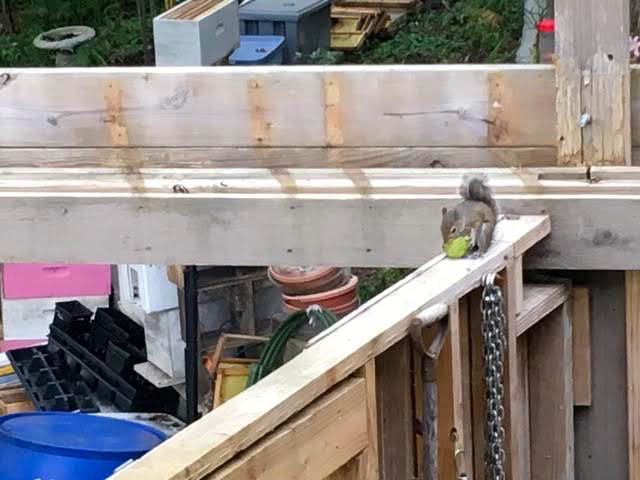
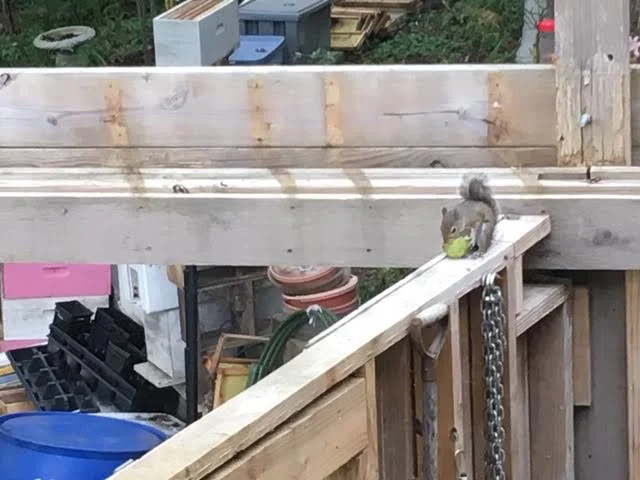
One of the squirrels eating one of my green Bartlett pears earlier this summer. (Photo by Charlotte Ekker Wiggins)

One of the squirrels eating one of my green Bartlett pears earlier this summer. (Photo by Charlotte Ekker Wiggins)

I would gather the leftovers the next day into a plant saucer, only to find them gone by mid-day.

I was silly enough to say to my handyman that there are more than enough pears to go around.

Apparently not.

The pear tree now only has two pears left. Can you spot one of them in this photo?

One of the two pears still left on my Bartlett pear tree. (Photo by Charlotte Ekker Wiggins)

One of the two pears still left on my Bartlett pear tree. (Photo by Charlotte Ekker Wiggins)

The other pear is on one of the lowest branches, hiding in the middle of construction materials.

My thought is the pear is not easy for squirrels to see so I hooked one of those fruit clam shells around it. The hope is that the clam shell will protect the one little pear until it can ripen enough for me to pick it.

I’m using a clam shell around one of the two pears hoping I will enjoy it. (Photo by Charlotte Ekker Wiggins)

I’m using a clam shell around one of the two pears hoping I will enjoy it. (Photo by Charlotte Ekker Wiggins)

Considering that this tree usually produces hundreds of pears every other year, I will start trimming some of the baby pears next spring and try to protect more for my use.

I have been told squirrels are very smart and will chew through fruit screens so I may need to come up with something hardier.

So far so good!

Charlotte

Dayflowers and Garlic Chives

Isn’t this a lovely flower border combination? (Photo by Charlotte Ekker Wiggins)

Isn’t this a lovely flower border combination? (Photo by Charlotte Ekker Wiggins)

Dayflowers and Garlic Chives

Just when I was beginning to think that I was getting my limestone hillside garden nicely pulled together, nature shows me up - again.

Not that I take credit for a lot of what is growing in my one acre garden. I learned a long time ago to let the plants find their happy spots and leave them there. I also embrace things that show up uninvited, and unannounced. Life is so much easier when one is not wrestling plants all of the time.

Several years ago, I decided I wanted some native pink phlox in one of the front flower beds. After painstakingly transplanting starts, I waited for the following year. The plants settled in the flower bed opposite of where I wanted them to grow. And there they stay.

So when I was invited to dig up plants at a neighbor’s home, I picked up these small tufts of greenery without knowing what they were. I used them as border plants since the greenery was a good size for marking flower beds.

When they bloomed, I identified them as garlic chives, a good bee plant although the scent may be better for keeping vampires away.

These garlic chives came from a neighbor’s house and finally bloomed this year. (Photo by Charlotte Ekker Wiggins)

These garlic chives came from a neighbor’s house and finally bloomed this year. (Photo by Charlotte Ekker Wiggins)

As I was taking my morning walk in my garden, I was startled to see the dayflowers growing in the middle of the garlic chives.

Originally from China, dayflowers have naturalized in Missouri and are now considered a wildflower. I like them because they are one of the few true blue flowers that grow in my garden. They also retain moisture in their stems, making them easy to grow without a lot of water through our Missouri heat.

Dayflowers are originally from China but have settled well in Missouri. (Photo by Charlotte Ekker Wiggins)

Dayflowers are originally from China but have settled well in Missouri. (Photo by Charlotte Ekker Wiggins)

When I pull them out of an area, I transplant them to another spot since they so nicely get along with other plants.

On this particular morning, I was struck by the blue dayflowers growing in the middle of the flower bed bordered with garlic chives. It was such a sweet combination.

Garlic chives and blue dayflowers together in one of my flower beds. (Photo by Charlotte Ekker Wiggins)

Garlic chives and blue dayflowers together in one of my flower beds. (Photo by Charlotte Ekker Wiggins)

Yet another reason why I encourage dayflowers to bloom throughout my garden.

Charlotte

Monkey Around with Liriope

Monkey grass (liriope muscari) blooming all over my Missouri garden. (Photo by Charlotte Ekker Wiggins)

Monkey grass (liriope muscari) blooming all over my Missouri garden. (Photo by Charlotte Ekker Wiggins)

Monkey Around with Liriope

When one gardens on the side of a limestone hill, one needs to have allies. By allies I mean hardy plants that grow in almost any condition, tolerating drought, shade, too much sun, too much rain and getting trampled over. A lot. If they bloom, even better. Not possible?

Think again!

Monkey grass, also known as liriope muscari, has been my best buddy for years. The fact that people often toss out mounds of the stuff endears them to me even more. This ground cover, also called Lilyturf, may grow heady and fast in other soil but in my rocky hillside garden they are much better behaved.

I use monkey grass on my limestone hillside to mark paths. (Photo by Charlotte Ekker Wiggins)

I use monkey grass on my limestone hillside to mark paths. (Photo by Charlotte Ekker Wiggins)

So in this photo, the liriope are the mounds of green leaves bordering the path. Monkey grass is also referred to as border grass and for good reason. The little mounds of 10-12 inch green leaves make a great hearty border that can easily put up with getting stepped on. This is where I started using monkey grass.

As the little plants multiplied, I used them to line my uneven flower beds. This way when the tree trunks I use to mark the borders decompose, the monkey grass will still mark flower bed edges.

One of my new flower beds with old railroad ties as borders. As they decompose, monkey grass will line the flower bed. (Photo by Charlotte Ekker Wiggins)

One of my new flower beds with old railroad ties as borders. As they decompose, monkey grass will line the flower bed. (Photo by Charlotte Ekker Wiggins)

Monkey Grass reminds of something Jim Henson would have created for the Muppet Show. The green tuffs look like crazy hair and the last thing you expect to see in hot August are spikes of lavender flowers.

I have these hardy plants growing in both sun and shade. Here they are lining a narrow shady border at the side of my garage.

Liriope lines this shallow border where columbine and impatiens grow behind it. (Photo by Charlotte Ekker Wiggins)

Liriope lines this shallow border where columbine and impatiens grow behind it. (Photo by Charlotte Ekker Wiggins)

Now a word on hardiness. Once I get these in the ground, I have to make rounds every day because deer like to nibble on them.

This little collection of Monkey Grass was getting ripped out of the ground for weeks until I smothered them with wood chips to help them settle in.

This spot was too narrow to plant much but monkey grass fills in nicely. (Photo by Charlotte Ekker Wiggins)

This spot was too narrow to plant much but monkey grass fills in nicely. (Photo by Charlotte Ekker Wiggins)

All of these perennial plants have solid green leaves with tiny long, purple flowers.

Earlier this year, I added a new liriope, variegated monkey grass. I like the pop of color lining the flower bed.

In addition to being hardy, I have found some of my honey bees visiting the tiny purple flowers.

They do die back in winter, sometimes leaving a mound of dry leaves by spring. Sometimes I cut them back but most often I leave them to regrow new leaves.

Variegated liriope muscari has white lined green leaves and darker purple flowers. (Photo by Charlotte Ekker Wiggins)

Variegated liriope muscari has white lined green leaves and darker purple flowers. (Photo by Charlotte Ekker Wiggins)

So if you are looking for a hardy, easy to establish border plant, this is it.

Charlotte

Fragrant Hostas

August lilies are actually a fragrant hosta with lovely 6-inch long white flowers. (Photo by Charlotte Ekker Wiggins)

August lilies are actually a fragrant hosta with lovely 6-inch long white flowers. (Photo by Charlotte Ekker Wiggins)

Fragrant Hostas

Ladybugs are to aphids as hostas are to shade gardens. Even though part of my Missouri limestone hillside garden is part to full shade, I haven’t succumbed to the lure of hostas. I do have a few.

The few that I do have are tied to my family. I have some at the front of my house that came from St. Paul, Minnesota, where I helped one brother landscape his first home. Another flower bed in the north side has New York hostas I hand-carried back from Virginia, where my other brother lives. These hostas are my sister-in-laws favorites. And now I have found a hosta I love, a fragrant variety with lovely white flowers.

These were a gift from a neighbor who has a shady garden area full of these hostas. At first I couldn’t believe the flowers were from a hosta. The white flowers did not look like the purple flowers I am used to seeing on hostas.

Fragrant hostas are certainly not a new thing on the gardening scene but some of my gardening friends were intrigued to hear I had a hosta with a scent. Many of our grandparents actually grew what has become known as the old fashioned "August lily". Indeed this large hosta, Hosta plantaginea, was first imported to England in 1790, and to the United States afterwards.

Love the center of the flower stem of August lilies. (Photo by Charlotte Ekker Wiggins)

Love the center of the flower stem of August lilies. (Photo by Charlotte Ekker Wiggins)

Hosta plantaginea is certainly the "white sheep" of the hosta family for a variety of reasons. First, it is one of the few hosta species that originated in China, as opposed to Korea and Japan. Hosta plantaginea is also the southern most naturally occurring hosta species, making it more heat loving than other members of the genus.

The flowering habit of Hosta plantaginea puts it in a class by itself. First of all the flowers are enormous by hosta standards, 6+ inches long and pure white, as compared to 1-2" long and purple for most hostas. Virtually every hosta except Hosta plantaginea has flowers that open around 7 am in the morning. Hosta plantaginea, on the other hand, opens at 4 pm in the afternoon. Educated scientists have still not figured out why this bizarre characteristic was selected for in the wild. The strong honeysuckle like fragrance of the old August Lily is absent in all other naturally occurring hosta species.

Hosta plantaginea, as the name August Lily suggests, bloom in late summer. This is in stark contrast to the majority of the more traditional hostas that flower from late April through June.

Another little noticed attribute of Hosta plantaginea is it's ability to reflush new foliage during the summer months. While most hosta species send up all of their foliage in the spring months, H. plantaginea is one of the only species that will continue to produce new leaves all summer long. This is a particular advantage when the original spring foliage becomes damaged or diseased, as can often occur in my garden.

If there are any drawbacks to Hosta plantaginea, it would be its desire to emerge much too early in the spring. Due to its heritage in the southern part of China where spring arrived early, Hosta plantaginea tries to emerge from its winter rest quite early, often in March. In most Missouri gardens, this means that a late spring frost could take its toll on the clump, often burning it back the ground. In more northerly climates, Hosta plantaginea has also proved to be a bit less hardy than the more northerly naturally occurring species.

Because Hosta plantaginea has a dramatically different bloom time, the number of hybrids that display the fragrant trait were slow to occur. Currently however, there are 56 registered hosta cultivars with fragrant flowers. Of these, only 27 are available commercially, as the remainder turned out to be poor garden specimens.

The scent of two cut flower stems have kept my kitchen and bathrooms company for more than a week. The fragrance is similar to jasmine.

To enjoy the fragrance in my garden, I planted my gift hostas behind a garden bench so I can sit close by and enjoy their scent. The spot also provides the plants with shade and some protection from cold winter winds.

These gift August lilies have been planted behind a bench so I can enjoy the fragrance while seated. (Photo by Charlotte Ekker Wiggins)

These gift August lilies have been planted behind a bench so I can enjoy the fragrance while seated. (Photo by Charlotte Ekker Wiggins)

So thankful my neighbor was willing to share these with me!

Charlotte

Order Missouri Native Plants

George O. White Nursery ordering form available online. (Photo by Charlotte Ekker Wiggins)

George O. White Nursery ordering form available online. (Photo by Charlotte Ekker Wiggins)

Order Missouri Native Plants

September 1, 2019 was the opening of the George O. White Nursery 2020 ordering window through April 15, 2020 and I have my order, and check, in the mail. Yes, that may just be a new record, even for me!

You don’t have to be so quick, I just have my heart set on getting a nice supply of native Beauty Berry bushes. I was given one earlier this year and I was astounded at how beautiful it is, photos don’t do it justice. The berries are also excellent wildlife food, which may keep my wildlife menagerie happy.

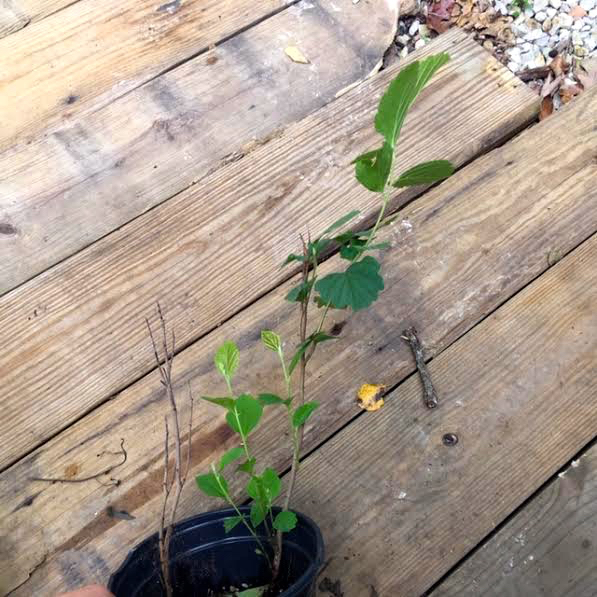
I ordered some seedlings last year as well; witch hazel, button bush, elderberries and rose mallow, all excellent pollinator plants. I wanted some serviceberries, a lovely spring tree but those were sold out. They are already sold out this year as well.

Once the seedlings arrived, I potted them in new soil and kept them moist for most of the growing season. The seedlings are now big enough to fend for themselves in the garden.

Some of the plant starts from earlier this spring, ready for transplanting. (Photo by Charlotte Ekker Wiggins)

Some of the plant starts from earlier this spring, ready for transplanting. (Photo by Charlotte Ekker Wiggins)

You can also plant the seedlings directly into soil once you get them next spring. I prefer to give them a growing season in pots so that I can more easily find them later.Placing them in pots also helps their roots get established so that the transplanting is more successful.

Here is one example of witch hazel seedlings. On the left the original seedling, on the right the witch hazel established and ready to be transplanted.

On left, one of the spring starts. On right, witch hazel with established roots. (Photo by Charlotte Ekker Wiggins)

On left, one of the spring starts. On right, witch hazel with established roots. (Photo by Charlotte Ekker Wiggins)

Not all seedlings make it but I have a good 90% success with the ones I have received. They are shipped bare rooted so it’s good to be prepared for when they are expected to arrive.

In the case of these seedlings, I had the pots filled with new potting soil waiting for the seedlings. Here is a rose mallow start, on the left:

This native rose mallow started out as the tiny stick on the left. (Photo by Charlotte Ekker Wiggins)

This native rose mallow started out as the tiny stick on the left. (Photo by Charlotte Ekker Wiggins)

The native rose mallow start sprung off that seedling and is now almost 5 feet tall, more than ready to be transplanted into the garden.

Rose mallow is a cousin to the hibiscus. The Missouri native ones are white with a burgundy center. What I like about rose mallow, also a cousin to what people call Rose of Sharon, is that it blooms from July to frost, providing nectar and pollen to my bees during the August dearth.

That same native rose mallow is now almost 5 feet tall, ready to move into the garden. (Photo by Charlotte Ekker Wiggins)

That same native rose mallow is now almost 5 feet tall, ready to move into the garden. (Photo by Charlotte Ekker Wiggins)

Once you place your order online, you will get an email confirming your order. You have 30 days from when the order was placed to pay. After the 30 days if you don’t pay the seedlings are made available to the next person who placed an order.

Last year, I ordered all items marked “sold out'“ online but ended up getting them all when previous orders were not finalized with payment.

When you order, you can designate what week of the month you want your seedlings shipped. I usually select mid-April because the weather tends to be more cooperative then.

If you live in Missouri, shipping to your Missouri address is free.

This is an excellent place to get yourselves native tree and shrub stock. Ten seedlings are $8.95; 25 seedlings are $10.95.

If you wait until December 1 or later, you can call 800-392-3111 for a recorded message concerning possible shipping delays and the kinds of trees still available.

This is my latest addition to my garden, Missouri’s native Beauty Berry, which provides wildlife winter food. (Photo by Charlotte Ekker Wiggins)

This is my latest addition to my garden, Missouri’s native Beauty Berry, which provides wildlife winter food. (Photo by Charlotte Ekker Wiggins)

What trees and shrubs do you plan to order?

Charlotte

Mystery Solved

The flower bed island at the head of my driveway where the mystery plant was growing. (Photo by Charlotte Ekker Wiggins)

The flower bed island at the head of my driveway where the mystery plant was growing. (Photo by Charlotte Ekker Wiggins)

Mystery Solved

For a number of years, the small flower bed at the top of my driveway has had a mystery plant growing in it.

At first I just cut it down to a couple of feet off the ground so that I could see my street sign number. The plants didn’t grow very tall, and I didn’t see them growing in other garden spots.

As I added mulch and the flower bed developed better soil, the mystery plants started to get taller.

This year, I decided to let everything grow to its full potential so that I could identify what they were, including the mystery plant in the front island.

After reaching a good 7-feet tall, I started to see flower buds branching off the top. Okay, so I had to carefully bend the plant down to see the buds but they were definitely there.

Here is the plant almost 6 feet tall with flower buds. (Photo by Charlotte Ekker Wiggins)

Here is the plant almost 6 feet tall with flower buds. (Photo by Charlotte Ekker Wiggins)

Sawttooth Sunflower

As soon as I saw the yellow flowers, I was able to identify the mystery plant: sawtooth sunflower Helianthus grosseserratus, a member of the daisy family, one of the six large plant families that provide bees and other pollinators like butterflies food throughout the US Midwest growing season.

The Latin name grosseserratus gives a hint to this plant’s description of being a giant herb. The ones on the lower end of this flower bed are growing taller than the ones on the shorter, or left side.

Because they can grow up to 16-feet tall, they do get knocked over by rain storms.

The tall plant stalks are now all blooming. (Photo by Charlotte Ekker Wiggins)

The tall plant stalks are now all blooming. (Photo by Charlotte Ekker Wiggins)

According to Missouri Department of Conservation, sawtooth sunflowers sometimes grow in dense colonies, other times as single specimens.

Lower stems are often hairless, reddish, sometimes with a white waxy coating. Flower heads are all yellow to 3½ inches across, with 10–25 fairly wide ray florets. Blooms July through October, providing pollinators with food during Missouri’s hot August dearth.

The leaves are about 10 inches long and 2½ inches wide, coarsely toothed.

Interestingly enough, sunflowers readily hybridize with each other, which can make identification difficult. Not counting hybrids, there are 16 species of Helianthus recorded for Missouri. This species is perhaps best identified by its leaves, which are mostly alternate, very narrow, folded lengthwise along the mid vein, with flat (uncurled) leaf margins, and yellow disk florets.

I have seen similar-looking yellow flowers but the leaves were different.

Great Pollinator Plant

The Illinois wildflowers website notes “the most common visitors to the flowers are bees, especially long-tongued species. Among these are honeybees, bumblebees, Cuckoo bees (Epeolus spp., Triepeolus spp.), digger bees (Melissodes spp.), and leaf-cutting bees (Megachile spp.).

Other insect visitors include Syrphid flies, bee flies, butterflies, moths, and beetles. Both nectar and pollen are available as floral rewards. Other insects feed on the foliage, plant juices, pith of stems, developing seeds, etc., of sunflowers. These insect feeders include caterpillars of the butterflies Chlosyne nycteis (Silvery Checkerspot) and Chlosyne gorgone (Gorgone Checkerspot), stem-boring caterpillars of Papaipema necopina (Sunflower Borer Moth) and Papaipema rigida (Rigid Sunflower Borer Moth), seed-eating caterpillars of the moths Homoeosoma electella (Sunflower Moth) and Stibadium spumosum (Frothy Moth), foliage-eating caterpillars of Grammia arge (Arge Tiger Moth) and Phragmatobia fuliginosa (Ruby Tiger Moth), and other moths.”

Now that I know what they are, they get to stay. I will move the street sign. After all, who wouldn’t want to claim to be growing a giant herb in their garden that provides for so many pollinators!

Charlotte

September Garden Chores

Keep an eye out for fall plant sales, there’s still growing time before the ground freezes. (Photo by Charlotte Ekker Wiggins)

Keep an eye out for fall plant sales, there’s still growing time before the ground freezes. (Photo by Charlotte Ekker Wiggins)

September Garden Chores

Where has this year gone? Just when I think I am making progress we have much appreciated rain but too much all at once. Have you ever tried to dig holes on a slippery, muddy limestone hillside? I don’t recommend it!

On the other hand, my potted plants are enjoying a much-needed break from record hot temperatures so I will wait until I don’t have to tie a rope around my waist to get things into the ground.

I live in USDA Hardiness Zone 5b/6a and here are some of the other garden chores I tackle in September:

Start cleaning up flowerbeds and vegetable gardens by removing spent plants and saving seeds.  Leave the ragweed to treat the soil, they will die once their work is done.

If you have been fertilizing, it is time to stop. Plants need to start slowing down and get out of the growth they usually pursue through spring and summer, even without the boost of fertilizers. Add a last dollop of compost mixed in the soil and that should be it for this season.

Do keep watering trees and shrubs from now through hard frost. Our first hard frost is usually mid to end of October.

 If you plan to start a new garden next year, this is the time to cover it with cardboard to kill off any current growth.

Good time to start drying favorite herbs for winter use. (Photo by Charlotte Ekker Wiggins)

Good time to start drying favorite herbs for winter use. (Photo by Charlotte Ekker Wiggins)

Bring some of your herbs inside including parsley, chives, rosemary , catnip and stevia. Basil can also be brought inside; sow seeds now to get new plants started for later use. Dry the herbs and store in airtight container.

Good time to move peonies. I have several I buried too deep so when replanting, remember to not bury any more than an inch or two beneath the soil surface.

Daylilies and iris can also be dug up and divided.

Make notes in your garden diary about to dos for next year. Note what plants worked well this year, what seeds you had meant to plant but didn’t get to – whatever you want to tackle next year.

Have favorite annuals? I do, too, and I trim them now before bringing them inside. You can also take root cuttings and start young plants if you have good indoor light. Geraniums, coleus, wax begonias, impatiens all will winter over inside if you keep them pinched and bushy. Geraniums will winter over stored in brown bags without soil.

Order spring bulbs. Daffodils are toxic to deer so they won’t get munched on. Tulips are edible so buy a few for color, then plant them behind a solid wall with wire if you don’t want wildlife snacking on them in the meantime.

If you have left over Amaryllis bulbs, put them in a dry, dark place without water and let them rest for a couple of months. If you want to time when they bloom, pot and water them 6 weeks prior to when you want them in bloom.

Don’t bag and rake clippings, leave them on your lawn to return Nitrogen to the soil.

This is also a good time to stock up on mulch. Buy it in bulk or load up at your local recycling center before they close down for the season.

Start trimming plants you plan to bring inside to overwinter.

Charlotte

The Race is On!

One of my resident squirrels snacking on my very green Bartlett pears. (Photo by Charlotte Ekker Wiggins)

One of my resident squirrels snacking on my very green Bartlett pears. (Photo by Charlotte Ekker Wiggins)

The Race is On!

Mid to late summer the race is on, a contest between wildlife and a gardener on who will get to the ripe produce first. In my Missouri hillside garden, the race is currently between a family of grey squirrels and I, who likes ripe Bartlett pears.

I have a semi dwarf Bartlett pear tree that started to fruit after growing for 30 years. I planted it next to my deck with the thought that one day I could sit on the deck and pick a ripe pear, one of my all-time favorite fruits. It’s my version of a tree of life.

My deck is currently torn up and getting rebuilt but that hasn’t stopped the squirrels, they have developed a taste for green pears and somewhat of a similar plan.

Gray squirrel selecting a green pear to pick. (Photo by Charlotte Ekker Wiggins)

Gray squirrel selecting a green pear to pick. (Photo by Charlotte Ekker Wiggins)

Like clockwork, they show up in my garden late afternoon and start shopping for their fruit snack. I know they are around because I see the tree branches shaking.

Once a pear is selected and removed, they settle in on my deck. Well, what is currently left of the old deck.

One of my resident squirrels enjoying an afternoon green pear snack. (Photo by Charlotte Ekker Wiggins)

One of my resident squirrels enjoying an afternoon green pear snack. (Photo by Charlotte Ekker Wiggins)

If I try to discourage them from climbing the pear tree, they scamper off for a few minutes only to return to their shopping.

Once they have a pear, they settle back on the deck to enjoy it.

Another grey squirrel enjoying a Bartlett pear on my torn up deck. (Photo by Charlotte Ekker Wiggins)

Another grey squirrel enjoying a Bartlett pear on my torn up deck. (Photo by Charlotte Ekker Wiggins)

So far there seems to be enough pears to go around but my handyman is not so sure. His comment sounded like one of those math questions - if four squirrels consume a pear a day and it takes the Bartlett pear three 4 weeks to ripen, how many squirrels will help plant more trees.

Next year I may hedge my bets and cover part of the tree with some kind of netting. In the meantime, I am still counting on sharing these pears with these enterprising squirrels.

Charlotte

Growing Straight Redbuds

To strengthen Eastern Redbud trunks, try braiding several together. (Photo by Charlotte Ekker Wiggins)

To strengthen Eastern Redbud trunks, try braiding several together. (Photo by Charlotte Ekker Wiggins)

Growing Straight Redbuds

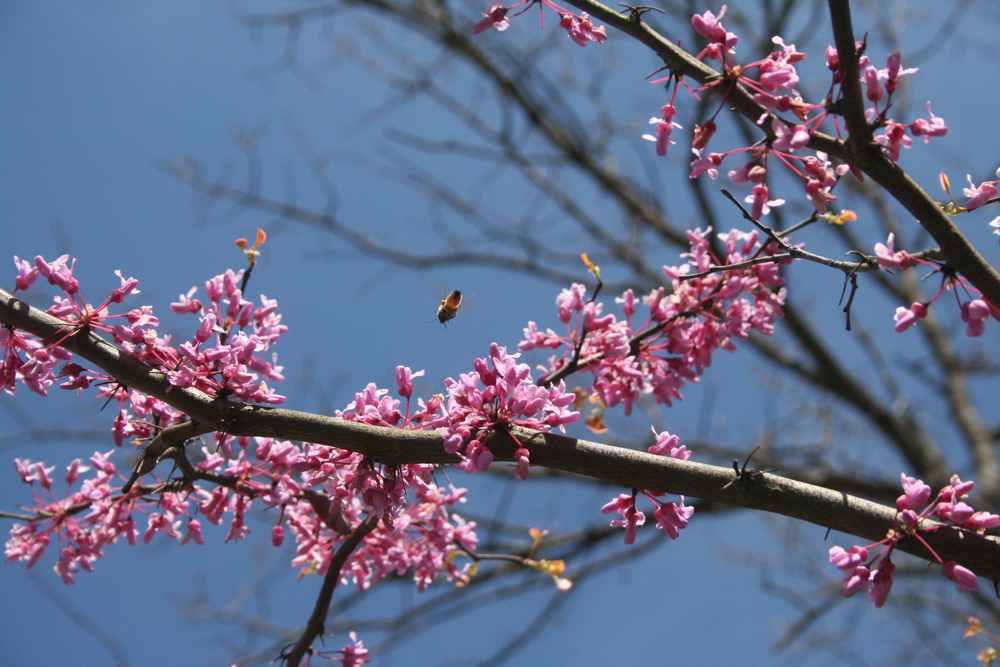
Missouri’s native Eastern Redbuds are a sight during spring. The greyish trunks get covered in small pink edible blossoms, a favorite nectar source for bees.

One of my honey bees visits a blooming Eastern Redbud tree in my spring garden. (Photo by Charlotte Ekker Wiggins)

One of my honey bees visits a blooming Eastern Redbud tree in my spring garden. (Photo by Charlotte Ekker Wiggins)

Growing Eastern Redbuds straight, however, is another matter.

The trees in nature are an understory tree, which means they grow in that area between the ground and the taller trees such as oaks and hickories. They are more on the same level as Missouri’s state tree, the dogwoods, also a spring-blooming tree that often follows in the Eastern Redbud footsteps. I like to think of these trees as the spring Trees of Life, a popular handmade patchwork quilt design.

Living on a Missouri limestone hillside, I tend to encourage as many Eastern Redbuds to grow since they already are established. To help them along, I do several things to encourage their straight trunk growth, starting with the very simple process of tying them to a nearby tree.

I make sure the tree I’m attaching will not compromise its growth by being tied to a nearby Eastern Redbud start.

Doubling and tripling twine ensures the Redbud will grow straight. (Photo by Charlotte Ekker Wiggins)

Doubling and tripling twine ensures the Redbud will grow straight. (Photo by Charlotte Ekker Wiggins)

Sometimes I can use two Eastern Redbud trees to anchor each other in their growth.

Those tend to be similar in size, or a trunk that has double trunk growth to stabilize one Eastern Redbud tree with the other one.

I place the string where I can see it as well as out of the way of my garden paths.

Here two Eastern Redbuds are being encouraged to grow straight together. (Photo by Charlotte Ekker Wiggins)

Here two Eastern Redbuds are being encouraged to grow straight together. (Photo by Charlotte Ekker Wiggins)

Periodically there is an Eastern Redbud without anything nearby where I can tie it. Then my handy, reusable pieces of rebar come in handy.

I can place the rebar at an angle to anchor the trunk and tie the Eastern Redbud to it.

Sometimes a piece of rebar helps to hold a Redbud tree trunk straight. (Photo by Charlotte Ekker Wiggins)

Sometimes a piece of rebar helps to hold a Redbud tree trunk straight. (Photo by Charlotte Ekker Wiggins)

When I have several young Eastern Redbud trees growing together, I can pretend to be a spider and weave a web of string between the young trees and a nearby oak. Keep the strings where you can easily see them in case you need to walk through the area.

In terms of when to do this, you can tie up trees almost any time of the year. I would be a little cautious doing it in winter when the tree trunk sap is not running and the trunk may be a little more brittle.

Several Eastern Redbuds are tied to this larger tree trunk to anchor them. (Photo by Charlotte Ekker Wiggins)

Several Eastern Redbuds are tied to this larger tree trunk to anchor them. (Photo by Charlotte Ekker Wiggins)

It may take a couple of years to give the Eastern Redbuds their straight trunks before I can untie them. The effort is well worth it for the beauty the trees offer my spring garden.

Charlotte

Cardboard Mulch

Cardboard makes a great flower bed mulch to kill off unwanted growth. (Photo by Charlotte Ekker Wiggins)

Cardboard makes a great flower bed mulch to kill off unwanted growth. (Photo by Charlotte Ekker Wiggins)

Cardboard Mulch

I’m taking a break from uncovering my latest new flower bed and creating a new one, courtesy of my stash of cardboard. If you garden on a hillside like I do, trying to even establish a new flower bed is a challenge. If you have an area that has established growth, it’s even more of a trial. That’s where my cardboard mulch kicks in.

Instead of using harmful chemicals to get rid of the unwanted growth, I use cardboard. The cardboard keeps the soil underneath moist as it kills off unwanted growth.

This is a cardboard pile that’s been sitting for about a month. (Photo by Charlotte Ekker Wiggins)

This is a cardboard pile that’s been sitting for about a month. (Photo by Charlotte Ekker Wiggins)

Once I establish my new flower bed site and make sure there is nothing growing there I want to keep, I haul my stash of repurposed cardboard to the new flower bed site, scattering the first layer over the new flower bed foot print. As I get more cardboard, I add it to the area, adding rocks to hold it down.

If I’m extra industrious, I will pour shovel fulls of wood mulch on top. If you have grass clippings, you could dump those on the cardboard.

By the time the new flower bed is ready for planting, the dry grass clippings could be incorporated to improve the soil. Make sure the grass is dry; still green grass is very hot and will burn.

Then it’s a matter of ignoring the looks of a cardboard-covered garden area for a couple of months as the cardboard kills off whatever is growing under it.

I do periodically peek underneath. I often find worms moving through the soil, a good indication that the cardboard is keeping the soil inhabitants happy. Birds and butterflies are not the only garden tenants we should cater to, the ones in the soil are what give us the flowers.

When I don’t see anything green anymore, I pile up the cardboard and move it to a new future planting area.

Underneath the cardboard, moist soil ready for planting. (Photo by Charlotte Ekker Wiggins)

Underneath the cardboard, moist soil ready for planting. (Photo by Charlotte Ekker Wiggins)

The cardboard lasts for about 3 new flower beds depending on the time of year. Early spring and late fall, when we have rain, the cardboard deteriorates faster.

In between, the cardboard holds out longer, even through summer rains. I suspect the heat dries out the cardboard faster.

I have also used cardboard as mulch, then dug a hole through it and planted it. It might be easier to plant something and then surround it with cardboard covered with mulch but I sometimes forget where I have used cardboard to kill off - usually - the vinca ground cover. Vinca is not a native plant but it has been invaluable to hold in my soil on this hillside until I develop the new flower beds.

If you have an area that is being taken over by unwanted plants, such as an iris bed or peonies, try small pieces of cardboard around them covered in mulch. After a few weeks you will find it easier to remove the unwanted plants and you will have both cardboard and mulch handy to keep the area clear of further unwanted guests.

And it will keep your soil moist, which is a huge plus, especially during Missouri’s infamous August dearth.

Charlotte


Picking Homegrown Blackberries

The first ripe blackberries on my cattle panel arbor. (Photo by Charlotte Ekker Wiggins)

The first ripe blackberries on my cattle panel arbor. (Photo by Charlotte Ekker Wiggins)

Picking Homegrown Blackberries

I have been thinking about doing this for years.

The garden dream was to set up arbors of some sort where I could grow blackberries and pick the fruit as I walked under the arbors.

Two years ago, I put up two cattle panels to guide visitors into my hillside apiary. I covered some of the panels with cedar boughs to cover some of the metal. At the same time, I planted thornless Navajo blackberries on either side so the blackberry canes could grow over the cattle panels.

The cedar boughs add extra support for the vines as they make their way over the cattle panels.

Two cattle panels covered in cedar boughs have blackberries nestled along the sides. (Photo by Charlotte Ekker Wiggins)

Two cattle panels covered in cedar boughs have blackberries nestled along the sides. (Photo by Charlotte Ekker Wiggins)

It’s hard to estimate how long plants will provide fruit on my Missouri hillside garden. My semi-dwarf pear tree took almost 30 years before it grew my first Bartlett pears. A limestone hill is difficult for root systems to get established.

At the end of July, I started to see the beginning of blackberries. They tend to flower in May, when the nectar flow starts where I live. Once the flowers finish blooming, the plant turns them into fruit, which contains the seeds.

As I started to spot ripe blackberries, my dream came through. I would walk through the archway and pick a handful of berries.

Two more blackberries ready for picking as I walk through! (Photo by Charlotte Ekker Wiggins)

Two more blackberries ready for picking as I walk through! (Photo by Charlotte Ekker Wiggins)

There truly is nothing better than picking blackberries and eating them straight off the plants!

I don’t use chemicals or pesticides in my garden so I can freely pick the fruit without being concerned about their exposure.

These are also thornless blackberries, so reaching through the cattle panels to pick the fruit is quite easy.

I will be adding compost mixed in mulch this fall, getting the blackberry plants ready for more blooming, and fruiting, next year.

Love it when a plan comes together!

Charlotte

Removing Daylily Stems

Daylily stems after flowering and still green. (Photo by Charlotte Ekker Wiggins)

Daylily stems after flowering and still green. (Photo by Charlotte Ekker Wiggins)

Removing Daylily Stalks

The daylily blooming season is wrapping up here in Missouri USDA Hardiness zone 5b/6a. The season started with the traditional single orange daylilies blooming. These edible plants were originally brought over from Europe by our settlers in the 1600s and now are considered one of Missouri’s native wildflowers, featured on this Native Wildflowers handmade quilt. The daylily season starts mid-May. They are now nude tall green stems, some with seed heads.

There is a tendency to want to grab clippers and go cut them down but I suggest waiting. In a couple more weeks, the stalks will dry on their own, making it very easy to gently pull them out of the leaves without having to bend over and cut them at the bottom.

Every day I see more and more of these dried stems among my flower beds.

When daylily stalks dry out, they can easily be removed. (Photo by Charlotte Ekker Wiggins)

When daylily stalks dry out, they can easily be removed. (Photo by Charlotte Ekker Wiggins)

The dried out daylily stalks are now hollow, making them lightweight and easy to remove.

If you compost them, cut them up into smaller pieces so they can mix into the other green items. They will count as a “brown” in the green/brown mixture in your composter.

I have also considered whether the dried stalks can be used to weave something. A basket comes to mind but a floor mat would probably be a better project to try.

Let me just add that to my “to do in winter when I have nothing else to do” list.

Charlotte


August Gardening Chores

Missouri’s native pink phlox blooms now until frost. (Photo by Charlotte Ekker Wiggins)

Missouri’s native pink phlox blooms now until frost. (Photo by Charlotte Ekker Wiggins)

August Gardening Chores

With unexpectedly cool days heading into August this year, I hope to get more done than I usually do but I still won’t do much planting.  The soil in USDA zone 5b/6a tends to be on the dry side this time of year so unless it is some form of emergency I will pot plants and keep them hydrated until fall. Other gardening chores for August include:

1.     Water plants at root level, which means no sprinklers. Use underground wands and move the wands to saturate soil. Gardens need an inch of rain a week. Don’t forget established shrubs and older trees, they also need moisture delivered to their roots to make sure they make it through the record hot August temperatures.

2.     Water potted plants daily; if temperatures are once again hitting record levels, maybe twice a day and move them into shade.

Add compost to keep the potted soil healthy.

Mulch flower beds, especially after a good rain.

3.     If you didn’t get to planting your garden this year, at least toss a few buckwheat seeds to help improve your soil. Buckwheat will sprout in about 6 weeks and will be welcome fall food for pollinators as well.

4.     If you haven’t been using your fresh herbs, this is a good time to start. Most may have flowered and lost some of their potency but they still can be added to salads and other summer dishes.

Rosemary and chamomile can be harvested and used in bloom. I chop up and freeze some of mine in ice cubes for winter use in soups.

5.     My tomatoes set late this year but they are finally ripening. Try to keep them evenly watered to minimize cracking.

6.     Have peonies you want to divide? Wait until after a good rain but you can start dividing them from now through September. Bury the root “eyes” no more than an inch or two beneath the soil; if you bury them deeper the plants won’t flower. If you have to move peonies without rain, use a hose to soak the soil around the plant before you try to dig it up.

7.     You can also dig up daylilies and iris now to divide and re-plant. Again I would wait until after a good rain. If you still need to move them, at least water the area with a hose first so you don’t rip roots when you try to dig them up.

8.     If you have Missouri’s native pink phlox growing in inconvenient places, wait after a rain and dig them up with soil around their shallow roots. Move to their new location and make sure their roots are hydrated for the rest of the month. They tend to settle in quickly.

9. Start saving seeds for next year. Marigolds, zinnias and sunflowers have a lot of seeds than can easily be stored.

10.     I am also developing new flower beds for next year by removing starts, adding cardboard and mulching.

11. Hot temperatures can prompt trees to drop leaves early. Leave leaves on the ground to return nitrogen to the soil. If you are worried about them sitting on grass, set your mower to a higher setting and cut them up when you mow. Leaves are a wonderful source of soil amendments. They also work well as mulch, helping to retain water when leaves are underground or under mulch.

Charlotte

Assassin Bugs

Assassin bug makes a meal out of a Japanese beetle in my garden. (Photo by Charlotte Ekker Wiggins)

Assassin bug makes a meal out of a Japanese beetle in my garden. (Photo by Charlotte Ekker Wiggins)

Assassin Bugs

Looks like we do have a garden ally in our quest to control Japanese beetles, the assassin bug!

I have seen a few of these in my garden in the last couple of years. They are quick and retreated when I tried to approach so I just kept an eye out for them. Since I don’t use pesticides in my garden, I have been seeing more of them and they are most welcome, especially when I caught the large light grey one making a meal out of a Japanese beetle.

Assassin bugs (family Reduviidae) are predatory insects that are of great benefit to gardeners so they fall under the beneficial insects category along with praying mantis and ladybugs. They capture and feed on a wide variety of prey including Japanese beetles, flies, caterpillars and yes, sometimes bees.

The assassin bug sits quietly until the prey gets close enough for them to stab it with its long mouthparts. After being immobilized by a paralyzing toxin, the prey’s body fluids are then drawn through the assassin bug’s soda straw-like mouthparts, very much like a bug drinking a milk shake.

Several insect books noted most species of assassin bugs are gray to black or brownish in color, though some unique to ecosystems can also be bright.

There are several kinds of assassin bugs:

Ambush bugs are a type of assassin bug that lie in wait for their prey on flowers. Some of these species are colored to blend in perfectly with their flower hiding places.

The wheel bug is the largest of the 150 or so species of North America assassin bugs. Adult wheel bugs are gray and approximately 3 cm (1 ¼ inches) long. Its name comes from the distinctive, cog-like crest arising from the top of the thorax, or middle section, of the wheel bug’s body . Wheel bugs will attack larger insects like grasshoppers and larger caterpillars.

Although most assassin bugs are highly beneficial, the cone nosed bug or kissing bug is parasitic on humans and other mammals. Cone nosed bugs have the same elongated head as the wheel bug, but can be distinguished from wheel bugs by their lack of a crest and by their orange and black markings where the abdomen extends laterally past the folding wings.

This assassin bug patrols one of my dwarf cherry trees. (Photo by Charlotte Ekker Wiggins)

This assassin bug patrols one of my dwarf cherry trees. (Photo by Charlotte Ekker Wiggins)

Don’t Mess With Assassin Bugs

The bug’s name is enough to keep me at bay but I know some people like to fiddle with what they find in their gardens. Some assassin bugs, most notably the wheel bug, will bite if picked up and handled carelessly. The bite of the wheel bug is immediately and intensely painful.

See bug name as motivation not to pick it up!

Persons who are bitten should wash and apply antiseptic to the site of the bite. Oral analgesics, such as aspirin or ibuprofen, may be useful to reduce the pain. Treatment by a physician is not usually needed.

As with any insect sting or bite, the victim should seek medical attention immediately if there is any sign of anaphylactic reaction, such as generalized swelling, itching, hives or difficulty breathing.

Charlotte