For the Love of Red

Margaret in one of her favorite garden spots, where she can watch frogs. (Photo by Charlotte Ekker Wiggins)

Margaret in one of her favorite garden spots, where she can watch frogs. (Photo by Charlotte Ekker Wiggins)

For the Love of Red

Margaret loved anything red. Red birds, red toys, my one pair of wool red socks, which often disappeared from my closet only to be found under sofas. Or sitting next to her as she napped.

Margaret was a part-Siamese cat who died a year ago after almost 21 years of keeping me company. I still miss her; she used to wake me up around 5:30 a.m., her favorite time to sit on my lap at a window waiting for birds to appear.

Her successor, Boo Boo Bartholomew takes my 10 p.m. bedtime seriously but he prefers to sleep in mornings so I had to buy an alarm clock.

When I started to consider how to mark Margaret’s grave, the gorgeous Cardinal flower came to mind. A true red, the tall flower can grow up to 6 feet tall, which I can easily see from my living room window.

It can take plants a good year for their roots to get established in my Missouri limestone hill so I wasn’t sure the plant had made it. Earlier today I found it starting to bloom, the stalk needing a little support so I gave it a stake to lean on.

The cardinal flower now blooming in Margaret’s memorial garden. (Photo by Charlotte Ekker Wiggins)

The cardinal flower now blooming in Margaret’s memorial garden. (Photo by Charlotte Ekker Wiggins)

Cardinal flowers Lobelia cardinalis is a Missouri native perennial which typically grows in moist locations along streams, sloughs, springs, swamps and in low wooded areas. According to Missouri Botanical Garden, it is a somewhat short-lived, clump-forming perennial which features erect, terminal spikes (racemes) of large, cardinal red flowers on unbranched, alternate-leafed stalks rising typically to a height of 2-3' (infrequently to 4').

Tubular flowers are 2-lipped, with the three lobes of the lower lip appearing more prominent than the two lobes of the upper lip. Finely-toothed, lance-shaped, dark green leaves (to 4" long). They usually bloom this time of year, late summer.

Cardinal flowers are very attractive to butterflies and hummingbirds, but not cardinals.

There are also white and rose-colored forms of this same plant.

The Genus name honors Matthias de l'Obel (1538-1616), French physician and botanist, who with Pierre Pena wrote Stirpium Adversaria Nova (1570) which detailed a new plant classification system based upon leaves.

Specific epithet means scarlet or cardinal red. Common name is in reference to the red robes worn by Roman Catholic cardinals.

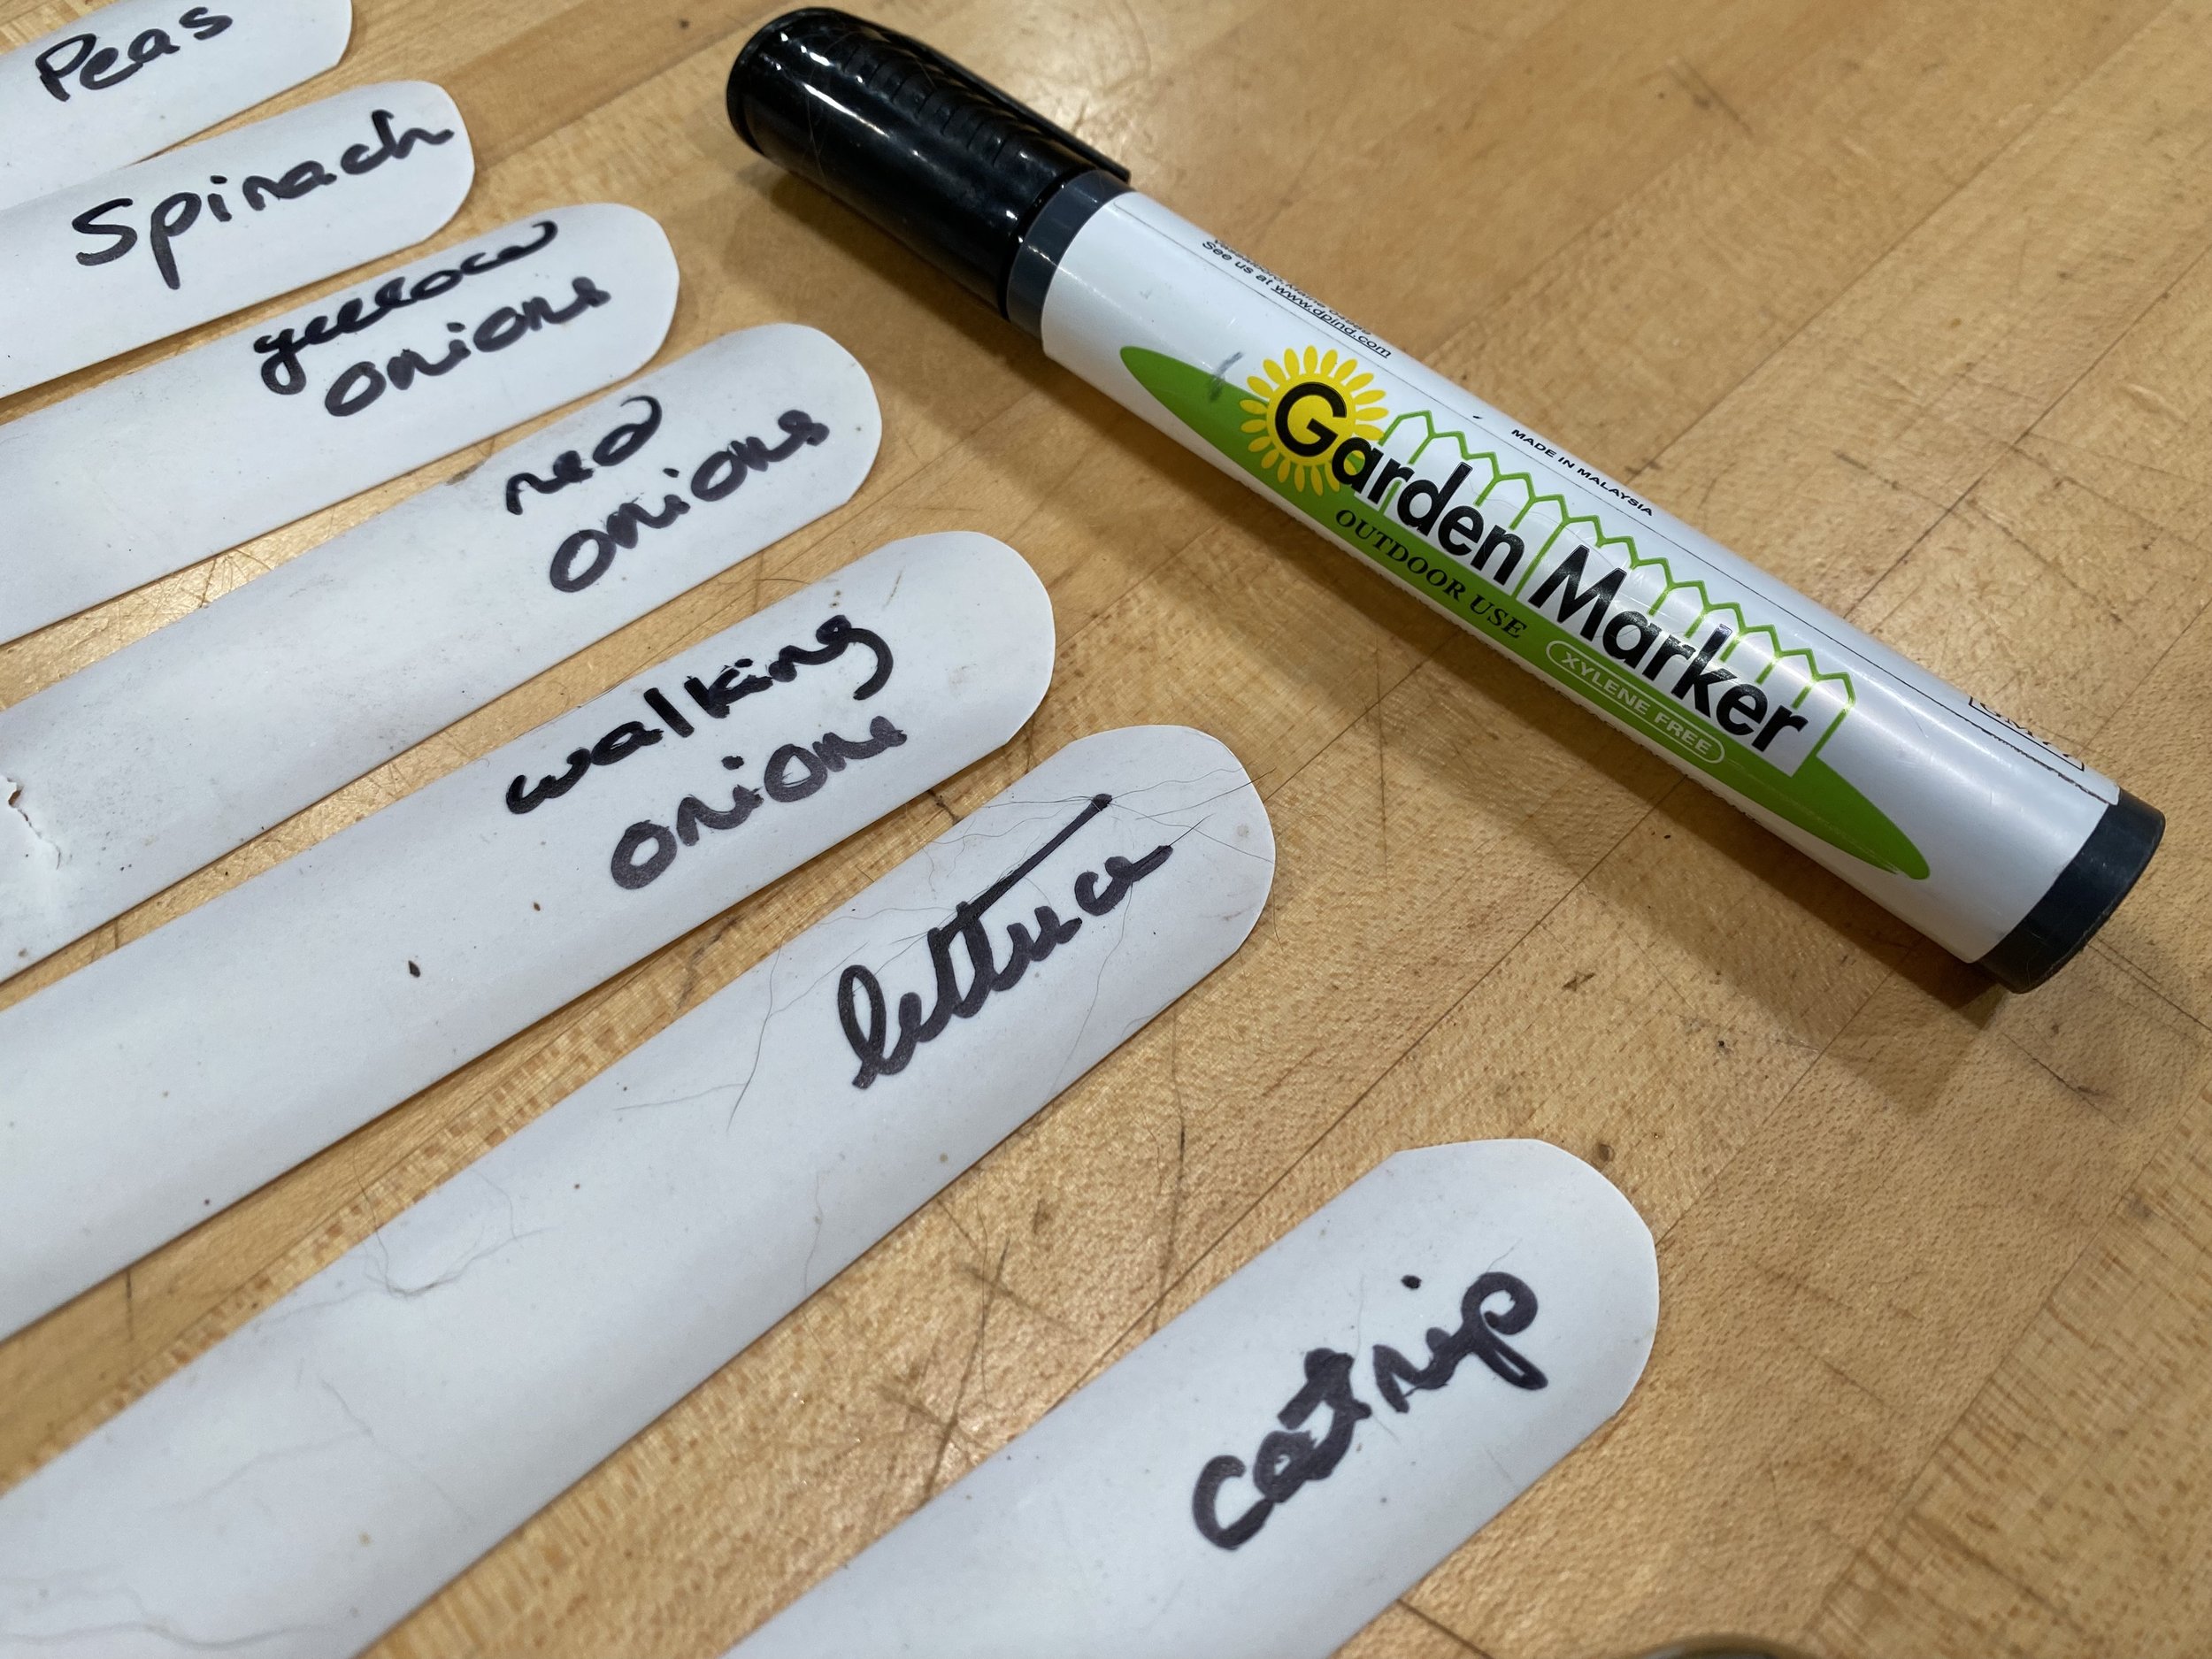
I considered a number of possibilities including Lambs Ear, which reminds me of Margaret’s soft pink ears. I did add a pussy willow bush in the memorial flower bed as well as some catnip, another one of Margaret’s favorites.

As I look closely at the Cardinal flower, it’s proud erect stance reminded me of when Margaret proudly stood up to me. I also recalled the times she carried my red socks around the house.

I’m sure Margaret will like having the lovely red flower close by!

Charlotte

My Red American Toad

Red Toad.jpg

My Red American Toad

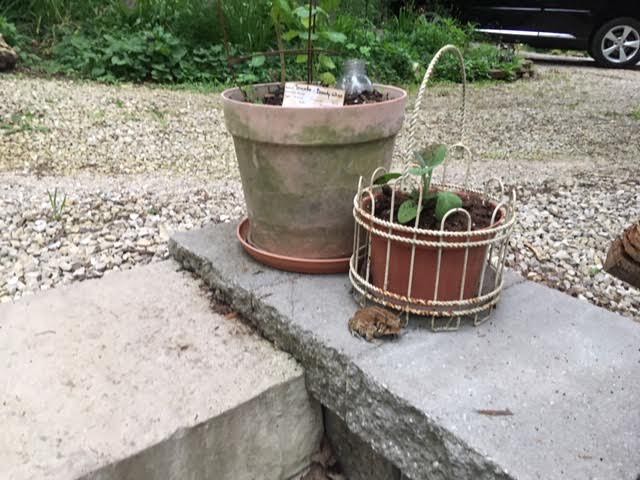
I met him on one of my morning garden walks. I know I have a variety of toads in my garden, mostly black so this was startling to say the least, and exciting - a red toad!

This toad is an American Toad bufo americanus. Toads, like other amphibians, do not drink with their mouths. Instead, they absorb moisture from the ground through a pelvic patch and store it in a lymph sac or bladder. The stored fluids are released when the toad becomes frightened, as most anyone who has picked up a frightened toad knows.

I didn’t pick this one up. I watched it watch me, then moved on. I saw no point in getting it unnecessarily excited.

According to Missouri Department of Conservation, toads are inactive during the day and burrow underground in sand or soil, also hiding under organic litter, bark, partially buried logs, and rocks. They become active in the evening and during rains.

This lack of daytime activity and their color camouflage are two of the toad’s defense mechanisms, along with their ability to puff themselves up to look more fearsome in the eyes of a predator. Toads also have a secret weapon that protects these otherwise harmless creatures from becoming another animal’s meal.

Kidney-shaped paratoid glands located behind toads’ eyes secrete a moderately potent toxin known as bufotoxin. The milky substance irritates the mucous membranes in predators’ mouths and can even cause death if an animal chooses to ignore the irritation and swallows the toad.

Contrary to popular folklore, toads do not cause warts, but because of bufotoxins, it’s a good idea to wash your hands after touching or holding a toad.

Toads are favorite foods of raccoons and hog-nosed snakes.

I like having toads in my garden because they consume mosquitoes, ants, spiders, beetles, crickets, and locusts, as well as snails, cutworms, and earthworms — 10,000 or more in one season.

Toads do not have teeth and must swallow prey whole. Toads blink their eyes when they snag a meal, which causes their eyeballs to roll into the roof of their mouth, pushing their prey into their throat, a characteristic shared with frogs.

Male toads woo potential mates with a long musical trill generated from an inflated vocal sac. They can sing alone, but in most cases large choruses can be heard at night. On occasion, they have been known to romance toads of other species. Although males are the most vocal, some female toads make chirping sounds when handled.

The American toad can be found statewide, with one subspecies, A. a. americanus, inhabiting northern Missouri, and a second dwarf species living predominately in the southern half of the state.

Bumpy red American toad is easy to spot. (Photo by Charlotte Ekker Wiggins)

Bumpy red American toad is easy to spot. (Photo by Charlotte Ekker Wiggins)

A female toad lays between 2,000 and 20,000 eggs. And unlike many frogs, which deposit their eggs singly or in masses, toads lay eggs in long strings. Most eggs hatch within a week, and the tiny, black tadpoles develop into toads that are ready to hop onto dry land in six to eight weeks.

Now I am wondering how many of the tadpoles in my tiny pond were actually toads instead of frogs.

For comparison, this is one of my sleek bullfrogs. (Photo by Charlotte Ekker Wiggins)

For comparison, this is one of my sleek bullfrogs. (Photo by Charlotte Ekker Wiggins)

Toads

  • Dry, warty skin

  • No teeth

  • Shorter hind legs than most frogs

  • Hop or crawl

  • Lay eggs in long, parallel strings

    And now, for frogs:

  • Smooth, wet skin

  • Tiny teeth on both upper and lower jaws

  • Jump or leap

  • Lay eggs singly, in small clumps, in large masses, or as a film of eggs on the water surface.

Now what do you have in your garden, toads or frogs, maybe both?

Charlotte

Native Missouri Phlox

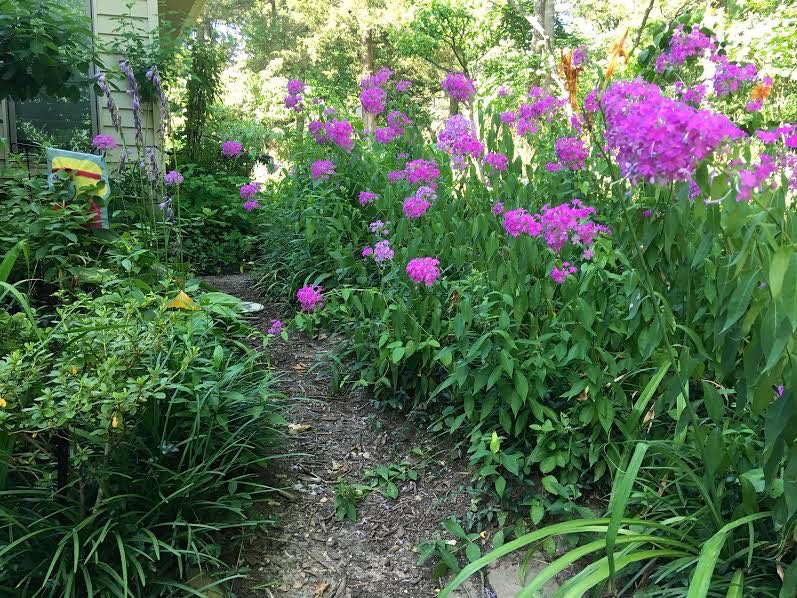
I tried to get the phlox to grow on the left but it moved to the right. Oh, well! (Photo by Charlotte Ekker Wiggins)

I tried to get the phlox to grow on the left but it moved to the right. Oh, well! (Photo by Charlotte Ekker Wiggins)

Native Missouri Pink Phlox

If there is one flower that represents a Missouri summer to me, it’s phlox Phlox paniculata. One of Missouri’s native wildflowers, the pink phlox is a smorgasboard for pollinators, especially butterflies and hummingbirds and benefit clearwing moth pollinators.

The plant itself is hardy and grows almost anywhere on my Missouri limestone hillside, except sometimes where I want it to grow. Nevertheless I leave it where it settles; sometimes nature has a much better idea of garden design than I do!

They prefer wet, moist conditions and grow in full sun to part shade in average to moist soil. Allow for ventilation to prevent miidew.

Pink phlox flower heads are tiny flowers growing together. (Photo by Charlotte Ekker Wiggins)

Pink phlox flower heads are tiny flowers growing together. (Photo by Charlotte Ekker Wiggins)

Many years ago I was tempted to buy some of the hybrid phlox varieties on the market. After doing some research, I found out the hybrids have to be kept separate from other phlox or they will revert back to the original phlox - you guessed it, the native Missouri pink phlox.

I do have a couple of patches of pink phlox where the flowers have a white petal center but it is not easy to distinguish from the other pink phlox, which has a solid pink color through the flowers.

This batch of phlox has a white center but is very similar otherwise to my other phlox. (Photo by Charlotte Ekker Wiggins)

This batch of phlox has a white center but is very similar otherwise to my other phlox. (Photo by Charlotte Ekker Wiggins)

Native phlox can grow almost anywhere, from shady spots in front of my house to the full sun areas facing south.

They also have a tendency to spread so I transplant the ones in inconvenient locations in spring. Their starts are easy to distinguish from other plants by their pointed green spring leaves.

Butterflies are usually visiting this Missouri native phlox flower bed all summer. (Photo by Charlotte Ekker Wiggins)

Butterflies are usually visiting this Missouri native phlox flower bed all summer. (Photo by Charlotte Ekker Wiggins)

Another advantage to native pink phlox is that it will continue to grow through the heat of August, keeping purple coneflowers and black eye Susans, also natives, company and providing my garden some much needed color.

They also apparently provide good cover for birds nests.

A little bird’s nest was built in a native Missouri phlox bed in my garden. (Photo by Charlotte Ekker Wiggins)

A little bird’s nest was built in a native Missouri phlox bed in my garden. (Photo by Charlotte Ekker Wiggins)

I read they can be started from seed but I haven’t tried to do that. I suspect I am growing them from seed in my garden seeing how far and wide they have spread without my help. Based on that, I would say they are easy to start from seed.

They are also excellent cut flowers although I confess to feeling a little guilty of depriving butterflies and hummingbirds.

Only a little, I love having fresh flowers inside!

Charlotte

Staying Cool

Muslin kitchen towels make great headbands and neck scarves to stay summer cool. (Photo by Charlotte Ekker Wiggins)

Muslin kitchen towels make great headbands and neck scarves to stay summer cool. (Photo by Charlotte Ekker Wiggins)

Staying Cool

With record hot temperatures again this summer, it’s important to stay cool. If you have seen me after a day in the garden, you know I am NOT talking about making a fashion statement!

One of my favorite ways to deal with Missouri’s summer heat and humidity is to use muslin kitchen towels, available in the kitchen section of most big box stores; 6-8 for about $5. I will go through the bundles and find the ones with the most kitchen towels since I use them for so many purposes outside of the kitchen.

For gardening purposes, the muslin kitchen towels make excellent head bands and neck scarves to catch sweat and be easily accessible to wipe off perspiration. I tend to leave my headbands with a fabric flap to cover the back of my head and protect my hair, then add a straw hat.

You can also easily tie the headband at the top and leave it there, gives an oddly royal headband look, don’t you think?

Also tie the muslin kitchen towel loosely around your neck to catch perspiration and have it handy to wipe off your hands. I tuck the ends under a t-shirt to catch perspiration at my neck.

Muslin kitchen towels are excellent neck ties to catch summer perspiration. (Photo by Charlotte Ekker Wiggins)

Muslin kitchen towels are excellent neck ties to catch summer perspiration. (Photo by Charlotte Ekker Wiggins)

Other Ways to Stay Cool

Keep a glass of water handy and drink before you go outside and when you come back in.

Take frequent breaks, no more than half an hour outside at a time.

Break from 3 p.m. to 5 p.m, the peak of the hot conditions.

Apply sunscreen. I notice mine almost immediately runs off so I keep it handy to reapply.

Wear light, loose cotton clothing. Change frequently if you get wet or you may develop a rash.

Work in shade if at all possible. I have a number of blue benches around my garden in shady areas so I can also sit down and enjoy the view.

Working With Plants

Note if a plant needs to be moved but don’t move it, it’s too hot for the roots to survive a move unless you are placing it in shade. Then water the soil first, wait a few minutes; move the plant and water again. You will need to water daily at least a couple of times until the plant re-establishes itself.

Hanging and deck plants will also need daily watering, possibly 2-3 times a day if they are in sun.

Open a deck umbrella to give deck plants a break from the hot sun. Move potted fruit plants such as lemons, limes and oranges into shade. Monitor other plants for sunburn on leaves. Plants can be conditioned to tolerate hotter temperatures but it has to happen gradually. Potted plants have less protection than those in the ground so check them frequently for signs of stress.

shade.jpg

If it rains, capture the rain in buckets and water plants the day after, they will respond better to rain water.

Other Options to Stay Cool

A gardening friend and I were comparing notes about the hot weather. He said he sometimes imagines his garden in winter, covered in snow and that helps keep him cool. There is something to be said about mind over not caring about the heat, I will have to try that.

Another friend was listening to the conversation and gave us another option - “stay inside,”, he said.

What an idea.

Charlotte


Tiger Lilies

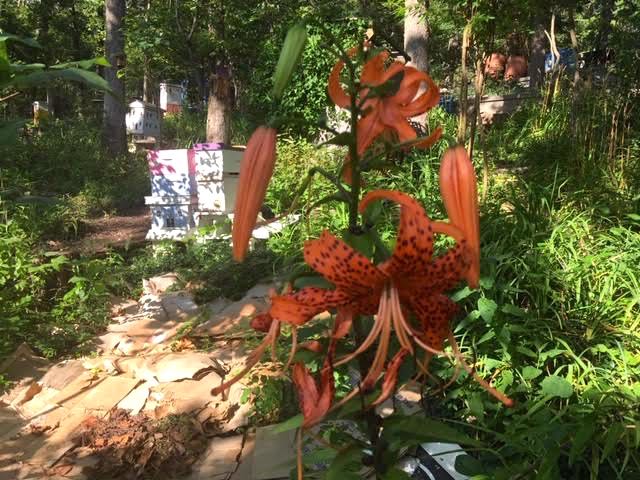
I have several tiger lily plants now growing together. (Photo by Charlotte Ekker Wiggins)

I have several tiger lily plants now growing together. (Photo by Charlotte Ekker Wiggins)

Tiger Lilies

For a number of years I have had tiger lilies growing scattered through my Missouri hillside garden. Some I planted; others birds did the honors. I used to have a piece of cotton fabric where tiger lilies turned into small charming tigers, an image that I still recall when I see these perennial flowers, not to mention Winnie the Pooh’s buddy Tigger, who makes an appearance on Hunny Buzz Crib Quilt Gift Set.

To give them more of a place of honor in my garden, earlier this year I decided to move them all together. I carefully dug up the bulbs with soil around them so I was sure I had the whole plants.

Plants classified as Lilium lancifolium (alternate botanical name, Lilium tigrinum) is a true lily and not a daylily such as Stella D-Oro. The sword shape of the leaves gives the plants their species name (lancifolium means "lance-leafed" in Latin).

Tiger lilies remind me of Asiatic lilies and Stargazer lilies gone wild. Between their black spots, dramatic orange color and flaring stamens with pollen, Tiger Lilies make a dramatic garden focal point.

Tiger lilies can grow 5-foot tall or more. (Photo by Charlotte Ekker Wiggins)

Tiger lilies can grow 5-foot tall or more. (Photo by Charlotte Ekker Wiggins)

Tiger lilies can be invasive but not on a limestone hillside. It’s not easy for plants to establish themselves let alone take off without first hitting a rock.

Although I love tiger lilies, I don’t bring them inside. Tiger lilies are poisonous to cats. Even small ingestion such as less than one to two petals or leaves, pollen, or water from the vase may result in severe, acute kidney failure. If you suspect your cat has ingested any part of one of these lilies, bring your cat (and the plant) immediately to a veterinarian for medical care. Generally, the sooner treatment is started, the better the prognosis.

Tiger lily seeds are called bulbils and grow at the base of the leaf. (Photo by Charlotte Ekker Wiggins)

Tiger lily seeds are called bulbils and grow at the base of the leaf. (Photo by Charlotte Ekker Wiggins)

Seeds of tiger lilies are called bulbils. Propagate this plant by bulbil or by bulb division. Ideally, this should be done during the spring before it starts to grow anew, but you can divide them in the fall in warmer climates.

Bulb division requires digging up the entire plant carefully when it is dormant and gently separating the individual bulbs. Replant your bulbs as separate plants with the pointed side aimed upward.

Bulbils will form along the stem of the plant at leaf axils. If you wish to minimize spreading, remove the bulbils and dispose of them. Or, if you wish to propagate more, you can carefully remove the bulbils and pot them as if they were bulbs to grow a new plant. These will take an extra year of time before they begin to bloom, so it is a slower growth process.

I happen to think these are interesting plants to have in a garden corner so if someone gives you a start, give them a try.

Charlotte

Froggy Bottom Pond Bullfrog

The bottom of my hill frog pond with goldfish. (Photo by Charlotte Ekker Wiggins)

The bottom of my hill frog pond with goldfish. (Photo by Charlotte Ekker Wiggins)

Froggy Bottom Pond Bullfrog

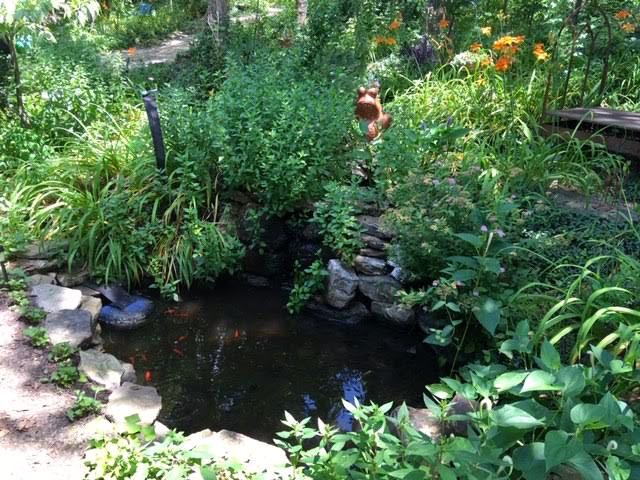
When I used to commute to Washington D.C., I spent a lot of time on the Metro rail subway, which inspired the name of this garden room, Froggy Bottom. Sitting at the lower end of the limestone hillside slope between the road and my garage, Froggy Bottom hosts two small ponds built from the holes made when the driveway was moved and concrete removed. It was easier, and less expensive, to make the ponds than to try to fill the holes with concrete.

The two ponds are small in size but big in use. Besides goldfish, the ponds are spring nurseries for a number of Missouri frogs. The constant turnover inspired this unique handmade quilt, Froggy Bottom handmade quilt.

In summer, dragonflies flit around the spearmint lining the west side of the pond.

Honey bees collect water from the water lettuce I add every year so they can safely access the water. Periodically I find birds taking baths under the small waterfalls.

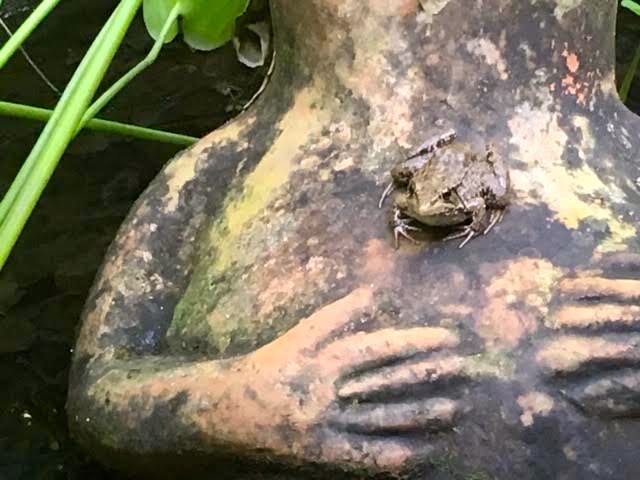
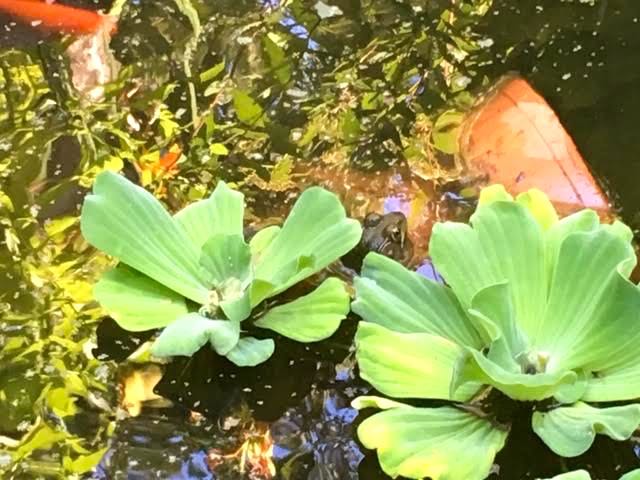
As I was feeding the goldfish this one afternoon, I found a new pond resident sitting on the chest of my very old clay frog.

My clay ceramic pond frog now has a friend. (Photo by Charlotte Ekker Wiggins)

My clay ceramic pond frog now has a friend. (Photo by Charlotte Ekker Wiggins)

The next question was, what kind of Missouri frog is this?

Earlier this spring, I counted 23 tadpoles growing legs before they became land animals but I didn’t know what species they were.

Can you identify the species with this photo?

See the tiny tadpole now turned frog on the ceramic frog leg? (Photo by Charlotte Ekker Wiggins)

See the tiny tadpole now turned frog on the ceramic frog leg? (Photo by Charlotte Ekker Wiggins)

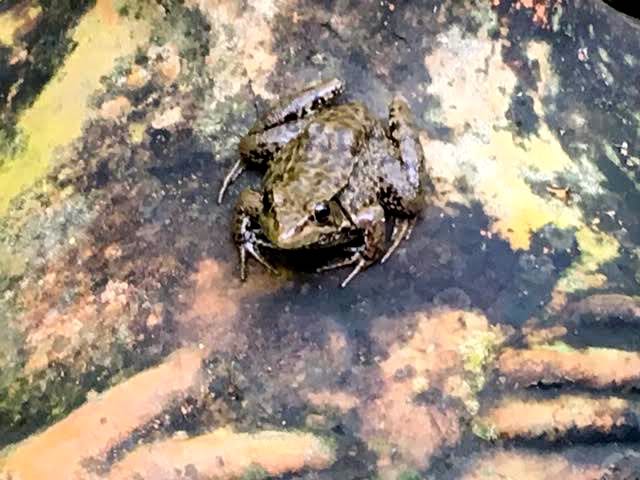
The tiny frog looked very much like the adult frogs hanging around the two ponds. Here two of the adult frogs were sitting on the rocky ledge.

Two frogs sit on the rocky ledge on the right. (Photo by Charlotte Ekker Wiggins)

Two frogs sit on the rocky ledge on the right. (Photo by Charlotte Ekker Wiggins)

So back to our frog identification, can you identify this frog?

Can you identify this Missouri frog? (Photo by Charlotte Ekker Wiggins)

Can you identify this Missouri frog? (Photo by Charlotte Ekker Wiggins)

A friend of mine suggested looking behind the eyes and identifying a saucer shape that is indicative of the Missouri bullfrog.

According to Missouri Department of Conservation, the bullfrog is Missouri’s largest frog; it ranges from green to olive to brown. The back may have small brown spots or dark, indistinct, irregular blotches. The hind legs are marked with distinct dark brown bars. The belly is white, and the throat may have some gray mottling. The external eardrum is large and round. On adult males this tympanum is much larger than the eye; on females, it’s about the same size as the eye. This species has been known to reach 8 inches from snout to vent. Call is a deep, sonorous “jug-a-rum, jug-a-rum” that can be heard from half a mile away or more.
I know I have a bullfrog in these ponds because I hear it when I walk by.

Well, it stops croaking when it is disturbed but I can hear one when I open my front door. It’s a wonderful sound to hear.

Look at the side of the head to identify the disc behind the eye. (Photo by Charlotte Ekker Wiggins)Frogs are good additions to a garden, they are part of the cycle of life consuming flies, mosquitos, dragonflies and other insects. Frogs are carnivo…

Look at the side of the head to identify the disc behind the eye. (Photo by Charlotte Ekker Wiggins)

Frogs are good additions to a garden, they are part of the cycle of life consuming flies, mosquitos, dragonflies and other insects. Frogs are carnivorous so as the frog gets larger, so do their meals.

You can see the round disc behind the eyes better in this photo. (Photo by Charlotte Ekker Wiggins)

You can see the round disc behind the eyes better in this photo. (Photo by Charlotte Ekker Wiggins)

Now I know I have not only Missouri tree frogs but now a bullfrog.

Or maybe another twenty one.

Charlotte

Feedlot Panel Arbor

This is a cattle panel bent into an arbor shape and covered in vines. (Photo by Charlotte Ekker Wiggins)

This is a cattle panel bent into an arbor shape and covered in vines. (Photo by Charlotte Ekker Wiggins)

Feedlot Panel Arbor

What can be more homey in your garden than a lovely greenery-covered arbor. Well, maybe an apple tree in late summer like this bless this home lap quilt and wall hanging apple tree but short of that, let’s take a closer look at the arbor idea.

If you have shopped for garden arbors, you know they can be pricey. The last ones I saw on sale started over $200.

What if I told you with a little ingenuity, you can add garden arbors to your garden without breaking the bank.

I have shared the garden arbors I am building in my Missouri hillside pollinator garden made out of cattle panels covered in cedar. However, if you need something smaller, take inspiration from this cattle panel arbor made out of a feedlot panel, which is 16 feet by 34 inches wide.

Built by one of my beekeeping students, this feedlot panel arbor was made by bending the panel in half to form the arch.

Clematis vines grow over the panels, covering the metal and providing shade as one walks under it.

The feedlot panel arbor is secured to the ground with rebar to ensure the panel doesn’t open back up.

The cost? Around $25 for the feedlot panel at your local hardware or farm and home center with another $10 for the rebar.

You can find other panels in various lengths and widths so pick one that will best fit your space.

Once the feedlot panel gets covered by the green, one doesn’t even know what forms the foundation of the arbor.

Are you tempted to make one of these?

Charlotte

Bluebird Gardens Summer Garden Tour

A variety of daylilies line my driveway to the house. (Photo by Charlotte Ekker Wiggins)

A variety of daylilies line my driveway to the house. (Photo by Charlotte Ekker Wiggins)

Bluebird Gardens Summer Garden Tour

My Missouri hillside garden is transitioning from the vestiges of spring into summer. Daffodils have made way for bee balm and Shasta daisies, and a variety of daylilies guide the walker through starting to overgrow mulched paths.

If I had to select a flower for the month for June it would be daylilies. From the original daylilies that migrated with European settlers along with bees and dandelions in the 1600s, daylilies provide a nice splash of color in a range of colors from orange to light yellow.

For the month of July, the flower of the month should be pink phlox, a native Missouri variety that easily grows in both sun and shade.

For my honey bees I have a variety of bee balm, a plant I suspect Dr. Seuss would have drawn if nature had not beat him to it.

Raspberry bee balm has spread through the hyssop flower bed. (Photo by Charlotte Ekker Wiggins)

Raspberry bee balm has spread through the hyssop flower bed. (Photo by Charlotte Ekker Wiggins)

Raspberry bee balm is a cultivated version of the native Missouri bee balm, glad I can entertain both in my garden. This batch of raspberry bee balm is growing in part shade.

One of my favorite perennial plants are daisies so it is with delight that I found this supply of Shasta daisies blooming quite well in another shady flower bed.

Shasta daisies bloom in a part shaded flower bed. (Photo by Charlotte Ekker Wiggins)

Shasta daisies bloom in a part shaded flower bed. (Photo by Charlotte Ekker Wiggins)

In addition to perennials, I have batches of herbs scattered through my garden. Spearmint surrounds the small pond at Froggy Bottom with a few sprigs sprouting roots when the tips hit the water.

Froggy Bottom includes a goldfish pond. (Photo by Charlotte Ekker Wiggins)

Froggy Bottom includes a goldfish pond. (Photo by Charlotte Ekker Wiggins)

More raspberry bee balm, this patch growing in full sun along with the Missouri native pink phlox.

Native Missouri pink phlox keep more bee balm company. (Photo by Charlotte Ekker Wiggins)

Native Missouri pink phlox keep more bee balm company. (Photo by Charlotte Ekker Wiggins)

Combined, both perennials and natives coexist quite nicely!

Charlotte

No More Pinching Mums

One of my mums that didn’t get quite pinched this year. (Photo by Charlotte Ekker Wiggins)

One of my mums that didn’t get quite pinched this year. (Photo by Charlotte Ekker Wiggins)

No More Pinching Mums

The Fourth of July US Independence Day celebration marks another garden milestone: no more pinching chrysanthemums.

Unpinched, chrysanthemums will grow tall and leggy. They will also bloom several months earlier than fall, when most people want the color in their garden.

Pinching, or removing the top 2-3 inch plant growth in spring keeps the chrysanthemum plants shorter and bushy. Once in bloom, the plants will be covered in flowers and sit closer to the ground.

Although some of the chrysanthemums in my garden were regularly pinched this year, others were not so it will be interesting to see how soon they start blooming. I also plan to stake the ones that may fall over from being too leggy.

Chrysanthemums are an excellent cut flower and natural bug repellent so I plant them in front of garden beds for easy access and bug patrol. I did find ladybugs on one earlier today so maybe the beneficial insects were just passing through.

If you want to add chrysanthemums, do it in spring so the plants have most of the growing season to establish themselves. They also work well to naturally repel bugs.

Charlotte

Japanese Beetles Are Here

Japanese beetles mating on cherry tree leaves in my garden. (Photo by Charlotte Ekker Wiggins)

Japanese beetles mating on cherry tree leaves in my garden. (Photo by Charlotte Ekker Wiggins)

Japanese Beetles Are Here

I was just about to pick a few lovely pink hybrid tea roses when I saw them inside the petals; Japanese beetles. They're here, and for the next 6 weeks it will be a battle between these wily invasive bugs and I.

A beautiful iridescent green, the 3/8th of an inch invasive beetles are eating machines, devouring fruit trees, roses and anything else edible in a garden.

Once they turn from grubs into beetles, they set off a pheromone scent that says "let's party" to other Japanese beetles. Actually the female beetles attract the males; they mate, eat some more, then fall into soil where they lay eggs that turn into grubs to hatch next summer.

Japanese beetles don’t damage trees and flowers they eat; they like a wide range of plants from edible native wildflowers to perennials such as fruit trees, rose of sharon, vegetables and roses. Although the plants they munch on look bad, they quickly recover once Japanese beetles drop into the ground to pulpate until next year.

Japanese beetles eat all garden edibles including roses. (Photo by Charlotte Ekker Wiggins)

Japanese beetles eat all garden edibles including roses. (Photo by Charlotte Ekker Wiggins)

If you can’t see Japanese beetles, you will know you have them when you see your plant leaves turning into lace.

In USDA Hardiness zone 5b/6a, Japanese beetles stick around for about 6 weeks.

Leaves that turn like lace are a sign of Japanese beetles. (Photo by Charlotte Ekker Wiggins)

Leaves that turn like lace are a sign of Japanese beetles. (Photo by Charlotte Ekker Wiggins)

Since I don't like to use chemicals, I have been trying to find a safe way to discourage them. After several tries, the most effective non-chemical approach I've found is to drop them in a can of soapy water.

They're smart, though.

Word will soon get around so you will need to sneak up on them or they'll see you and literally drop straight down off the plant. I find it’s easiest to catch them in the morning, when they are sluggish and I use that dropping down to my advantage, placing the coffee can with sudsy water right under them to easily catch them.

There are also Japanese traps on the market but those are basically female Japanese beetle pheromones that attract the male Japanese beetles. If you read the instructions, they say to place the traps downwind and at the edge of your property but I see many people hanging the traps in the middle of their gardens, which will just generate more bugs next year.

It would be even better if we could locate the grubs before they hatch but from what I've read, that's a lot more difficult to do.

For a long term solution, my brother in Virginia has treated his lawn with milky spores. He has dozens of crepe myrtles, one of Japanese beetles favorite munchies. According to him, Japanese beetle grubs eat the spores;

get sick; die and in the process, release more milky spores. It can take several years to eliminate the beetles, not counting whether your neighbors have treated their lawns.

I catch Japanese beetles early morning in soapy water. (Photo by Charlotte Ekker Wiggins)

I catch Japanese beetles early morning in soapy water. (Photo by Charlotte Ekker Wiggins)

Ok, time to soap up and pick off those bugs!

Charlotte
Pallet Raised Beds

Zuchini is growing in this pallet raised bed at a friend’s garden. (Photo by Charlotte Ekker Wiggins)

Zuchini is growing in this pallet raised bed at a friend’s garden. (Photo by Charlotte Ekker Wiggins)

Pallet Raised Beds

I have to confess, I am fascinated with what people make out of pallets. So fascinated that one weekend I dragged several pallets home and have them leaning up against a tree halfway down my hillside waiting for me to be inspired, and brave enough, to transform them. There are truly so many choices!

The bravery comes from having to use tools I am not familiar with so I wait for a time when there is a handyman around to supervise.

The first pallet idea that caught my attention was the pallet bench one of our beekeeping students has in her apiary. What I particularly love about the pallet bench is that it is lightweight, which means it is easy to move around. I do have several garden benches that weigh a ton so once I have them in place, they are not going anywhere. I would love to have one or two I can easily drag around to catch the best vantage point watching my honey bees.

Now I have a second idea. My gardening friend Tom mentioned recently that he now has raised beds out of pallets. Since I have to work extra hard to make flower beds on my limestone hill garden, I was intrigued and took a peek the next time I was invited to his garden.

Cut the pallets in half, then attach at the corners. (Photo by Charlotte Ekker Wiggins)

Cut the pallets in half, then attach at the corners. (Photo by Charlotte Ekker Wiggins)

Very easy to make, he said. The pallet is cut in half and attached at the corners.

What about keeping soil in?

He used used straw from his horse stable, filling the pallet raised beds before adding vegetables. I found zuchinis growing in one; squash in another, and then there was the tomato pallet raised bed.

Tomatoes taller than I am are growing in this raised bed full of used straw. (Photo by Charlotte Ekker Wiggins)

Tomatoes taller than I am are growing in this raised bed full of used straw. (Photo by Charlotte Ekker Wiggins)

The once pallet-high used straw is now about half way down the inside of the pallet raised bed but the tomatoes don’t seem to notice.

What about critters? Can he keep rabbits out of his garden?

No problem, he said, his dogs are on constant rabbit patrol. \

Well, so that answer doesn’t really count, does it.

For the record, these were tomatoes purchased around Valentine’s Day and kept in a greenhouse until May, after the last danger of hard frost. Our last frost in mid-Missouri in USDA Hardiness zone 5b/6a is May 10, around Mother’s Day.

Looking at these pallet raised beds now has me thinking these would also make a nice short fence that would be handy for blackberries and other brambles. That’s assuming one has a straight and level place to put it.

Oh, don’t look at me, I garden on a Missouri limestone hill, the only thing straight is my house foundation and that’s because they worked at it before building it!

Charlotte

Missouri's Daylily Season

Tiny grasshopper visits one of my orange daylilies. (Photo by Charlotte Ekker Wiggins)

Tiny grasshopper visits one of my orange daylilies. (Photo by Charlotte Ekker Wiggins)

Missouri’s Daylily Season

It’s still amazing to me when I think about our European ancestors. They packed up only a few belongings to travel the Atlantic to make a new home in North America, carrying with them dandelions and Hemerocallis fulva, what we today call Missouri’s Orange daylilies. Actually some in Missouri call these “ditch lilies” because that’s where they can sometimes be found but in general, they are often considered a nuisance or a “weed.”

Not to our European ancestors. They depended on these daylilies for food and on the dandelions for medicine.

As someone who “discovered” these lovely perennials many decades ago, I find them handy in my Missouri hillside garden for a number of reasons.

First, since I garden on an acre where my neighbors told me “nothing would grow,” I use Missouri’s orange daylilies to help me hold in soil. Missouri’s orange daylilies will grow in almost any condition and soil including gravel and clay. They also nicely will help hold in soil, not so easy when one is gardening on land that has an incline.

One of my limestone hillsides covered in Missouri’s orange daylilies.(Photo by Charlotte Ekker Wiggins)

One of my limestone hillsides covered in Missouri’s orange daylilies.(Photo by Charlotte Ekker Wiggins)

In addition to holding in soil, I use Missouri’s orange daylilies to help mark paths since once the blooming period is over, the greenery helps to cover plants that may die back behind them.

Missouri Orange Daylilies on the way to one of my apiaries. (Photo by Charlotte Ekker Wiggins)

Missouri Orange Daylilies on the way to one of my apiaries. (Photo by Charlotte Ekker Wiggins)

Missouri’s orange daylilies are quite versatile, they will grow well in both sun and dapled shade, like this flower bed with my “cats” in the garden.

My garden “cats” sitting in the middle of Missouri orange daylilies. (Photo by Charlotte Ekker Wiggins)

My garden “cats” sitting in the middle of Missouri orange daylilies. (Photo by Charlotte Ekker Wiggins)

Last but not least, Missouri’s orange daylilies are entirely edible. These Missouri native wildflowers are still grown in European kitchen gardens precisely because the plants are edible. The newly-growin stalks are called “poor man’s asparagus” and the flower buds are delicious in salads.

Since I don’t use chemicals in my Missouri hillside garden, I can pick orange daylilies with confidence but I would not try that on a batch of orange daylilies from the side of a road - or a ditch.

Orange daylilies line one of my paths down the hill. (Photo by Charlotte Ekker Wiggins)

Orange daylilies line one of my paths down the hill. (Photo by Charlotte Ekker Wiggins)

Missouri’s orange daylilies may not be the best cut flowers because the flowers only last a day. If you pick some with buds, the buds will open on the second and third days so you can mix them with other fill in flowers for a bouquet.

I frankly enjoy a cut bouquet of just orange daylilies. I pick off the dead flowers every day and watch the buds unfold.

If you look closely, these often overlooked Missouri wildflowers are actually quite lovely.

A close up of Missouri’s orange daylilies. (Photo by Charlotte Ekker Wiggins)

A close up of Missouri’s orange daylilies. (Photo by Charlotte Ekker Wiggins)

Add a few to your garden and see for yourself!

Charlotte

Moving Time!

Pick ax makes digging easier although I prefer to wait for a day after a good rain. These iris are ready to move to their new garden spot. (Photo by Charlotte Ekker Wiggins)

Pick ax makes digging easier although I prefer to wait for a day after a good rain. These iris are ready to move to their new garden spot. (Photo by Charlotte Ekker Wiggins)

Moving Time!

It's not officially fall but late summer is the beginning of moving time in my garden. Peonies, iris, day lilies, daffodils and hardy hibiscus in particular better have their suitcases packed because this is when they relocate.

To make your plant moving easier, consider the following tips:


1. Know where the plants will end up. That means not only identifying the site but checking the soil, amending it if necessary, and preparing the site for the incoming plants including ample root space.


2. If in doubt, check the plants growing habits. Make sure you are not planting something that will grow tall where you don't want it.


3. Whatever you are moving, dig up the plant with soil around the roots. Moving soil will help minimize trauma to plant roots.


4. Water. Add moisture to where you will be digging as well as where you will be planting. Wet soil is easier to dig, which is why I time my digging sessions after a good rainstorm. You also need well hydrated soil when you plant or anything you plant will die.


5. Wait 2-4 weeks until all blooming has stopped before moving.


6. Check for bugs. If you have any bugs, treat with Neem oil spray, which absorbs into the plant to fight bugs from the inside. Do not move diseased plants or you will be spreading the issues. Mark the plants and periodically check them until the bugs are gone, then move the plants.

Once moved, some plants like these daylilies won't stand up straight. Don't worry, they will next year after they have settled in. (Photo by Charlotte Ekker Wiggins)

Once moved, some plants like these daylilies won't stand up straight. Don't worry, they will next year after they have settled in. (Photo by Charlotte Ekker Wiggins)


7. Have mulch handy. Mulching newly-moved plants greatly increases their chances of surviving the mood. Make sure the mulch is seasoned so that it doesn't burn delicate roots.


8. Make notes. Keep a little map or notes in your garden diary about where you planted items so you can check back next year. I can't tell you how many times I have moved plants, forgotten where I put them only to find them popping up a year or two later. I just found a catalpa tree I moved several years ago that survived and is now growing quite nicely. Plants will spend the first couple of years of their life growing strong roots. They will loose their green tops at the height of hot weather to survive. As long as their roots stay hydrated, the plants will survive.


9. Move on a cloudy, overcast day or late in the day so they don’t have to be stressed by full sun.
10. Check your new plantings. I periodically find a plant or two pushed out of their new holes by curious wildlife so ensure that they are staying where you put them.


11. Water daily for the first two weeks or more. To the plant this is a new growing environment so make sure you keep the soil nicely hydrated while the roots re-establish themselves. For some plants it can take several months.


12. Mulch. Once you know the soil is moist, add mulch. The mulch will help preserve the moisture but still check to make sure soil is hydrated.


13. Make notes of what other plants need to move.

These sprawling iris are settled into their new spot with water, mulch and a note in my garden diary. (Photo by Charlotte Ekker Wiggins)

These sprawling iris are settled into their new spot with water, mulch and a note in my garden diary. (Photo by Charlotte Ekker Wiggins)

One more note. Moved plants in the fall will not settle in and stand straight before the end of the season but they will next year when they grow in their new garden location. Just make sure their roots don't pop out while they are settling in.

Charlotte
 

Gardening Book Gift Idea

Fritillaria on Black-eye Susan By Charlotte Ekker Wiggins

Fritillaria on Black-eye Susan By Charlotte Ekker Wiggins

Gardening Book Gift Idea

It's time to start thinking about gift ideas and this is one that will keep on giving, a book from National Wildlife with seasonal tips on gardening. It has a very small personal connection, too, the publication includes one of my garden photos.

When I entered the National Wildlife's photo contest, it never crossed my mind that down the road I would be asked to sell the photo for one of their upcoming publications.

I have been a National Wildlife supporter for decades. My one-acre limestone hillside garden is a Certified Wildlife Garden, which means I meet their criteria for providing food, shelter and water to native wildlife. I often recommend their accreditation quizz as a guide to planning a wildlife-friendly garden.

National Wildlife Federation purchased my fritillaria photo for their publication.

National Wildlife Federation purchased my fritillaria photo for their publication.

National Wildlife  also sent me a complimentary copy of the book they published. They selected a number of articles from their magazine, presented by season:

Several seasonal topics are covered in wildlife gardening, a great gift idea!

Several seasonal topics are covered in wildlife gardening, a great gift idea!

Since I am pursuing new gardening techniques, I thought it was serendipitous that my butterfly photo showed up in the chapter about gardening for change:

Here's my photo in the National Wildlife Federation article about gardening for change.

Here's my photo in the National Wildlife Federation article about gardening for change.

Yes, I am tickled that my photo is published but more importantly, I think this is a great gardening gift idea. Besides beautiful photos, the articles cover pertinent issues we all face in our gardens.

"Wildlife Gardening: Tips for Four Seasons" is $14.95 and available from the National Wildlife Federation's website.

No, I don't get any proceeds from the sale, I do think the publication would be a great gift and good reading for those upcoming cold winter months.

Charlotte

September Gardening Chores

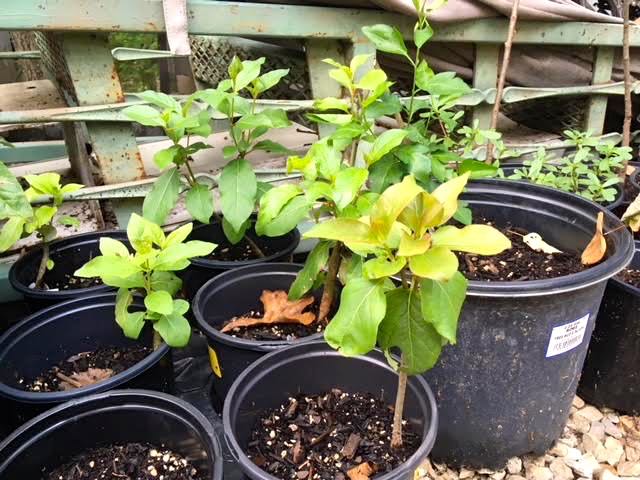
Time to plant trees in the garden, these are bare roots I potted late spring.

Time to plant trees in the garden, these are bare roots I potted late spring.

September Gardening Chores

It can’t almost be fall, I still have summer chores to finish. The following are some of the gardening chores for September if you live in USDA Hardiness zone 5B:

If you have been fertilizing, it is time to stop. Plants need to start slowing down and get out of the growth they usually pursue through spring and summer, even without the boost of fertilizers. Add a last dollop of compost mixed in the soil and that should be it for this season.

Do keep watering trees and shrubs from now through hard frost. Our first hard frost is usually mid to end of October.

Start cleaning up flowerbeds and vegetable gardens by removing spent plants and saving seeds.  Leave the ragweed to treat the soil, they will die once their work is done.

 If you plan to start a new garden next year, this is the time to cover it with cardboard to kill off any current growth.

Bring some of your herbs inside including parsley, chives, rosemary , catnip and stevia. Basil can also be brought inside; sow seeds now to get new plants started for later use. Dry the herbs and store in airtight container.

Good time to move peonies. I have several I buried the eyes too deep so when replanting, remember to not bury any more than an inch or two beneath the soil surface. Daylilies and iris can also be dug up and divided.

Make notes in your garden diary about to dos for next year. Note what plants worked well this year, what seeds you had meant to plant but didn’t get to – whatever you want to tackle next year.

Have favorite annuals? I do, too, and I trim them now before bringing them inside. You can also take root cuttings and start young plants if you have good indoor light. Geraniums, coleus, wax begonias, impatiens all will winter over inside if you keep them pinched and bushy. Geraniums will winter over stored in brown bags without soil.

GC Sept Gardening Chores 2.jpg

Order spring bulbs. Daffodils are toxic to deer so they won’t get munched on. Tulips are not so buy a few for color, then plant them behind a solid wall with wire if you don’t want wildlife snacking on them in the meantime.

If you have left over Amaryllis bulbs, put them in a dry, dark place without water and let them rest for a couple of months. If you want to time when they bloom, pot and water them 6 weeks prior to when you want them in bloom.

My deck is starting to get covered in leaves so I am sweeping them off to the composter and getting those emptied onto the flowerbeds. Don’t bag and rake clippings, leave them on your lawn to return Nitrogen to the soil.

This is also a good time to stock up on mulch. Buy it in bulk or load up at your local recycling center before they close down for the season.

Start trimming plants you plan to bring inside to overwinter. It's almost fall!

Charlotte

Snappy Turtle

This is where I found this turtle in my garden, as if it had climbed my garden steps. (Photo by Charlotte Ekker Wiggins)

This is where I found this turtle in my garden, as if it had climbed my garden steps. (Photo by Charlotte Ekker Wiggins)

Snappy Turtle

I have lost count of the number of turtles I have helped cross a road.  Usually they are a variety of Missouri box turtle; Missouri is home to 18 different turtle species.

Over the years, it’s the box turtles that have hung around my garden.  Lefty Louie was a three-legged box turtle that chose to spend several seasons in my garden, stopping by the garage door whenever he wanted a strawberry. The many turtle adventures - I do brake for turtles - also led me to carry Turtle Time Quilt and Wall Hanging.

I was thinking about Lefty Louie the morning I was walking through my garden and saw a new visitor sitting at the top of my retaining wall stairs. Moving towards the back for a closer look, I realized this was one of Missouri’s common snapping turtles, not a turtle one wants to pick up and expect to still have all fingers.

One of our local park ponds had a resident snapping turtle in the 1980s. When the US Army came in one summer to help clean out the pond , the crew reportedly would quickly make for landfall every time “Friskie” would surface and snap at their heels.

Maybe this turtle is just walking through, I thought to myself. They do migrate through. Within minutes, it was moving towards my little goldfish pond.

Look at the back side, that tail looks quite pre-historic. (Photo by Charlotte Ekker Wiggins)

Look at the back side, that tail looks quite pre-historic. (Photo by Charlotte Ekker Wiggins)

These snapping turtles used to be a popular food source, or so I am told. Starting March 1, 2018, Missouri Department of Conservation made it illegal to harvest common snapping and soft shell turtles for commercial use. They can still be harvested for personal use but the limit has been reduced from five each to a total of two.

It shouldn’t affect many. According to the state conservation department, very few individuals reported harvesting turtles for food during their 2017 open houses but snapping turtles are commercially sold to foreign markets.

Missouri Department of Conservation said turtles are loosing ground to land conversion, draining of wetlands and channelization of rivers, which have replaced their preferred habit – swamps, marshes and meandering streams.

Missouri is home to 18 turtle species. A couple of decades ago, I remember box turtle numbers precipitously dropped due to highway mortality and people were encouraged to not hit them as they migrate. Here are  Missouri Department of Conservation’s other recommendations:

Don’t adopt or buy turtles for pets.

Don’t shoot turtles for sport. It’s illegal and it puts pressures on an already stressed animal group.

Report turtle poachers to Operation Game Thief 800-392-1111.

Be careful where you drive, especially in spring and summer when box turtles are mating, nesting and dispersing. If you can do so safely, stop and help a turtle cross the road. Always move the turtle in the direction it is headed.

Created habitat areas around your home or farm with wetlands and wooded, shrubby and grassy natural habitat.

And my snappy visitor?

I tossed a plastic tote over it and carefully nudged it into the tote before turning it over. The turtle was moved to a large open pond about 15 miles from my house with a nearby stream.

Charlotte


August Gardening Chores

Give inside and deck plants a good rain shower or two during very hot spells.

Give inside and deck plants a good rain shower or two during very hot spells.

August Gardening Chores

I don’t plant anything in my garden in August.  The soil in USDA zone 5b is so dry few plants will survive even if watered so I just skip doing much planting. I also try not to watch as some of my plants fry under the hot sun but I know if I can keep the roots wet, they will come back later this year, or next:

1.     Water plants at root level, which means no sprinklers. Use underground wands and move them to saturate soil. Gardens need an inch of rain a week. Don’t forget established shrubs and older trees, they also need moisture delivered to their roots to make sure they make it through the record hot August temperatures.

2.     Water potted plants daily; if temperatures are once again hitting record levels, maybe twice a day and move them into shade. Add compost to keep the potted soil healthy.

3.     If you didn’t get to planting your garden this year, at least toss a few buckwheat seeds to help improve your soil. Buckwheat will sprout in about 6 weeks and will be welcome fall food for pollinators as well.

4.     If you haven’t been using your fresh herbs, this is a good time to start. Most may have flowered and lost some of their potency but they still can be added to salads and other summer dishes. Rosemary and chamomile can be harvested and used in bloom. I chop up and freeze some of mine in ice cubes for winter use in soups.

Irregular watering contributes to tomatoes cracking. They're still good, they just look odd!

Irregular watering contributes to tomatoes cracking. They're still good, they just look odd!

5.     My tomatoes set late this year but they are finally ripening. Try to keep them evenly watered to minimize cracking.

6.     Have peonies you want to divide? Wait until after a good rain but you can start dividing them now through September. Bury the root “eyes” no more than an inch or two beneath the soil; if you bury them deeper the plants won’t flower. If you have to move peonies without rain, use a hose to soak the soil around the plant before you try to dig it up.

7.     You can also dig up daylilies and iris now to divide and re-plant. Again I would wait until after a good rain. If you still need to move them, at least water the area with a hose first so you don’t rip roots when you try to dig them up.

8.     Start saving seeds for next year. Marigolds, zinnias and sunflowers have a lot of seeds than can easily be stored.

9.     I am also developing new flower beds for next year by removing starts, adding cardboard and mulching.

10. Hot temperatures can prompt trees to drop leaves early. Leave leaves on the ground to return nitrogen to the soil. If you are worried about them sitting on grass, set your mower to a higher setting and cut them up when you mow. Leaves are a wonderful source of soil amendments. They also work well as mulch, helping to retain water when leaves are underground or under mulch.

Charlotte

How to Dead Head Plants

A dry seed head on a Self Heal herb plant could be removed to encourage more flowers.(Photo by Charlotte Ekker Wiggins)

A dry seed head on a Self Heal herb plant could be removed to encourage more flowers.(Photo by Charlotte Ekker Wiggins)

How to Dead Head Plants

Removing the spent flower heads on plants encourages the plant to produce more flowers. It also makes the plant look nicer and is the fastest way to improve the look of one's garden.

I do dead head plants in spring and early summer. Towards the end of summer and fall, however, I tend to leave the seed heads on so birds will have winter food. Many native plants are a ready source of food for wildlife including black eyed Susans, purple coneflowers, Autumn Sedum and perennial herbs.

Before snipping anything off, take a look at the plant and observe how it grows. Remove the dry seed head and whatever stem portion is dead above a growing bud. This should encourage the plant to grow in a more bushy form and produce more flowers.

One more note on removing spent plant seed heads. For years I used a variety of pruners, taking periodic breaks so that my hands didn't cramp up from all of the repetitive movement.

Traditional pruners can easily clip off plant flower heads. (Photo by Charlotte Ekker Wiggins)

Traditional pruners can easily clip off plant flower heads. (Photo by Charlotte Ekker Wiggins)

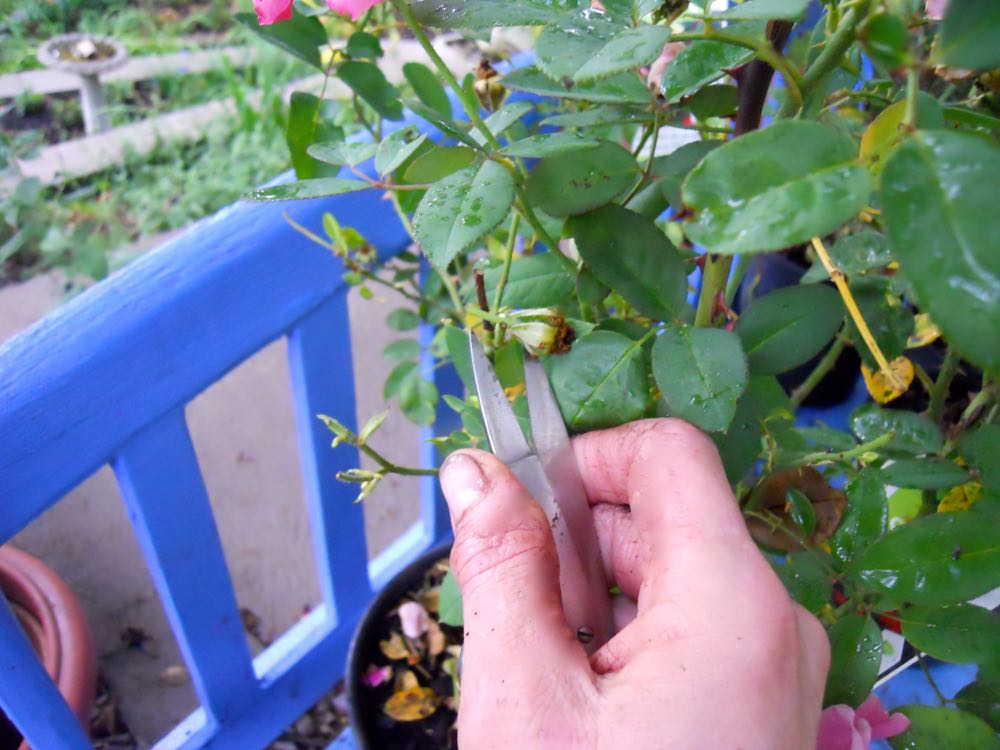
Now I have a couple of sewing thread snips dedicated to gardening. These work much faster and easier than pruners and I can rotate between my right and left hand.

A pair of thread snips are easier and quicker to use to dead head plants. (Photo by Charlotte Ekker Wiggins)

A pair of thread snips are easier and quicker to use to dead head plants. (Photo by Charlotte Ekker Wiggins)

Spent flower plant heads can be stored in bags for use next year. They can also be composted.

Charlotte

July Gardening Chores

Keep flowering plants and shrubs blooming by removing spent blooms, here I am using quilting thread snips. (Photo by Charlotte Ekker Wiggins)

Keep flowering plants and shrubs blooming by removing spent blooms, here I am using quilting thread snips. (Photo by Charlotte Ekker Wiggins)

July Gardening Chores

Heat. It’s what drives every gardener this month, whether it’s making sure the garden gets an inch of moisture a week to stay cool or mulch to remain cool. Among the other chores for July, besides enjoying picking berries:

1.     Deadhead flowering plants. Removing spent blooms will help keep plants healthy and may even give you a second and third wave of flowers. I use sewing and quilting thread snips to quickly remove spent blooms.

2.     Remove weeds/unwanted plants. Unwanted plants take up nutrients, moisture and space away from desired plants. In this context, competition is not a good thing.

3.     Know your weeds. If you weren’t sure what it was before, whatever was growing should be showing its true identity by now. Many plants casually labeled weeds are forgotten herbs; others, like goldenrod, are blamed for what a true weed, ragweed does, which is aggravate allergies. And ragweed is a good plant, it only grows in very poor soil and adds nutrients to improve it before it dies off. Did I say know your weeds already??

4.     Give your garden one inch of water a week. When you water, use a watering wand or place the hose into the ground, no sprinkling. In hot summer weather, using sprinklers is a waste, the water just evaporates before it even hits the ground.

5.     Touch up mulch. Mulch will help keep garden beds cool. Make sure it’s aged mulch. If the mulch is steaming, it’s too young to use on flower beds.

6.     Keep your early morning dates with Japanese beetles. Catch them in soap-filled buckets to help reduce the population. Don’t try to catch them later in the day, they will just fly off.

7.     No more compost for woody plants, time for them to start hardening off and getting ready for winter.

8.     Don’t forget to water trees deeply, especially newly-planted trees and the oldest ones.

9.     Rambler roses done blooming? Prune.

10. How are your vines? My blackberries and clematis need a little help so I gauge their possible growth for the rest of this season and add support. Oh, I’m often wrong, the idea is just to give them extra support or it’s a mess trying to untangle them later. I usually wait until next year then and start with fresh growth.

In record heat, keeping roots watered is the best way to help plants pull through. (Photo by Charlotte Ekker Wiggins)

In record heat, keeping roots watered is the best way to help plants pull through. (Photo by Charlotte Ekker Wiggins)

11. I am starting to make new flower beds so I am hauling cardboard boxes home to get a good start. Once I line the beds with cardboard, I add mulch to start making the foundation of the bed. After the next rain, soil will be added, then another layer of mulch.

12. Start thinking about what needs to be done early next spring. I keep a list, check it twice…

13. The nearby composter will also get cleaned out. Not entirely, leave a good bucket-full as compost starter for the next batch.

14. Mowing grass? Don’t bag or rake clippings, they return Nitrogen to the soil.

15. Plant buckwheat in open areas. It’s not only a fast-growing, Nitrogen-introducing cover crop for garden spots, it also gives bees a source of food during August, when little else is in bloom.

Charlotte


Summer Watering Tips

It's helpful to have a rain gauge to make sure your garden is getting at least 1" of water a week. (Photo by Charlotte Ekker Wiggins)

It's helpful to have a rain gauge to make sure your garden is getting at least 1" of water a week. (Photo by Charlotte Ekker Wiggins)

Summer Watering Tips

With record hot temperatures hitting Missouri this summer, utility companies are setting up watering schedules and providing guidance on when someone can, and can't, water their lawns. Although those steps are helpful, there are several things gardeners can do to improve watering efficiency starting with how they water.

During our 2012 drought, I watered my garden with an underground wand, making sure the plant roots were hydrated. Even though the top of the plants died off, most of them grew again the following year because the roots had been kept alive through watering.

In addition, the flower beds were mulched, which helps keep moisture in the soil.

This year, as we head into another record hot summer, invest in two things: a watering wand and a rain gauge. The rain gauge will help you keep track of how much water your garden has had. The recommended amount is one inch a week.

The watering wand will ensure roots are kept watered and hydrated.

You can also use sprinkling systems but know that past 95F the water evaporates so plants do not get any relief.

An underground wand is the best way to water a garden in the hot Missouri summer days. (Photo by Charlotte Ekker Wiggins)

An underground wand is the best way to water a garden in the hot Missouri summer days. (Photo by Charlotte Ekker Wiggins)

In addition, you can add wet leaves around trees to make sure they get some water. A layer of mulch over wet leaves will make sure the water doesn't quickly evaporate.

Have beginning gardeners in your neighborhood? Consider a gardening kit as a gift, it can  keep basic gardening tools handy. If you don't have one, this is a good time to put one together and don't forget to add a rain gauge and watering wand.

What watering techniques do you use in hot summers?

Charlotte