Do You Want to Keep Ash Trees with Borers?

Emerald ash borer exit hole on the side of one of my former ash trees. (Photo by Charlotte Ekker Wiggins)

Emerald ash borer exit hole on the side of one of my former ash trees. (Photo by Charlotte Ekker Wiggins)

“Charlotte, I read that you now have emerald ash borers in your trees and you are using the cut down ones for flower borders. Will keeping the cut down tree trunks on your property spread emerald ash borers? I am also thinking of using the cut down trees as flower bed borders but I don’t want to encourage the destructive bugs….” — Peter

Do You Want to Keep Ash Trees with Borers?

Hi Peter, I had the very same question for our Missouri Department of Conservation. I live in Phelps County in mid-Missouri. one of the 114 counties in the state. Most are now reporting emerald ash borers. Here was the answer they gave me:

“Your area is known to have a building population of emerald ash borer (EAB). By keeping the trees on your property, you aren't spreading this insect. If your trees were infested prior to being cut, then it's likely that some of the EAB larvae that are currently in the trees will finish their lifecycle this spring and chew out as adult beetles in May. The beetles won't re-infest your ash wood, however, so your ash wood won't continue to be a source of food for EAB. You may notice lots of other native borers that attack the wood, since many of our native species help with decomposing dead trees on the forest floor. When I use ash in my garden and flower beds, I usually get about 2 years out of a large chunk before the native borers break it down to the point where it isn't useful to me.

You might extend the life of the wood by applying a product to prevent borers, like BoraCare or TimBor, or even sealing the wood with an outdoor wood sealer. 

Since the only food source for EAB is ash trees, you have effectively discouraged this pest from your yard by removing your ash. If you have other ash on the property that you hope to keep alive, then I would recommend treating them with insecticide. More information can be found in this treatment guide: https://mdc.mo.gov/sites/default/files/downloads/mo_eab_management_guide.pdf 

Robbie Doerhoff
Forest Entomologist”

Insecticides are out of the question for me since I keep bees so I am resolved that I will lose the rest of my ash trees and am already planning what to plant in their stead.

Charlotte

When to Plant Mums

Chrysanthemums are popular fall flowers to plant for color. (Photo by Charlotte Ekker Wiggins)

Chrysanthemums are popular fall flowers to plant for color. (Photo by Charlotte Ekker Wiggins)

“Hello, we recently bought mums to plant in the flower beds around our home. What time of year should we plant mums? And what else can we do to guarantees they come back every year? Thank you.” — Alyssa

When to Plant Mums

Hi Alyssa,

It's getting late in the season to plant mums but as long as the ground is not frozen you should be able to still get them in. Make sure they, and the soil you are planting them in, is well-watered before you add the plants. Once in, add mulch to keep their soil temperature from fluctuating. A nice blanket of wet dried leaves will work if you don't have anything else handy.

The key to pulling mums through winter is to keep them regularly watered. I take 2 old milk jugs full of water out to my garden twice a month and water my mums if we haven't had rain and/snow. You are basically keeping the roots hydrated so they can establish themselves.

Don't cut off the dry flowers, those will protect the new growth that will start at the bottom in the center.

If you want to add more mums, spring is a good time to get starts, that way the plant has all growing season to establish itself and grow. To maximize blooms, pinch off the starts every week until July 4, that will keep their shape rounded and bushy.

If you have any other questions, please let me know. Good luck!

Charlotte

When Is It Too Late to Plant in Fall?

Part of my stash of sale plants I am getting into the ground in late October in mid-Missouri. (Photo by Charlotte Ekker Wiggins)

Part of my stash of sale plants I am getting into the ground in late October in mid-Missouri. (Photo by Charlotte Ekker Wiggins)

“Charlotte, that’s a pile of plants to get into the ground before winter. We had a frost last night, aren’t you afraid the cold weather will kill them off?” — Darryl

When Is It Too Late to Plant in Fall?

Hi Darryl,

I would if I had not done this a few times before. The question of when to stop planting has to do with how cold the soil is, not the first hard frost. In USDA Hardiness zone 5b, although we may have our first killing frost around Halloween, which kills off the top of the plant, the critical part of the plant that needs to get established is the roots. The soil where I live stays warm well into December.

That’s why fall is a good time to plant trees. There will be a good 4-6 weeks before the ground hardens and the winter cold pushes plants into dormancy.

Plants that have been established in pots over the growing season have strong enough roots to get them into the ground now so they can settle in before the winter soil freeze. I would be less enthusiastic if these plants were recently planted and their roots were still developing. When you see roots waving at you from the bottom of the pot that’s a sure sign the roots have had a good growing spurt.

If you have bare root plants, I would pot them in new potting soil, water them well and bury them in a garden area still in their pots. A nice mulch blanket of dry leaves will keep moisture in the soil and protect the plants from temperature fluctuations. I also place a couple of handfuls of wet dry leaves in the bottom of the hole to make sure the roots have access to moisture.

I will do the same thing with any plants I can’t get into the ground now.

I have successfully pulled a number of plants through winter still in their pots in my nursery area but I do feel guilty when they are still growing there after 2 years. I really should move them into their final growing space in my garden.

Charlotte

How to Fix a Bird Bath

Ready made concrete applied to old bird bath edges can easily restore an old bird bath to use. (Photo by Charlotte Ekker Wiggins)

Ready made concrete applied to old bird bath edges can easily restore an old bird bath to use. (Photo by Charlotte Ekker Wiggins)

How to Fix a Bird Bath

"...I have an old bird bath I love but the top has broken and now doesn't hold water. Is there a way I can easily fix it? I am NOT handy at all...." -- Susan

Hi Susan, there are no guarantees but it's worth investing in a small container of ready mix concrete and see what you can do.

I had a similar bird bath that literally came apart after I tried to repair it with concrete. When the old part of the bird bath fell away, I was left with a new top that was literally rough around the edges.

Armed with a small container of ready mix concrete and a level, I added a finished rim to the bird bath so now it will hold water. It may take a few days for the concrete the dry all of the way through so I try to stay away from knocking into it.

It helps to have a small container of water handy as you're working with the ready made concrete. The water allows you to wet the concrete and easily reshape it.

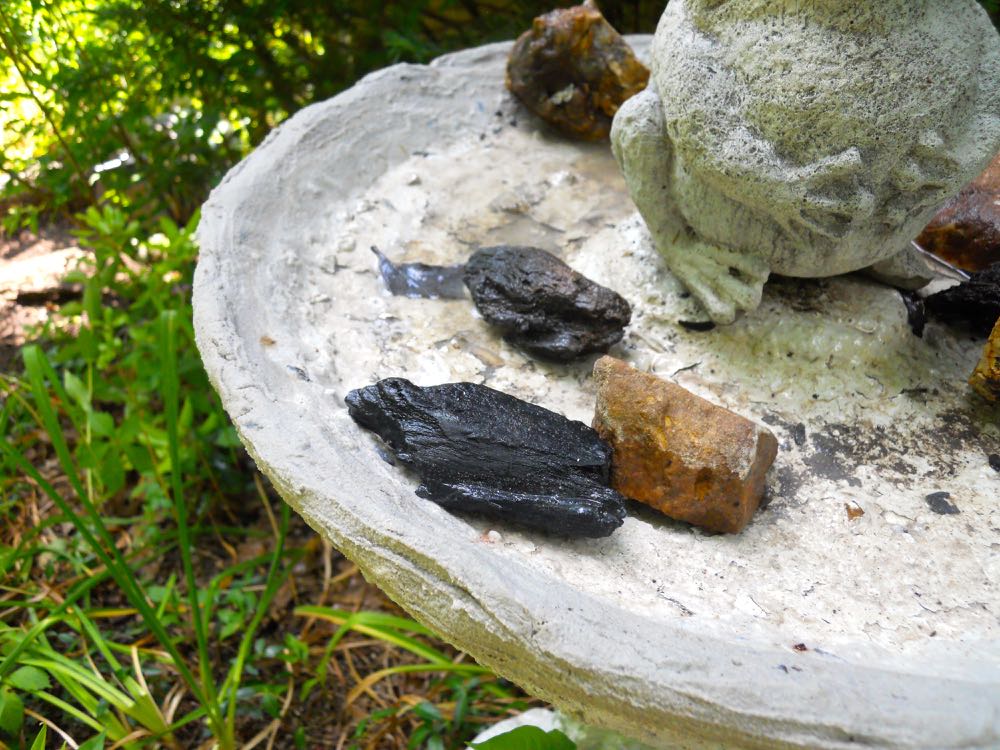
Here's my old bird bath with the top still drying:

Here's my old bird bath with a new ready made concrete edge around the top rim. (Photo by Charlotte Ekker Wiggins)

Here's my old bird bath with a new ready made concrete edge around the top rim. (Photo by Charlotte Ekker Wiggins)

The rocks? I keep rocks and twigs in my bird baths to give my honeybees safe landing spots, they are also looking for water in record hot summer days.

Charlotte

Are Peonies Good Cut Flowers?

Cut peonies out of my garden in my kitchen going on two weeks now.

Cut peonies out of my garden in my kitchen going on two weeks now.

"...I've had a terrible time keeping peonies inside as cut flowers. They die within a day. What am I doing wrong?" -- Stephanie

Are Peonies Good Cut Flowers

Hi Stephanie,

Sorry you are having trouble enjoying cut peonies inside, peonies are one of the many garden flowers that make wonderful cut flowers, it is one of the reasons why I love having them in my garden. Besides the beauty of the flowers and watching ants on the buds, cut peonies have a lovely fragrance that infuses any room. I like to add bouquets to bathrooms and, obviously, my kitchen.

See if these 5 tips will help you have cut peonies that last more than a day inside:

1. Cut the peony flowers when the buds are starting to unfurl, not when the flowers are in full bloom. Make sure to shake off the ants before bringing them inside.

2. Use tap water you've let sit for at least a day to eliminate fluoride or rain water in the vase.

3. Trim the flower stems every day or every other day and give them new water.

4. Place the flower vase away from heating and air conditioning vents. Don't place your vase on top of a hot TV, next to a stove or anything that radiates heat.

5. Keep furry paws away from the flowers. I do battle with one of my cats that likes to bop the peony buds like tiny boxing bags.

Let me know how these work for you. Peonies are well worth the effort!

Charlotte


Easy Way to Water

One way to make sure you are not watering too much is to first check the soil with your finger.

One way to make sure you are not watering too much is to first check the soil with your finger.

"...the most beautiful plants, love your winter reading nook. I kill mine, usually by drowning. How do I keep from giving my plants too much water?" -- Emily

Easy Way To Water

Hi Emily,

It's so easy to over water, especially when one doesn't use ways to check if plant needs water. I press my finger into the soil first to make sure they are hydrated before I add water. In winter, plants dry out faster because heat impacts the moisture in soil so if I have to guess, I water.

The second trick I use is very simple.

Using a spray bottle to water ensures you don't give your plants too much water.

Using a spray bottle to water ensures you don't give your plants too much water.

I use a spray bottle. It is an easier way to make sure I am not watering too much and I also use that method in summer. Plants not only enjoy the misting but watering them with a spray bottle better controls the amount of water added.

Now I still give my plants a good drink every few days to make sure the roots are nicely wet but using a spray bottle should help you better moderate how much water you add.

When you pot your plants, also consider punching holes in the sides of a used water bottle and place it low in the pot so you can mound soil up around it. Once settled in, you can fill up the bottle with water and the holes will make sure the soil towards the bottom of the pot, where the roots are, also gets moisture.

One of the old water bottles with punctured holes in one of my inside flower pots.

One of the old water bottles with punctured holes in one of my inside flower pots.

There's another way to measure moisture but I'm not sure how well this works. This is a meter that supposedly tells you if your plants have enough water or not. I am trying it out this winter in my potted plants but I am sure it won't work outside in the ground.

This moisture, ph and light meter is supposed to help grow better plants, testing it now.

This moisture, ph and light meter is supposed to help grow better plants, testing it now.

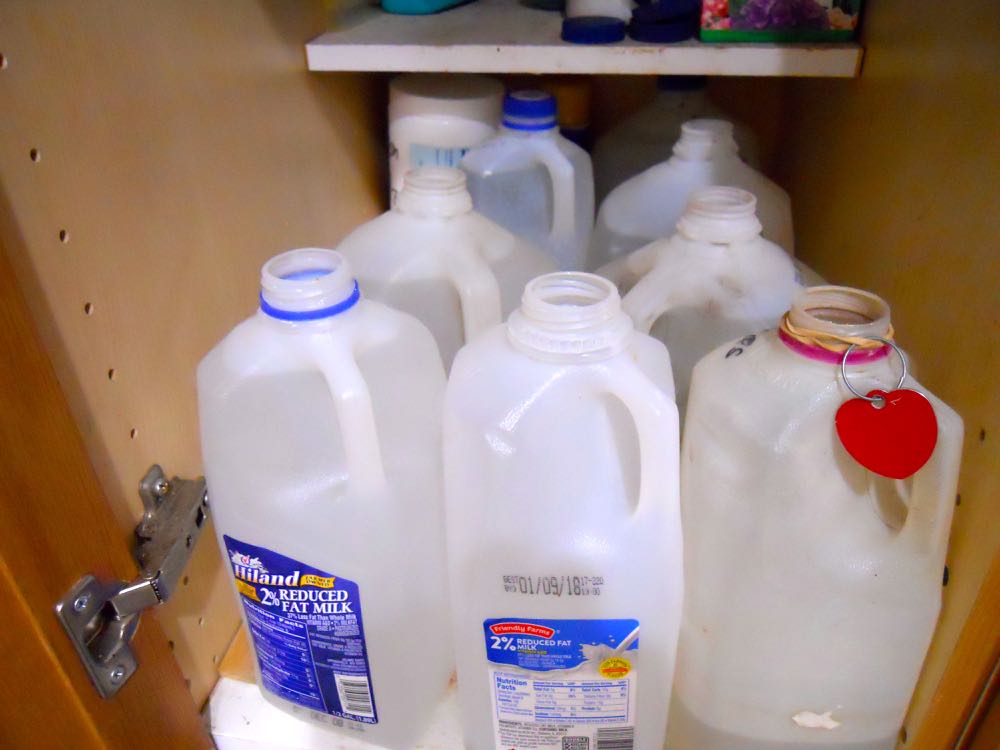
Use old milk bottles to hold tap water for a day or two so added chemicals can dissipate.

Use old milk bottles to hold tap water for a day or two so added chemicals can dissipate.

I also recycle milk bottles to hold tap water for a couple of days. Tap water has added fluoride that should be evaporated before you add tap water to plants. Don't keep a lid on the milk bottles or you won't let the fumes evaporate.

Also in winter, use room temperature water so saving them in milk jugs provides that. If you water plants with cold tap water you are bound to kill the plants by shocking the roots, most inside plants are tropical plants and are used to warm water.

I also save rain water in spring and summer for my plants in these jugs, they love the rain water.

Frankly use the spray bottle and get used to checking the plant soil before you add water should work just fine. Let me know how this works for you!

Charlotte

Planting Surprise Lily Bulbs

Dried surprise lily bulbs ready to be planted, they look similar to daffodil bulbs.

Dried surprise lily bulbs ready to be planted, they look similar to daffodil bulbs.

"We couldn't find any bone meal...so we settled on some bulb fertilizer. I mixed a tablespoon in each of the 34 holes I dug before I deposited the Pink Lady bulb. "A"  told us a week ago she is already seeing the greenery coming up. Should she top dress or side dress with the bulb fertilizer? If so when, how  much and where?" -- Kenny

Planting Surprise Lily Bulbs

Hi Kenny,

That's exciting, means the bulbs are settling in well, that's not a garden surprise, is it?

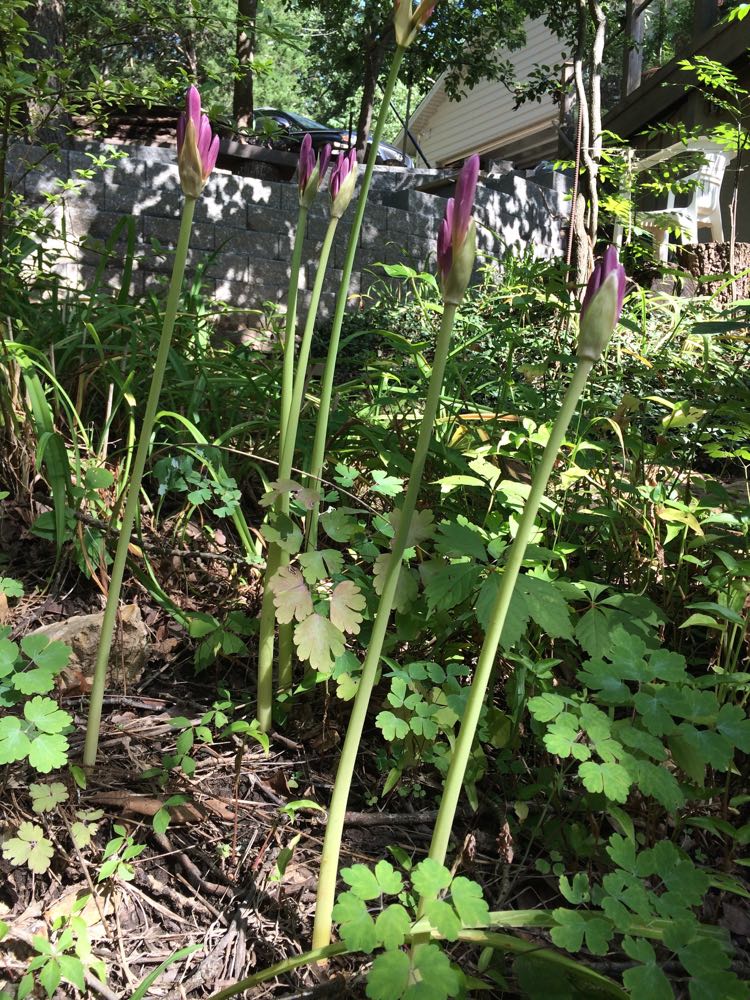
No, if you added bulb fertilizer in the bottom of the holes before planting that should be enough. Leave the bulbs alone until you start seeing little buds on stalks popping up.

Surprise lily buds start growing mid-July in my Missouri hillside garden.

Surprise lily buds start growing mid-July in my Missouri hillside garden.

Once the greenery is up, let it go through its full cycle and turn yellow, don't cut it or remove the greenery, that's how the bulbs build up their energy.

I plant surprise lilies in flower beds where other flowers help to cover them as they die down.

I plant surprise lilies in flower beds where other flowers help to cover them as they die down.

I tend to plant mine with other plants around them so they cover up the greenery as it dies back.

We should have a good year for surprise lilies, the cold temperatures will trigger the growth.

We should have a good year for surprise lilies, the cold temperatures will trigger the growth.

The cold temperatures winter 2017-2018 will set the bulbs to blooming later this year.

Enjoy!

Charlotte

Planting Visiting Daffodil Bulbs

Some of the 70 lbs of daffodil bulbs vacationing in Missouri from my brother's Virginia garden.

Some of the 70 lbs of daffodil bulbs vacationing in Missouri from my brother's Virginia garden.

Visiting Daffodil Bulbs

"So.... do you just store the bulbs for now or plant them????" -- Vicki

Hi Vicki,

I plant them now! I can't wait until next year, the daffodil bulbs are already starting to grow, which means they are using the energy stored in the bulbs. If I wait, they will grow and die because they can't repurpose soil nutrients into stored food without being in soil.

As long as the soil isn't frozen, those of us who live in USDA Hardiness zone 5b can continue to plant, if we don't mind being out in cold weather. Bulbs, shrubs, trees can all be settled in this time of year.

You can also move some perennials but I prefer to wait until spring, or when they are just starting to grow to do that in most cases. I don't always remember what I planted in a spot. Chances are good if I dig someplace, the spot is already occupied.

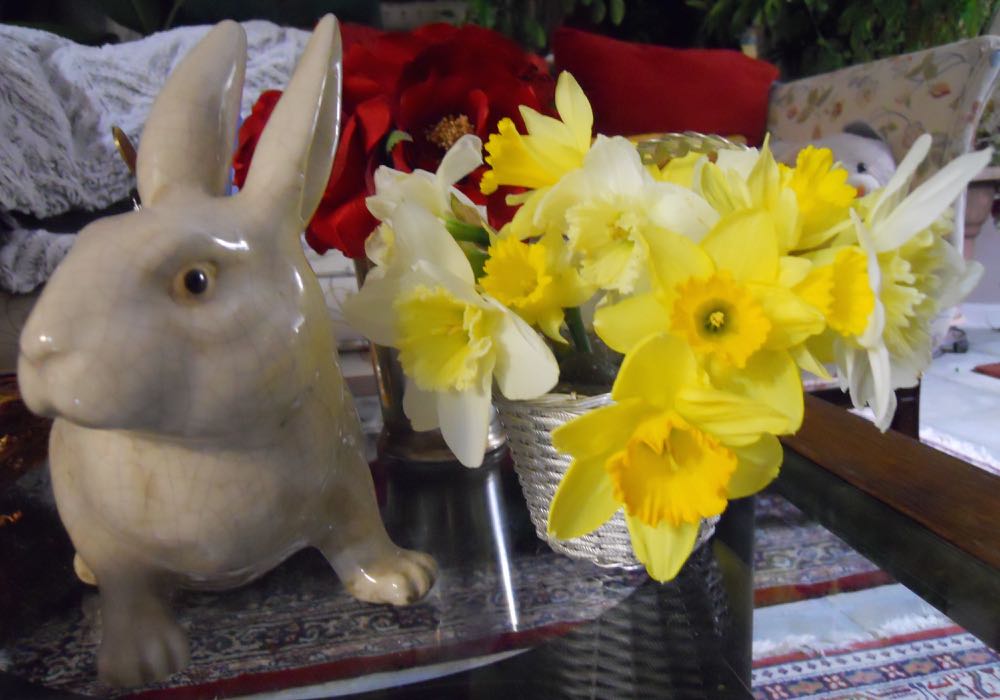
Some of the daffodils cut out of my garden last year, love their sunny disposition!

Some of the daffodils cut out of my garden last year, love their sunny disposition!

Love for the sunny daffodils runs in our family, I have a hillside full of them. One of my neighbors used to call my garden "daffodil land." I have them scattered in places where they can expand on their own - it's called naturalizing - and they aren't missed when I sneak out to pick a few!

For my brother's daffodil bulbs, I have them in a large flower bed planted in rows so they can easily be dug up later. I also have some at the corner of a path I can see from my living room window so I can enjoy them when they finally bloom.

It could be a couple of years before the bulbs have enough energy but that's okay, they are worth the wait. I have some yellow roses that can add a splash of sunshine in the garden in the meantime.

Do you have daffodils in your garden?

Charlotte


Christmas Cactus Blooming Out of Season

The cactus on the left is a Thanksgiving cactus, the one on the right a Christmas cactus.

The cactus on the left is a Thanksgiving cactus, the one on the right a Christmas cactus.

Christmas Cactus Blooming Out of Season

“The Christmas cactus from my grandmother is getting ready to bloom, what did I do wrong? – Martha

Hi Martha, I also have a “Christmas” cactus blooming right now, I’m embracing the blooms and calling it my Winter cactus. These hardy tropical plants need a little help to bloom on cue here in Missouri. Back in their native Brazil ,they have weather triggers to get them to bloom in December, the beginning of the South American summer.

Your cactus may be the older, true Christmas cactus if it came from your grandmother. Most cactuses sold on the market today are actually Thanksgiving cacti, which explains why they tend to bloom end of November.

To determine what kind of cactus you have, look at the green fronds. The original Christmas cactuses (Schlumbergera bridgesii) have smooth, round edges while Thanksgiving cacti (Schlumbergera truncata) have pointy, jagged ones.

Mine started to bloom because I had it outside on my back porch last fall. Thanksgiving and Christmas cacti are called "short day plants" meaning in order to produce flower buds, they require fewer daylight hours and/or cool night temperatures. Our fall shorter days and cooler nights signal the plants to produce buds.

To get your Christmas cactus to bloom when you want the blooms, locate it indoors in a cool, bright location where daytime temperatures are 65-70° F and evening temperatures are 55-65° F. If plants are exposed to cooler night temperatures of 55° F, plants will bloom in approximately 5-6 weeks, sometimes regardless of the day length.

My Thanksgiving cactus in bloom, see the spiky ends to the green fronds?

My Thanksgiving cactus in bloom, see the spiky ends to the green fronds?

I frankly don’t mind when they bloom out of season, I love having them in bloom any time they decide the time is right. Maybe you can also leave Santa Claus a note?

Aren't they beautiful??

Charlotte

Native Gardener's Companion

Prairie Moon Nursery's catalog has plants and seeds easily identified as pollinator plants. 

Prairie Moon Nursery's catalog has plants and seeds easily identified as pollinator plants. 

"Hi Charlotte, I enjoy our blog and newspaper articles so much! Do you happen to have a recommendation for a native plant catalog that shows how to handle monarch seeds and other wildflowers? I haven't been able to get too many wildflower seeds to sprout..." -- Anne Marie

Native Plant Catalog with How to Guides

Hi Anne Marie,

Glad you enjoy my writing. That's a very good question because many wildflowers do need special care before they will grow, something some people don't realize when they pick up wildflower seeds.

Stratification is exposing seeds to the same conditions they would have in nature to break their dormancy, something akin to kissing Sleeping Beauty to get her to wake up. Some seeds require moisture and warmth, others exposure to cold for a period of time, and even others such as pine tree seeds need exposure to heat and fire. Many seeds sold today don't tell you whether they have been pre-conditioned or not so if you're not sure, it's best to treat the seeds.

My favorite native plant catalog just arrived marked "damaged by the Postal Service" so my apologies for the rough look, I didn't do it, I promise!

I posted this so you could see USPS damage stamp but my, my those free seeds are distracting.

I posted this so you could see USPS damage stamp but my, my those free seeds are distracting.

Prairie Moon Nursery's native North American Wildflowers plant catalog with handy guides.

Prairie Moon Nursery's native North American Wildflowers plant catalog with handy guides.

My favorite native plant catalog with how to guides is the Native Gardener's companion out of Winona, Minnesota is Prairie Moon Nursery's Native Gardener's Companion, Seeds and Plants of authentic North American Wildflowers for Restoration and Gardening. Whew, long title but it gives you an excellent idea of what you will find inside.

Not only do they have lovely photographs of wildflowers, a must for any reference catalog, but they have added "how to" guides including a very helpful guide to stratification. They call it "germination codes and instructions," a handy guide to how to unlock those seeds and how long they need to be exposed to specific conditions.  

Prairie Moon Nursery catalog guide to germination has photos to illustrate the information.

Prairie Moon Nursery catalog guide to germination has photos to illustrate the information.

Not sure what to plant together? This catalog has suggested planting combinations, which always gives me some good ideas for where to add plants to ones I already have started, or how to combine the ones I may find on sale. Since I tend to be a frugal shopper, these combinations are great inspiration because I don't always buy the plants that end up together at the same time. Or my friends don't share their surplus plants when I get other ones.

This is also another good source for plants if you don't want to wait, they are locally-grown, not wild-dug, and at least 1-2 years old, which is unusual any more. That means these are established plants and have a better chance of successfully transplanting.

Some of the wonderful plant combinations, and color combination inspiration.

Some of the wonderful plant combinations, and color combination inspiration.

Back to those tempting seed packets. The seed packets are $2.50 each which is a less expensive way to try new native plants to see if you can grow them, and if they take in your growing conditions.

This last seed mix name had me chuckling, we all want seeds to quickly start, don't we?

Prairie Moon Nursery native plant catalog features quick seed mixes for pollinators.

Prairie Moon Nursery native plant catalog features quick seed mixes for pollinators.

Not sure what plants attract what pollinators? Let's all turn to page 35-36, they have a wonderful guide on what kinds of plants attract what pollinators. And to those of you new to this, if you find your brand new plants munched on, congratulations, that means some bug found the food source you planted for them.

This Plant-Insect Interaction guide provides a cheat sheet for what to plant for what pollinators.

This Plant-Insect Interaction guide provides a cheat sheet for what to plant for what pollinators.

Their plant photos actually feature some of the pollinators that are attracted to the wildflowers. I now am at a point in my garden photography that if I don't see a pollinator on a plant, the photo is not complete, every plant with a pollinator on it is a story. Aren't these just marvelous??

Love, LOVE these plants photos with visiting pollinators, this is the way flower photos should be!

Love, LOVE these plants photos with visiting pollinators, this is the way flower photos should be!

One more note, Prairie Moon Nursery has this native plants catalog and a more detailed cultural planting guide for advance gardeners and professional landscapers. You can also download both catalogs online if you don't want to wait for a catalog to be mailed to you.

If you live close to where they are located, make sure to call first, tours of the nursery are only available through appointment.

Sigh. I sure do like seeds. So this year, every Prairie Moon Nursery order includes a free packet of Wild Bergamot (Monarda fistulosa), I have bergamot growing all over my one-acre certified wildlife and Monarch Way Station hillside garden but I would gladly add more!

Let me know what you think of the Prairie Moon Nursery catalogs, and if you try out any seed packets!

Charlotte


Source for Old Marigold Seeds

Marigolds growing in my old vegetable garden.

Marigolds growing in my old vegetable garden.

"Char, I'm looking for a source for old-fashioned marigolds. Bill says the new ones don't work as well as the old ones. Thoughts?" -- Ardith

Source for Old Marigold Seeds

Hi Ardith, from what I have read marigolds have been hybridized to the point where they are not as effective as they used to be to deter bugs. I used to plant them every year to not only deter bugs but to provide long-lasting cut flowers.

I now use annual basil to line my garden beds and include pots of basil between other potted plants to deter insects.

Marigolds Baker Creek had in their 2017 catalog. My 2018 catalog is around here somewhere....

Marigolds Baker Creek had in their 2017 catalog. My 2018 catalog is around here somewhere....

One of the best sources for heirloom seeds is Baker Creek in Mansfield, Missouri. The seed company started to preserve heirloom and old-fashioned seeds and has quickly become a major provider of the kinds of seeds you are trying to find.

Stick with the old-fashioned varieties like tiny French marigold. The white ones were introduced a couple of decades ago and have almost no scent. They are pretty to have in the garden but don't do much to deter bugs.

Charlotte

Moving Irises

These yellow irises were a gift from a friend’s garden. She dug them up after they had bloomed so once in my garden, they bloomed the following year. When dug up while blooming, it can take iris 2 years to bloom again.

These yellow irises were a gift from a friend’s garden. She dug them up after they had bloomed so once in my garden, they bloomed the following year. When dug up while blooming, it can take iris 2 years to bloom again.


“My iris are blooming and they need to be divided.  Can I divide them after they are finished now or do I have to wait until fall?  They are so thick and crowded that not all of them bloom.  Can I dig them up and store them until fall and replant them somewhere?” – Vicki

Moving Irises

The best time to divide irises is immediately after they bloom through fall. No need to dig them up now and store unless you are moving, best to keep them in the ground growing until you are ready to divide and replant. Decreased blooming is a definite sign your iris are ready to be divided.

The next sign that you should consider transplanting your iris is if the roots, or rhizomes start heaving out of the ground. Overcrowded iris rhizomes will start to push on each other, which results in the entire root system of your iris plants literally pushing themselves out of the ground. They may even stop putting up foliage and the plants may only grow foliage on the outside edges of the clump.

Best Time to Make the Move

The best time to transplant iris is in the summer, after the iris have finished blooming, up until fall. To divide your iris, start by lifting the clump of iris plants out of the ground with a spade or fork. If possible, lift the whole mass out whole, but if you are unable to do this, carefully break the clump into smaller parts and lift these out.

Next, brush of as much dirt as possible from the iris rhizomes. This will make it easier to see when you are breaking the clumps apart. The next step in dividing iris plants is to divide the iris rhizomes.

 Irises store energy in their rhizome, or root. To divide these roots, make sure a piece of green foliage is attached. Cut the foliage back 4-6 inches after blooming and move to their new location. Also plant the root very shallow in the ground…

 Irises store energy in their rhizome, or root. To divide these roots, make sure a piece of green foliage is attached. Cut the foliage back 4-6 inches after blooming and move to their new location. Also plant the root very shallow in the ground, barely covering the tiny roots on the side of the rhizomes, and water.

Each iris rhizome should be divided into pieces that are 3 to 4 inches long and have at least one fan of leaves on the rhizome. Do not remove the roots from the rhizomes. As you get closer to the center of the clump, you may find large sections of rhizomes that have no leaf fans. These can be composted.

Check all of the divided iris rhizomes for iris borers and disease. The iris rhizomes should be firm and not soft. If the rhizome feels soft, throw it away.

Once the iris rhizomes have been divided, you can replant them.

First, trim all of the iris leaf fans back to about 6 to 9 inches tall. This will allow the plant to re-establish its roots without having to support a large amount of foliage at the same time. Next, plant the iris rhizomes in the selected location. This location should receive a good deal of sunlight and should be well draining.

Dig a hole where the rhizome will settle into the ground just below the ground level. If planting several iris near each other, point the rhizomes away from each other and space them 18 inches apart. Spread the roots out around the rhizome and then cover the roots and the rhizome with dirt. Water the newly transplanted iris plants well. 

Charlotte

Managing Moles

The telltale signs of moles include raised soil as they tunnel a good 10 inches underground along flower beds and maybe even through your lawn.

The telltale signs of moles include raised soil as they tunnel a good 10 inches underground along flower beds and maybe even through your lawn.

"...another year of tackling moles in our yard. Any suggestions of how to get rid of them?" - Ray

Managing Moles

There are six species of moles living in North America. It may seem like all of them are working your yard at once but the one that makes all of those runs is the Eastern Mole. These pointed-nose insectivores tunnel year around looking for earthworms, grubs and other insects.

Long Term Strategy

If you have a lot of moles, you probably have an oversupply of grubs and bugs. Try spraying your lawns with milky spore disease or beneficial nematodes to get rid of the grubs. This will also rid your lawn of Japanese beetle larvae but it may take a year or two to start seeing results.

For more immediate results:

  •  Try sprinkling powdered red pepper at their tunnel entrances and coffee grounds where tunnels are starting.
  • Mix up a spray of 3 parts castor oil to 1 part dish detergent; use 4 tablespoons of this concoction in a gallon of water, and soak the tunnels and the entrances.
  • ·Another mole repellent is 6 oz. of castor oil and 2 tbsp of Murphy’s Oil Soap or dish soap in one gallon of water to make a concentrate. Mix one ounce of concentrate per gallon of water and apply to the lawn.  Make sure to reapply the homemade mole repellent after rain or watering.

How to Prevent Burrowing

If moles are in a garden area, dig a trench roughly 6 inches wide and two feet deep. Fill it with rock or line it with wire to prevent burrowing pests from invading.

Most Effective Approach

The most effective and reliable method for controlling moles is to trap them. Traps should be placed in early spring when you first notice tunnels, or after the first fall rains. Determine which tunnels are active by flattening the run, marking the location, and checking to see if the tunnel is raised within a day or two. Traps work well because they capitalize on the mole’s natural instinct to clear an obstructed tunnel.

Use a humane trap, and release the moles at least 5 miles from your home in a rural area away from someone else’s garden.

If you want to protect specific plants, dig a 2- to 3-foot hole and line the sides and bottom of the hole with wire mesh. Fill the hole with soil and plant.

Don’t bother with home remedies such as chewing gum, mothballs, broken bottles, flooding and laxatives – studies have shown that these substances are ignored.

Castor bean plants are an interesting annual but there is little proof they actually deter moles in a garden.  

Castor bean plants are an interesting annual but there is little proof they actually deter moles in a garden.  

Castor Beans

One of the more traditional mole deterrents is planting castor beans. Although very dramatic, and Thomas Jefferson once grew a specimen to 22 feet, there is no proof that these plants deter moles so plant only if you want something exotic growing.

Japanese Beetle Deterrent

Trying to rid your garden of moles can be frustrating so look at it another way. If you have Japanese beetles, moles can be your friend since they eat Japanese beetle grubs that become those little green eating machines. Moles will eat as much as 70-80% of its body weight in insects every day.

One More Benefit

In addition, moles help aerate soil, something that in the Ozarks one usually has to use a pick ax to do.

Charlotte

Unplanted Tree

Unplanted trees winter over with a nice bed of mulch to protect them.

Unplanted trees winter over with a nice bed of mulch to protect them.

"....HELP! My brother gave me a redbud tree from a garden center sale...We didn't get it in the ground before winter, it's been sitting in a burlap bag in my garage. I water it every once in awhile. Is there hope it will make it until spring?" -- Amy

Unplanted Tree

Hi Amy, lucky for you, Eastern redbuds are one of my all-time favorite spring trees! They are hardy stock. A native to Missouri, they are also a relatively easy and hardy species to grow. Assuming your garage is frost free, the tree should pull through winter. To make sure, is the tree off the ground? If not, place it in a cardboard box with a thick layer of newspapers, old blanket or some other kind of insulation between the tree bottom and the cold floor. Also gently scrape a tiny spot on the trunk and see if it is still green, a dormant tree won't show any activity but the trunk will be green.

In case you get more tree gifts, another way to pull these trees through winter is to mulch them outside, like the ones in the pictures. A nice blanket of mulch will keep the trees in a dormant stage long enough so that it basically sleeps through the cold weather.

Pile mulch around unplanted trees a good 3-4 feet high during winter.

Pile mulch around unplanted trees a good 3-4 feet high during winter.

Wrapping tree trunks also helps protect them temporarily.

Good luck, Amy, let us know how your redbud does later this spring!

Charlotte

Natural Insect Control Idea

Three of my birdhouses repaired and waiting to be installed for natural pest control.

Three of my birdhouses repaired and waiting to be installed for natural pest control.

"...love your articles in the Kaleidoscope (Weekly Newspaper). If I shouldn't be using pesticides in my garden, what suggestion do you have for natural insect control?" -- Theresa

Natural Insect Control Idea

Hi Theresa, you have several options but one of my favorites is birdhouses. Well, not the actual birdhouses but what the birdhouses attract to a garden. This is the time of year when I walk through my garden and start bringing birdhouses into my garage for repairs, if they haven't already wintered over on one of my shelves. That's when I get a better idea of whether they have been occupied and who has been using them.

If I leave my garage door open, it's fun to catch birds walking along the shelves checking out the birdhouses. If I have a part glued, I put the birdhouse out in the sun to help the glue dry faster. Not a good idea to run the risk of having birds getting caught in the sticky stuff.

I also like to get any painting dry before I return the birdhouses so they will also sit in the sun after a paint job. Now I add a wad of newspaper in the entrance if the paint takes more than a couple of days to dry because if the real estate is nice, birds will move in even if the bird house is not dry, or in a tree.

Birds are natural insect predators so they are wonderful contributors to keeping garden insect numbers down. The cute birdhouses, like the little church one, are just an extra benefit!

Charlotte


Finding Perfect Gardening Gloves

My favorite, and the gardening gloves I recommend, with re-inforced fingertips.

My favorite, and the gardening gloves I recommend, with re-inforced fingertips.

Finding Perfect Gloves

"Charlotte, I shopped at a local store for gardening gloves and they had so many options it confused me. I took (my wife) by and she picked out a perfect pair that looked a lot like these. She used them last week. They performed perfectly. The leather finger tips stood up well. Thanks for the help. I would not have thought of that on my own." -- Kenny

Kenny, finding the right gardening gloves can be a challenge because there are too many choices. When I have only the wrong gloves available. I won't use them and that's SO bad for my hands. It takes weeks for the damage to be repaired, and in the meantime I live with painfully cut and scratched hands with broken nails....not a pretty sight.

When I have good gardening gloves that fit well and stand up to my gardening habits, I can spend most of the day in them and still get a lot done. I have tried a lot of gloves and carry these gardening gloves because they have lasted the longest and survived me, no small feat.

Thanks for sharing, nice to hear I was able to help!

Charlotte


How to Pick an Amaryllis bulb?

How to Pick an Amaryllis Bulb That Blooms

"...over the years, I have tried to pick an Amaryllis bulb that will bloom and failed. What do I need to get?" - Amanda

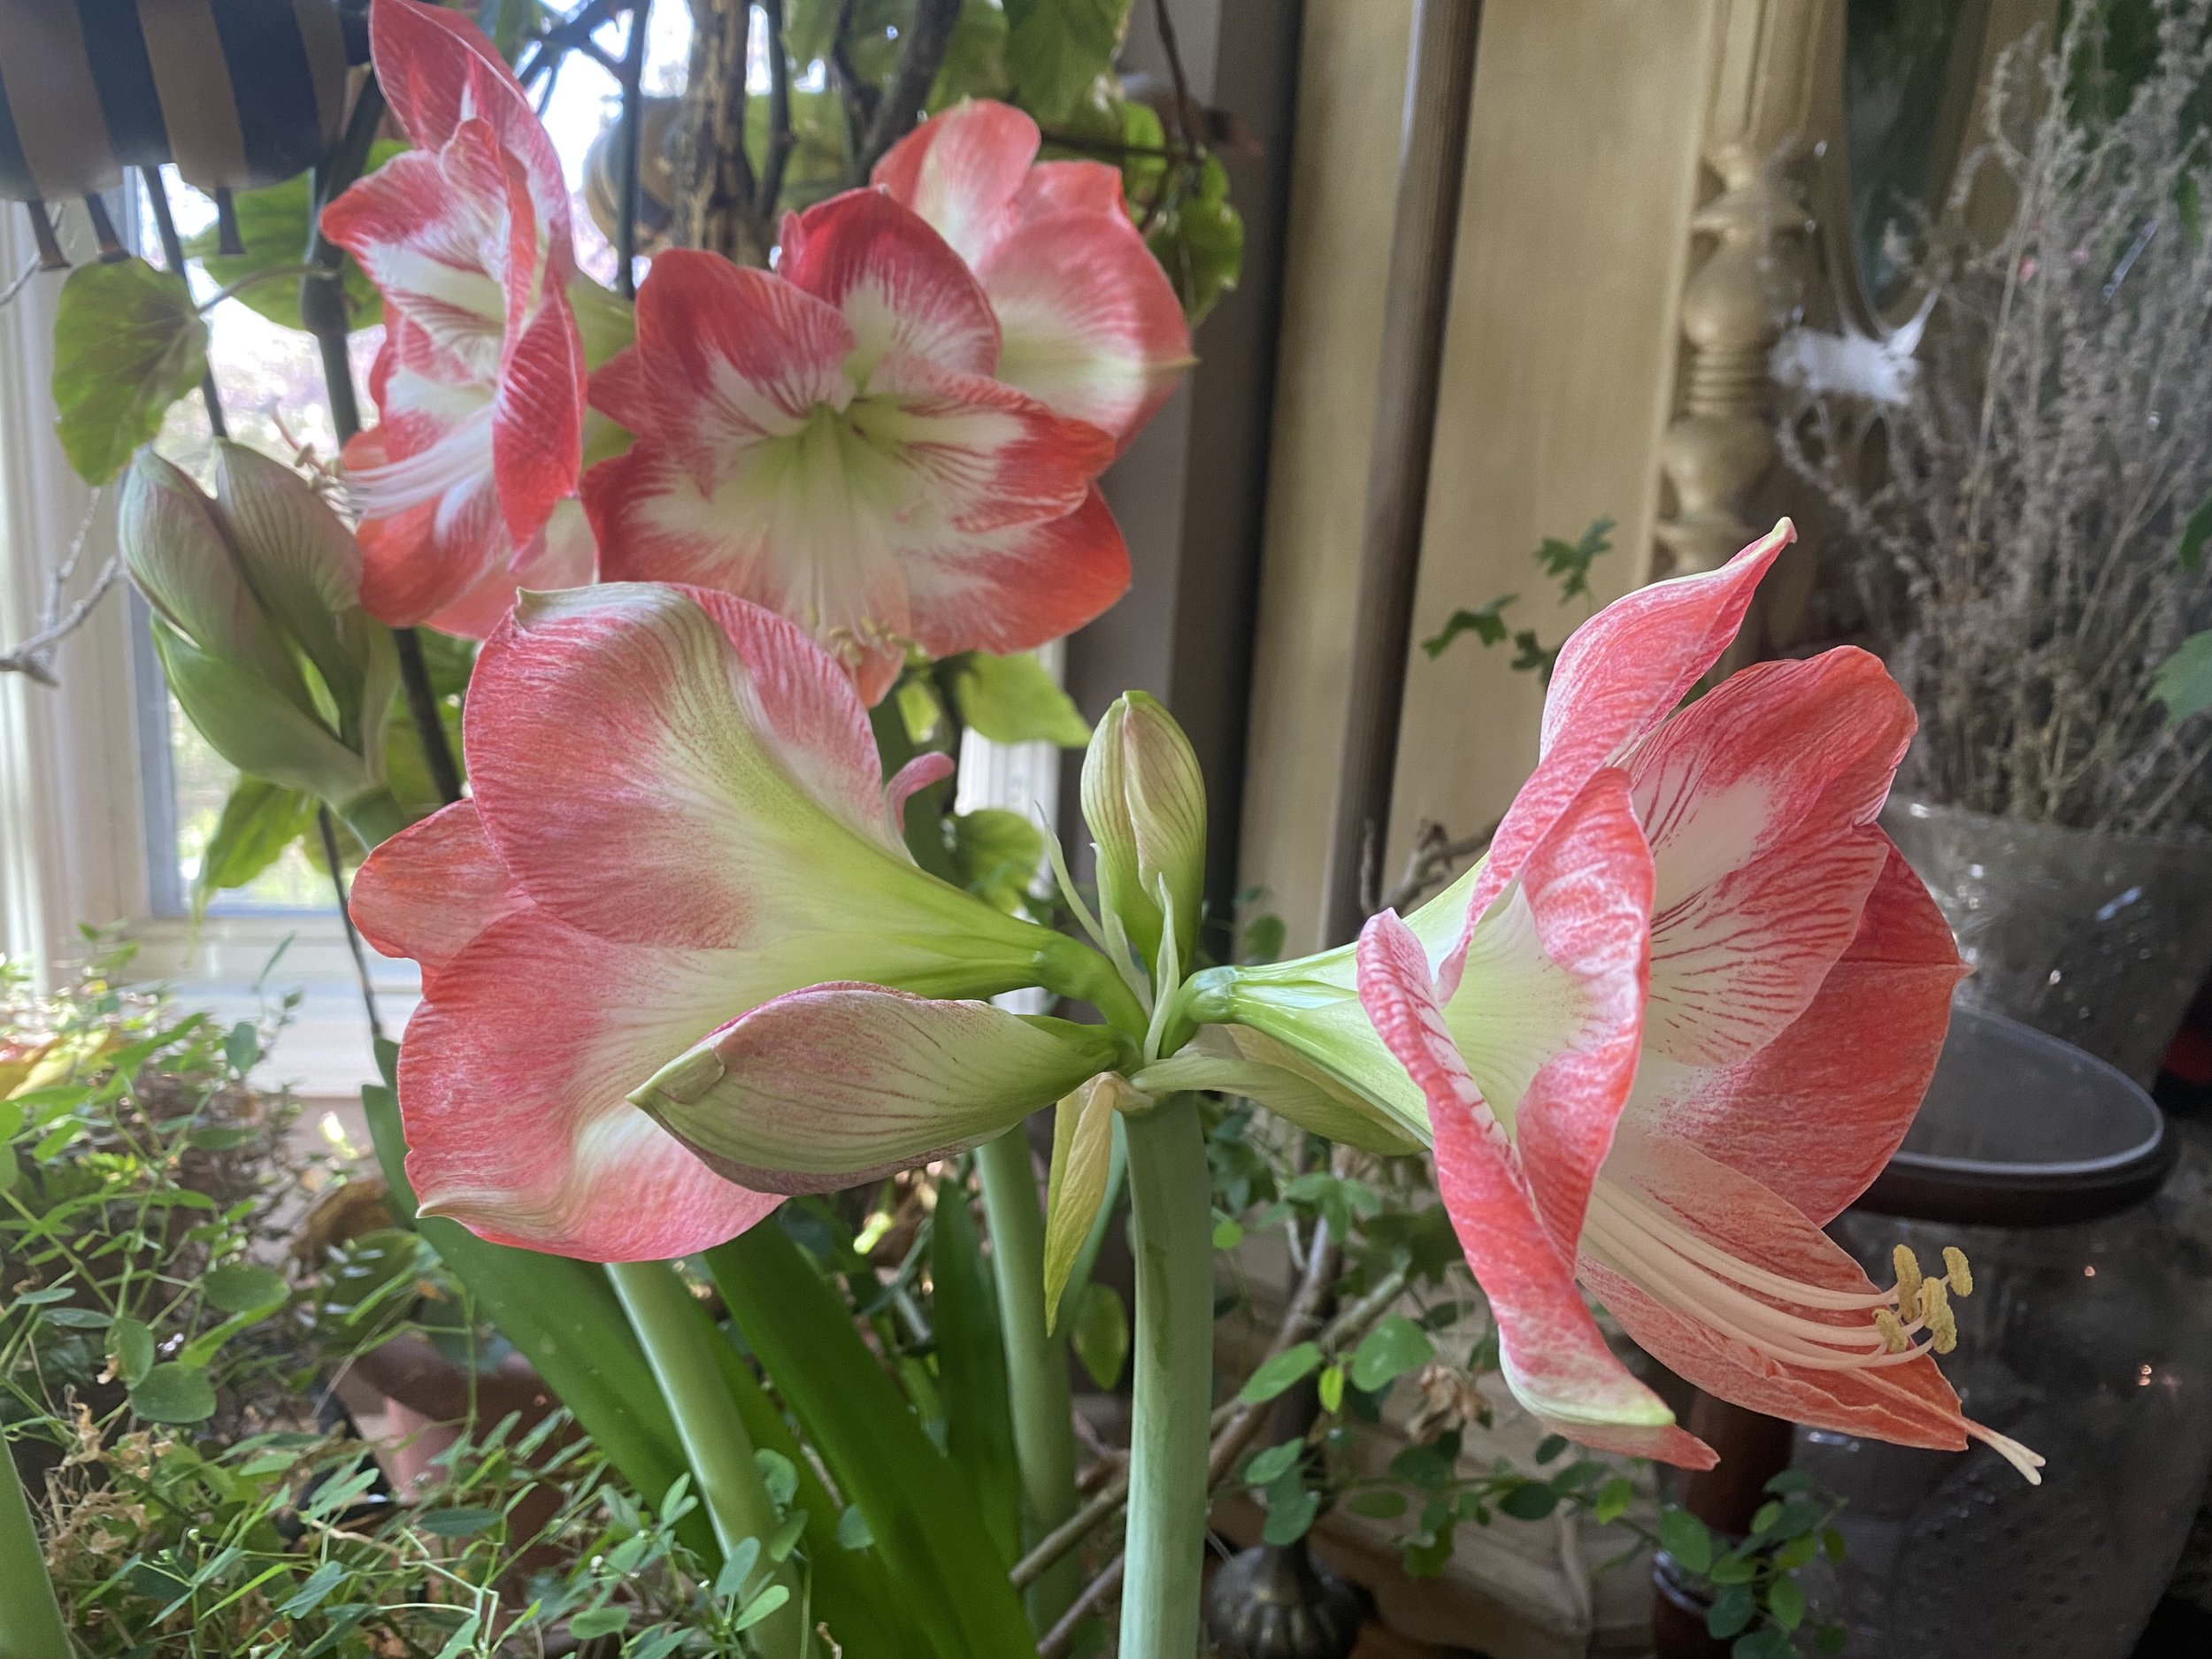
Hi Amanda, don't get discouraged, Amaryllis are easy and fun to grow. I love to give them as gifts, especially because one can watch them grow on a daily basis, especially in the middle of winter when the weather outside is cold, the landscape is covered with snow and there is nothing green within miles.

What to Look for in Amaryllis Bulbs

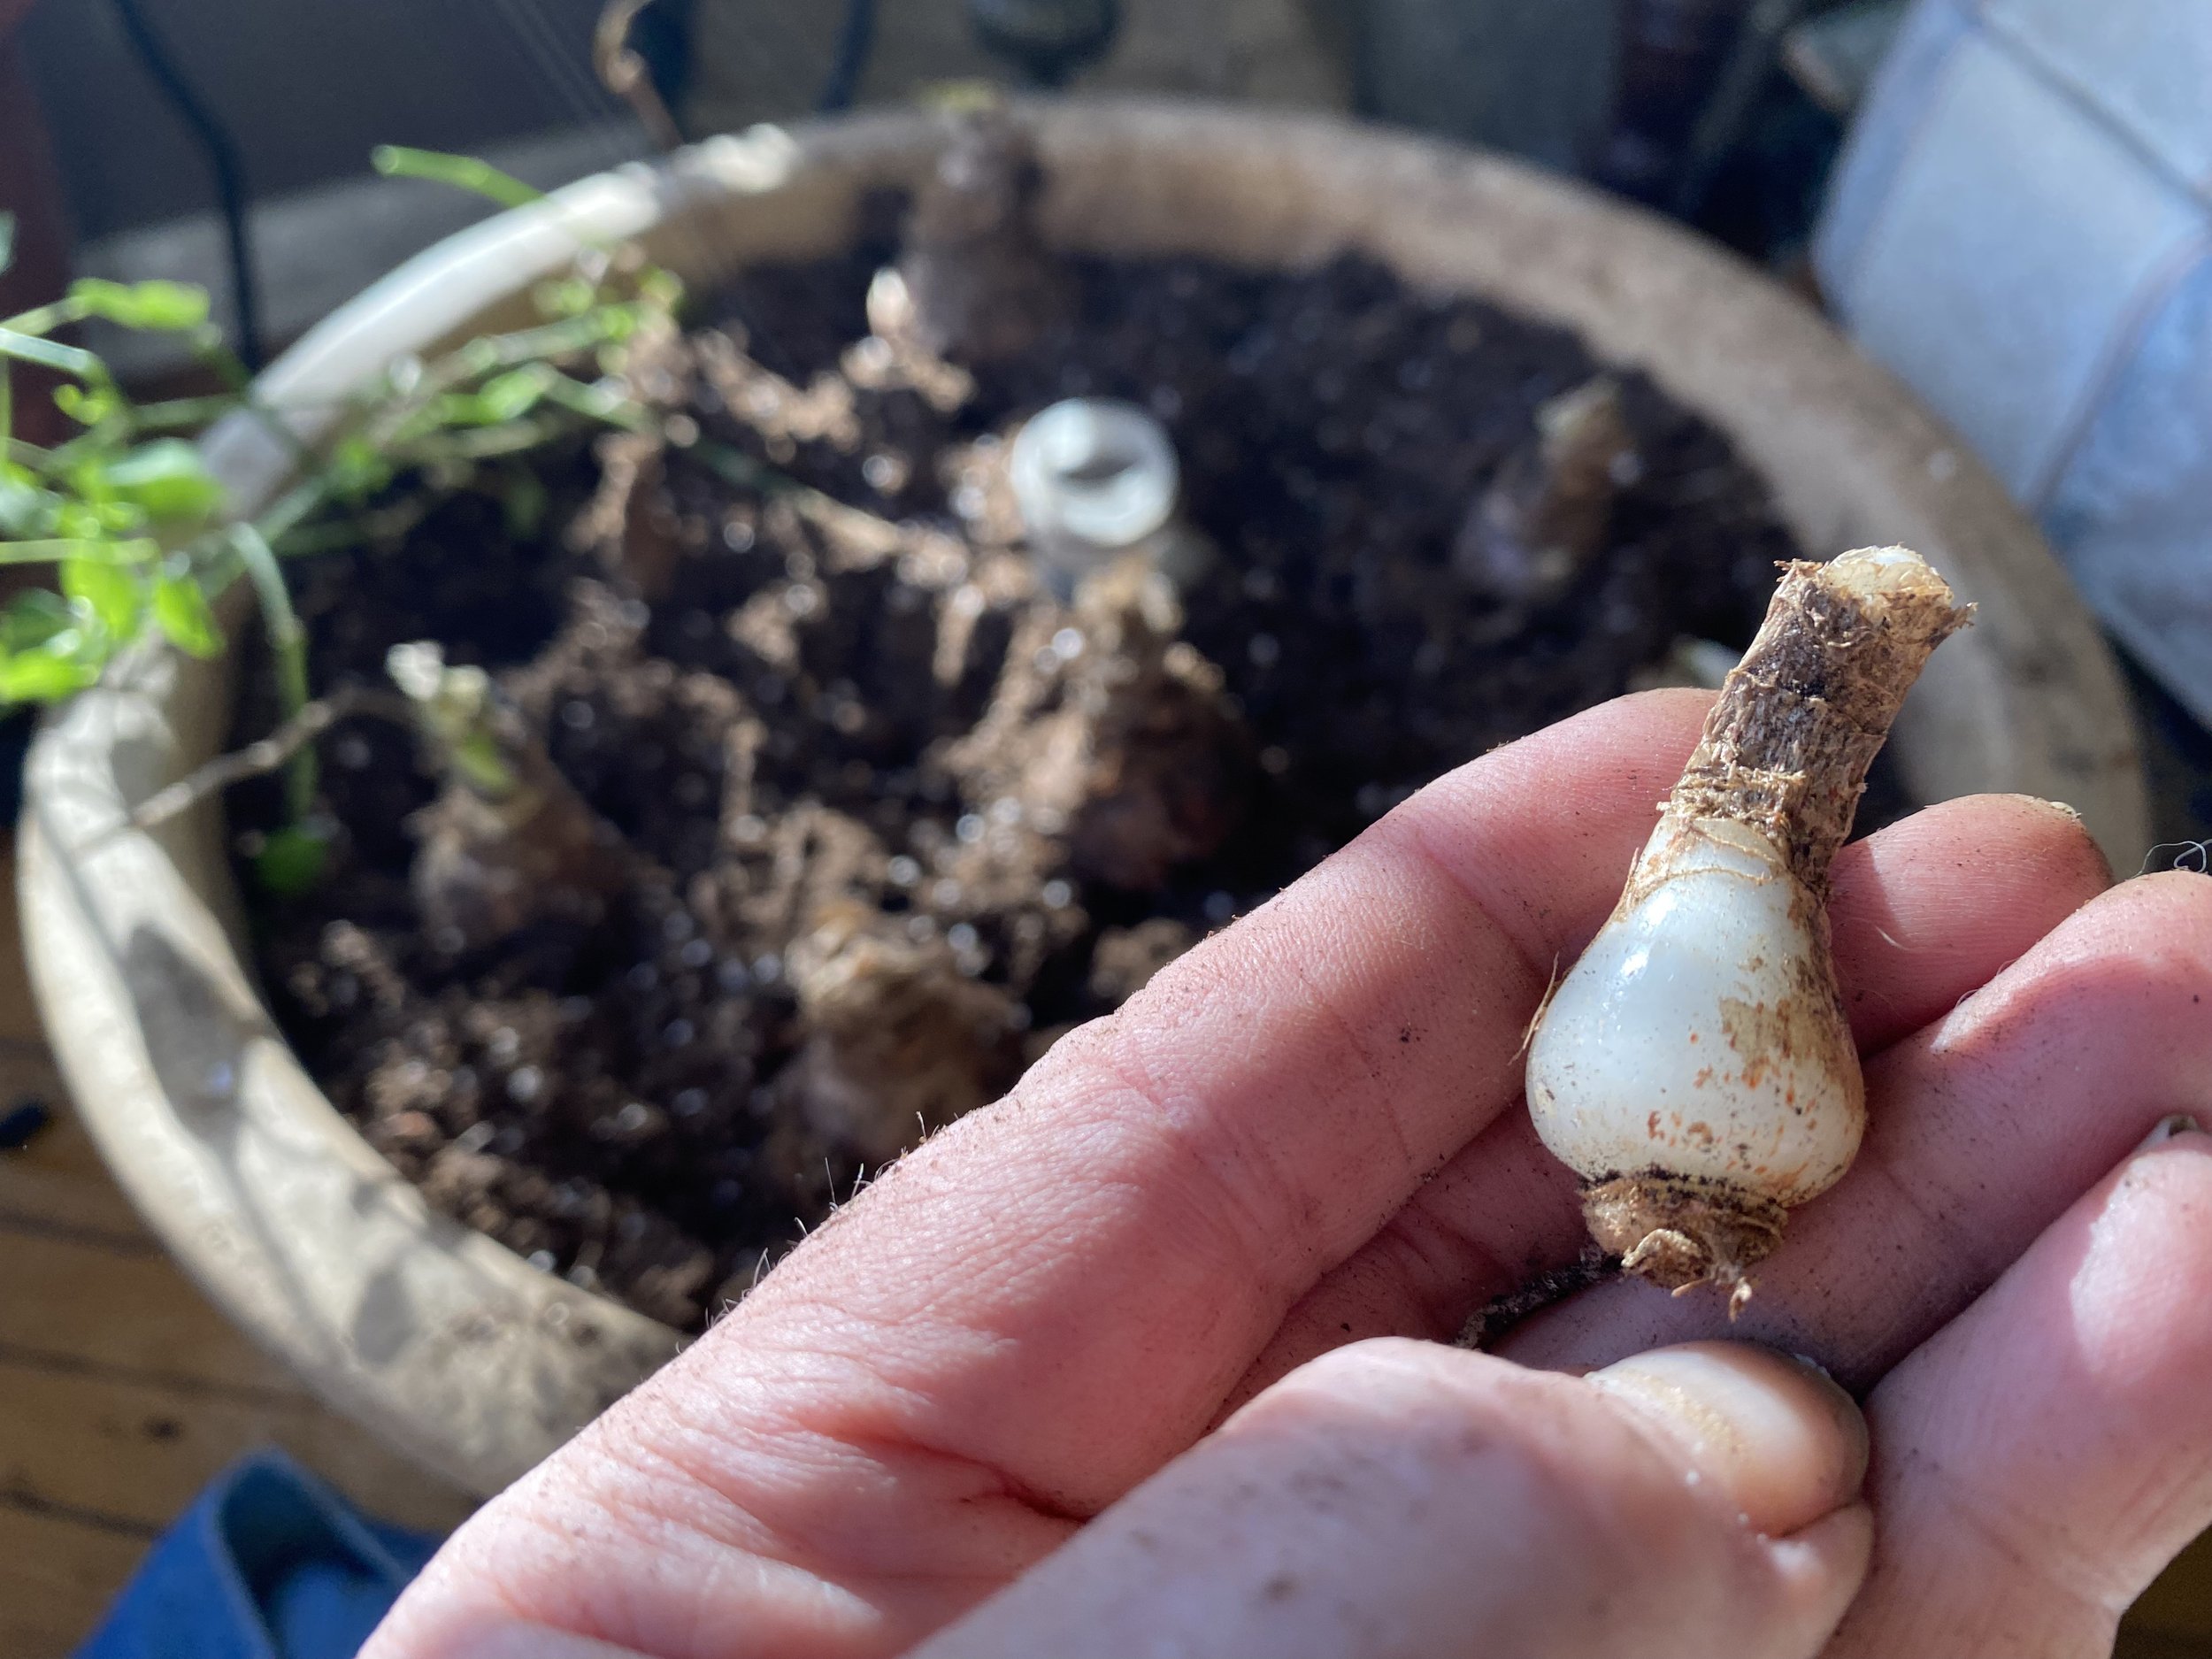
First, don't pick a bulb that is all brown, without any growth showing. When buying loose bulbs, it's a gamble whether you are getting an Amaryllis bulb that stored enough energy to bloom before it was removed from soil, dried and shipped for sale.

Most Amaryllis are sold in gift boxes. Don't be afraid to gently open the box and look inside. You are looking for an Amaryllis bulb that already has a bud tip showing. The bud tips are easy to spot from leaf tips because they are thicker. Leaf starts are good to have, too, but it you only see leaf starts, the bulb may not bloom.

In the following photo, the bud tip is on the right, the leaf tip is on the left. 

Amaryllis bulb with a bud tip showing will ensure you have a blooming flower starting.

Amaryllis bulb with a bud tip showing will ensure you have a blooming flower starting.

If an Amaryllis bud is not showing any growth by the time it is in a box at a retail store, chances are it didn't get enough energy stored in the bulb before it was harvested. If you are buying Amaryllis bulbs for gifts, pass on those, you want a bud tip showing.

Also don't be afraid if the bud tip is all white, that just means it has not been exposed to light to turn green. This bulb will still bloom once the emerging Amaryllis bud tip is exposed to sun to turn green.

Amaryllis bulb with a white emerging bud tip, right, and leaves, that need sun exposure.

Amaryllis bulb with a white emerging bud tip, right, and leaves, that need sun exposure.

See the leaves starting on the left? Don't cut off the leaves, that will help recharge the bud after it blooms.

I try to pick Amaryllis buds as they are starting at the bulb base but if you need something blooming sooner, pick the bulb bud several inches taller. Either way, once the bulb is in soil, the plant will keep growing until it blooms. 

Actually I have bought Amaryllis bulbs on sale that bloomed without soil but it took extra energy from the bulb and took longer for the bulb to recuperate before it bloomed again. Even if you pick an Amaryllis bulb that's several inches high, get it into soil as soon as you can and water. That will help the bulb get nutrients and keep the Amaryllis bulb healthy.

This Amaryllis bulb grew and is getting ready to bloom without even being in a pot with soil.

This Amaryllis bulb grew and is getting ready to bloom without even being in a pot with soil.

Ok, now for a little test. Look at this photo and tell me, which one is the emerging Amaryllis bud and which side has the emerging leaves?

Amaryllis bud is on the left, emerging green leaves are on the right.

Amaryllis bud is on the left, emerging green leaves are on the right.

Amaryllis Bulb Care

Once the Amaryllis bulb leaves die back, the bulb should rest for a couple of months before you water it to get it started again. In other words, don't water it for a couple of months - how easy is that.

I have some Amaryllis bulbs that are 6 years old now, so much fun to see them repeatedly blooming. And they are quite large now, too!

Good luck, let me know how you do on your next Amaryllis bulb shopping trip!

Charlotte


How to Tell Mum Starts Have Taken

Rust-colored mum starts at Bluebird Gardens.

How to Tell Mum Starts Have Taken

"...I read your instructions on how to get mums started with root hormone. How can I tell they have roots?" -- Nadine

Hi Nadine, there are several ways you can tell if your mum starts now have roots.

One way is to observe how the cutting is doing once you placed it in the ground. In the photo, I have two mum cuttings. If I had to guess at this point, the one on the left has a better chance of rooting than the one on the right. The leaves and flowers on the one on the left are still green and vibrant; the cutting on the right is shriveling, which means no water and nutrients are getting into the plant.

One thing you could do about the one on the right is gently remove it out of the ground, re-cut the end to right under a growing node; re-apply root hormone and stick it back in the ground.

The second way is to gently tug on the root cutting. If the plant resists, chances are roots are developing. If the cutting comes up, recut the bottom, re-apply root hormone and try again.

The last way is the surefire way. If you are transplanting the cuttings to a permanent spot, you can peek at the bottom to confirm roots as you are transplanting.

Here's another batch of mum starts in my garden. Which ones from this photo do you think are getting a good start so far?

Here's another batch of mum starts in my garden. Which ones from this photo do you think are getting a good start so far?

If you don't have root hormone - I tend to run out at the end of the season - you can also root mum cuttings in water. I use a clear glass so that I can easily see when the roots get started. Replace the water daily and keep them away from curious cats, one of mine likes to re-decorate the house with mum cuttings. Not must mum cuttings, anything in water is an invitation to drag the greenery all over but that's another story.

Also remember to water seedlings once a month through winter so you will have established perennials. Good luck!

Charlotte

How Does My Pot Garden Grow?

My deck garden full of pots at the end of August 2016. It was a very hot summer!

My deck garden full of pots at the end of August 2016. It was a very hot summer!

How Does My Pot Garden Grow?

“…was wondering how your pot garden is doing? My mother started one this year and she is struggling with her tomatoes….” – Lisa

Hi Lisa, your Mom is not alone, this was a hard growing season for tomatoes. Between the record hot temperatures and the extremes in soil conditions – too much water one day, not enough the next – my tomatoes also did not do well.

However, now that temperatures are moderating, my tomatoes are starting to ripen so hopefully your Mom will soon get a late bounty as well.

One of my first beefsteak tomatoes to ripen this year, early September. Finally!

One of my first beefsteak tomatoes to ripen this year, early September. Finally!

My green peppers and cucumbers were fried in our record heat; my eggplant start was munched on early on but seems to be making a good recovery, and my herbs are plodding along.

My eggplant has made a lovely recovery and shares a pot with purslane.

My eggplant has made a lovely recovery and shares a pot with purslane.

Basil, one of my favorite herbs, is growing in a pot ready to bring it in later this fall.

Basil, one of my favorite herbs, is growing in a pot ready to bring it in later this fall.

I actually caught myself thinking I may just stick with my deck pot garden next year instead of trying to plant a traditional garden. We’ll see, it was a humid day, the heat may have gotten to me for a minute or so but it’s not a bad idea. Planting in pots is much easier. I can better manage soil and watering conditions and better shoo away uninvited visitors.

Charlotte

Leftover Surprise Lilies

"...saw your surprise lilies on Facebook, so beautiful! I have a question. I moved my surprise lily bulbs this spring but a couple of them came up again. Do I move them now or do I have to wait until next spring to move them?" -- Lisa

Lisa, here are leftover surprise lilies blooming in one of the flower beds in front of my house, too!

Lisa, here are leftover surprise lilies blooming in one of the flower beds in front of my house, too!

Leftover Surprise Lilies

Hi Lisa, I have a few "leftover" surprise lilies myself!

If I had a flower of the month club, surprise lilies would be my August flower. This North American cousin of the traditional holiday gift flower Amaryllis blooms in Missouri when little else is in bloom. August is Missouri's dearth month, usually the hottest month of the year and when plants shut down to survive the hot weather conditions.

I also thought I had moved all of the surprise lily bulbs out of the corner of a front flower bed so I could settle an old bird bath under the rain gutter to collect rain water. Instead, two bulbs I missed digging up sprung up this August 2016, a little out of place now that the rest of the surprise lilies are gone.

If you don't have to move them this fall, I wouldn't. Let the bulbs collect energy over fall and winter over where they are currently growing. Then spring, when the leaves start peeking out of the ground, dig them up and move them.

Pick a rainy spring day so rain water will help settle them into their new location.

One of the secrets to successfully moving any plants is to dig them up in a ball of soil; most won't even know they were moved.

If you have to move them now, wait until the flowers are finished and gone to seed. Remove the stem with the seed pods. Leave 2-3 inches at the top so you know where the bulbs are. Dig them up with a huge shovel so you don't disturb the roots and carefully move them to a new hole that will fit the glob of soil you removed.

Water well with a pinch of all purpose fertilizer to help them get re-established.

Chances are if you keep them in soil, the move won't interrupt their growing cycle and they will bloom again next year. It's a technique I have successfully used for most of my plant moves in my garden.

If the bulbs are disturbed and have to spend energy re-establishing their roots, they won't collect enough energy to be able to bloom next year. It may take a full growing cycle for them to bloom again.

Now I took a different approach to my little leftover lilies. Instead of digging them up, I added three more surprise lily bulbs to the flower bed corner and watered well. No one would expect them to be growing there and that makes me smile. 

What can I say,  I love surprise lilies!

Charlotte